Table of Contents >> Show >> Hide
- Before You Touch a Rock: Two Big Rules
- Way #1: Gravel Vacuum (Clean Rocks Without Taking Them Out)
- Way #2: Remove, Scrub, and Vinegar-Soak (For Algae & Mineral Buildup)
- Way #3: Diluted Bleach Disinfection (The “Reset Button” for Rocks)
- How to Keep Fish Tank Rocks Cleaner Longer (Without Living With a Siphon in Your Hand)
- Troubleshooting: “I Cleaned the Rocks… Why Is My Tank Still Ugly?”
- Real-World Experiences & Lessons Learned ()
- Conclusion
Fish tank rocks have one job: look pretty while doing absolutely nothing. And yet, somehow, they still manage to collect
algae, mulm (that brown “mystery dust”), uneaten food, and the occasional surprise that makes you question your fish’s
life choices. The good news? You don’t need to “deep clean” your aquarium like it’s a kitchen after Thanksgiving.
You just need the right method at the right timeso your tank looks sharp without nuking the beneficial bacteria that
keep your fish alive and your water from turning into a science fair project.
Below are three fish-safe, practical ways to clean aquarium rocks (including gravel and pebble substrates). Each method
has a “when to use it,” step-by-step instructions, and a few don’ts that’ll save you from the classic mistake:
“I cleaned everything and now my tank is… angry.”
Before You Touch a Rock: Two Big Rules
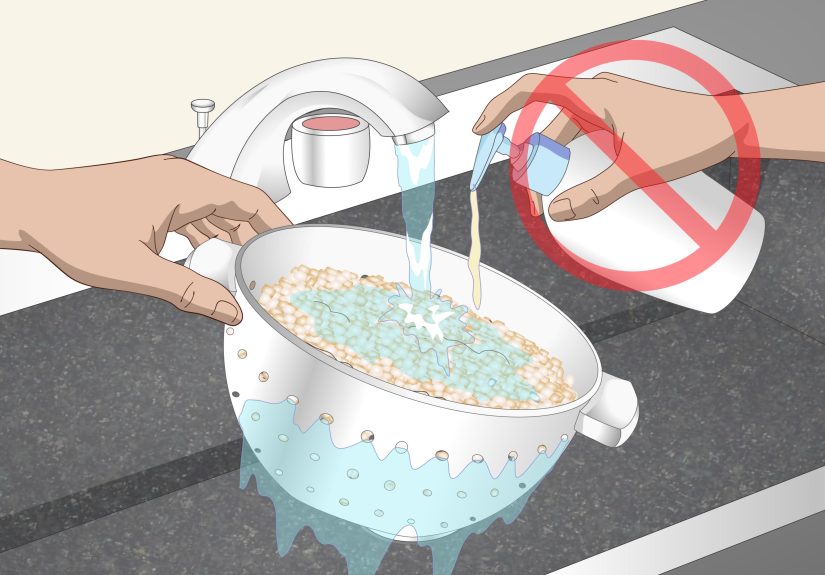
Rule #1: Never use soap, dish detergent, or household cleaners
Soap residue clings like glitter after a craft dayexcept it’s not festive and it can harm fish. If you need “more power,”
use aquarium-appropriate options like vinegar for mineral deposits or a properly diluted bleach solution for disinfection
(only when necessary). Your sponge should be aquarium-only, not “the one that previously met spaghetti sauce.”
Rule #2: “Clean” doesn’t mean “sterile” (unless you’re disinfecting on purpose)
A healthy tank runs on beneficial bacteriaespecially in your filter, but also on surfaces like rocks and gravel.
Your goal during routine maintenance is to remove excess waste and algae, not to turn your substrate into a hospital
operating room. Sterilizing is a special move, not your weekly hobby.
Quick signs your rocks actually need attention
- Brown gunk between stones: trapped detritus and fish waste (common in gravel).
- Green film: algaeusually from light + nutrients being a little too cozy together.
- White crust: hard water mineral buildup (common in high-alkalinity areas).
- Rotten-egg smell when disturbed: a red flag for trapped anaerobic pocketsclean more gently and more often.
Way #1: Gravel Vacuum (Clean Rocks Without Taking Them Out)
If your “rocks” are really gravel, pebbles, or a rocky substrate on the bottom of the tank, this is your MVP.
A gravel vacuum (also called an aquarium siphon) lifts waste while letting heavier gravel fall back down.
Think of it as cleaning your carpet by removing crumbs without ripping out the flooring.
Best for
- Routine maintenance
- Waste trapped between gravel and pebbles
- Keeping water clear and odor-free
What you’ll need
- A gravel vacuum/siphon
- A bucket (aquarium-only is ideal)
- A towel (because water always wins)
Step-by-step: the “don’t crash your cycle” method
- Turn off heaters and filters if the water level will drop below safe operation.
- Start the siphon and place the rigid tube into the gravel.
-
Use a gentle plunge-and-lift motion: push the tube down until it reaches near the bottom,
let gravel tumble briefly, then lift slightly so the gravel drops back while debris gets carried away. - Work in sections (especially if your tank is established). Don’t vacuum every square inch like you’re sanding a deck.
-
Stop around a normal water change amount (often 20–30% for many community tanks),
unless you’re following a specific plan for your setup. - Refill with dechlorinated water matched to temperature, then restart equipment.
Example: 10-gallon betta tank vs. 55-gallon community tank
In a 10-gallon tank, you can usually vacuum a small area weekly (especially around feeding spots) and do a modest water change.
In a 55-gallon tank, you may rotate zonesleft side this week, right side next weekso you don’t over-disturb the substrate
all at once. The goal is consistency, not a once-a-month gravel apocalypse.
Pro tips (aka: how to not siphon your gravel into the void)
- Pinch the hose briefly if gravel climbs too highletting heavier pieces drop back down.
- Vacuum the “gross corners” first (behind hardscape, under decor, near driftwood).
- Don’t chase perfection: a tiny bit of debris is normal; your filter will catch what gets stirred up.
Way #2: Remove, Scrub, and Vinegar-Soak (For Algae & Mineral Buildup)
When rocks look like they’ve been frosted with green film or white crust, a targeted scrub is faster than trying
to “fix it with vibes.” This method is especially useful for decorative rocks (or larger stones) that you can safely remove.
Vinegar is great for mineral deposits and can help loosen light algae so brushing is easier.
Best for
- Decorative rocks and stone structures
- Hard water stains/mineral crust
- Stubborn algae patches you can’t reach in-tank
What you’ll need
- A clean bucket or container
- An aquarium-dedicated toothbrush or soft brush
- Plain white distilled vinegar
- Dechlorinated water (for rinsing/soaking)
Step-by-step
- Scoop out tank water into a bucket (using tank water helps preserve beneficial microbes on surfaces).
- Remove the rocks and give them a quick rinse in the bucket to knock loose debris.
- Scrub with a brushfocus on crevices where algae loves to throw parties.
-
Vinegar soak for crusty buildup:
- For light buildup: soak in a 1:1 mix of vinegar and water for 15–30 minutes.
- For heavy mineral deposits: use stronger vinegar (even undiluted) and soak longer, checking periodically.
- Scrub againyou’ll usually find the “white crust” gives up after the soak.
- Rinse thoroughly with dechlorinated water. (If you use tap water, rinse well and dechlorinate before returning to the tank.)
- Return rocks to the tank gently to avoid stirring up a sandstorm of debris.
A smart little “rock test” before you commit
Some rocks (like limestone and other calcium-based stones) can raise pH and hardness. If you drip a little vinegar on a dry rock and it fizzes,
that’s a clue it contains carbonates. That doesn’t automatically mean “bad,” but it does mean the rock can affect water chemistry.
This matters a lot if you keep fish that prefer softer, lower-pH water.
When to skip vinegar
- If your tank is extremely pH-sensitive and you’re worried about residuerinse very thoroughly and consider plain scrubbing instead.
- If you can’t remove the rocks without stressing fish or collapsing your hardscapeuse Way #1 instead.
Way #3: Diluted Bleach Disinfection (The “Reset Button” for Rocks)
Sometimes you need more than “a good scrub.” If you’re dealing with rocks from an unknown source, a tank reset, nuisance organisms,
or decorations that look like they survived a swamp documentary, disinfection can be appropriate.
The keyword is diluted. The second keyword is rinsed. The third keyword is dechlorinated.
(Yes, it’s a trilogy.)
Best for
- Rocks and gravel being reused from a questionable setup
- Hard algae outbreaks you want to fully wipe out on removable items
- Disinfecting before setting up a new tank
Do NOT use this on
- Porous wood/driftwood (it can absorb chemicals)
- Live plants
- Anything you can’t rinse thoroughly
- “Decor” with delicate dyes you don’t want bleached into sadness
What you’ll need
- Unscented household bleach (no fragrance, no additives, no “splash-less” formulas)
- Gloves and good ventilation
- A bucket/container (non-metal preferred)
- Dechlorinator/water conditioner
- Clean water for repeated rinsing
Step-by-step: safe bleach method for aquarium rocks
- Pre-rinse and scrub rocks to remove obvious dirt and loose organics (bleach works better after the gunk is reduced).
- Mix a 10% bleach solution (about 1 part bleach to 9 parts water).
- Soak rocks brieflyoften around 10–15 minutes is enough for disinfection of hard surfaces.
- Drain and rinse several times with fresh water, stirring the rocks to release trapped solution.
-
Dechlorinator soak: fill the container with water, add a generous dose of water conditioner,
and soak rocks for at least 15–30 minutes (longer is fine). This helps neutralize remaining chlorine. - Air-dry completely if possible. Chlorine off-gasses as items dry, adding another safety layer.
- Smell test: if you smell bleach, you’re not done. Rinse/soak again until there’s no chlorine odor.
Optional alternative: hydrogen peroxide for spot-cleaning
For lighter “I just want to knock back algae” situations, some aquarists use 3% hydrogen peroxide outside the tank as a short soak,
followed by thorough rinsing. It’s not a magic wand, but it can be a gentler option than bleach for certain scenarios.
If you’re unsure, default to scrubbing + water changes first.
How to Keep Fish Tank Rocks Cleaner Longer (Without Living With a Siphon in Your Hand)
- Feed like a grown-up: If food hits the gravel every meal, you’re basically “composting” your substrate.
- Adjust light duration: Too much light + nutrients = algae’s favorite rom-com.
- Improve flow: Dead spots behind rocks collect waste. Slightly redirect your filter outflow if needed.
- Use a clean-up crew (when appropriate): Snails, shrimp, and algae-eaters can helpbut they’re staff, not janitors with unlimited overtime.
- Stick to routine maintenance: Small, regular gravel vac sessions beat dramatic “full rescapes” every month.
Troubleshooting: “I Cleaned the Rocks… Why Is My Tank Still Ugly?”
Cloudy water after cleaning
You probably stirred up fine debris. Run mechanical filtration, consider a bit of filter floss, and give it 24–48 hours.
Avoid scrubbing everything at once next timework in sections.
Algae comes back fast
That’s a light-and-nutrients issue, not a “your brush lacks courage” issue. Reduce photoperiod, avoid overfeeding,
and keep up with regular water changes. Cleaning rocks treats the symptom; balancing the tank treats the cause.
Fish seem stressed after a big cleaning
Sudden changes (large water swings, deep substrate disruption, temperature differences) can stress fish.
Keep changes smaller and more frequent, match temperature, and avoid “resetting” the tank unless necessary.
Real-World Experiences & Lessons Learned ()
If you hang around aquarists long enough, you’ll notice a pattern: everyone has a “gravel incident.”
It’s practically a rite of passagelike burning your first pancake, but wetter and with more judgmental fish.
The most common story starts with good intentions: “I’m going to get this tank spotless.” Then it ends with
a foggy aquarium, startled fish, and someone whispering, “Why does the water smell… ambitious?”
One of the biggest lessons people learn is that routine beats drama. When you gravel-vac a little each week,
the rocks never get “that bad,” and you don’t feel tempted to pull everything out and scrub like you’re prepping for a home inspection.
Aquarists often notice that the dirtiest areas are predictable: under feeding zones, behind rock piles, and in corners where flow is weak.
Once you identify your tank’s “mess hotspots,” maintenance becomes a quick loop instead of a full afternoon.
Another common experience: the siphon always targets the innocent. That tiny snail? The siphon sees it.
That curious shrimp? Also on the list. Many keepers learn to hover the gravel vacuum slightly above small livestock zones,
or to use a finer intake guard when working around babies and nano fish. The practical trick is to vacuum slowly and keep
a close eye on the tubebecause once you’ve accidentally vacuumed a snail, you’ll develop a sixth sense for “crunchy sounds”
you never wanted to hear.
People also discover that rocks aren’t always just rocks. Someone brings home “cool stones” from outside,
drops them in, and suddenly the pH climbs or the hardness shifts. That’s why experienced aquarists do a simple vinegar fizz test
and research the stone type before it ever meets their tank. The tank isn’t being picky; it’s just chemistry doing chemistry things.
Finally, there’s the hard-earned wisdom about disinfecting: bleach works, but rinsing is the real hero.
Aquarists who use diluted bleach successfully tend to be almost comically thoroughmultiple rinses, a dechlorinator soak,
and an air-dry that lasts until they’re completely sure there’s no chlorine smell. The “smell test” becomes a running joke,
but it’s also a genuinely useful safety check. The overall takeaway from hobbyists is simple: start with the gentlest method,
escalate only when needed, and remember that your tank doesn’t need to be sterile to be healthy. It just needs to be stable.
Conclusion
Cleaning fish tank rocks doesn’t have to be a full-scale remodel. For day-to-day upkeep, a gravel vacuum is the simplest way
to remove trapped waste without tearing down your aquascape. When rocks get crusty or algae-coated, a scrub plus vinegar soak
can restore them without harsh chemicals. And if you truly need to disinfectlike when reusing rocks from an unknown setup
a properly diluted bleach method with thorough rinsing, dechlorination, and drying can be done safely.
Pick the method that matches the mess, keep your routine consistent, and your rocks will go back to doing what they do best:
sitting there quietly, looking impressive, and pretending they didn’t start this whole situation.