Table of Contents >> Show >> Hide
- First, a reality check: what pore strips can (and can’t) do
- Before you DIY: a quick safety checklist
- Prep steps that make DIY pore strips work better (and safer)
- Method 1: Classic Gelatin + Milk Pore Strip
- Method 2: Gelatin + Water + Activated Charcoal Strip
- Method 3: Egg White + Tissue “Quick Strip”
- Aftercare: what to do right after you peel
- How to keep pores looking clearer long-term
- When to skip DIY and talk to a professional
- FAQ
- Experience Notes: What People Commonly Notice When DIYing Pore Strips at Home
There are two kinds of people in this world: (1) the ones who see a pore strip and think “self-care,” and (2) the ones who see a pore strip and think “science fair volcano, but make it skincare.”
If you’re here, you might be a little bit of bothand honestly, same.
Homemade pore strips can be a quick, satisfying way to lift some surface gunk from your nose (or chin/forehead), but they’re not magic. Think of them like a lint roller for your pores:
oddly satisfying, sometimes helpful, and occasionally a bad idea if your skin is already irritated.
This guide walks you through three DIY options, how to use them safely, and how to keep your pores looking clearer long-termso you’re not making “kitchen chemistry strips” every weekend.
First, a reality check: what pore strips can (and can’t) do
Blackheads vs. sebaceous filaments: the plot twist
Blackheads (also called open comedones) are pores that get clogged with oil (sebum) and dead skin cells. The top is open to air, and that material oxidizes, which is why it looks dark.
Sebaceous filaments, on the other hand, are normal structures in your pores that help move oil to the surface of your skin. They can look like tiny dots, especially on the nose, and they refill quickly because they’re doing an actual job.
Here’s the key point: pore strips can pull out surface plugs and also tug out some sebaceous filaments. That can make pores look “cleaner” for a moment, but it can also leave skin dry, irritated, or extra sensitive if you overdo it.
What you should expect (and what you shouldn’t)
- Expect: temporary smoothness, some visible “stuff” on the strip, and pores looking a bit less obvious for a day or two.
- Don’t expect: smaller pores forever, a permanent fix for blackheads, or a cure for acne.
- Also don’t expect: that every dot on your nose is a blackhead. Sometimes it’s just your pores being… pores.
Before you DIY: a quick safety checklist
DIY pore strips rely on adhesionmeaning they stick to your skin and then you peel them off. That’s exactly why they can irritate you if you’re not careful.
Use this checklist so your “glow-up” doesn’t turn into “why is my nose angry at me?”
Skip DIY pore strips if you have:
- sunburn, windburn, or peeling skin
- eczema, psoriasis, rosacea, or a very reactive/sensitive skin barrier
- open cuts, scrapes, or popped pimples in the area
- an active rash or recent waxing/shaving on the same spot
- recent strong exfoliation (like a peel, strong acid, or a retinoid) within the last 24–48 hours
Do this every time:
- Patch test on a small area (jawline or side of face) the first time you try a recipe.
- Don’t overheat mixtures. Warm is fine. Hot is a no.
- Limit frequency to about once a week at most (less if you’re easily irritated).
- Stop if it stings, burns, or hurts. “Beauty is pain” is not a medical recommendation.
Prep steps that make DIY pore strips work better (and safer)
Most DIY strips fail for one of two reasons: (1) they don’t stick well, or (2) they stick too well and you regret everything.
These prep steps aim for the sweet spot.
1) Cleanse first
Use a gentle cleanser to remove sunscreen, makeup, and surface oil. If your skin is slick, the strip won’t grip evenly.
2) Warm water, not a sauna
Splash with warm water or hold a warm (not hot) damp washcloth to the area for 1–2 minutes. You’re softening surface debris, not trying to steam a dumpling basket on your face.
3) Apply on slightly damp skin (unless the recipe says otherwise)
Many adhesive-style strips grip better on skin that’s lightly damp, but egg-white methods usually go on dry skin for best “film” formation. Follow the method-specific notes below.
Method 1: Classic Gelatin + Milk Pore Strip
This is the “OG DIY pore strip” because gelatin sets into a flexible film and milk adds slip and proteins. The peel can lift surface debris and dead skin, especially around the nose.
It’s also easy to customize: you can make a thin layer for sensitive skin or a thicker layer for stronger peeling power.
What you’ll need
- 1 tablespoon unflavored gelatin
- 1 tablespoon milk (dairy or unsweetened plant milk)
- Small microwave-safe bowl or a heat-safe cup
- Brush or clean fingertips for application
- Optional: a small piece of tissue paper (for reinforcement)
Step-by-step
- Mix: Stir gelatin and milk until combined. It will look lumpy at first. That’s normal.
-
Warm gently: Heat for 10 seconds at a time, stirring between rounds, until you get a smooth, syrupy paste.
(If it’s hot, waityour face is not a mug of cocoa.) - Test temperature: Dab a tiny bit on the inside of your wrist. Warm is fine; hot is not.
- Apply: Spread a thin, even layer over your nose (or other target area). Avoid eyebrows and hairline.
- Optional reinforcement: Press a small piece of tissue onto the layer, then paint a second thin layer on top.
- Let it dry: Wait 10–15 minutes, until fully dry and stiff to the touch.
- Peel slowly: Start at the edges and peel toward the center, keeping the skin taut with your other hand.
- Rinse residue: Use lukewarm water to remove leftover bits. Don’t scrub.
Pro tips (because the kitchen and your face both deserve respect)
- Thin layer = less irritation. Thick layers peel harder and may tug on delicate skin.
- Don’t apply too close to nostrils. The skin there is thin and easily irritated.
- If it won’t peel: You applied too thin or didn’t let it dry fully. Rinse off and try again another day.
Method 2: Gelatin + Water + Activated Charcoal Strip
Activated charcoal is popular because it can bind (adsorb) certain impurities. In skincare, it’s often used in rinse-off products and masks. In a DIY strip, charcoal mainly adds an “oil-absorbing” vibe
and a dramatic black color that makes you feel like a superhero in disguise. Functionally, the peel effect still comes mostly from the gelatin film.
What you’ll need
- 1 tablespoon unflavored gelatin
- 1 tablespoon warm water
- 1/2 teaspoon activated charcoal powder (optional; start small)
- Small bowl + spoon
- Brush or clean fingertips
- Old towel or paper towel (charcoal can stain)
Step-by-step
- Mix: Combine gelatin and warm water. Stir well.
- Add charcoal: Sprinkle in a small amount and mix until evenly gray-black.
- Warm gently if needed: If it thickens too quickly, warm for a few seconds and stir.
- Apply carefully: Spread a thin layer on your nose. Avoid the sides if you’re sensitive.
- Dry fully: Wait 10–15 minutes, until stiff and dry.
- Peel slowly: Peel from the edges inward. If it hurts, stop and rinse off with lukewarm water.
- Rinse residue: Charcoal can cling. Be patient and gentleno aggressive scrubbing.
Safety notes for charcoal DIY
- Less is more. Too much powder can make the strip crumbly and harder to remove.
- Avoid if you’re very sensitive. Not because charcoal is “toxic,” but because peel-off products can be irritating and charcoal can add friction during removal.
- Don’t DIY if you’re already using strong acne actives. If your routine includes retinoids or frequent acids, your barrier may be more prone to irritation.
Method 3: Egg White + Tissue “Quick Strip”
Egg white dries into a tight film that can lift surface debris when peeled off. The tissue acts like a scaffold so the film peels in one piece instead of flaking off like dried glue.
This method tends to feel tight and can be a bit intense for sensitive skin, so go slowly and don’t turn it into a weekly tradition unless your skin tolerates it well.
What you’ll need
- 1 egg white (just the white)
- Thin tissue or 1-ply paper towel (tear into strips)
- Small bowl + fork
- Clean brush or fingertips
Step-by-step
- Separate the egg white: Place it in a clean bowl and lightly whisk until slightly foamy.
- Apply a thin layer: On clean, dry skin (not damp), spread a thin coat on your nose.
- Place tissue: Press tissue strips onto the wet egg white.
- Seal with a second coat: Paint a thin layer of egg white over the tissue.
- Dry completely: Wait 10–15 minutes until the tissue is stiff.
- Peel slowly: Lift from the edges and peel toward the center. If it’s stuck, dampen with warm water and remove gently.
- Rinse: Wash off residue with lukewarm water and pat dry.
Extra caution with egg white
- Allergy check: If you have egg allergies, skip this method.
- Hygiene matters: Use a clean bowl/brush. Don’t store leftover egg white mixtures.
- If it feels too tight: That’s your cue to stop. Dampening and removing is better than “power peeling.”
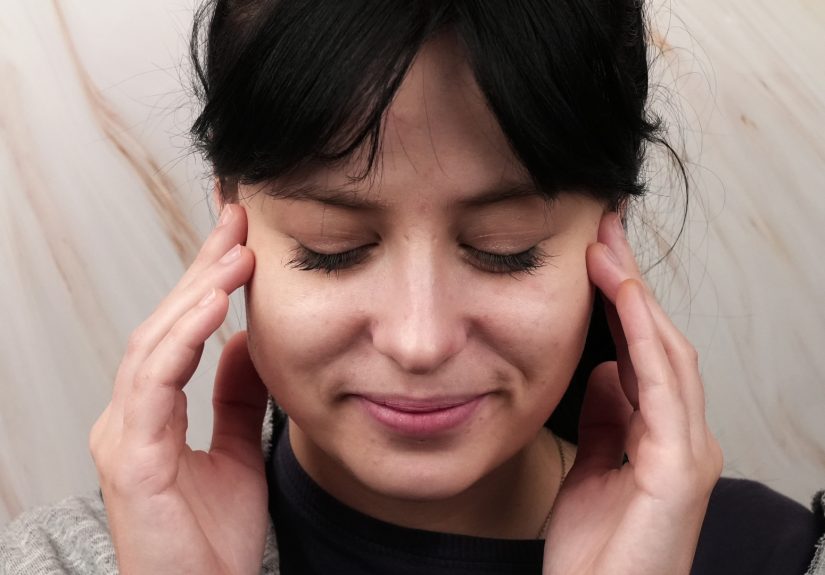
Aftercare: what to do right after you peel
The peel is only half the story. What you do after matters because your skin barrier may be slightly stressed.
Think “calm and moisturize,” not “let’s add a 12-step acid routine because I’m feeling ambitious.”
Do this
- Rinse with lukewarm water to remove residue.
- Use a gentle cleanser if there’s stickiness left behind.
- Apply a simple moisturizer (non-comedogenic is ideal).
- Use sunscreen the next dayirritated skin is more sensitive to sun.
Avoid this for 24 hours
- strong exfoliating acids (high-percentage AHAs/BHAs)
- retinoids if you’re new to them or easily irritated
- scrubs, cleansing brushes, or anything “gritty”
- picking at pores (your skin is not bubble wrap)
How to keep pores looking clearer long-term
DIY pore strips are the “movie trailer.” The full film is your regular skincare routine.
If you want fewer visible clogs over time, the most effective approach is consistent, gentle care that keeps oil and dead skin from building up in the first place.
1) Cleanse consistently (but gently)
Wash your face morning and night, especially after sweating. Harsh cleansers can backfire by drying out skin and triggering more oiliness.
2) Consider salicylic acid (BHA) for clogged pores
Salicylic acid is oil-soluble, which is why it’s commonly used for acne and clogged pores. It can help exfoliate inside the pore lining and reduce the look of blackheads over time.
If you’re new to it, start with a low strength and use it a few times per week rather than going full speed on day one.
3) Retinoids (like adapalene) can help keep pores from clogging
Retinoids support cell turnover and can help prevent new clogs. Over-the-counter adapalene is a popular option, but it can be irritating at first.
Start slowly, moisturize, and don’t stack it with every exfoliant you own.
4) Clay masks are a less “rip-and-tear” option
Clay masks can absorb oil and help minimize shine without the same peel-off tug. They’re not a permanent fix either, but many people find them gentler than strips.
5) Non-comedogenic products really matter
If your moisturizer, sunscreen, or makeup clogs your pores, you’ll keep chasing blackheads no matter how many strips you peel.
Look for “non-comedogenic” and remove makeup thoroughly at the end of the day.
When to skip DIY and talk to a professional
DIY can be fun, but it’s not the best tool for every situation. Consider professional help if:
- you have painful or inflamed acne (red bumps, cysts, or nodules)
- you’re getting frequent breakouts with scarring
- your skin gets irritated easily or stays red after stripping
- blackheads don’t improve after 6–8 weeks of a consistent routine
FAQ
Do homemade pore strips remove blackheads “better” than store-bought?
Not necessarily. Both work mainly by adhesion. Homemade versions can be simpler (fewer additives), but they can also be less predictable in stickiness and strength.
Either way, results are usually temporary.
How often can I use DIY pore strips?
For most people, no more than once a weekless if you’re sensitive. Overuse can irritate the skin barrier and leave you red, dry, or more breakout-prone.
Why do my pores look “filled again” the next day?
Because sebaceous filaments refill and oil production doesn’t stop. Pores are not empty rooms you can permanently vacatethey’re active structures.
A routine with pore-friendly ingredients helps more than repeated stripping.
Can I use these on my cheeks or chin?
You can, but be careful. Cheek skin is often more delicate than the nose. Start with a thin layer, patch test, and avoid any inflamed pimples.
Is it normal to see little “spikes” on the strip?
Yes. That can be a mix of surface oil plugs, dead skin, and sometimes sebaceous filaments. It’s satisfying, but it’s not a scoreboard for “how dirty you were.”
Skin naturally produces oilcongrats on having a functioning face.
Experience Notes: What People Commonly Notice When DIYing Pore Strips at Home
Let’s talk about the part no one puts on the “5-minute DIY pore strip” posts: the lived experience. Not “I did this once and now I have glass skin forever,” but what people commonly notice when they actually try it,
including the funny, the frustrating, and the “why is my nose now the color of a cherry tomato?”
The first experience is usually the prep realization: DIY strips work best when your skin is clean and your expectations are… reasonable. People who go in thinking
“this will erase years of blackheads in one peel” tend to be disappointed. The ones who treat it like a temporary resetsomething that can lift surface buildupusually feel satisfied.
It’s a subtle mindset shift, but it changes how you judge the results.
Gelatin recipes feel surprisingly “legit” once you get the texture right. The most common early mistake is overheating. If the mixture is too hot, it can feel uncomfortable,
and people quickly learn that skincare should not feel like a dare. The second common mistake is applying a layer that’s too thickbecause thicker feels “stronger,” right?
Except then it either peels like you’re waxing your nose (ouch) or it cracks and flakes, leaving a weird patchwork cleanup situation.
After a try or two, many people settle into the sweet spot: thin, even, fully dry.
The “wow factor” moment is usually the first peel. Even when the strip only removes surface debris, it looks dramatic. That’s partly because the film
creates contrastespecially with charcoaland partly because it’s genuinely satisfying to see anything come off. Some people describe their pores looking smoother right away,
especially along the sides of the nose where texture can be more noticeable. Others notice almost no change and realize what they thought were blackheads were mostly sebaceous filaments.
Either way, it’s a quick education in “my skin is normal, and pores don’t disappear.”
Egg white strips are the most “love it or hate it” experience. People tend to report that they feel tighter than gelatin and can be trickier to peel cleanly.
The tissue trick helps, but if it doesn’t dry completely, it can peel unevenly. If it dries too much, it can feel extra tuggyespecially near the nostrils.
The common adjustment is to apply thinner layers and remove slowly, using warm water to soften any stubborn edges instead of forcing it.
Redness is a frequent “post-strip” realitynot always dramatic, but common enough that people learn to plan around it.
Many report that if they strip and immediately follow with a simple moisturizer, the redness fades faster. The worst outcomes usually happen when people stack too much:
strip + scrub + strong acid + retinoid = a very unhappy skin barrier. The more experienced DIYers often treat strip night like “calm night” and save active treatments for other days.
The long-term experience trend is that most people either (1) stop doing strips because they realize consistent skincare works better, or (2) keep strips as an occasional tool
for special occasions (“I want my nose to look smoother for an event”). The most satisfied group tends to combine occasional stripping with prevention:
gentle cleansing, non-comedogenic products, and a pore-friendly ingredient like salicylic acid a few times per week. Instead of fighting their pores, they manage them.
In other words: DIY pore strips can be fun and useful in moderation. But the real “secret” is boring (sorry): consistency wins. Your pores are doing their job,
and your goal isn’t to erase themit’s to keep them from getting clogged and angry.