Table of Contents >> Show >> Hide
- Why Tomato Stains Are So Stubborn
- Way 1: Attack Fresh Tomato Stains Fast
- Way 2: Treat Dried Tomato Stains with a Vinegar and Baking Soda Boost
- Way 3: Use an Oxygen Bleach Soak for Set-In Tomato Stains
- Extra Tips for Upholstery, Rugs, and Delicates
- Mistakes That Make Tomato Stains Worse
- The Bottom Line
- Real-Life Tomato Stain Experiences and What They Teach You
- SEO Tags
Tomato stains are the overachievers of the mess world. They do not simply land on your shirt, wave politely, and leave. No, they arrive with oil, color, and attitude. One minute you are enjoying spaghetti, salsa, or a burger with ketchup like a civilized adult, and the next minute your favorite shirt looks like it lost an argument with marinara.
The good news is that tomato stains are absolutely beatable if you use the right approach. The trick is knowing whether you are dealing with a fresh splatter, a dried blotch, or a fully set-in stain that has already survived one lazy wash cycle and is now feeling very confident. This guide breaks the cleanup into three smart methods so you can stop panicking, stop rubbing the fabric like it owes you money, and start removing the stain the right way.
Below, you will find three practical ways to remove tomato stains from clothes and other washable fabrics, plus extra tips for upholstery, rugs, and delicate materials. There is a little science, a little strategy, and just enough humor to make laundry feel slightly less like a punishment.
Why Tomato Stains Are So Stubborn
Tomato stains are annoying because they are usually not just one kind of stain. Tomato sauce, ketchup, salsa, and pasta sauce often combine a greasy component with a strong red or orange pigment. That means you are not only lifting color from fabric, but also breaking down oil. In other words, this is a two-part villain.
That is why one quick rinse sometimes does not cut it. If you treat only the color, the oily residue can stay behind. If you attack only the grease, the red tint may linger like a bad decision. Add heat too early, especially from a dryer, and the stain can settle in for the long haul. So the real secret is not magic. It is matching the method to the age and severity of the stain.
Way 1: Attack Fresh Tomato Stains Fast
Best for: New spills on cotton, polyester, blends, towels, napkins, and most washable everyday fabrics
If the stain just happened, congratulations: this is your easiest cleanup window. Fresh tomato stains are much easier to remove before the oils sink in and the pigments dry down. Time matters here, but you do not need to sprint through the house in dramatic slow motion. You just need to act before the stain bakes into the fibers.
What to do
- Lift off the extra mess first. Use a spoon, dull knife, or paper towel to remove excess sauce. Do not smear it around. That only gives the stain more real estate.
- Blot, do not rub. Press with a clean cloth or paper towel to absorb what you can. Rubbing pushes the stain deeper into the weave.
- Flush with cold water from the back of the fabric. Turn the garment inside out and run cold water through the stain from behind. This helps push the tomato residue out the way it came in instead of driving it farther through the front.
- Apply a little liquid dish soap or liquid laundry detergent. Dish soap is especially helpful when the stain has an oily sauce component. Gently work it in with your fingers or a soft brush.
- Let it sit for 5 to 10 minutes. This gives the cleaner time to loosen grease and discoloration.
- Rinse and wash according to the care label. Once pretreated, wash in the warmest water the fabric can safely handle. If the label says cool or cold only, obey the label. Laundry is not the place for rebellion.
- Air-dry and inspect. If any stain remains, repeat the treatment before machine drying.
This method works well because it handles both major issues right away: cold water helps prevent early setting, and the detergent starts breaking down the greasy side of the stain. For many fresh tomato spills, that is enough to solve the problem in one round.
Why this method works
Fresh stains are still sitting closer to the surface of the fibers. They have not had time to oxidize, dry fully, or bind more tightly to the fabric. Cold water helps remove loose residue, while detergent tackles the oily part that plain water leaves behind. Think of it as stain removal before the tomato gets emotionally attached to your shirt.
Way 2: Treat Dried Tomato Stains with a Vinegar and Baking Soda Boost
Best for: Dried spots, older splatters, and mystery stains you found after dinner, after laundry day, or after a full week of denial
Dried tomato stains are trickier, but they are not a lost cause. Once the stain has dried, the goal shifts from quick flushing to rehydrating and loosening what has already settled into the fabric. This is where a pantry-based treatment can help.
What to do
- Start by loosening the dried residue. Gently scrape off any crusty or dried material with a spoon or dull edge.
- Soak the stained area with white vinegar. You do not need to drown the whole garment. Just saturate the stain enough to soften it.
- Make a simple baking soda paste. Mix baking soda with a small amount of water until it forms a spreadable paste.
- Apply the paste and scrub gently. Use a soft toothbrush or small laundry brush to work the paste lightly into the stain.
- Let it sit for 15 to 30 minutes. This gives the treatment time to lift residue and discoloration.
- Rinse with cool water. Then wash the garment as usual using laundry detergent.
- Air-dry again. No dryer until the stain is actually gone.
This method is useful when the stain is no longer fresh enough for a simple rinse-and-wash fix. It helps loosen what has dried into the fibers and gives you a second chance before moving on to heavier-duty treatment.
When to use this instead of the first method
Use this method when you find the stain later, when a first wash did not fully remove it, or when the tomato mess came from a thicker sauce that dried into the fabric. It is also a good option for people who want to try a household fix before using a dedicated stain remover.
One important note: always test any stain treatment on a hidden area first, especially on dark or delicate fabrics. Vinegar and scrubbing can be too aggressive for some materials, and nobody wants to replace one problem with a bigger one.
Way 3: Use an Oxygen Bleach Soak for Set-In Tomato Stains
Best for: Tough stains that survived washing, old set-in marks, and garments that still look faintly orange even after your best effort
If the stain has gone full stubborn, it is time to bring in oxygen bleach. This is often the best move for washable whites and many colorfast items, especially when the garment has already been washed and the stain is still hanging on. Oxygen bleach is not the same as chlorine bleach. It is generally gentler, often color-safe, and widely used for stain soaking.
What to do
- Read the garment care label first. If the fabric is wool, silk, leather, or another delicate material, stop and check whether the product is safe for it. Many are not.
- Dissolve oxygen bleach according to package directions. Use the recommended water temperature and amount. Do not freestyle chemistry.
- Soak the item. Let the garment sit for at least 1 to 2 hours. For stubborn stains, several hours or overnight may help.
- Wash as usual. Follow the care label and use regular laundry detergent.
- Air-dry and inspect. If needed, repeat. Stain removal is sometimes a rematch, not a one-round knockout.
This method is especially helpful when the stain has already survived a wash cycle or when the sauce was rich, greasy, or deeply pigmented. It gives the cleaner more contact time than a quick pretreat, which can make a major difference on set-in discoloration.
Who should be cautious
Be careful with delicate fabrics, structured garments, or anything labeled dry-clean only. If the care tag says “dry clean,” believe it. That tag has seen things. Also, if you are treating bright or dark colors, always spot-test first, even if the product says color-safe.
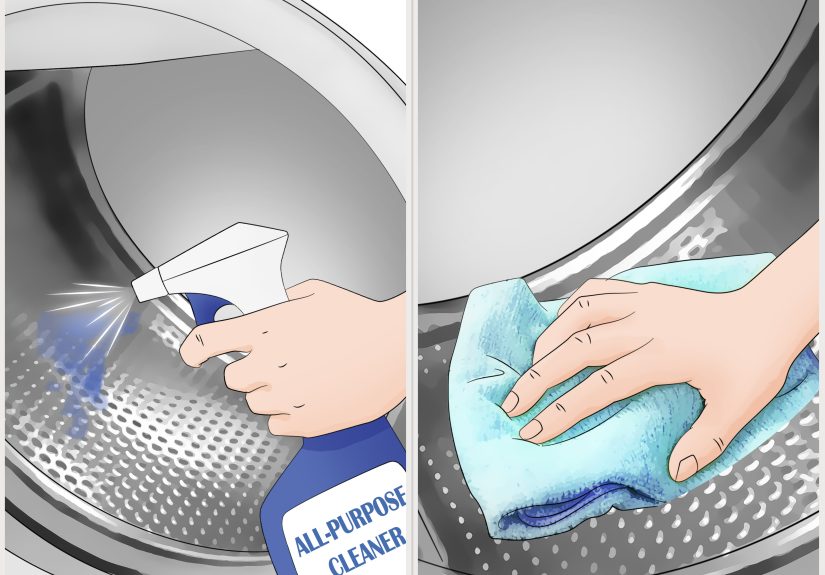
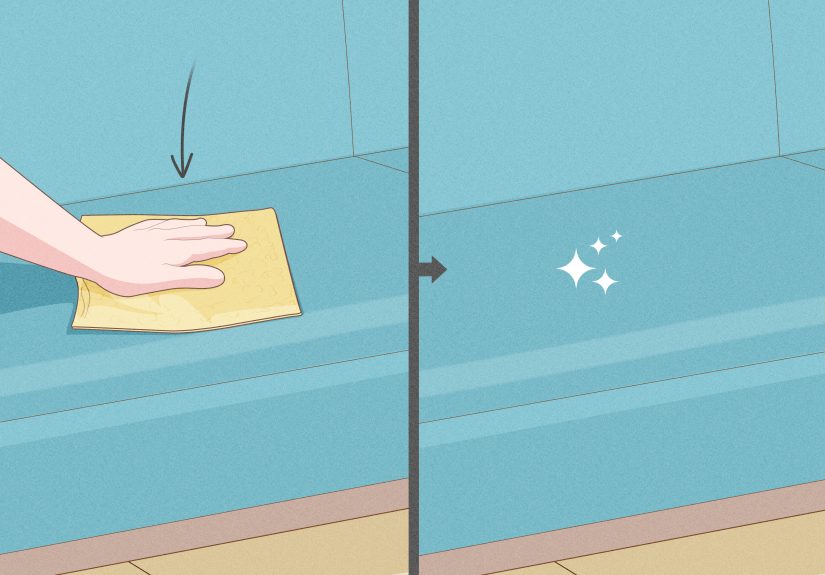
Extra Tips for Upholstery, Rugs, and Delicates
Tomato stains rarely limit themselves to clothing. They also enjoy couch cushions, dining chair seats, rugs, table linens, and the one throw pillow you bought because it looked “low maintenance.” If the spill lands on upholstery or carpet, the rule is simple: blot gently, use a mild cleaning solution sparingly, and do not oversaturate the fabric.
For many soft surfaces, a light mixture of dish soap and water can help lift the stain. Dab with a microfiber cloth, then blot with fresh water to remove residue and dry the area thoroughly. Scrubbing hard can fuzz fibers, spread the stain, or create a clean-looking ring around the spot that somehow feels like a personal insult.
For silk, wool, and other delicate fibers, skip harsh scrubbing and be cautious with enzyme products. These fabrics often need gentler methods or professional care. When in doubt, test first or take the item to a cleaner. It is cheaper than turning a blouse into a cautionary tale.
Mistakes That Make Tomato Stains Worse
- Using hot water too early: Start with cold water when the stain is fresh. Heat too soon can lock in the mess.
- Rubbing aggressively: This can grind the stain deeper into the fabric and rough up the fibers.
- Skipping pretreatment: Tomato stains usually need more than a standard wash.
- Putting the item in the dryer before checking: Dryer heat can set leftover residue and make a second cleanup much harder.
- Ignoring the care label: The right stain method on the wrong fabric can still end badly.
If you remember only one thing from this article, let it be this: never celebrate too early and toss the garment into the dryer without checking the stain in bright light first. Many tomato stains become laundry legends because someone assumed “close enough” was good enough.
The Bottom Line
The best way to remove tomato stains depends on when you catch them. Fresh stains respond best to cold water and detergent. Dried stains often need a vinegar-and-baking-soda reset. Set-in stains usually need the big guns: an oxygen bleach soak. No matter which method you use, the winning formula is the same: act quickly, treat gently, follow the care label, and keep the dryer out of the conversation until the stain is truly gone.
Tomato stains may be dramatic, but they are not unbeatable. With a little patience and the right strategy, your clothes can absolutely return from the marinara battlefield looking respectable again.
Real-Life Tomato Stain Experiences and What They Teach You
Tomato stains have a funny way of showing up in real life at the exact worst moment. It is almost impressive. One of the most common experiences is the classic white-shirt pasta disaster: you are halfway through dinner, feeling great, and then one enthusiastic noodle snap sends a red dot straight onto your chest. In that moment, most people make one of two mistakes. They either rub the stain with a napkin until it spreads into a pink cloud, or they ignore it until they get home and discover it has dried into the fabric like a souvenir. The lesson is simple: a calm blot and a quick cold-water rinse beat panic every time.
Another all-too-real scenario happens with kids’ clothes. Ketchup, pizza sauce, and pasta seem magnetically attracted to sleeves, collars, and school uniforms. Parents often report that the stain looked gone after washing, only to reappear once the shirt dried. That experience teaches an important truth: damp fabric can hide leftover oily residue. What looks clean in the laundry room may suddenly glow orange again in daylight. Air-drying first is not just a fussy laundry habit. It is the move that saves you from baking a faint stain into permanence.
Then there is the couch incident. Someone balances a bowl of spaghetti on the sofa because “it’ll be fine,” which is the kind of sentence that usually ends with cleanup supplies. The sauce lands on the cushion, everyone freezes, and now there is a debate about whether to scrub, spray, soak, or pretend it blends in with the upholstery pattern. People who have been through this tend to learn the same lesson fast: soft furnishings need patience. Blotting with a mild cleaning solution works better than flooding the fabric, and restraint is often more effective than brute force.
Dried tomato stains also have a special talent for showing up late. You pull a shirt from the hamper days later and discover a mysterious rusty-red spot near the hem. No one remembers when it happened. No one accepts responsibility. At this point, the stain is less of a mess and more of an investigation. This is where experience teaches the value of step-by-step treatment. Rehydrate, pretreat, wash, inspect, repeat if needed. Old stains are not always impossible, but they do demand more patience and less wishful thinking.
And of course, there is the emotional damage caused by the “almost clean” shirt. You do everything right, wash it carefully, and still see a faint peach-colored shadow where the stain used to be. That is the point where many people give up. But experienced stain fighters know that tomato stains often come out in stages. A second round of treatment, especially with oxygen bleach on washable fabrics, can make the difference between “laundry casualty” and “good as new.” In other words, tomato stains are rude, but they are not unbeatable. They just reward persistence, smart timing, and a refusal to let spaghetti win.