Table of Contents >> Show >> Hide
- Specific Gravity 101 (Quick, Useful, and Not Boring)
- Before You Test: The Three Things That Make or Break Accuracy
- Method 1: Hydrometer (The Classic Float Test)
- Method 2: Pycnometer (Specific Gravity Bottle) Small Volume, Big Accuracy
- Method 3: Density by Mass-and-Volume (Scale + Glassware) Plus the Digital Upgrade
- Which Method Should You Use?
- Common Problems (and the Fixes That Actually Work)
- Real-World Uses (So This Isn’t Just a Science Class Flashback)
- Conclusion: The Best SG Test Is the One You Can Do Correctly
- Experience Section: What SG Testing Is Like in the Real World (The Good, the Bad, and the Bubbly)
Specific gravity sounds like something a superhero gets tested for at the DMV (“Ma’am, your cape is fine, but your specific gravity is suspicious.”). In real life, it’s much more usefuland way less dramatic. Specific gravity (often called relative density) tells you how heavy a liquid is compared to water. That simple comparison shows up everywhere: brewing, automotive fluids, aquariums, chemistry labs, food production, and quality control.
In this guide, you’ll learn three practical ways to test the specific gravity of liquidsfrom the classic floaty hydrometer to the lab-precise pycnometer to the “scale + volume” method (with a quick look at modern digital density meters). Along the way, we’ll cover temperature, accuracy, common mistakes, and real-world examplesso you can get results you actually trust.
Specific Gravity 101 (Quick, Useful, and Not Boring)
Specific gravity (SG) is a ratio:
The idea
SG compares the density of your liquid to the density of water at a stated temperature. Because it’s a ratio, it has no units. Water is the reference, but water’s density changes with temperatureso temperature matters more than most people expect.
The basic relationship
If you know density, specific gravity is basically:
SG = (density of liquid) / (density of water)
In everyday use, you’ll often see reference temperatures like 60°F (15.56°C) or 68°F (20°C). In more technical work, you might see other conventions (including water referenced at 4°C). The key is: always record the temperature and the instrument’s calibration basis.
Before You Test: The Three Things That Make or Break Accuracy
1) Temperature (Yes, Again)
SG measurements are temperature-sensitive for two reasons: the liquid changes density with temperature, and water (your reference) does too. Many hydrometers are calibrated at a specific temperature (commonly 60°F or 68°F), and readings taken at other temperatures may need correction.
2) Bubbles and Foam
Trapped bubbles make a liquid act “lighter” than it really is. Foam can make readings messy (and sometimes hilariously wrong). If your sample tends to foam (beer wort, detergents, some cleaners), let it settle or degas as appropriate for your setting.
3) Safety and Common Sense
Most SG testing is harmless (water, sugar solutions, beverages). But some liquids are hazardous (solvents, strong acids, fuels). If a liquid can burn skin, produce dangerous fumes, or is flammable, testing should only be done in a properly supervised workspace with appropriate protective equipment and ventilation.
Method 1: Hydrometer (The Classic Float Test)
A hydrometer is a weighted glass float with a scale. You place it in a tall container of liquid, and it floats at a level determined by the liquid’s density. Denser liquid = hydrometer floats higher; less dense liquid = it sinks more.
Best for
- Brewing (original gravity/final gravity)
- Saltwater/aquarium mixing
- Automotive fluids (with the correct specialty hydrometer)
- Quick checks where “close enough” is fine
What you need
- A hydrometer with the right range for your liquid
- A tall hydrometer jar or graduated cylinder
- A thermometer
- Optional: temperature correction table/tool for your specific hydrometer and liquid type
Step-by-step (the reliable way)
- Check the calibration temperature printed on the hydrometer (common values are 60°F or 68°F).
- Fill a tall cylinder with enough sample so the hydrometer will float freely without hitting the bottom.
- Lower the hydrometer gently. Give it a small spin between your fingers to help shake off bubbles that cling to the glass.
- Let it settle. Wait for bobbing to stop and for foam to clear.
- Read at eye level. For most clear liquids, you read the scale at the liquid surface (meniscus rules vary by instrument and liquid; in many practical SG uses, the reading is taken at the surface level while keeping your eye even with the liquid line).
- Record the temperature of the sample and apply a correction if needed for that hydrometer/liquid.
Practical example
Say you’re mixing a sugar solution for a food project. You take a hydrometer reading of 1.080 at 75°F, but your hydrometer is calibrated at 60°F. Without correction, you may be slightly offbecause the liquid (and water reference behavior) changes with temperature. If precision matters, you correct the reading using the hydrometer’s guidance or an appropriate correction table/tool.
Common hydrometer mistakes
- Wrong tool for the job: not all hydrometers measure the same scale (SG vs alcohol vs API gravity, etc.).
- Ignoring temperature: “It’s probably fine” is not a measurement strategy.
- Reading at an angle: parallax error is real and it will clown your data.
- Bubbles on the stem: tiny bubbles can shift readings more than you’d think.
Method 2: Pycnometer (Specific Gravity Bottle) Small Volume, Big Accuracy
A pycnometer (also called a specific gravity bottle) is a calibrated flask that holds a very precise volume. Instead of relying on floating behavior, you rely on weighing. This method is a favorite in labs because it can be very accurate, especially when temperature is controlled.
Best for
- Laboratory work and quality control
- Liquids where you want higher precision than a hydrometer provides
- Small sample volumes
What you need
- A pycnometer/specific gravity bottle with stopper
- An accurate balance (the more precise, the better)
- Distilled water (for calibration/reference)
- A thermometer (and ideally a water bath if you need tight temperature control)
How it works (conceptually)
You weigh:
- the empty bottle,
- the bottle filled with water at a known temperature,
- the bottle filled with your sample at (ideally) the same temperature,
Then you use the mass differences to calculate density and specific gravity.
Step-by-step (lab-style, simplified)
- Clean and dry the pycnometer thoroughly. Residue changes mass and ruins accuracy.
- Weigh the empty pycnometer (with stopper) and record the mass.
- Fill with distilled water to the mark (or insert stopper to overflow the capillary, depending on design), remove exterior droplets, and weigh again. Record the water temperature.
- Empty, rinse, and fill with your sample in the same way. Avoid bubbles. Weigh and record the sample temperature.
- Calculate SG using the ratio of masses for equal volumes (with temperature accounted for if your protocol requires it).
Why people love pycnometers
- Precision: fixed volume + careful weighing can be very accurate.
- Repeatability: done correctly, you can reproduce results with confidence.
- Great for documentation: protocols are easy to standardize.
Where pycnometers can go wrong
- Temperature drift: if water and sample are at different temperatures, your comparison gets messy.
- Incomplete filling: tiny voids or bubbles matter because the whole method assumes a fixed volume.
- Wet exterior: a few drops on the outside add mass you didn’t mean to measure.
Method 3: Density by Mass-and-Volume (Scale + Glassware) Plus the Digital Upgrade
If you can measure mass and volume, you can calculate density. And if you have density, you can calculate specific gravity. This is the “workhorse” approach in teaching labs and many practical settings, because it doesn’t require specialty floating instruments.
Best for
- Teaching labs and basic quality checks
- Liquids that are hard to read with a hydrometer (foam, narrow ranges)
- Situations where you want SG but don’t have a hydrometer/pycnometer handy
What you need
- A balance
- A way to measure volume (graduated cylinder, volumetric pipet, or volumetric flask)
- A thermometer
- Optional: a reference table/value for water density at your measurement temperature
Step-by-step (the clean, repeatable version)
- Weigh the empty container (dry graduated cylinder or flask). Record the mass.
- Add a known volume of your liquid (for better accuracy, use a volumetric pipet rather than “eyeballing a meniscus”).
- Weigh the container again. Subtract to get the mass of the liquid alone.
- Calculate density = mass / volume.
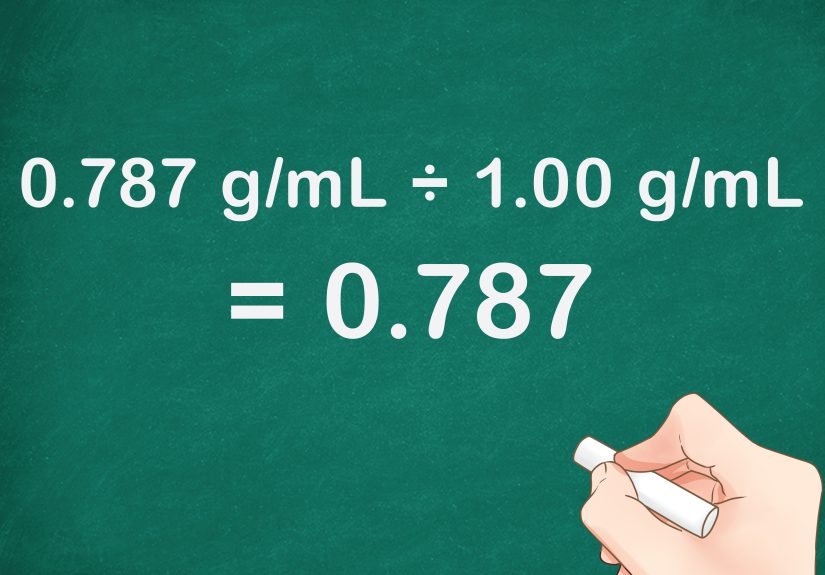
- Calculate SG by dividing by the density of water at the same reference temperature (or the temperature basis you are using/reporting).
Example (with numbers that behave)
You measure 25.00 mL of a liquid. The liquid’s mass (by difference) is 26.50 g.
Density = 26.50 g / 25.00 mL = 1.060 g/mL.
If water at your reference temperature is approximately 0.998–1.000 g/mL (depends on temperature), SG will be close to 1.06, but a proper calculation uses the correct water density for that temperature if you need higher precision.
The digital upgrade: oscillating U-tube density meters
In many modern labs, a digital density meter (often based on a vibrating/oscillating U-tube) measures density automatically. The instrument detects how the oscillation frequency changes when filled with your sample, and converts that into density (and then SG). These instruments typically include temperature control, which is a huge deal for reliable density work.
Digital meters can be fast and consistent, but they still have “gotchas”: bubbles, contamination, and very viscous liquids can affect readings. Think of them as “excellent at measuring exactly what you put in the cell,” which is both a compliment and a warning label.
Which Method Should You Use?
| Method | Best For | Typical Accuracy | Sample Size | Cost / Effort |
|---|---|---|---|---|
| Hydrometer | Fast checks, brewing, field-style work | Moderate (depends on reading + temp control) | Medium (tall cylinder) | Low cost, low effort |
| Pycnometer | Lab accuracy, QC, small volumes | High (when temperature is controlled) | Small | Low-to-moderate cost, higher effort |
| Mass + Volume | Teaching labs, flexible setups | Moderate to high (depends on glassware + technique) | Flexible | Low cost, moderate effort |
| Digital Density Meter | High-throughput labs, tight repeatability | High | Very small | Higher cost, low effort per test |
Common Problems (and the Fixes That Actually Work)
Problem: “My SG keeps changing.”
If your liquid is warming/cooling, evaporating, or separating (like a mixture that isn’t fully blended), SG can drift. Fix: stabilize temperature, mix thoroughly, and measure promptly.
Problem: “My hydrometer reading is weirdly high/low.”
Likely culprits: bubbles clinging to the hydrometer, foam, or reading the meniscus incorrectly. Fix: spin the hydrometer gently, let foam settle, read at eye level, and confirm the hydrometer range matches your expected SG.
Problem: “I used water = 1.000, so I’m done.”
For rough work, that might be okay. For anything that needs precision, remember: water’s density changes with temperature. Fix: use the proper water density for your temperature basis or follow a standardized procedure.
Problem: “My pycnometer results don’t match.”
Usually it’s temperature mismatch, incomplete filling, or wet exterior surfaces. Fix: control temperature, remove bubbles, wipe the exterior consistently, and repeat with careful technique.
Real-World Uses (So This Isn’t Just a Science Class Flashback)
Brewing and fermentation
Hydrometers are used to estimate sugar content before fermentation and how much sugar has been converted afterward. Temperature correction matters because a warm sample can shift readings enough to confuse your process decisions.
Automotive and mechanical fluids
Some applications use SG as a quick indicator of concentration or condition (but always use the correct tool designed for that fluid, and follow safe handling guidanceespecially with any corrosive or hazardous fluids).
Food and beverage production
Syrups, brines, and concentrated solutions often rely on density/SG checks for consistency. A hydrometer is quick; a pycnometer or digital density meter can be used for tighter QC.
Conclusion: The Best SG Test Is the One You Can Do Correctly
If you want a fast, practical measurement, start with a hydrometerjust respect temperature and technique. If you want high precision with a small sample, the pycnometer is your best friend (the picky, accurate friend who labels everything). And if you want flexibility without specialty floats, mass-and-volume density calculations get you to SG with solid reliability, especially when you use good glassware and careful measuring.
Whichever method you choose, the “secret sauce” is the same: control temperature, avoid bubbles, measure carefully, and record enough details that your future self won’t have to guess what you did.
Experience Section: What SG Testing Is Like in the Real World (The Good, the Bad, and the Bubbly)
People usually expect specific gravity testing to be a quick “dip and read” moment. Sometimes it is. But the first time you try itespecially with a hydrometer you learn a humbling truth: liquids do not always behave like cooperative spreadsheet data. The most common early experience is watching the hydrometer bob like a tiny buoy in a storm while you hover nearby, pretending you’re calm and scientific, even though you just want it to stop moving so you can write down one number. Once it settles, you feel confidentuntil you notice a ring of tiny bubbles clinging to the stem, and suddenly you’re negotiating with physics.
In classrooms and basic labs, the “mass + volume” method often becomes the first real lesson in measurement discipline. Students quickly discover that reading a graduated cylinder isn’t just “look at the line.” There’s the meniscus, the eye-level rule, and the realization that 10.0 mL and 10.00 mL are not the same claim. A typical moment of progress happens when someone repeats the measurement three times and sees the numbers tighten upless scatter, more trust. That’s the point where SG stops being a mysterious property and starts feeling like something you can actually control with good technique.
The pycnometer experience is different: it’s quieter, slower, and strangely satisfying. There’s a ritual to itclean, dry, weigh; fill, wipe, weigh again. It feels like the method is teaching patience. People who try it for the first time often get tripped up by what seems like trivial stuff: a droplet on the outside, a fingerprint on glass, or a tiny trapped bubble. But that’s also why the method builds confidence. When you finally get consistent masses and a stable temperature, the calculated SG snaps into place with a “that makes sense” kind of accuracy. It’s the difference between guessing someone’s height by looking at them and measuring it with a ruler.
Temperature is the surprise villain in nearly everyone’s SG story. You can do everything “right” and still get a reading that disagrees with expectationsbecause the sample was warmer than the hydrometer’s calibration temperature, or because the liquid warmed in your hands while you carried it across the room. In practical settings, people often learn to build small habits that prevent big headaches: letting samples sit to equilibrate, measuring temperature first, and writing down the calibration temperature printed on the instrument before doing anything else. Those habits feel fussy… right up until the day you need to explain your results to someone else.
And then there’s foamfoam is chaos with excellent PR. In brewing, syrups, detergents, and some mixed solutions, foam can make a hydrometer reading look like a magic trick. A common experience is thinking the SG is higher than it is because the surface you’re reading isn’t truly the liquid lineit’s a bubbly, optimistic approximation of one. With practice, people learn to wait, tap the cylinder gently, or use techniques appropriate to their setting to reduce foam and bubbles. The big takeaway is that SG testing isn’t about owning fancy gear; it’s about building repeatable technique. Once you do, the number you write down stops being “a reading” and becomes information you can use.