Table of Contents >> Show >> Hide
- How to Choose the Right One-Day Project (So You Actually Finish)
- One-Day DIY Toolkit (Minimal but Mighty)
- 30 Easy One-Day Projects to Decorate Your Space
- 1) Create a No-Stress Gallery Wall
- 2) Paint an Accent Wall That Actually Looks Intentional
- 3) Try a Painted “Arch” or Soft Shape Feature
- 4) Add Peel-and-Stick Wallpaper to One Wall (Maximum Wow, Minimum Commitment)
- 5) Make “Wallpaper Art” in Frames
- 6) Install a Picture Ledge for Layered Styling
- 7) Swap Out a Light Fixture or Upgrade a Shade
- 8) Replace Cabinet Hardware (Tiny Change, Big Payoff)
- 9) Paint an Old Mirror Frame (Instant “New Piece” Energy)
- 10) Upgrade Your Front Door Area (Even If You’re in an Apartment)
- 11) Hang Curtains the “High and Wide” Way
- 12) Try No-Drill Curtains (Renter-Friendly Privacy in an Afternoon)
- 13) Make a Cozy “Lamp Layer” (Goodbye Overhead Lighting Doom)
- 14) Install a Plug-In Sconce Pair by the Bed
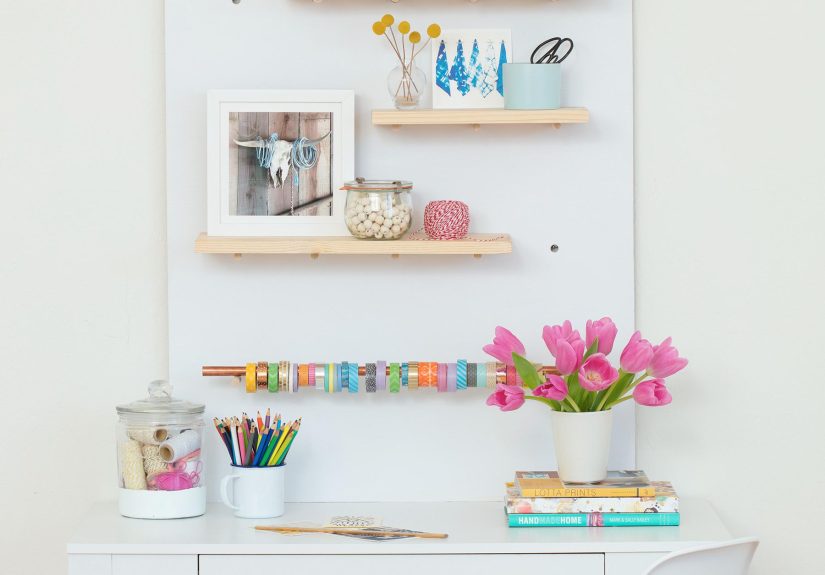
- 15) Build a Simple Pegboard Organizer Wall
- 16) Style Open Shelves Like a Pro (Without Buying 40 New Things)
- 17) Create a “Drop Zone” Entry Tray + Hooks
- 18) Refresh a Thrifted Side Table with Paint or Stain
- 19) Add Peel-and-Stick Tile as a Quick Backsplash Upgrade
- 20) Put Down Peel-and-Stick Floor Tile in a Small Area
- 21) Make a “Jewel Box” Powder Room with Color + One Bold Element
- 22) Upgrade Your Bath: New Shower Curtain + Coordinated Towels
- 23) Build a Simple Wood Slat Feature (Small Section)
- 24) Create a DIY Headboard Look with Paint
- 25) Make a Statement with Oversized Plants (Or the Best Faux You Can Find)
- 26) Group Candles and Objects into a “Coffee Table Moment”
- 27) Swap Throw Pillow Covers and Add a Cozy Blanket
- 28) Make a DIY “Catch-All” Tray (Air-Dry Clay or Wood)
- 29) Repaint Interior Doors or Just the Trim (A Sneaky Transformation)
- 30) Create Warm “Nook Lighting” with String Lights or LEDs
- One-Day Project Game Plan (So It Doesn’t Turn Into a Two-Week Saga)
- Common Mistakes That Make DIY Decor Look “DIY” (In the Bad Way)
- What I Learned After Trying These One-Day Projects (Real-Life Experience)
- Conclusion
Want your home to feel “new” by tonightwithout starting a renovation that turns into a personality trait?
Good news: one-day DIY decor projects are the sweet spot. They’re fast enough to finish before you lose
momentum, and impactful enough that you’ll walk by later and think, “Wait… I live here? Nice.”
Below are 30 easy, mostly budget-friendly projects you can complete in a single daymany in just a few hours.
They range from renter-friendly upgrades (hello, peel-and-stick everything) to simple woodworking and paint
projects that look far more expensive than they are. Pick one, queue up a playlist, and let Future You enjoy
the glow-up.
How to Choose the Right One-Day Project (So You Actually Finish)
The secret to a satisfying one-day makeover is choosing a project with a clear “before vs. after.”
If you’re stuck, use this quick filter:
- Pick one visual anchor: a wall, a window, a light, or a surface you see constantly.
- Keep the mess proportional: painting a single wall? Great. Painting the entire house? That’s a lifestyle.
- Choose reversible when unsure: removable wallpaper, Command strips, swap-in hardware, and slipcovers.
- Plan drying/curing time: paint and adhesives need breakseven if you don’t.
One-Day DIY Toolkit (Minimal but Mighty)
Most of these projects use the same core supplies. If you have these, you’re basically unstoppable:
- Measuring tape + pencil
- Level (or a level app that you actually trust)
- Painter’s tape
- Utility knife + extra blades
- Microfiber cloths
- Stud finder (optional, but your drywall will thank you)
- Drill/driver + bits
- Spackle + putty knife (for “oops” moments)
30 Easy One-Day Projects to Decorate Your Space
Each project below includes a realistic time window and a quick success tip. Mix and match based on your space,
comfort level, and how dramatic you want tonight’s “after” photo to be.
1) Create a No-Stress Gallery Wall
Time: 2–4 hours. Best for: blank living room or hallway walls.
Lay your frames on the floor first. Trace each frame on paper (or use painter’s tape outlines) and test the layout
on the wall. Keep spacing consistent, and use one “hero” piece in the center to anchor the collection.
Pro tip: Mix art with personal photos for warmth, and keep frame finishes to 2–3 max so it looks curated, not chaotic.
2) Paint an Accent Wall That Actually Looks Intentional
Time: 4–6 hours including dry time. Best for: bedrooms, dining rooms, small offices.
Choose the wall that naturally draws attention (behind the bed, TV, or sofa). Use a matte or eggshell finish for a modern look,
and cut in carefullycrisp edges do most of the heavy lifting.
3) Try a Painted “Arch” or Soft Shape Feature
Time: 3–5 hours. Best for: renters who can paint, kids’ rooms, reading nooks.
Tape an arch behind a nightstand or desk to fake architectural charm. Two close оттен tones create depth without screaming “DIY.”
It’s like contouring… but for walls.
4) Add Peel-and-Stick Wallpaper to One Wall (Maximum Wow, Minimum Commitment)
Time: 2–5 hours. Best for: powder rooms, entryways, behind shelving.
Clean the wall, measure twice, and start from a plumb vertical line. Smooth as you go with a soft squeegee.
Patterns hide minor mistakesyour perfectionism can take a nap.
5) Make “Wallpaper Art” in Frames
Time: 1–2 hours. Best for: apartments, dorms, commitment-phobes.
Use peel-and-stick wallpaper or wrapping paper inside large frames for oversized art on a budget. It looks custom,
and you can swap it seasonally like your streaming subscriptions.
6) Install a Picture Ledge for Layered Styling
Time: 1–3 hours. Best for: living rooms, stairways, above a desk.
Picture ledges let you rotate art without making your wall look like Swiss cheese. Style with frames + a small plant + one sculptural object.
7) Swap Out a Light Fixture or Upgrade a Shade
Time: 1–3 hours. Best for: dining rooms, bedrooms, entryways.
A new pendant or semi-flush mount can change the whole mood. If wiring makes you nervous, start smaller:
replace the shade, or add a plug-in swag light.
Safety note: Turn off power at the breaker for any hardwired work.
8) Replace Cabinet Hardware (Tiny Change, Big Payoff)
Time: 1–2 hours. Best for: kitchens, bathrooms, dressers.
New knobs and pulls are the jewelry of your homesmall, shiny, and surprisingly powerful.
Keep hole spacing consistent, or use a template for clean alignment.
9) Paint an Old Mirror Frame (Instant “New Piece” Energy)
Time: 2–3 hours. Best for: entryways, bedrooms, bathrooms.
Sand lightly, clean thoroughly, and use a paint formulated for slick surfaces (or prime first).
Try black for modern, soft white for classic, or a bold color if you like compliments.
10) Upgrade Your Front Door Area (Even If You’re in an Apartment)
Time: 1–3 hours. Best for: first impressions.
Add a new doormat, a door wreath, and a small outdoor-safe planter. If allowed, swap the house numbers
or add a battery-powered lantern for cozy curb appeal.
11) Hang Curtains the “High and Wide” Way
Time: 1–2 hours. Best for: making ceilings look taller.
Mount rods higher than the window frame and extend them beyond the edges so curtains can stack off the glass.
The room instantly feels biggerlike it started doing Pilates.
12) Try No-Drill Curtains (Renter-Friendly Privacy in an Afternoon)
Time: 30–90 minutes. Best for: rentals and tricky walls.
Use tension rods, adhesive hooks, or no-drill brackets. It’s a fast way to add softness and privacy without patching holes later.
13) Make a Cozy “Lamp Layer” (Goodbye Overhead Lighting Doom)
Time: 1–2 hours. Best for: living rooms and bedrooms.
Add two warm lamps in a room (table lamp + floor lamp). Aim for soft, warm bulbs.
The vibe shifts from “waiting room” to “I own throw blankets on purpose.”
14) Install a Plug-In Sconce Pair by the Bed
Time: 2–3 hours. Best for: freeing up nightstand space.
Plug-in sconces look custom without electrical work. Center them roughly 6–10 inches above shoulder height when seated in bed.
15) Build a Simple Pegboard Organizer Wall
Time: 2–4 hours. Best for: offices, craft rooms, kitchens.
Paint a pegboard to match your wall or go bold. Add hooks, small shelves, and containers.
It’s decor that earns its keeplike a cute roommate who also does dishes.
16) Style Open Shelves Like a Pro (Without Buying 40 New Things)
Time: 1–2 hours. Best for: bookshelves, built-ins, kitchen shelves.
Use the “rule of threes”: stack books, add a vessel, include something living (plant) or textured (woven basket).
Leave some breathing roomempty space is a design choice, not a failure.
17) Create a “Drop Zone” Entry Tray + Hooks
Time: 1–3 hours. Best for: stopping the daily scavenger hunt for keys.
Mount hooks for bags and add a tray for keys/mail. If you want extra polish, add a small mirror above it
to bounce light and make it feel intentional.
18) Refresh a Thrifted Side Table with Paint or Stain
Time: 4–6 hours. Best for: living rooms, bedside tables.
Light sanding + a quality paint in a satin finish can make a $15 find look boutique.
Swap the knob and suddenly it’s “vintage,” not “someone else’s old table.”
19) Add Peel-and-Stick Tile as a Quick Backsplash Upgrade
Time: 3–6 hours. Best for: kitchens, laundry rooms, wet bars.
Clean and degrease the wall first (this is not optionalgrease is the enemy of sticky things).
Start from a level line, and cut carefully around outlets.
20) Put Down Peel-and-Stick Floor Tile in a Small Area
Time: 4–8 hours. Best for: powder rooms, laundry rooms, entryways.
This works best on a clean, smooth, well-prepped surface. Focus on small spaces for a true one-day finish,
and use a roller (or firm pressure) so tiles bond well.
21) Make a “Jewel Box” Powder Room with Color + One Bold Element
Time: 4–8 hours. Best for: small bathrooms.
Paint the walls a saturated color, then add one standout: a framed print, a punchy mirror, or updated light fixture.
Small rooms forgive bold choices because they’re basically design playgrounds.
22) Upgrade Your Bath: New Shower Curtain + Coordinated Towels
Time: 30–60 minutes. Best for: easiest refresh imaginable.
Choose a shower curtain with structure (linen-look or waffle texture) and match towels in a complementary tone.
Add a small plant or candle and call it a spa. You deserve it.
23) Build a Simple Wood Slat Feature (Small Section)
Time: 6–10 hours. Best for: behind a TV, headboard wall, or entry nook.
Keep it manageable: do a partial slat panel, not a whole room. Paint the back wall first,
then attach slats evenly. The texture reads “designer” even if you were measuring like a raccoon in a hurry.
24) Create a DIY Headboard Look with Paint
Time: 2–4 hours. Best for: bedrooms on a budget.
Paint a wide rectangle (or arch) behind the bed to mimic a headboard. Add wall-mounted reading lights
or a framed print above for extra polish.
25) Make a Statement with Oversized Plants (Or the Best Faux You Can Find)
Time: 1–2 hours. Best for: empty corners.
One tall plant in a nice planter instantly makes a room feel “done.”
If your track record with plants is… complicated… choose a forgiving variety or a high-quality faux.
26) Group Candles and Objects into a “Coffee Table Moment”
Time: 30–90 minutes. Best for: living rooms.
Use a tray to corral items: one candle, one small stack of books, one organic element (wood, stone, or a plant).
The tray makes it look curated rather than “I set things here because gravity.”
27) Swap Throw Pillow Covers and Add a Cozy Blanket
Time: 30–60 minutes. Best for: instant seasonal change.
Keep pillow inserts, change covers. Mix textures (bouclé, linen, velvet) and keep colors in the same family.
Toss on a blanket and you’ve basically staged a catalog photo.
28) Make a DIY “Catch-All” Tray (Air-Dry Clay or Wood)
Time: 1–2 hours active (plus drying if clay). Best for: nightstands and entryways.
A small tray instantly reduces visual clutter. If using clay, keep the shape organic for a modern look.
If using wood, stain it and add felt feet for a finished touch.
29) Repaint Interior Doors or Just the Trim (A Sneaky Transformation)
Time: 6–10 hours. Best for: making the whole home feel refreshed.
Fresh white doors make a home feel clean and crisp; dark doors can look dramatic and upscale.
Remove knobs, clean well, and use a paint designed for trim/doors to reduce brush marks.
30) Create Warm “Nook Lighting” with String Lights or LEDs
Time: 30–90 minutes. Best for: bedrooms, reading corners, dorms.
Use LED strips behind a headboard, shelf, or TV for soft glow. Keep wires hidden with clips.
It’s cozy, modern, and the easiest way to make a space feel intentional at night.
One-Day Project Game Plan (So It Doesn’t Turn Into a Two-Week Saga)
- Buy supplies the day before (or at least before you start “just one quick trip” #3).
- Prep first: clean surfaces, patch holes, measure, protect floors.
- Set a hard stop: choose a time you’ll quit, even if it’s not perfect.
- Finish the “final 10%”: wipe down, put tools away, style the area. That’s where the magic lives.
Common Mistakes That Make DIY Decor Look “DIY” (In the Bad Way)
- Skipping prep: dirty walls and greasy backsplashes sabotage adhesives and paint.
- Bad measuring: measure twice, cut once, then measure again because confidence is not accuracy.
- Wrong scale: too-small art and tiny rugs make rooms feel unfinished.
- Harsh lighting: one bright overhead light can erase all your cozy decor work.
What I Learned After Trying These One-Day Projects (Real-Life Experience)
The first time I tried a one-day decor project, I picked something “easy”: peel-and-stick wallpaper.
I had a tape measure, a utility knife, and the unstoppable optimism of someone who had not yet met
the concept of “crooked first panel.” Here’s what actually happened: I started late, eyeballed the first strip,
and spent the next hour slowly realizing that “eyeballing” is not a measurement system recognized by any
known civilization. The fix was simpledraw a plumb line and start overbut that moment taught me the golden rule:
the first 15 minutes determines whether the rest of the day is satisfying or mildly haunted.
After that, I became a big believer in projects with a clear boundary. A gallery wall works because it’s contained:
once the frames are up, you’re done. Same with swapping hardware or styling shelves. Painting, on the other hand,
is like opening a bag of chipstechnically finite, but emotionally it feels like it could go on forever. The way to keep
paint projects truly “one-day” is to pick a single feature: one wall, one door, one piece of furniture. You get the
transformation without the spiral.
I also learned that lighting is the fastest cheat code. The day I added two warm lamps to a living room that had been
surviving on one overhead fixture was the day it stopped feeling like a rental and started feeling like a home.
Nothing else changedsame couch, same rug, same “temporary” coffee table that had been temporary for years.
But soft lighting made every texture look richer and every corner feel calmer. If you’re overwhelmed by where to start,
start with lighting. It’s hard to regret.
Another surprise: the projects that feel small often create the biggest daily relief. A drop-zone tray and a few hooks by
the door won’t win a design award, but it eliminates the constant “where are my keys?” scavenger hunt. A picture ledge
doesn’t just decorate a wall; it makes changing art feel possible, so your space evolves instead of staying frozen in the
month you moved in. Even upgrading a shower curtain and towels can make mornings feel more put togetherlike your
bathroom got a fresh haircut.
Finally, I learned to plan for the “last mile.” The difference between a project that looks polished and one that looks
unfinished is usually not talentit’s cleanup and styling. Put the tools away. Wipe the surfaces. Hide the packaging.
Add one finishing touch: a plant, a framed print, a candle, a bowl for keys. That last 10% is where your brain switches
from “I’m in the middle of a project” to “Wow, my space looks better.” And honestly, that feeling is the whole point.
Conclusion
Decorating your space doesn’t require a remodel, a huge budget, or a three-month identity crisis in the paint aisle.
Pick one one-day project that solves a real pain pointblank walls, bad lighting, clutter hotspots, or tired finishes
and you’ll feel the difference immediately. Start small, finish strong, and take the after photo. You earned it.