Table of Contents >> Show >> Hide
- Start Here: A Simple System That Actually Sticks
- Countertops and Daily Zones
- Create “work zones” (not “wherever there’s space” zones)
- Use a tray to corral counter essentials
- Limit countertop appliances to your true top three
- Add a utensil crockbut only for the tools you use constantly
- Mount a magnetic strip for knives (or use an in-drawer knife tray)
- Hang frequently used tools on hooks or a rail
- Set up a “landing pad” for mail and random paper
- Cabinets and Shelves
- Store everyday dishes at arm level
- Use shelf risers to double your vertical space
- Add a turntable (Lazy Susan) for deep corners and awkward shelves
- Install pull-out shelves (or use slide-out bins) for base cabinets
- Use a vertical organizer for baking sheets, cutting boards, and trays
- Put pans on a rack (or use dividers) instead of stacking
- Hang pot lids on the inside of a cabinet door
- Use under-shelf baskets for instant “extra drawers”
- Dedicate one cabinet as the “food storage container zone”
- Use clear bins to group small items (and prevent cabinet sprawl)
- Add toe-kick drawers or low-profile bins if you’re renovating
- Drawers and Utensils
- Use adjustable drawer dividers for utensils and tools
- Go vertical with a layered cutlery organizer (if drawer space is tight)
- Create a dedicated “grab-and-go” drawer
- Use small bins for measuring spoons, bag clips, and tiny gadgets
- Store knives safely: in-drawer tray, block, or magnetic strip
- Use a spice drawer insert (or shallow drawer bins) for labels-up storage
- Separate “use daily” tools from “special occasion” tools
- Give junk drawers boundaries (yes, even the junk drawer)
- Pantry and Dry Goods
- Declutter first: expired food and “one-time ingredients”
- Organize pantry by category, then by frequency
- Decant messy staples into airtight containers
- Use bins as “pantry drawers”
- Try tiered shelves for cans and spices
- Make “first in, first out” your pantry rule
- Label shelves or bins to make maintenance effortless
- Fridge and Freezer Organization
- The Hidden Areas That Make a Big Difference
- How to Keep Your Kitchen Organized (Without Turning It Into a Part-Time Job)
- Experiences: What It Feels Like When These Ideas Click (and What Trips People Up)
- Conclusion
If your kitchen drawers are so full you need a permit to open them, you’re not alone. Kitchens collect clutter the way
socks collect mystery lint: quietly, constantly, and a little aggressively. The good news? You don’t need a bigger
kitchenyou need a smarter one.
This guide breaks kitchen organization down into practical, real-life moves (not “buy 47 matching jars and become a new
person”). You’ll get 38 kitchen organization ideasplus specific examples and a maintenance planso your cabinets, pantry,
counters, and fridge stop feeling like a game of “where did I put the thing I use every day?”
Start Here: A Simple System That Actually Sticks
Before you buy organizers, do a quick reset. Organization works best when you build it around your habits, not your
fantasy self who makes sourdough on weekdays.
The 5-step declutter method
- Empty: Take everything out of one zone at a time (one cabinet, one drawer, one shelf).
- Edit: Toss expired food, recycle packaging, and donate duplicates you never reach for.
- Group: Make categories (baking, snacks, oils, kid cups, lunch gear, etc.).
- Contain: Use bins, dividers, risers, and turntables to keep categories from migrating.
- Label + maintain: Labels reduce “shove it anywhere” behavior. Maintenance beats marathons.
Now for the fun part: the 38 ideas. Pick a handful that match your kitchen layout and pain pointsthen build momentum.
Countertops and Daily Zones
-
Create “work zones” (not “wherever there’s space” zones)
Group items where you use them: coffee near mugs and filters; cooking tools near the stove; cutting boards near prep
space. When zones make sense, clutter naturally decreases because things have a “home base.”Example: Put oil, salt, pepper, and a spoon rest in a small tray by the stove instead of scattering them across the counter.
-
Use a tray to corral counter essentials
A tray creates a visual boundary. It turns “random pile of stuff” into “intentional station,” and it makes wiping
counters fasterjust lift the tray and clean. -
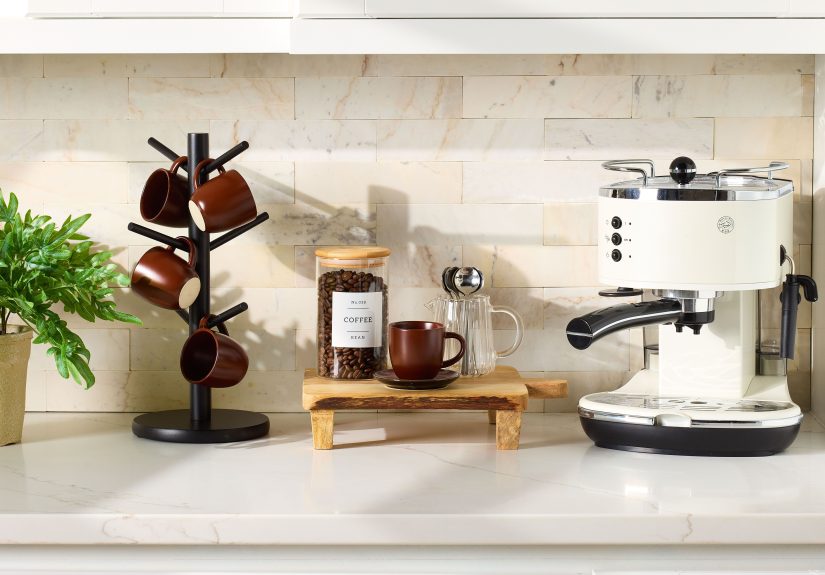
Limit countertop appliances to your true top three
If an appliance hasn’t earned its counter real estate, it goes into a cabinet or gets donated. Keep daily drivers out,
store the occasional-use items. Your counter isn’t a museum exhibit. -
Add a utensil crockbut only for the tools you use constantly
Great for spatulas, tongs, and a whisk. Not great for 19 novelty spoons and the broken can opener you “might fix.”
Less is more, especially next to heat. -
Mount a magnetic strip for knives (or use an in-drawer knife tray)
A magnetic strip saves counter and drawer space while keeping blades accessible. If you prefer hidden storage, use a
dedicated in-drawer tray so knives don’t roam free like sharp little gremlins. -
Hang frequently used tools on hooks or a rail
A simple rail near the stove can hold measuring spoons, a ladle, or oven mitts. It’s a small upgrade that removes
clutter from drawers and counters. -
Set up a “landing pad” for mail and random paper
Kitchens attract paper clutter. Use a small bin, wall file, or a single folder. The rule: paper goes in
the landing padnot on the counter where it evolves into a paper ecosystem.
Cabinets and Shelves
-
Store everyday dishes at arm level
Put your daily plates, bowls, and cups on the easiest-to-reach shelves. Save high shelves for serving platters and
occasional items. This reduces “everything falls out” cabinet moments. -
Use shelf risers to double your vertical space
Shelf risers are a sneaky way to add an extra “floor” inside tall cabinets. Perfect for mugs, bowls, or pantry staples
that otherwise stack into chaos. -
Add a turntable (Lazy Susan) for deep corners and awkward shelves
Turntables are ideal for oils, vinegars, nut butters, condiments, vitaminsanything you want to see without excavating
the back of the cabinet like an archaeologist. -
Install pull-out shelves (or use slide-out bins) for base cabinets
Base cabinets are notorious black holes. Pull-out shelves or sturdy slide-out bins make it easy to grab pots, mixing
bowls, or small appliances without unloading the whole cabinet. -
Use a vertical organizer for baking sheets, cutting boards, and trays
Store flat items upright so you can grab one without unstacking five. A vertical rack instantly upgrades any cabinet
that currently behaves like a sheet-pan Jenga tournament. -
Put pans on a rack (or use dividers) instead of stacking
Stacking pans leads to clanging, scratching, and frustration. Dividers or a pan rack keeps them separated and easier to
reachespecially for nonstick cookware. -
Hang pot lids on the inside of a cabinet door
Lid organizers (or simple hooks) stop lids from sliding around. Bonus: you’ll stop using a random dinner plate as a lid
substitute because the real one vanished. -
Use under-shelf baskets for instant “extra drawers”
Clip-on baskets create extra space for napkins, snacks, wraps, or small containersespecially helpful in rental
kitchens where you can’t install new shelving. -
Dedicate one cabinet as the “food storage container zone”
Containers should not live everywhere. Keep them in one spot, with lids separated (bin or lid rack). This ends the
nightly “find the matching lid” scavenger hunt. -
Use clear bins to group small items (and prevent cabinet sprawl)
Grouping by bin keeps categories intact. Try bins for tea, snacks, baking supplies, lunch items, or spice refills. Pull
the whole bin out instead of picking through a messy shelf. -
Add toe-kick drawers or low-profile bins if you’re renovating
The space under lower cabinets can become valuable storage for flat items like trays, placemats, or rarely used baking
pans. If you’re not renovating, a low rolling bin may still work in some layouts.
Drawers and Utensils
-
Use adjustable drawer dividers for utensils and tools
Dividers stop the “everything becomes one giant utensil soup” problem. Adjust them to your tools, not the other way
around. -
Go vertical with a layered cutlery organizer (if drawer space is tight)
Vertical, stacked cutlery organizers save space by storing pieces in layers. It’s especially helpful in narrow drawers
or small kitchens. -
Create a dedicated “grab-and-go” drawer
Stock it with lunch bags, reusable utensils, foil, zip bags, and snack containers. This keeps weekday routines smooth
and prevents rummaging in five locations before 7 a.m. -
Use small bins for measuring spoons, bag clips, and tiny gadgets
Tiny tools multiply. A small bin inside the drawer keeps them together so they don’t disappear under the potato masher
for six months. -
Store knives safely: in-drawer tray, block, or magnetic strip
Loose knives are dangerous and damage blades. Pick one safe system. If you have kids, choose the option that fits your
household safety needs. -
Use a spice drawer insert (or shallow drawer bins) for labels-up storage
If you have a drawer near the stove, storing spices label-up makes them easy to find quickly. If not, a tiered rack in a
cabinet can mimic the same visibility. -
Separate “use daily” tools from “special occasion” tools
Keep everyday tools in the most accessible drawer. Move special tools (turkey baster, frosting tips, sushi mat) to a
higher cabinet or bin so prime drawer space stays functional. -
Give junk drawers boundaries (yes, even the junk drawer)
Use a segmented tray and a strict list: batteries, tape, scissors, pens, one multi-tool. If it doesn’t fit the
categories, it doesn’t live there. A junk drawer can be usefulit just can’t be a portal to another dimension.
Pantry and Dry Goods
-
Declutter first: expired food and “one-time ingredients”
Check dates, toss stale items, and be honest about ingredients you bought for one recipe in 2021. This creates space
instantly and helps prevent buying duplicates. -
Organize pantry by category, then by frequency
Categories like breakfast, baking, snacks, canned goods, grains, sauces, and beverages keep everything predictable.
Keep frequently used items at eye level; store backups higher or lower. -
Decant messy staples into airtight containers
Flour, sugar, rice, oats, cereal, and pasta store neatly in airtight containers. It reduces visual clutter and helps
protect food quality. Label containers with the item name and (optionally) the expiration date. -
Use bins as “pantry drawers”
Bins keep snack bags, tortillas, baking packets, and condiment refills from toppling over. They also make it easy to
pull everything out and take inventory. -
Try tiered shelves for cans and spices
Tiered racks make labels visible. You’ll waste less food because you’ll actually see what you haveespecially in
pantries with deep shelves. -
Make “first in, first out” your pantry rule
Put newer items behind older ones so older items get used first. It’s a simple habit that reduces expired-food
surprises and saves money. -
Label shelves or bins to make maintenance effortless
Labels aren’t just for aestheticsthey’re instructions for future you (and everyone else who lives in your home). Even
basic masking tape labels can prevent daily clutter creep.
Fridge and Freezer Organization
-
Create fridge zones (and stop losing produce)
Assign areas: leftovers, drinks, breakfast, ingredients, snacks. Use clear bins for small items like cheese sticks,
yogurt, or sauces so they don’t hide behind a lettuce bag and retire there permanently. -
Use a “Eat Me First” bin
Designate one bin or shelf for foods that need to be used soon. It’s a simple way to reduce food waste and avoid the
dreaded “mystery container” situation. -
Label and date freezer items
Freezers are where leftovers go to become legends. Use freezer tape or labels to mark what it is and the date. This
makes meal planning easier and reduces “Is this chili… or spaghetti sauce?” debates. -
Store freezer foods by type in bins
Use bins for frozen fruit, proteins, vegetables, and prepared meals. When everything has a category, you can grab what
you need without digging to the frozen bottom-of-the-world.
The Hidden Areas That Make a Big Difference
-
Optimize under-sink storage with a caddy and safe zones
Under-sink spaces are tricky because of plumbing. Use a small caddy for cleaning supplies and keep them separate from
anything food-related. A tension rod can hang spray bottles, while a bin can hold sponges and gloves. -
Set up a streamlined trash + recycling station
If your trash bags, recycling, compost, and extra sponges live in five locations, clutter spreads fast. Store trash
bags and cleaning wipes near the bin, and keep a small container for compostable scraps if you use one.
How to Keep Your Kitchen Organized (Without Turning It Into a Part-Time Job)
Use the “one-minute reset”
Every day (or most days), do a one-minute reset: return items to zones, wipe counters, and put away strays. One minute
prevents a one-hour weekend cleanup.
Do a 10-minute weekly audit
- Check the fridge for leftovers that need to be eaten or tossed.
- Scan the pantry for items running low (and avoid buying duplicates).
- Return anything that drifted into the wrong cabinet.
Keep 10–20% of your pantry space empty
A pantry stuffed to the ceiling is a pantry that can’t breathe. Leaving a little space helps you see what you have, store
new groceries, and avoid the “everything collapses” shelf avalanche.
Experiences: What It Feels Like When These Ideas Click (and What Trips People Up)
When people start decluttering and organizing a kitchen, the first surprise is usually how much “invisible stress” the
clutter caused. It’s not dramatic in the momentit’s tiny friction, repeated all day: searching for a lid, moving a stack
of pans to reach the pan you actually need, opening the pantry and getting hit with the avalanche of snack bags that
instantly fall out like they’re auditioning for an action movie.
A common experience is that the biggest wins aren’t expensivethey’re behavioral. For example, once someone sets up a
simple “coffee zone,” mornings get calmer fast. The scoop is always there. The filters aren’t buried behind a random tea
collection. The mugs live nearby. It’s a small change, but it removes daily decision fatigue. People often say it feels
like the kitchen suddenly “works with them” instead of against them.
Another pattern: the first cabinet people organize becomes the model for the rest of the kitchen. Someone might start
with the container cabinet because it’s the most annoying. They add one bin for lids, one shelf for containers, and
suddenly the whole kitchen feels less chaotic because the worst problem is gone. That momentum matters. It’s why starting
with your biggest frustration (not the easiest drawer) can be motivatingwhen the pain point improves, you want to keep
going.
People also notice how quickly “clear containers + labels” changes shopping habits. When snacks are in one bin, pasta is
visible, and baking ingredients are grouped, it’s easier to avoid buying duplicates. You don’t come home with yet another
bottle of soy sauce because you couldn’t see the three you already had. Over time, many households find they waste less
food because they can actually spot what needs to be used.
The most common challenge? Organizing around an unrealistic version of daily life. For instance, someone might build a
beautiful baking station but rarely bakes. Or they might tuck the air fryer into a high cabinet even though they use it
every night. When the “home” for an item is inconvenient, people stop putting it awayand clutter returns. The fix is
simple: reorganize based on what you do most often. There’s no trophy for storing things “correctly” if it makes your day
harder.
Another real-life lesson: families need visible systems. A single person might love minimalist, hidden storage. But in a
busy household, a few labeled bins (“Lunch,” “Snacks,” “Breakfast,” “Baking”) can prevent constant questions and
rummaging. Kids (and adults) are more likely to maintain a system when it’s obvious where things go. If your household is
in a fast-moving seasonschool mornings, packed schedulesaim for the easiest possible reset, not the fanciest one.
Finally, people often report that the kitchen stays organized when they treat it like a living system, not a one-time
makeover. Containers change, tastes change, schedules change. The goal isn’t perfection; it’s low-friction routines. A
weekly 10-minute fridge audit, a quick pantry scan, and a daily one-minute reset can keep the kitchen in “easy mode” most
of the year. And when it slips (because it will), you’ll know exactly how to bring it backwithout needing to emotionally
recover afterward.
Conclusion
Decluttering your kitchen isn’t about making it look like a showroomit’s about making it easier to cook, clean, and live.
Start with zones, contain the categories, label what matters, and keep your system realistic for your actual routines.
Choose a few ideas from the list, implement them well, and build from there. Your future self (the one who finds the lid
on the first try) will be thrilled.