Table of Contents >> Show >> Hide
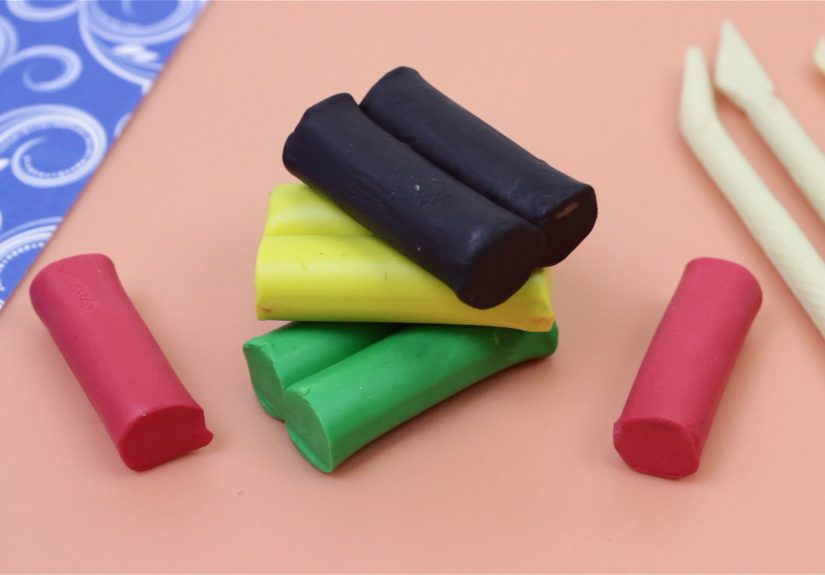
- Before You Start: Choose the Right Clay
- Basic Tools You Actually Need
- 1. Make Pinch-Pot Animals for Rounded, Beginner-Friendly Shapes
- 2. Build Coil Animals for Long Bodies, Tails, and Expressive Movement
- 3. Use Slab Building for Flat Shapes, Relief Art, and Decorative Animal Pieces
- 4. Sculpt Solid or Over an Armature for Detailed, Realistic Clay Animals
- How to Finish Clay Animals So They Look Better Than “School Project Cute”
- Common Mistakes When Making Clay Animals
- What I Learned From Making a Small Clay Zoo
- Conclusion
- SEO Tags
Clay animals are one of those rare crafts that feel charming at every skill level. A toddler can make a lumpy little turtle and call it a masterpiece. A serious sculptor can spend hours shaping the turn of a fox’s ear or the sleepy expression on a basset hound. Both are valid. Both are delightful. And both begin the same way: with a lump of clay and the dangerous thought, “How hard can this be?”
If you want to learn how to make clay animals, the good news is that there is no single correct method. In fact, that is what makes this craft so addictive. You can pinch, roll, cut, layer, sculpt, smooth, texture, and occasionally mutter at a tail that keeps falling off. Whether you are using air-dry clay, polymer clay, ceramic clay, or lightweight paper clay, the secret is choosing the technique that matches the animal you want to make.
This guide breaks the process into four practical methods. Each one works well for different animal shapes, different skill levels, and different types of clay. By the end, you will know which approach makes sense for cute clay animals, realistic animal sculpture, beginner projects, and more detailed handmade creatures that look like they belong in a tiny museum gift shop.
Before You Start: Choose the Right Clay
Not all clay behaves the same, and that matters more than most beginners expect. If you pick the wrong material, your penguin may become a pancake before lunch.
Air-Dry Clay
Air-dry clay is the easiest option for most home crafters. It hardens on its own, does not require a kiln, and is great for beginner clay animals, classroom crafts, ornaments, magnets, and decorative figures. It is especially good for projects that use pinch, coil, and slab techniques. Once dry, it can usually be painted and sealed.
Polymer Clay
Polymer clay is excellent for detailed miniatures, tiny animal charms, jewelry, and small collectible figures. It stays workable until baked, which means you can keep fussing with a cat face for an unreasonable amount of time. That is both a blessing and a personality test. Polymer clay is perfect for crisp details, smooth surfaces, and layered color work.
Ceramic Clay
Ceramic clay is the traditional sculptor’s choice if you have access to kiln firing. It is ideal for serious hand-built animal sculpture, larger forms, and pieces that you want to last. It also demands more planning, because drying and firing are less forgiving than casual craft clay.
Paper Clay
Paper clay is lightweight, easy to shape, and useful for mixed-media or larger decorative animals that would feel heavy in regular clay. It is a smart choice for wall pieces, ornaments, or animals built over a simple support structure.
Basic Tools You Actually Need
You do not need a fancy studio to create clay animals. A beginner-friendly setup includes clay, a smooth work surface, a rolling tool, a craft knife, a toothpick or needle tool, a small bowl of water, and something soft for smoothing. If you are making polymer clay animals, add a baking surface and follow the package directions closely. If you are working with ceramic or air-dry clay, keep plastic wrap nearby so unfinished pieces do not dry out faster than your patience.
1. Make Pinch-Pot Animals for Rounded, Beginner-Friendly Shapes
The pinch-pot method is the easiest way to create clay animals if you are just starting out. It works beautifully for creatures with rounded bodies, like owls, turtles, hedgehogs, birds, frogs, cats, and plump little bears that look like they know where the snacks are.
How It Works
Start by rolling your clay into a ball. Press your thumb into the center, then pinch and rotate the clay until it forms a hollow shape with even walls. That hollow body becomes the main form of the animal. From there, you add ears, legs, tails, wings, or a face using smaller bits of clay.
Why This Method Works
Pinch pots force you to think in simple forms, and that is a good thing. Most animals can be reduced to basic volumes: a round body, a smaller head, and a few attached features. This makes the process less intimidating and keeps your sculpture from becoming an overcomplicated blob with identity issues.
Best Animals for This Technique
- Owls with textured feathers
- Turtles with patterned shells
- Frogs with exaggerated eyes
- Round birds and chicks
- Cat or fox heads turned into tiny bowls or trinket dishes
Pro Tips
Keep the wall thickness even so the piece dries consistently. If you attach extra features, score the surfaces first and press them on firmly. For air-dry or ceramic clay, this step makes a real difference. A pinch-pot animal is simple, but it does not have to look plain. Texture can do a lot of the heavy lifting. Use a toothpick for fur, a fork for feathers, or a blunt tool to press scales, spots, and sleepy eyelids into the surface.
2. Build Coil Animals for Long Bodies, Tails, and Expressive Movement
Coil building is perfect when your animal needs curves, stretch, or drama. Snakes, lizards, octopuses, dachshunds, mice, and whimsical dragons all benefit from a rolled-clay approach. Coils are basically clay ropes, and they are far more useful than they sound.
How It Works
Roll the clay between your hands or against the table to create long, even coils. These can be used as the entire animal body or combined with other shapes. A snake can be one beautiful continuous coil. A dog might have a pinch-pot or oval body with coil legs, a coil tail, and coil ears. A dragon can be built from several coils layered and blended together.
Why This Method Works
Coils create movement. They bend, loop, curl, and twist without much fuss. That makes them ideal for animals that need sweeping tails, raised necks, wrapped poses, or decorative flourishes. This is also a great method for clay animals that lean more stylized than realistic.
Best Animals for This Technique
- Snakes and eels
- Cats with curled tails
- Mice with thin tails and rounded ears
- Dragons, dinosaurs, and fantasy creatures
- Octopuses with spiraled tentacles
Pro Tips
Try not to roll coils that are too thin for the size of the project. Spindly legs may look elegant for five glorious minutes, then collapse like overcooked noodles. If your animal needs to stand, keep the body low and the legs thick enough to support the weight. Join coil sections carefully and blend the seams so the sculpture feels intentional rather than assembled in a panic.
Coil work also looks fantastic when you leave some of the rolled texture visible. For a whimsical animal sculpture, visible coils can become part of the style rather than something to hide.
3. Use Slab Building for Flat Shapes, Relief Art, and Decorative Animal Pieces
If pinch pots are great for round animals and coils are great for curvy animals, slabs are ideal for flat or structured designs. A slab is simply a rolled-out sheet of clay, and it opens the door to all kinds of clay animal projects that look polished without being technically scary.
How It Works
Roll the clay to an even thickness, then cut shapes using a knife, template, or paper pattern. You can layer slabs for relief sculptures, fold them slightly for dimension, or attach details on top. Slab building is especially useful for wall hangings, ornaments, plaques, masks, decorative tiles, and standing animals with stylized silhouettes.
Why This Method Works
Slabs make it easy to control proportion. If you struggle with symmetry, this method is your new best friend. Draw the animal shape first, then transfer it to clay. It is a good choice for fox profiles, owls, fish, butterflies, bears, rabbits, and folk-art style creatures.
Best Animals for This Technique
- Owl wall hangings
- Fish plaques and ornaments
- Butterflies and insects
- Animal face masks
- Folk-art birds, rabbits, and foxes
Pro Tips
Compress the slab gently after rolling to reduce warping. If you add pieces on top, make sure both parts are at a similar moisture level before joining. Slabs also take texture beautifully, so this is the time to press in lace, leaves, stamps, fabric, carved lines, or handmade patterns. A turtle shell, fish scales, and bird feathers all become much easier when the base is flat and stable.
For air-dry clay animals, slabs are especially practical because they dry relatively evenly and are less likely to slump than tall sculpted pieces.
4. Sculpt Solid or Over an Armature for Detailed, Realistic Clay Animals
This is the method for makers who want more realism, more detail, or simply more artistic drama. If your goal is a rabbit with expressive ears, a horse head with personality, a sleepy bulldog, or a miniature zoo that makes people say, “Wait, you made that?” this is your lane.
How It Works
Begin with the largest shapes first: body, head, and limb placement. Think in simple geometry before you chase details. A rabbit is not “a rabbit” at first; it is an oval body, a smaller head, cylinders for legs, and long tapered ears. Once the proportions feel right, refine the structure and add surface details.
For small polymer clay animals, you can sculpt directly from solid clay. For larger air-dry, paper clay, or ceramic animals, an armature may help. That might be a simple foil bulk, a support for posture, or another lightweight internal form depending on the clay type and final use.
Why This Method Works
It gives you freedom. You are not locked into a bowl shape, a rope shape, or a flat pattern. You can build expression into the face, change the pose, exaggerate anatomy, and create characters rather than just objects.
Best Animals for This Technique
- Rabbits, foxes, dogs, and cats
- Horse or deer heads
- Woodland creatures with realistic features
- Miniature figurines for display
- Storytelling sculptures and mixed-media animals
Pro Tips
Always work from large shapes to small details. Do not begin with nostrils on a head that still looks like a potato. Keep reference photos nearby. Study where the eyes actually sit, how the muzzle projects, and how the ears connect to the skull. Those small observations make your animal sculpture feel alive.
If you are using polymer clay, condition it well first and bake according to the brand instructions. If you are using ceramic clay, remember that a home oven is not a substitute for kiln firing. If you are using paper clay, take advantage of its lighter weight for ears, tails, and larger decorative shapes that would be awkward in denser clay.
How to Finish Clay Animals So They Look Better Than “School Project Cute”
Finishing is where a decent piece becomes a memorable one. Let air-dry or paper clay dry slowly and evenly. Rotate pieces so all sides get airflow. Sand gently once dry if the material allows it. Then paint with light layers rather than one thick coat that hides all your lovely texture.
Acrylic paint is the usual favorite because it is easy to control and gives strong coverage. Dry brushing works well for fur and feathers. Washes can sink into carved lines and make scales, wrinkles, and textures stand out. A clear sealer can protect decorative pieces, especially if they will be handled or displayed openly.
For polymer clay, many artists skip paint entirely and build color directly into the clay. That can give a cleaner, more professional result. For ceramic work, underglazes and glazes open up even more possibilities if you are firing the piece properly.
Common Mistakes When Making Clay Animals
- Adding thin parts too early: Tiny legs, tails, and ears break hearts every day.
- Ignoring structure: If the pose cannot physically stand, the clay will let you know.
- Skipping scoring: Joined parts need help staying attached.
- Rushing dry time: Fast drying often leads to cracks.
- Over-detailing too soon: Get the proportions right before fussing over whiskers.
What I Learned From Making a Small Clay Zoo
The first time I tried to make clay animals, I was wildly confident for someone who had never successfully attached four legs to anything. I started with a cat, because cats look simple until you try to sculpt one. Suddenly you are negotiating body balance, ear placement, tail attitude, and the mysterious geometry of a face that somehow looks judgmental from every angle.
What surprised me most was how much clay rewards patience and punishes overconfidence. When I slowed down and built the animal from simple shapes, everything improved. The body made sense. The pose made sense. Even the expression started to work. But when I rushed into details too early, I ended up with a creature that looked less like a cat and more like a baked potato that had seen things.
I also learned that every clay type changes the experience. Air-dry clay felt friendly and forgiving at first, especially for quick projects and larger forms. It let me experiment without worrying about firing. But it also taught me to respect drying time. A fox with delicate ears can look perfect at noon and crack by dinner if it dries too fast. Polymer clay, on the other hand, gave me the freedom to keep refining tiny details, which was fantastic for miniature animals and terrible for my ability to stop “fixing” things that were already fine. Ceramic clay felt the most traditional and the most serious. It demanded more planning, but the results had a presence that was hard to beat.
Texture became my secret weapon. A rough little tool, a toothpick, the edge of a spoon, and even scraps of fabric could transform a simple form into feathers, fur, scales, or shell patterns. That was the moment clay animals stopped feeling like basic crafts and started feeling like sculpture. You do not always need more detail. Sometimes you just need the right surface.
Another lesson was that cute beats perfect more often than people expect. One of the most successful pieces I made was a chunky owl with oversized eyes and ridiculous eyebrows. It was not realistic. It was not elegant. It looked like it paid taxes late. But it had personality, and that is often what makes handmade clay animals appealing. People connect with character before they analyze technical precision.
In the end, making clay animals taught me to think like both a builder and a storyteller. You are solving practical problems like support, moisture, attachment, and proportion. But you are also deciding whether your rabbit looks shy, whether your turtle looks wise, and whether your dragon looks noble or like it steals sandwiches. That combination is what makes the craft so satisfying. It is part technique, part imagination, and part accepting that at least one leg will probably need reattaching. Honestly, that is half the charm.
Conclusion
If you want to create clay animals successfully, the smartest move is not chasing the fanciest design. It is choosing the right method for the shape you want to build. Pinch pots are great for rounded beginner projects. Coils shine in animals with movement and long forms. Slabs work beautifully for flat decorative designs and relief art. Sculpting from solid forms or over an armature gives you the most freedom for realistic or character-driven creatures.
Start simple, study real animal shapes, and let the material guide you. Your first clay animal does not need to be perfect. It just needs enough personality to make you smile when you put it on the shelf. Once that happens, congratulations: you are now one project away from building an entire clay menagerie.