Table of Contents >> Show >> Hide
If your floor feels like a squeaky trampoline or smells like a forgotten gym bag,
the problem may not be your flooring at allit might be the subfloor. This hidden
layer of plywood or OSB sits on top of your floor joists and under your finished
flooring, quietly carrying the weight of your life. When it fails, everything on
top suffers.
Knowing when to repair flooring versus when to replace the subfloor is a big deal.
A simple patch job can cost a few bucks and an afternoon. Full subfloor replacement,
on the other hand, can run $3 to $10 per square foot or more once you factor in
labor and new flooring, depending on room size, materials, and local rates.
In true Bob Vila spirit, this guide breaks down five clear times to replace a
subfloor, plus a straightforward, step-by-step overview of how to do it safely and
correctly. We’ll also cover costs, code basics, and some real-world lessons from
the trenches so you can walk across your floors without squeaks, bounce, or fear.
What a Subfloor Actually Does
Before you start grabbing pry bars and circular saws, it helps to know what a
subfloor isand what it isn’t.
- Subfloor: Structural sheet material (typically plywood or OSB) attached to the joists. It provides a flat, strong surface for everything above.
- Underlayment: A thin layer (foam, cement board, etc.) that smooths the surface and improves sound or moisture performance for specific flooring types.
- Finished flooring: Hardwood, LVP, tile, carpet, laminatewhat you actually see and walk on.
The subfloor has one main job: be flat, dry, and solid. When it gets wet, moldy,
spongy, or structurally compromised, your floor can’t do its joband that’s when it
’s time to consider replacement instead of another cosmetic fix.
5 Times It’s Time to Replace a Subfloor
1. After Major Water Damage or Chronic Moisture Problems
Water is a subfloor’s arch-nemesis. Burst pipes, leaking toilets, overflows, or
long-standing bathroom and laundry leaks can saturate wood panels. When moisture
sits for more than about 24–48 hours, wood can swell, delaminate, and grow mold,
even after the surface looks dry again.
Common signs include:
- Soft, spongy, or “mushy” spots when you walk across the floor
- Blistering or bubbling in vinyl and laminate flooring
- Persistent musty or moldy odors, even after cleaning
- Water stains on ceilings below bathrooms, laundry rooms, or kitchens
In these cases, replacing only the flooring is like repainting a rusty caryou’re
just hiding the problem. If the subfloor is swollen, flaking, or moldy, it needs
to be cut out back to solid, dry wood.
2. When the Floor Is Sagging, Bouncy, or Uneven
If one corner of the room feels like a mini ski slope, or the floor bounces when
someone walks by, you may have more than just a cosmetic issue. Sagging or uneven
floors can be caused by:
- Rotten subfloor from long-term moisture
- Panels that have separated from joists
- Subfloor that’s too thin for the joist spacing
- Joist issues below (rot, over-span, or settling)
Flooring pros often list sagging, bouncing, or “springy” floors as top warning
signs of subfloor problems that go beyond a simple nail-down fix.
A level, solid floor should not move noticeably under your weight.
3. Persistent Squeaks That Won’t Quit
A few squeaks in an old house? Charming. A choir of squeaks in one area that keep
getting worse? That’s usually a structural complaint.
Squeaky floors are often caused by movementpanels rubbing on joists, fasteners
working loose, or gaps forming between materials. Over time, moisture, improper
fastening, or undersized subfloor panels can all contribute.
If you’ve already tried simple fixes from above (like driving screws through the
finished floor into the joists where practical) and squeaks persist in one
localized area, pulling up the flooring and examining the subfloor for cracks,
delamination, or movement is the next step. Severely damaged or cracked panels
should be replaced, not just re-fastened.
4. Visible Mold, Rot, or Pest Damage
If you peel back flooring and see black or green mold patches, crumbly wood, or
obvious termite or carpenter ant damage, that section of subfloor is done.
Mold doesn’t just stainit can weaken the wood fibers and pose potential health
issues, especially for people with asthma or allergies. Significant pest damage
likewise means the wood can’t carry loads reliably. Many remediation and flooring
experts recommend removing and replacing any subfloor that is structurally
compromised or deeply infested, rather than trying to “seal it in.”
5. During a Major Remodel or When Upgrading to Heavier Flooring
Sometimes you replace a subfloor not because it’s catastrophically damaged, but
because it’s marginaland you’re about to ask it to work a lot harder.
Examples:
- Installing stone or large-format tile that needs a very stiff, flat base
- Upgrading from carpet to hardwood in an older home with thin, bouncy subfloor
- Changing the layout or moving walls so joist loads shift
Building and flooring industry guidelines often call for subfloor panels at least
5/8 inch thick for joists spaced 16 inches on center, with 3/4 inch panels
providing a stiffer, more resilient feel.
If your existing subfloor is thinner, damaged, or patched in multiple areas,
replacing or adding new panels can help prevent cracked tile, noisy floors, and
callbacks later.
How to Replace a Subfloor Step by Step
Subfloor replacement is not a casual afternoon DIY, but many experienced
homeowners can tackle moderate projects with the right tools, patience, and
respect for safety. If there is structural damage to joists, extensive mold, or
uncertainty about what you’re seeing, hiring a pro is the smart move.
Step 1: Diagnose and Mark the Damaged Area
Start by:
- Walking the room and marking soft, squeaky, or sagging spots with painter’s tape.
- Checking below (in a basement or crawlspace) for stains, discoloration, or rot.
- Locating joists so you can plan cuts that land over solid framing.
Most pros recommend cutting the subfloor so that all new panel edges end on top
of joists, not in mid-air.
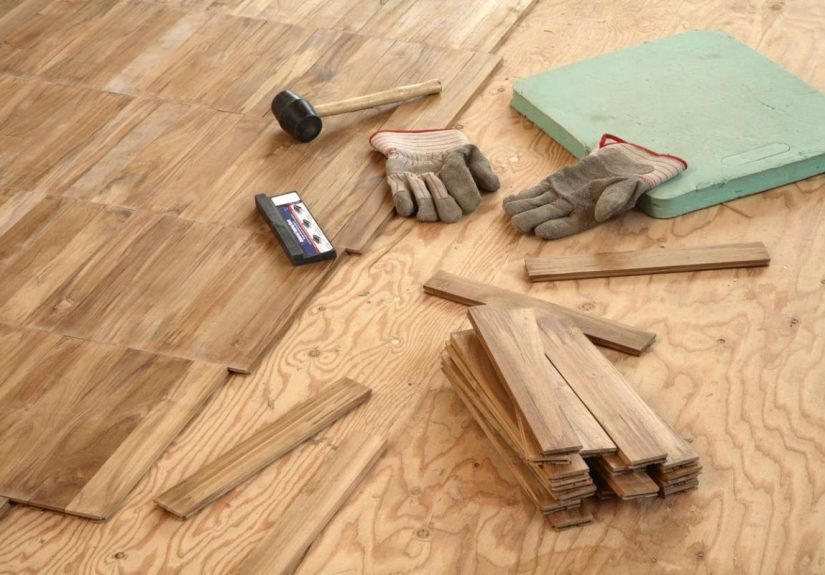
Step 2: Remove Trim, Fixtures, and Flooring
Take out:
- Baseboards and shoe molding around the room perimeter
- Toilets, vanities, or appliances in bathrooms and kitchens
- The finished flooring (tile, vinyl, hardwood, or carpet and pad)
Use the appropriate demo method for your floor typetile often requires a
demolition hammer and scraper; hardwood may be pried up in sections; vinyl and
laminate usually come up more easily. Wear safety glasses, gloves, and a dust
mask, especially when working around old adhesives or suspected mold.
Step 3: Cut Out the Damaged Subfloor
Once the subfloor is exposed:
- Locate joists and snap chalk lines so your cuts will fall on the center of the joists.
- Set your circular saw to the thickness of the subfloor so you don’t cut into joists.
- Cut along your lines to free the damaged section into manageable pieces.
- Pry up the pieces using a pry bar, removing old nails or screws as you go.
Be sure to remove all mushy, delaminated, or moldy wooddon’t leave “just a little”
because it looks like extra work. That’s how problems come back later.
Step 4: Inspect and Repair Joists
With the subfloor removed, this is your golden opportunity to inspect the structure:
- Check joists for rot, insect damage, or cracks.
- Sister new joists alongside damaged ones if necessary.
- Install blocking between joists where new panel edges will land for extra support.
Any structural repairs should be done to codeand if you’re unsure, bring in a
contractor or structural engineer, especially in heavily loaded areas like kitchens
with big islands or stone countertops.
Step 5: Install the New Subfloor Panels
For most residential projects, tongue-and-groove plywood or OSB panels
manufactured for flooring are used. Choose a thickness that meets or exceeds code
and industry recommendations for your joist spacing.
- Dry-fit panels so seams land on joists or blocking and the tongues and grooves lock together cleanly.
- Apply construction adhesive in a serpentine pattern along the joist tops to reduce future squeaks.
- Lay down panels and fasten with deck screws (often every 6 inches on panel edges and every 8 inches in the field, or as local code requires).
- Leave small expansion gaps at walls and between panels if recommended by the manufacturer.
Screws are generally preferred over nails because they are less likely to work
loose over time and cause squeaks.
Step 6: Prep for the New Flooring
Once the new subfloor is down:
- Check for flatness with a long straightedge or level.
- Sand any high joints or ridges.
- Fill low spots or seams with floor-leveling compound where needed.
- Install underlayment appropriate for your flooring: cement board for tile, foam for LVP/laminate, rosin paper or felt for hardwood, etc.
After that, you’re ready to lay your new floor according to manufacturer
instructionsand enjoy a solid, quiet, non-squishy surface for years to come.
What It Costs to Replace a Subfloor
Costs vary widely depending on the room size, damage, location, and whether you DIY
or hire a pro. Nationally, subfloor replacement typically runs about $3 to $10 per
square foot just for the subfloor work, with total project costs often landing
between $1,500 and $5,000 for common home projects.
Factors that affect price include:
- Extent of damage: A small bathroom corner vs. an entire first floor.
- Type of material: Plywood vs. OSB, moisture-resistant panels, or specialty products.
- Access: Easy, open room vs. complicated spaces packed with cabinets and plumbing.
- Local labor rates: Big metro areas often charge more than rural regions.
- Extra work: Joist repairs, mold remediation, asbestos abatement, or structural engineering.
If you’re DIYing, you’ll save on labor but still need to budget for dump fees, tool
rental (like a demolition hammer or saw), and any safety gear and materials.
Common Mistakes to Avoid
- Only replacing the visible damage: Always chase moisture and rot back to solid, dry material.
- Ignoring mold: Moldy panels should be removed, not just painted over.
- Undersizing the subfloor: Don’t go thinner than code or manufacturer recommendations.
- Not using adhesive: Skipping construction adhesive makes squeaks far more likely.
- Failing to fix the cause: A hidden plumbing leak or poor ventilation will ruin even a brand-new subfloor all over again.
Real-World Experiences: Lessons from Subfloor Replacements
Ask anyone who has replaced a subfloor, and they’ll tell you the same thing: it’s
not glamorous work, but it’s ridiculously satisfying when it’s done right. Here are
some of the most common “wish I’d known” lessons from homeowners and pros:
1. It Almost Always Takes Longer Than You Think
On paper, replacing a subfloor in a small bathroom sounds like a weekend project:
pull the toilet, pry up the tile, cut out the damaged panel, put in a new one, done.
In reality, by the time you remove mortar, cut around plumbing penetrations, deal
with stripped screws, and run to the store twice for extra screws and shims, you
might be looking at two or three weekendsespecially if you’re new to this kind of
work.
The smart move is to give yourself more time than you think you need and to accept
that once you open up the floor, you may find surprises that require extra
attention. It’s better to be pleasantly surprised than stuck showering at the gym
for a week because your bathroom is still mid-demo.
2. The Hidden Problem Is Often Worse Than the Visible One
Many homeowners start a project because of a small soft spot around a toilet or a
mysterious squeak in front of the fridge. Once the flooring comes up, they discover:
- A long-term wax ring leak that rotted several square feet of subfloor
- Mold spreading under vinyl or laminate farther than expected
- Joists that have started to rot, crack, or separate from hangers
That’s not a failureit’s a win. You’ve discovered a problem while it’s still
fixable instead of waiting until it becomes a structural emergency. Budgeting a bit
extra in both time and money for “surprises” is one of the best ways to keep stress
down.
3. The Right Tools Make a Huge Difference
Homeowners often start with whatever tools they already have, then quickly realize
that a few strategic upgrades can turn a miserable job into a manageable one.
Common MVP tools include:
- A circular saw with adjustable depth to cut through panels without slicing joists
- A good pry bar set (flat bar and a heavier wrecking bar)
- An oscillating multi-tool for tight corners and around pipes
- A shop vacuum with a fine-dust filter to keep debris under control
Renting or buying the right tools often saves you enough time and frustration to
be worth every penny.
4. Communication with Contractors Matters
If you’re hiring out the work, don’t be shy about asking detailed questions:
- Will they remove all damaged material, including moldy sections, not just patch?
- What panel thickness and material do they plan to use?
- Will they use screws and adhesive, not just nails?
- How will they handle mold remediation, if present?
Because quotes for subfloor work can range widely, asking for a clear scope of work
(what’s included, what’s not, and what happens if they find additional damage)
helps you compare apples to apples and avoid surprise add-ons later.
5. Fixing the Root Cause Is the Real Win
The biggest “experience” lesson might be this: the subfloor is the symptom, not the
disease. You can replace panels perfectly, but if that slow plumbing leak, poor
ventilation, or failed caulking isn’t addressed, you’ll be right back where you
started in a few years.
Many homeowners now include subfloor checks as part of regular home maintenance:
walking rooms barefoot to feel for changes, occasionally inspecting under tubs and
around toilets, and peeking at ceilings below wet rooms for stains. Catching an
issue early can mean a simple localized repair instead of a full-room tear-out.
In short, subfloor replacement isn’t just a repairit’s an opportunity to reset the
structure beneath your floors so that everything above feels solid, safe, and
squeak-free. Do it once, do it right, and you probably won’t have to think about it
again for a very long time.
Conclusion & SEO Summary
A healthy floor starts with a healthy subfloor. If you’re dealing with major water
damage, sagging or bouncy floors, persistent squeaks, visible mold or rot, or
you’re planning a big flooring upgrade, it may be time to replace the subfloornot
just the surface. By understanding the warning signs, following a solid step-by-step
process, and respecting building code and best practices, you can restore strength,
safety, and comfort underfoot.
Whether you tackle the work yourself or call in a pro, the goal is the same: a
strong, quiet, level base that makes your finished flooring look and perform its
best for years to come.
sapo: Not all floor problems are skin-deep. Soft spots, sagging areas, mystery squeaks, and musty smells often point to trouble in the layer you can’t see: the subfloor. In this Bob Vila–style guide, you’ll learn five specific situations when replacing a subfloor is the smartest moveespecially after water damage, structural issues, or major remodelsplus a practical step-by-step overview of how to tear out damaged panels and install new ones correctly. We’ll walk through material choices, building code basics, and real-world cost ranges so you can budget with confidence, then finish with hard-earned lessons from homeowners and pros who’ve been there. If you want floors that feel solid, quiet, and safe for the long haul, start by getting the subfloor right.