Table of Contents >> Show >> Hide
- First, the 60-second “Seed Storage Reality Check”
- Way #1: The “Paper Packet + Shoebox” Method (Simple, Cheap, Works)
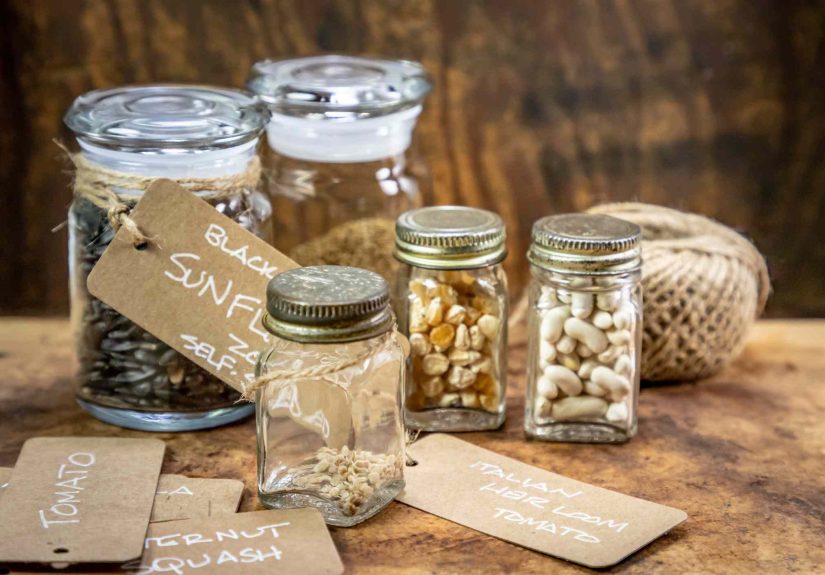
- Way #2: The “Mason Jar Seed Bank” (Airtight + Organized + Weirdly Satisfying)
- Way #3: The “Double-Barrier Bin” (Pest-Proof + Budget-Friendly)
- Way #4: The Refrigerator “Seed Drawer Vault” (Cool Temps, Great for Longer Storage)
- Way #5: The Freezer Backup Method (For Long-Term StorageBut Only If Seeds Are Very Dry)
- Way #6: The “Moist-Chill” Method (For Seeds That Need Cold Stratification)
- How Long Do Seeds Last (Really)?
- The 5-Minute Germination Test (So You Don’t Plant Hope and Disappointment)
- Common Seed Storage Mistakes (AKA: How Seeds Get Defeated)
- Wrap-Up: Your Spring Garden Starts in Winter Storage
- Real-World Experiences: What Gardeners Learn After a Few Winters of Saving Seeds
You know that smug little feeling when you find a half-used seed packet and think, “Future me is going to be so grateful”? Then winter shows up, humidity does a surprise dance, and your seeds quietly age like lettuce left in a hot car.
The good news: most garden seeds are surprisingly toughif you store them the way seeds like to be stored: cool, dry, dark, and stable. The bad news: the top seed killers are basically the same things that ruin chips: heat, moisture, and light. (Also pests. Mice are not your seed librarians.)
Below are six practical, real-life-friendly ways to store leftover seeds before winter hitsplus a few quick checks to make sure what you’re saving will actually sprout come spring.
First, the 60-second “Seed Storage Reality Check”
Seed longevity is mainly controlled by temperature and humidity. A classic rule of thumb used by growers is: temperature (°F) + relative humidity (%) should be under 100 for decent storage conditions. That’s why a cool closet beats a sunny windowsill every time.
Before you store anything, do these two things
- Make sure seeds are dry. If you saved them yourself, dry them thoroughly with airflow in a cool, dark spotavoid “hot” drying methods.
- Label like a future genius. Crop + variety + year + any notes (like “shade bed” or “great flavor”). You will not remember in March. No one does.
Now, let’s get into the six storage methods (pick one or mix and match depending on what you’ve got and where you live).
Way #1: The “Paper Packet + Shoebox” Method (Simple, Cheap, Works)
This is the easiest option for most store-bought packets and many home-saved seeds that are fully dry. Think of it as “seed storage for normal people with normal time.”
How to do it
- Keep seeds in their original paper packets or move them into small paper envelopes.
- Sort packets into categories (cool-season veggies, summer veggies, flowers, herbs).
- Put them in a shoebox, photo box, or small lidded container.
- Store the box in a cool, dark, dry place (a closet in a heated room usually beats garages and sheds).
Best for
- Most leftover store-bought seed packets
- Gardeners in drier climates or homes with decent indoor humidity control
- Anyone who wants “good enough” storage without becoming a seed scientist
Pro tip: avoid spots with wild temperature swings. Seeds don’t love the roller coaster.
Way #2: The “Mason Jar Seed Bank” (Airtight + Organized + Weirdly Satisfying)
If you live somewhere humidor your home gets swampy when the heat kicks onthis method is gold. Airtight storage helps keep humidity from creeping in and messing with seed viability.
How to do it
- Place seed packets (or labeled envelopes) inside a clean, dry mason jar with a tight lid.
- Add a desiccant to control moisture (silica gel packets work great).
- Store the jar in a cool location (pantry, basement only if it’s dry, or the fridgemore on that below).
Best for
- Humid regions and homes where “dry” is more of a personality trait than a reality
- People who want fewer mystery mold situations
- Seed savers storing multiple varieties
Extra credit: use small envelopes inside one big jar so you can store multiple varieties together without a confetti explosion.
Way #3: The “Double-Barrier Bin” (Pest-Proof + Budget-Friendly)
If you’ve ever opened a storage box and found… evidence of “rodent interest,” you already understand the value here. This is especially useful if you store seeds in basements, garages, or any place that might host tiny furry freeloaders.
How to do it
- Put seed packets into a sealed zipper bag (or several bags by category).
- Add a silica gel packet in each bag or in the main container.
- Place those bags into a rigid plastic bin or container with a snug lid (bonus points for a gasket seal).
- Store in a cool, dark spot indoors.
Best for
- Gardeners who store seeds in basements or utility areas
- Anyone who’s ever said, “Wait… why is this packet shredded?”
- Large seed collections (flowers + veggies + experiments + “I bought these at 2 a.m.”)
This method also reduces humidity swingsbecause seeds hate surprise weather inside your container.
Way #4: The Refrigerator “Seed Drawer Vault” (Cool Temps, Great for Longer Storage)
Refrigerators sit in that sweet spot for seed storage: cool temperatures that slow aging. But fridges can also be humid insideso the secret is seal everything well.
How to do it
- Keep seeds in packets/envelopes, then place them in an airtight jar or sealed container.
- Add a desiccant packet to keep moisture down inside the container.
- Put the sealed container in a stable fridge spot (a drawer is usually calmer than the door).
- Important: when you take seeds out, let the sealed container reach room temperature before opening to prevent condensation on the seeds.
Best for
- Seeds you want to keep viable for multiple seasons
- Shorter-lived seeds (like onions and some others) that benefit from better storage conditions
- People with warm houses or inconsistent indoor temps
If your spring goal is “strong germination without buying everything again,” this is one of the best household options.
Way #5: The Freezer Backup Method (For Long-Term StorageBut Only If Seeds Are Very Dry)
Freezing can extend storage life for many common garden seeds, but the rule is simple: do not freeze damp seeds. Moisture + freezing can create damage. Think of it like freezing a water balloonscience happens.
How to do it
- Make sure seeds are thoroughly dry. If you saved them yourself, dry with airflow and patience.
- Place packets/envelopes in an airtight container (jar or heavy freezer bag) with a desiccant packet.
- Freeze in a spot that stays consistently cold (avoid frequent in-and-out).
- When removing from the freezer, let the sealed container acclimate to room temperature before opening to prevent condensation inside.
Best for
- Gardeners who buy in bulk or save a lot of seed
- Extra backup seed you don’t plan to open often
- People who love being prepared (or who accidentally buy duplicate packets every year)
“Open less, store better” is the freezer strategy in one sentence. Every warm-up is a mini stress test.
Way #6: The “Moist-Chill” Method (For Seeds That Need Cold Stratification)
Most vegetable and many flower seeds store best dry. But some seedsespecially certain perennials and native plantsgerminate better after a period of cold, moist conditions (cold stratification). In that case, dry storage isn’t the goal; controlled moisture is.
How to do it (basic stratification storage)
- Place seeds in a labeled bag or container with a slightly moist medium (like damp vermiculite, peat, or a barely damp paper towel).
- Seal it and store it in the refrigerator for the time your seed type needs (varies by plant).
- Check occasionally for mold and moisture level (moist, not wet).
Best for
- Perennials and natives that require cold stratification
- Specific species that don’t tolerate drying (less common in typical veggie gardens, but they exist)
- Gardeners planning winter sowing or early spring germination indoors
If you’re unsure whether a seed needs this treatment, store it dry first and research that specific plant before you commit to moist storage.
How Long Do Seeds Last (Really)?
Seed life varies by plant type and storage conditions. Many common garden seeds can remain viable for multiple years when stored properly, but germination rates typically drop over timeespecially if storage is warm or humid.
Practical takeaways
- Most seeds: often fine for a couple of seasons under good storage conditions.
- Short-lived seeds: some crops are famously picky and lose viability fasterstore them colder and plan to use them sooner.
- Older packets: not “trash,” just “test first.”
The 5-Minute Germination Test (So You Don’t Plant Hope and Disappointment)
If seeds are more than a year oldor storage conditions were questionabledo a quick germination test before you bet your spring garden on them.
How to test
- Count out 10–25 seeds (depending on how many you can spare).
- Place them between moist paper towels (damp, not dripping), then put in a labeled plastic bag or covered container.
- Keep warm (many seeds do well around typical indoor room temps, and many tests use ~70–75°F).
- Check daily and keep the towel moist.
- After the normal germination window for that crop, calculate the percent sprouted.
If germination is low, you can still use the seedsjust sow thicker, or prioritize them for less “mission critical” beds.
Common Seed Storage Mistakes (AKA: How Seeds Get Defeated)
- Storing in garages or sheds: temperature and humidity swings can crush viability.
- Not sealing in the fridge: cold is good; fridge humidity is not, unless you block it out.
- Freezing without drying: risky for many seedsdry first, seal well, and open carefully.
- Skipping labels: “Mystery Pepper 2024” sounds fun until you’re spacing seedlings.
- Ignoring pests: rodents and insects don’t just eat seeds; they ruin packets and contaminate storage.
Wrap-Up: Your Spring Garden Starts in Winter Storage
The best spring gardens aren’t built in Aprilthey’re quietly assembled in late fall when you stash seeds the right way. Pick a storage method that matches your home (and your personality), keep seeds dry, protect them from humidity swings, and label everything like you’re writing a love letter to Future You.
Do that, and when winter hits, you’ll be the rare gardener who doesn’t panic-buy a second packet of the same basil you already own. That’s not just organized. That’s growth.
Real-World Experiences: What Gardeners Learn After a Few Winters of Saving Seeds
Ask a group of gardeners about seed storage, and you’ll hear a surprisingly consistent theme: the first year is optimistic, the second year is educational, and by the third year, people either become seed-storage pros… or they’re still finding unmarked baggies that look like kitchen spices.
One of the most common “aha” moments comes from humidity. Gardeners often start with the simplest plantoss packets into a drawerand it works fine until a damp season, a humid basement, or a leaky garage “teaches” that paper packets don’t block moisture. The result is usually subtle: seeds don’t look dramatically different, but germination slows down, sprouts come up unevenly, and the spring garden feels patchy. That’s often the moment people upgrade to airtight jars or bins with a desiccant packet. Suddenly, the same varieties behave like they’re actually awake and ready to grow.
Another lesson shows up in March: labels matter more than anyone wants to admit. Many gardeners remember the crop but forget the variety, or they remember the variety but not the year. A simple “tomato” label becomes less helpful when you have three tomatoes and one was the “amazing sauce one” you swore you’d grow forever. Over time, experienced seed savers tend to settle into a quick labeling routine: crop + variety + year, and one tiny note like “great in containers” or “slow to bolt.” That tiny note is the difference between re-creating a favorite harvest and playing spring roulette.
People also learn the value of “open carefully” when using cold storage. More than a few gardeners have pulled a jar from the fridge, popped it open immediately, and created the tiniest indoor weather event: warm air meets cold container, condensation forms, and suddenly the seeds aren’t dry anymore. It’s not always catastrophic, but it’s annoyingand it can shorten storage life. Once gardeners start letting the container warm up before opening, they stop re-drying seed batches like they’re running a miniature seed rescue operation.
Then there’s the seed-life reality check. Many gardeners discover that some seeds are “long-haulers” while others are “use me soon” types. The typical response isn’t to throw everything awayit’s to rotate. Short-lived seeds get planted first the next season, while longer-lived ones can stay in reserve. Experienced gardeners also do quick germination tests on older packets, especially before dedicating bed space. It’s a small effort that prevents big disappointment.
Finally, community gardens and seed swaps add a fun twist: once people store seeds better, they tend to save more, share more, and experiment more. A jar system or a labeled bin doesn’t just preserve seed viabilityit preserves momentum. When spring arrives, the barrier to planting is lower, choices are clearer, and the garden starts with confidence instead of confusion. That’s the quiet magic of winter seed storage: it turns “maybe” into “let’s go.”