
Table of Contents >> Show >> Hide
- A quick “what am I looking at?” tour of lath and plaster
- Before you patch: diagnose the hole (and avoid surprise chaos)
- Tools and materials (keep it realistic)
- Way #1: Traditional plaster-style patch (the best “invisible” repair)
- Way #2: Drywall insert patch (fast, strong, and shockingly neat)
- Texture matching: make your patch look like it belongs there
- Common mistakes (and how to avoid them)
- Quick decision guide
- Real-world experiences: what typically happens in actual homes (and how to win anyway)
- SEO tags (JSON)
Lath-and-plaster walls are the charming grandparents of modern drywall: thicker, stronger, better at muffling noise,
and occasionally cranky when you poke them the wrong way. If you’ve got a holewhether it’s a doorknob
“oops,” a removed vent, or a mystery gap from an old light fixturedon’t panic. You can fix it without ripping out
the whole wall (and without turning your house into a haunted dust museum).
This guide walks you through two proven methods:
(1) a traditional plaster-style patch that blends beautifully with old walls, and
(2) a drywall insert patch that’s fast, strong, and very DIY-friendly.
Along the way, you’ll learn what makes lath-and-plaster different, how to keep repairs from cracking later, and how
to match texture so your patch doesn’t scream “I was fixed on a Sunday.”
A quick “what am I looking at?” tour of lath and plaster
Lath, plaster, and the little hooks called “keys”
Traditional plaster walls are built over thin wood strips called lath. Wet plaster was pressed into the gaps
between lath strips so it squeezed through and hardened behind them. Those hardened blobs are called
keys, and they’re what lock the plaster to the lath.
When plaster gets old, keys can break, lath can loosen, and the wall can become crumbly around holes or cracks.
The best repairs don’t just “fill the hole”they re-stabilize the surrounding plaster so your patch stays put.
Before you patch: diagnose the hole (and avoid surprise chaos)
Step 1: Safety first (especially in older homes)
- Lead paint warning: If your home was built before 1978, assume painted surfaces may contain lead. Avoid dry sanding and control dust.
- Shut off power at the breaker if you’re working near outlets, switches, or old light openings.
- Wear protection: safety glasses, a dust mask/respirator, and gloves. Old plaster is basically tiny rock snacks for your eyes.
- If you’re under 18: get an adult to helpespecially for cutting, drilling, and anything involving power tools.
Step 2: Figure out what’s actually missing
Use a flashlight and gently tap around the damage.
- Only finish coat missing? (shallow chips, small dents) You can usually patch with a setting compound or patching plaster.
- Plaster missing, lath still there? Greatyour patch can grab onto the lath gaps and recreate keys.
- Lath broken or missing? You’ll need to add new wood lath or metal lath, or switch to the drywall insert method.
- Plaster around the hole feels springy? Reattach it first (plaster washers are your best friend) before you fill anything.
Step 3: Pick your method
- Way #1 (Traditional plaster-style patch): Best for historic walls, curved surfaces, and a finish that blends naturally.
- Way #2 (Drywall insert patch): Best for larger holes, missing lath, and quick repairsespecially if you plan to skim/paint the whole wall anyway.
Tools and materials (keep it realistic)
Basic toolkit
- Drop cloth, painter’s tape
- Utility knife, stiff putty knife, and a 6″ taping knife
- Vacuum (shop vac if possible) + brush attachment
- Bucket, mixing paddle (or sturdy stick), and a hawk or flat board
- Sanding sponge (fine) and/or 120–150 grit sandpaper
- Primer and paint
Common materials for lath-and-plaster repairs
- Plaster washers + drywall screws (for loose plaster)
- Bonding agent (often PVA-based) or plaster bonder
- Patching plaster or setting-type joint compound (stronger than premixed mud for deep fills)
- Fiberglass mesh tape (or paper tape, depending on your finish preference)
- Wood lath strips or metal lath (if you need backing)
- Drywall piece (for Way #2), plus furring strips/cleats if needed
Way #1: Traditional plaster-style patch (the best “invisible” repair)
When to use this method
- The wall is mostly intact and you want the repair to blend with original plaster thickness.
- The lath is present (or can be restored) and you want a durable patch that behaves like plaster.
- You’re dealing with irregular shapes, curved walls, or a finish that drywall patches struggle to mimic.
Step-by-step: patching the hole like plaster pros (without growing a mustache)
1) Prep the area (clean edges = cleaner repair)
- Lay down a drop cloth and tape off trim.
- Remove all loose plaster with a putty knife. Don’t be gentle with loose materialit already quit.
- Undercut crumbly edges slightly so new material has something solid to lock onto.
- Vacuum dust thoroughly. Dust is the #1 enemy of “why is my patch falling off?”
2) Reattach any loose plaster (don’t patch over a wobbly foundation)
If the plaster around the hole sounds hollow or flexes when you press it, secure it before patching:
- Place plaster washers a couple inches back from the broken edge, spacing them every several inches where plaster feels loose.
- Drive screws through washers into the lath (or framing if needed). Tighten just enough to pull plaster snugdon’t crush it.
- Scrape away any raised ridges around washers so the patch coats can go on smoothly.
3) Repair or replace lath (because plaster needs a skeleton)
- If wood lath is missing: screw in new lath strips to studs (or add a scrap “bridge” behind existing lath so the new piece has something to fasten to).
- If lath is mostly there but weak: add a piece of metal lath behind the hole. A simple trick is to slide metal lath in, pull it snug against the back, and hold it in place until your first coat sets.
4) Condition + bond (old plaster is thirsty)
Old lath and plaster can suck moisture out of fresh patch material too fast, leading to cracking and weak bond.
Lightly dampen the lath and surrounding plaster edge, then brush on a bonding agent or plaster bonder.
5) Apply the base/scratch coat (build strength first)
- Mix patching plaster or setting-type compound to a thick “peanut butter” consistency.
- Press the material firmly into the lath gaps so it forms mechanical grip (think: new keys).
- Fill the hole to about halfway (or slightly recessed), leaving room for the next coats.
- Rough up the surface with your putty knife or a scarifying tool to help the next layer bond.
6) Reinforce edges (so the patch doesn’t re-crack along the seam)
Once the scratch coat is firm, apply mesh tape around the patch perimeter where old meets new. This is especially
helpful if the hole edges were jagged or the wall has a history of cracking.
7) Apply the second coat (bring it close to flush)
- Apply a second coat, slightly thinner than the first.
- Feather the edges outward so the patch transitions smoothly into the wall.
- Stop just shy of perfectly flushleave a tiny bit of space for your final skim.
8) Finish coat / skim coat (make it disappear)
- Apply a thin skim of finishing compound or fine plaster to blend the surface.
- Feather wide. A wide feathered patch is easier to hide than a thick, tight mound.
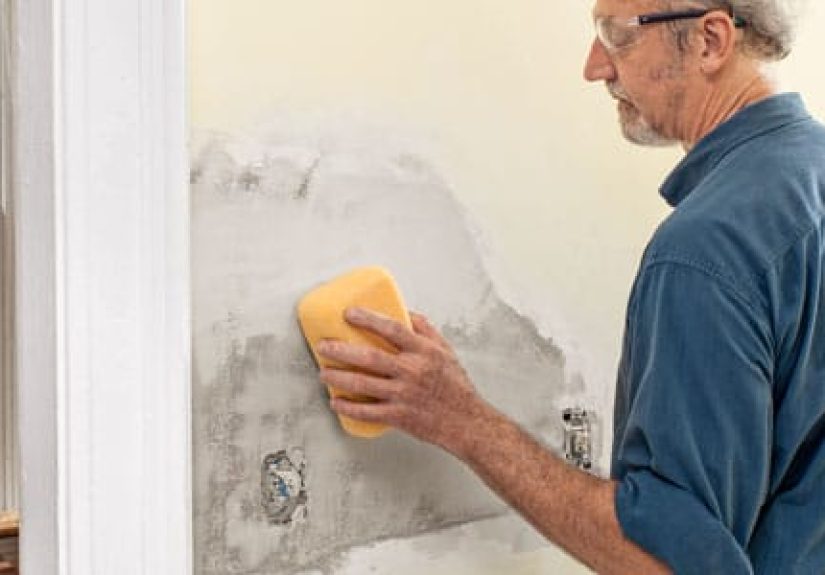
- Let it dry fully. Lightly sand if needed (try a damp sponge for gentle smoothing to minimize dust).
9) Prime and paint (the “why does it flash?” prevention step)
New patch material is porous. If you paint without priming, you may get dull spots (“flashing”) or uneven sheen.
Prime the repair, then paint.
Way #2: Drywall insert patch (fast, strong, and shockingly neat)
When to use this method
- The hole is larger, irregular, or missing lath.
- You want a quicker repair with common materials.
- You’re okay with feathering compound a bit wider to match plaster thickness.
Two drywall insert options (pick your personality)
Option A: “Square it up + screw to backing” (best for bigger holes)
- Cut the hole into a clean shape (square/rectangle is easiest). Remove loose plaster back to solid edges.
- Add backing strips: slip two wood cleats into the cavity (one on each side), hold them tight, and screw through the existing wall into the cleats.
- Cut a drywall patch to fit the opening. Dry-fit it; it should sit slightly recessed (plaster walls are often thicker than drywall).
- Screw the patch into the backing strips.
- Tape the seams with mesh or paper tape.
- Build up with setting-type compound in thin coats, feathering wider each coat until flush.
- Skim, sand, prime, paint.
Option B: The “California patch” (best for medium holes in flatter areas)
A California patch uses drywall paper as built-in tape. It’s great when you want fewer pieces and a smooth finish.
(Pro tip: it works best when your wall surface is fairly flatold plaster can be… creatively flat.)
- Cut a drywall square that’s a bit larger than the hole.
- On the back of that drywall piece, score about 1″ in from each edge, then snap away the gypsum core while keeping the front paper intact around the perimeter.
- Trace the gypsum “core” outline on the wall and cut the wall opening to match.
- Apply joint compound under the paper flaps, press the patch in, and smooth the paper edges flat.
- Skim over the patch in thin coats, feathering wide, then sand/prime/paint.
The thickness trick (why drywall patches sometimes look “sunken”)
Many plaster walls are thicker than 1/2″ drywall. That’s normal. The fix is simple:
set your drywall patch slightly recessed and build the surface back up with setting-type compound and a final skim.
If you try to make the drywall perfectly flush at the start, you’ll fight proud edges and telegraph lines later.
Texture matching: make your patch look like it belongs there
If your wall is smooth
- Feather wide, sand lightly, and shine a light across the wall (raking light) to spot ridges before painting.
- Prime the patch. Then paint the whole wall if possible for the best blend.
If your wall is textured
- Orange peel / knockdown: practice on scrap first. You can dab or flick thinned compound with a stiff brush, then lightly knock it down as it starts to set.
- Old plaster swirls or trowel marks: mimic the pattern with the same motion and tool size (small trowel or wide knife).
- “Age texture” (a.k.a. charming imperfection): don’t over-sand. Sometimes slightly imperfect is the perfect match.
Common mistakes (and how to avoid them)
- Patching over loose plaster: always stabilize first with washers or reattachment methods.
- Skipping bonding agent: old plaster edges are often dusty and thirstybonding improves adhesion.
- Using only premixed mud for deep fills: it can shrink and crack. Use setting-type material for strength in the base layers.
- Over-sanding (especially in older homes): creates a ton of dust and can expose lead paint. Smooth with a knife and use damp-sponge finishing when possible.
- Not priming: leads to flashing and uneven sheen even if the patch is perfectly smooth.
Quick decision guide
- Small hole, lath intact: Way #1 is usually fastest and blends best.
- Medium hole, lath questionable: Either method works; pick Way #2 if you want structure first, finesse second.
- Large hole or missing lath: Way #2 is typically the easiest, strongest route.
- Historic finish you want to preserve: lean Way #1 (and consider hiring a plasterer for ornate areas).
Real-world experiences: what typically happens in actual homes (and how to win anyway)
Let’s talk about the part no one includes in a “five easy steps” tutorial: the moment you start the repair and
your wall decides to tell you its entire life story. Lath-and-plaster repairs are rarely hard, but they can be
unpredictable in a very “surprise, I’m crumbling!” sort of way.
One common scenario: you’re patching what looks like a fist-sized hole from an old doorstop. You scrape the
edges, and suddenly the hole grows. It’s not because you’re doing it wrongold plaster often fails in a
perimeter where keys have broken. The trick is to stop thinking “I’m fixing a hole” and start thinking “I’m
stabilizing an area.” That’s why plaster washers feel like cheating. You secure the surrounding plaster first,
and the whole repair becomes calmer, flatter, and dramatically less dramatic.
Another real-life classic: the patch looks great at night, but in the morning sunlight it looks like a subtle
topographic map of the Rocky Mountains. That’s “raking light,” and it’s brutally honest. The win here is not
more sandingit’s wider feathering. A repair that’s feathered 12–16 inches can disappear; a repair that’s
feathered 2 inches often looks like a bullseye. This is also where the “smooth it with the knife while it’s
wet” mindset pays off. Every ridge you remove wet is one less dust cloud you create later.
If you’ve ever painted a patch and thought, “Why is this spot shinier/duller than the rest?”congratulations,
you’ve met flashing. Fresh plaster and joint compound absorb paint differently than old painted surfaces. Priming
isn’t optional; it’s the difference between “professional repair” and “I swear it looked fine until I painted.”
If you want a near-invisible finish, prime the patch and consider painting the entire wall, especially if the
existing paint is older, matte, or slightly yellowed.
Drywall inserts have their own “experience highlight reel.” The big one is thickness. Plaster walls are often
thicker than drywall, so your patch might sit a little recessed. That’s normal and even helpfulyou can build
up with setting-type compound and feather out smoothly. The mistake is trying to force a perfectly flush drywall
patch from the start, then fighting proud edges and tape lines forever. Let the drywall be the structure and
let the compound do the blending.
And then there’s textureespecially the “historic texture” that isn’t a named pattern so much as a mood.
Sometimes the best match isn’t perfectly smooth. If your original wall has gentle waves and hand-troweled marks,
a mirror-flat patch can look wrong. In those cases, the winning move is to intentionally leave the final skim
with the same subtle movement. Yes, it feels weird to not chase perfection. But the wall didn’t start perfect,
and matching the wall’s personality is how you make the repair disappear.
The overall takeaway from real projects: lath-and-plaster repairs reward patience, clean prep, and thin coats.
Secure what’s loose, bond what’s dusty, build in layers, and prime before paint. Do that, and your wall goes
back to being what it always wanted to be: quietly impressive and totally uninterested in your drama.


