
Table of Contents >> Show >> Hide
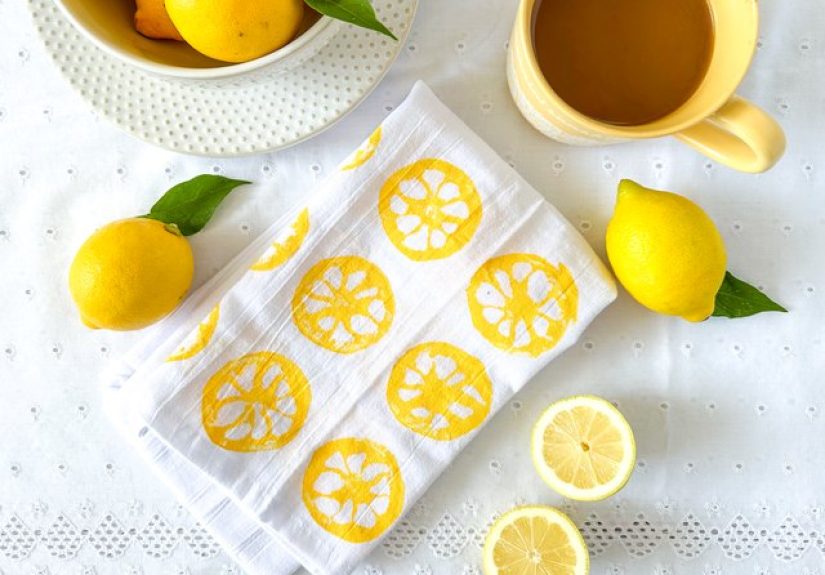
If your kitchen is feeling a little “meh” and your dish towels have seen one too many spaghetti nights, it’s time to add some zestliterally. Citrus-print tea towels are bright, modern, and surprisingly easy to make at home. With a few lemons, limes, or oranges and some fabric paint, you can turn plain cotton towels into cheery kitchen workhorses that look like they came from a boutique gift shop.
This project is inspired by classic DIY citrus towel tutorials that use real fruit or simple stamps to create fresh, graphic prints on fabric. Crafters love this technique because it’s affordable, beginner-friendly, and totally customizable. Whether you’re dressing up your own kitchen or making a stack of handmade hostess gifts, citrus-print tea towels are a quick win.
Why Make Citrus-Print Tea Towels?
Tea towels are the unsung heroes of the kitchen. They dry dishes, cover rising dough, line baskets of warm rolls, and mop up the occasional mystery puddle. When you add a citrus print, you get all that practicality plus a pop of color that instantly brightens the room.
Hand-stamped and painted towels are also a staple in DIY decor because they’re inexpensive but look high-end. Home and craft bloggers often recommend flour sack towels or cotton-linen blends as the perfect blank canvas: they’re lightweight, very absorbent, and show off painted designs beautifully.
And of course, handmade tea towels make fantastic gifts. Tie a citrus towel around a loaf of bread, a bag of gourmet coffee, or a wooden spoon set, and you have a budget-friendly but thoughtful present for teachers, neighbors, or party hosts.
Supplies You’ll Need
You don’t need a craft room full of fancy tools to pull this off. Most of these items are easy to find at any craft store, big-box retailer, or even in your pantry.
Basic Materials
- Plain cotton or flour sack tea towels – White or light colors work best so the citrus design really pops.
- Citrus fruit – Lemons, limes, oranges, or grapefruits. Pick firm, fresh fruit for clean impressions.
- Acrylic craft paint in citrus colors – Think lemon yellow, lime green, orange, coral, and a bit of white for mixing.
- Fabric paint medium – This turns ordinary acrylic paint into washable fabric paint when heat-set.
- Small paintbrush or foam dauber – For applying paint to the fruit surface.
- Sharp knife – A chef’s knife or large serrated knife for cutting the fruit cleanly.
- Paper towels – To pat fruit dry and blot off excess paint.
- Plastic sheet or garbage bag – To protect your table or counter.
- Iron and ironing board – For heat-setting your design so it survives the wash.
Optional Extras
- Painter’s tape to mask off borders or stripes.
- Ruler and disappearing fabric pen for laying out patterns.
- Foam or potato stamps if you prefer a more controlled, reusable shape.
Step-by-Step: How to Make Citrus-Print Tea Towels
Step 1: Prewash and Prep Your Towels
Wash and dry your tea towels before you do anything else. This removes sizing and finishes from the fabric that can keep paint from bonding properly. Skip the fabric softenersoftener can leave a coating that repels paint. After washing, iron out any major wrinkles so the fabric lies flat while you stamp.
Step 2: Cut and Prepare the Citrus
Slice your citrus fruit in half across the “equator,” not from stem to blossom end. This exposes the pretty starburst of segments and gives you that classic citrus-wheel look.
Gently squeeze a bit of juice out of each half into a bowljust enough so the surface isn’t soaking wet. Too much juice can water down your paint and blur the design. If you’re going for very crisp details, you can carve away some of the juicy pulp while leaving the segment membranes intact. This is a popular trick among DIYers for getting ultra-clear citrus rings on fabric.
Step 3: Mix the Paint with Fabric Medium
On a disposable plate or palette, mix your acrylic paint with fabric medium according to the bottle instructionsoften around a 2:1 or 1:1 ratio. Stir well until you have a smooth, creamy texture. Fabric medium helps the paint stay flexible instead of crunchy and ensures your pattern won’t crack or wash out over time.
If the mixture seems too thick, add a drop or two of water. If it’s too runny, add a tiny bit more paint. You’re aiming for the consistency of heavy cream or yogurt.
Step 4: Test Your Stamp
Before you commit to the towel, always test on scrap fabric or a paper towel. Use a brush or foam dauber to dab a thin, even coat of paint onto the cut surface of the fruit. Press it onto the test surface, lift straight up, and check the results.
If the print is blobby, you’re using too much paint. Blot the citrus on a clean paper towel and try again. If the print is faint, you either need a bit more paint or slightly firmer pressure. Many crafters recommend a dab-dab-dab motion with the brush instead of brushing back and forththis helps keep paint from pooling in the grooves.
Step 5: Stamp the Tea Towels
Lay your towel flat on top of a plastic sheet with a layer of paper towels underneath. Decide where you want your design: along the bottom edge like a border, scattered all over like confetti, or clustered in one corner for a modern, off-center look.
Reload your citrus stamp with paint and press it firmly onto the towel. Hold for a second, then lift straight up to avoid smears. Reapply paint every one or two impressions. Repeat the pattern, rotating the fruit slightly each time so the design looks lively and organic.
You can mix different fruits and colors on one towelyellow lemons, green limes, and orange slices make a playful trio. If you want a more minimal style, stick to a single fruit and color but vary the spacing and direction.
Step 6: Add Details (Optional)
Once your main citrus shapes are stamped, you can use a fine brush to add small touches: tiny white highlights, darker outlines, or little leaves and stems. Just keep your hand lighttoo much outlining can make the design look stiff instead of fresh.
Some makers like to mix in simple stripes or polka dots using painter’s tape and a foam brush, creating a patterned background with citrus prints layered on top. Others cut basic shapes from craft foam or potatoes to stamp leaves or abstract dots alongside the fruit.
Step 7: Let Dry and Heat-Set
Allow the towels to dry completely, ideally for 24 hours or according to the paint manufacturer’s instructions. Once dry, heat-set the design by ironing the painted area on the reverse side for a few minutes on the recommended temperature. Place a scrap cloth or parchment paper between the iron and towel if you’re nervous about paint transfer.
After heat-setting, most fabric paints and mediums are washable. Turn the towels inside out or use a gentle cycle and cool water to help preserve the colors.
Design Ideas and Variations
1. Border Prints
Stamp a row of citrus slices along the bottom edge of the towel, leaving about 2–3 inches from the hem. This creates a neat, tailored look that works well if your towel will often hang on an oven door or hook.
2. All-Over Pattern
For a more playful vibe, scatter citrus shapes across the entire towel. Start at one corner and work diagonally, rotating the stamp and alternating colors. Think of it like making your own citrus polka dotscasual, fun, and perfect for summer gatherings.
3. Monochrome Minimalist
If bright color isn’t your thing, try a single ink color like charcoal gray or navy on a white towel. The citrus shape still reads as fresh and modern, but the overall look is more understated and fits seamlessly in neutral or farmhouse-style kitchens.
4. Mix-and-Match Sets
Make a set of three towels with complementary designs: one packed with lemons, one with limes, and one with oranges. Keep the colors cohesive so they look like a curated collection when folded or hung together. These sets are particularly popular as hostess or housewarming gifts.
Care, Troubleshooting, and Safety Tips
Common Printing Problems
- Blurry edges: Too much paint or too much juice. Blot the fruit well and use a thinner coat of paint.
- Patchy prints: Not enough paint or uneven pressure. Dab a bit more paint on the stamp and press down evenly over the whole fruit.
- Paint cracking after washing: Usually caused by skipping fabric medium or heat-setting. Be sure to follow the product instructions carefully.
Food and Safety Notes
Once a piece of fruit has been used as a stamp with paint, treat it as a craft supply, not a snack. Keep it away from children’s mouths and kitchen prep areas. When you’re done, toss it in the trash or compost bin.
Longevity Tips
- Wash citrus-print tea towels in cold or warm water, not hot.
- Avoid bleach or harsh stain removers on the printed area.
- Line-dry or tumble dry on low to protect the paint.
- If colors start to fade after many washes, you can always add a fresh round of stampingbuilt-in “refresh” feature!
How Citrus-Print Tea Towels Fit Into Your Home Decor
Handmade tea towels are an easy way to dip your toes into custom home decor without committing to a big project like painting cabinets or tiling a backsplash. Design experts often suggest rotating seasonal textileslike towels, runners, and pillowsto refresh a room on a budget.
In summer, citrus designs pair beautifully with natural wood cutting boards, woven baskets, and glass drink dispensers full of lemonade. In winter, a more subdued monochrome citrus print still hints at sunshine when everything else feels gray.
Because these towels are relatively quick to make, they’re also a fun group activity. Host a craft night, set out bowls of lemons, paint in different shades, and let everyone design their own towel. Just be sure to label them before they leave, or you’ll end up with a custody battle over the cutest print.
Real-Life Experiences & Extra Tips for Citrus-Print Tea Towels
One of the best parts of this project is how forgiving it is. Even the “mistakes” tend to look charming once the towel is fully stamped. Think about real lemons: they’re not perfectly symmetrical, and that’s exactly what makes them look real and fresh. Lean into the imperfections, and your towels will feel intentional and handmade instead of factory-produced.
Many crafters who’ve tried citrus stamping say the biggest surprise is how much difference prep makes. Taking five extra minutes to dry the fruit, carve out excess pulp, and test your paint thickness can completely change your results. The first stamp or two might look a little muddy, but by the third or fourth try, you’ll find your rhythm and start seeing those crisp little segments pop out clearly on the fabric.
If you’re doing this with kids, set expectations ahead of time. Let them know that this isn’t about perfect circles; it’s about having fun and making something useful together. Younger kids might enjoy stamping bold, solid shapes, while older kids can experiment with layering colorslike a pale yellow base with a darker orange ring on top. You can even assign each child their own fruit and color, so everyone’s creations feel unique.
Another practical tip from experienced DIYers: work in batches. Once the towels are prewashed and ironed, line them up and stamp all of them in one session while your paints are out. It doesn’t take much longer to make four or six towels than it does to make one, and you’ll have an instant stash of gifts. Keep a couple on hand for last-minute birthdays, teacher appreciation days, or holiday exchanges.
Over time, you may notice a soft “lived-in” look develop as the towels are washed and used. Rather than seeing this as wear and tear, think of it as patinalike a favorite pair of jeans that gets better with age. If a design ever fades more than you like, treat it as an opportunity to add another layer of stamping. A few new lime or grapefruit slices layered over a faded lemon print can give the towel a fresh second life.
Finally, don’t be afraid to use your citrus-print towels daily. They’re not too precious to handle real kitchen messes. In fact, the more you use them, the more they’ll feel like a natural part of your homelittle slices of sunshine hanging right next to the oven, ready to jump into action. And every time you grab one, you’ll remember that you didn’t just buy something cute; you made it with your own hands, which is always a little bit magic.
Conclusion
Making your own citrus-print tea towels is a simple project that pays off in a big way. With a few pieces of fruit, some fabric-safe paint, and an afternoon at the kitchen table, you can create custom textiles that brighten your space, elevate everyday tasks, and make thoughtful, budget-friendly gifts. Whether you go bold and colorful or clean and minimalist, these towels prove that a small DIY project can add a surprising amount of personality to your home.


