
Table of Contents >> Show >> Hide
- What an AAV Does (and Why Your Sink Might Need One)
- Before You Touch a Pipe: Code, Permits, and Reality
- How High Should the AAV Be Installed?
- What an AAV Can’t Do (Important So You Don’t Blame It for Everything)
- Tools and Materials You’ll Typically Need
- Step-by-Step: How to Install an AAV Under a Sink
- Step 1: Confirm your layout and pick the AAV location
- Step 2: Remove the P-trap (and drain the “surprise soup”)
- Step 3: Dry-fit the new vented configuration
- Step 4: Measure, cut, and prep the pipe
- Step 5: Assemble the glued joints (PVC/ABS) or tighten slip joints (tubular)
- Step 6: Install the AAV on the riser
- Step 7: Reinstall the P-trap and align everything
- Step 8: Test like you mean it
- Common Variations and Special Cases
- Troubleshooting: If Something Feels Off
- Maintenance: How Long Does an AAV Last?
- Safety Notes (Because Water Is Patient and Persistent)
- Conclusion
- Real-World Experiences (The “What People Learn the Hard Way” Section)
If your sink drain gurgles like it’s auditioning for a swamp monster movieor your P-trap keeps “mysteriously”
losing its water sealyour plumbing may be starving for air. That’s where an air admittance valve (AAV)
comes in: a small, one-way vent that lets air into the drain system when water flows, helping your sink drain smoothly
without pulling water out of the trap (and without turning your cabinet into a perfume counter for sewer gas).
This guide walks you through how to install an AAV for a sink step by step, with practical examples,
code-aware tips, and the kind of real-world “oops” moments people don’t mention until the second trip to the hardware store.
(Spoiler: measure twice, cut once… and still be emotionally prepared to cut again.)
What an AAV Does (and Why Your Sink Might Need One)
Your plumbing drain system needs air for the same reason you need a straw hole in a juice box: without it,
water can “glug,” slow down, and create negative pressure. That negative pressure can siphon water out of the P-trap,
breaking the water seal that blocks odors.
An AAV is a one-way mechanical vent. When draining water creates suction, the valve opens briefly to admit air,
then closes to help keep sewer gas from venting into the room. This is especially handy in remodels, island sinks,
basement bars, or situations where running a traditional vent to the roof is difficult or expensive.
Signs you may benefit from an AAV under the sink
- Gurgling after draining (especially when a dishwasher or nearby fixture discharges)
- Slow drainage even when there’s no obvious clog
- Odors that show up after a big drain event (a trap seal may be getting siphoned)
- A sink installed far from a vent stack (common in islands or additions)
Before You Touch a Pipe: Code, Permits, and Reality
AAVs are common, but they’re not universal. Some areas permit them broadly under code frameworks like the
International Plumbing Code (IPC) and International Residential Code (IRC), while other jurisdictions
using Uniform Plumbing Code (UPC) may restrict them unless locally amended.
The practical move: check your local plumbing rules (or ask your local building department) before installing.
In many places, AAVs are allowed only when installed per manufacturer instructions, in an accessible location,
and at specific heights above the drain line. If your job is part of a permitted remodel, the inspector will care.
Two rules that almost always apply
- Accessibility: An AAV must remain accessible for inspection and replacement (no burying it behind drywall).
- Air access: The valve needs air movementdon’t seal it in an airtight box or pack it in insulation.
How High Should the AAV Be Installed?
For a typical sink installation using an individual/branch-type AAV, the goal is: high in the cabinet, upright,
and above the trap arm/horizontal drain section. Many manufacturers and code-adjacent guidance call for the AAV to sit
at least a few inches above the horizontal branch or trap arm it serves, and to remain close to vertical (not leaning like
it’s tired of your DIY decisions).
Quick placement checklist (sink cabinet edition)
- Install the AAV upright (close to vertical, typically within a small allowable tilt range).
- Position it as high as practical under the counter while staying accessible.
- Keep it above the horizontal drain section/trap arm it vents.
- Do not install where it can be splashed, coated in chemicals, or sealed off from air.
What an AAV Can’t Do (Important So You Don’t Blame It for Everything)
An AAV primarily helps with negative pressure (suction). It does not reliably relieve
positive pressure events in the drain system. If you have a partial blockage, poor slope, or backpressure from
the sewer line, an AAV isn’t a magic air escape hatch. In fact, slow drainage plus bubbling elsewhere can be a clue that a
drain or venting system needs deeper attention than “add a valve and pray.”
Translation: if you smell strong sewer gas constantly, see backups, or multiple fixtures misbehave together,
consider diagnosing for clogs, improper venting layouts, or drain line issues instead of treating the AAV as
a tiny superhero with a cape made of plastic.
Tools and Materials You’ll Typically Need
Your exact parts depend on whether your under-sink drain is tubular (common in bathrooms) or solvent-welded PVC/ABS
(common in many remodels). Most AAV retrofits involve adding a tee-style fitting and a short vertical riser to mount the valve.
Common tools
- Bucket and towels (because gravity is undefeated)
- Channel-lock pliers (for slip nuts)
- Tape measure + marker
- Plastic pipe cutter or hacksaw (for PVC/ABS)
- Deburring tool or utility knife/sandpaper
Common materials
- A code-listed air admittance valve sized for your application
- Sanitary tee or approved fitting arrangement for the drain layout
- Short length of pipe for a vertical riser (PVC or ABS to match existing)
- Adapter for the AAV (many valves include a threaded adapter)
- Primer/cement (PVC) or cement (ABS), as appropriate
- Thread-seal tape (for threaded AAV connections)
- Optional: new P-trap parts if your old ones are crusty or mismatched
Step-by-Step: How to Install an AAV Under a Sink
The exact geometry varies by sink and drain rough-in, but the strategy is consistent:
add a vertical vent takeoff after the trap, then mount the AAV on that takeoff, keeping it upright and accessible.
Step 1: Confirm your layout and pick the AAV location
Look under the sink and identify:
(1) the sink tailpiece (vertical pipe from the drain),
(2) the P-trap,
(3) the trap arm (the horizontal-ish run to the wall or floor drain).
Your AAV will connect to a short vertical riser that ties into the drain system after the trap.
Plan for the AAV to sit toward the back of the cabinet, high enough that it won’t interfere with stored items,
but still reachable without disassembling half your life.
Step 2: Remove the P-trap (and drain the “surprise soup”)
Place a bucket under the trap, loosen the slip nuts, and remove the trap assembly. Expect water. It’s not personal.
If the parts are old, take a photo before disassembly so you can recreate the routing (and prove to yourself that it
really did look like that).
Step 3: Dry-fit the new vented configuration
Dry-fitting is where you win the job. You’re aiming for a configuration that:
keeps the trap aligned with the sink tailpiece and wall stub-out,
adds a tee/fitting to create a vertical riser for the AAV,
and preserves proper slope on the drain run.
Many under-sink AAV installs use a sanitary tee arrangement and a short vertical section of pipe.
Depending on your setup, you may need a couple of extra adapters to transition from tubular slip-joint parts
to solvent-welded fittings (or vice versa). Don’t treat this like failuretreat it like plumbing’s love language.
Step 4: Measure, cut, and prep the pipe
Mark your cuts carefully. Cut pipe square, then deburr and bevel the edge slightly. A clean, smooth edge helps
fittings seat properly and reduces the chance of a leaky joint (or a connection that “looks fine” until it isn’t).
Step 5: Assemble the glued joints (PVC/ABS) or tighten slip joints (tubular)
If your install uses PVC: prime and cement according to the product directions. If it uses ABS: use the correct cement.
Keep everything aligned using your dry-fit marks. Build the tee + riser assembly so that the riser is vertical and ends
with the correct adapter for the AAV.
If your setup is mostly slip-joint tubular parts, keep washers oriented correctly and hand-tighten first.
Over-tightening can crack slip nuts or distort washersaka “leaks you can’t explain at 11 p.m.”
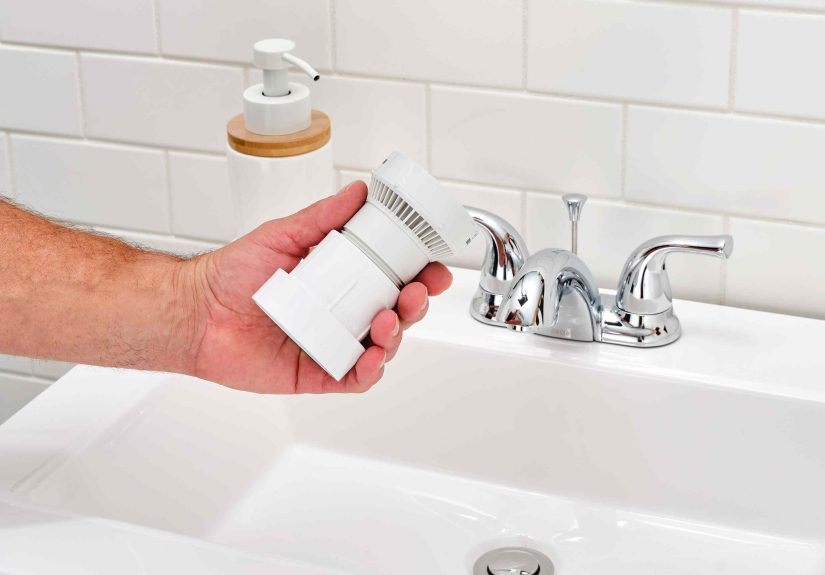
Step 6: Install the AAV on the riser
Most AAVs screw into a threaded adapter. Wrap thread-seal tape on the AAV’s male threads, then thread the valve into
the adapter by hand until snug. Keep it upright. The valve should not be jammed in sideways like a crooked hat.
Place the AAV so it has free air movement and remains accessible. Under-sink is typical and often preferred
specifically because it’s reachable for replacement.
Step 7: Reinstall the P-trap and align everything
Reconnect the P-trap to the sink tailpiece and to the trap arm/drain connection. Check that the trap arm has a gentle
slope toward the drain and that nothing is strained or pulled off-center. Plumbing hates tension.
Step 8: Test like you mean it
Run water, then fill the basin and release it for a stronger discharge. Watch every joint with a flashlight.
Feel for moisture with a dry paper towel (it’s basically leak-detection makeup). Listen for excessive gurgling.
If you still hear gurgling, confirm the valve is upright, placed high enough, and that the drain isn’t partially clogged.
An AAV can’t compensate for a drain line that’s already arguing with gravity.
Common Variations and Special Cases
Kitchen sink with garbage disposal
A disposal can increase discharge turbulence (and sometimes noise), so placement and drainage slope matter even more.
Make sure the trap and trap arm aren’t forced into an “S-shape” or awkward dip. If the cabinet is crowded,
consider repositioning the riser to the back corner where it’s still accessible but protected.
Double-bowl sink
Double-bowls typically use a baffle tee and a continuous waste setup. You still want the AAV connected to the drain
system after the trap. Keep the vent takeoff vertical, and avoid “creative” configurations that block airflow.
Island sinks and remodels
AAVs are often used when a roof vent is impractical. But many codes still require at least one vent through the roof
somewhere in the building’s drain system. Think of the AAV as a helper, not a total replacement for all venting.
Troubleshooting: If Something Feels Off
Problem: Still gurgling
- Check for partial clogs or buildup in the trap arm and branch drain.
- Confirm the AAV is installed upright and not jammed against the cabinet wall.
- Verify the AAV is placed high enough above the horizontal drain section.
Problem: Sewer smell
- Confirm the P-trap holds water and isn’t being siphoned.
- Inspect for leaks at slip joints (tiny leaks can smell big).
- If odor persists, the AAV may be stuck open or contaminatedreplace it.
Problem: Leaks at the new joints
- Slip joint leak: reseat washer, align piping, hand-tighten, then a gentle snug with pliers.
- Glued joint leak: unfortunately, that’s usually a redodry-fit, cut back, and re-cement correctly.
- Threaded leak: reapply thread-seal tape and hand-tighten to snug.
Maintenance: How Long Does an AAV Last?
AAVs are mechanical devices, so they can wear out over timeespecially in environments with dust, chemicals,
or cabinet humidity. The biggest reason you keep it accessible is so you can replace it without opening a wall.
If the sink starts gurgling again years later, replacing the valve is often a reasonable first step.
Safety Notes (Because Water Is Patient and Persistent)
- If you’re unsure about local requirements or your drain layout is unusual, consult a licensed plumber.
- Use the correct solvent cement for your pipe material (PVC vs ABS). Don’t mix-and-hope.
- Keep the AAV away from harsh chemicals or fumes that could affect its internal seal.
- If multiple fixtures are affected, diagnose the broader systemdon’t just add valves everywhere like stickers on a laptop.
Conclusion
Installing an AAV (air admittance valve) for a sink can be a smart, code-friendly way to improve drainage,
reduce gurgling, and protect your P-trap sealespecially in remodels and hard-to-vent locations.
The recipe is simple: confirm local rules, plan a clean layout, keep the valve upright and accessible,
install it above the horizontal drain section it serves, and test thoroughly.
Done right, an AAV is the behind-the-scenes stagehand that keeps your sink draining smoothly while your cabinet stays
blissfully un-fragranced. And if you ever need to replace it, you’ll thank your past self for not burying it behind drywall
like a time capsule of regret.
Real-World Experiences (The “What People Learn the Hard Way” Section)
One of the most common experiences people report with under-sink AAV installs is that the “easy” part isn’t the valve
it’s the geometry. On paper, it’s “add a tee, add a riser, screw on the valve.” In a real cabinet, you’re juggling
disposal housings, supply lines, drawers, cleaning bottles, and that one random shelf you forgot was there. The lesson:
don’t just plan for the pipe to fitplan for your hands to fit later, because sooner or later you’ll want to inspect or replace
the valve.
Another frequent experience: the first dry-fit looks perfect… until you reinstall the trap and realize the trap arm is now
slightly off-line, forcing a slip joint to sit at an angle. That’s when tiny leaks happenoften not as dramatic drips, but as a
slow “mystery dampness” that only appears after a full sink drain. The fix is usually not brute force tightening; it’s backing
up, realigning, and ensuring the piping isn’t under stress. Plumbing tends to punish impatience with a wet cabinet floor.
People also discover that an AAV won’t magically fix every odor. If the smell is caused by a loose slip joint, a cracked trap,
a dry trap in a rarely used sink, or a bigger venting/drain issue, the valve isn’t the villain or the heroit’s just a part doing
a specific job. A very typical “aha” moment happens when someone installs an AAV to stop gurgling, but the gurgling remains
because the real problem was a partial clog farther down the line. Once the drain is cleaned, the AAV suddenly “works,” and
the homeowner feels like they gained wizard powers. The reality is simpler: the system finally has both airflow and a clear path.
A surprisingly practical takeaway: cabinet air matters. Some homeowners tuck the valve behind a stack of bins or wrap it in
insulation “to keep it safe.” But AAVs need air movement to operate properly. If the cabinet gets packed tight, or if the valve
is boxed in without ventilation, performance can suffer. A common compromise is mounting it toward the back corner, high up,
with enough clearance around it so air can reach itwhile still leaving it visible and reachable.
Finally, experienced DIYers often say the biggest success factor is choosing compatible parts and resisting shortcuts.
Matching PVC-to-PVC or ABS-to-ABS, using the correct cements, deburring cuts, and allowing proper cure time sounds boring
until you compare it to the experience of redoing a joint because you rushed. If you want an AAV install that stays quiet
for years, the “unsexy” steps are usually the difference between a clean win and a cabinet that becomes a part-time aquarium.


