Table of Contents >> Show >> Hide
- Why a DIY tripod lamp is such a smart project
- What you need to make an easy DIY tripod lamp
- Before you start: keep the lamp simple and safe
- How to make an easy DIY tripod lamp step by step
- Best design ideas for a DIY tripod lamp
- Common mistakes to avoid
- How to style your DIY tripod lamp in a room
- Real-life experiences with making a DIY tripod lamp
- Conclusion
- SEO Tags
If your living room feels a little bland, a DIY tripod lamp can fix that faster than you can say, “Why is this corner so aggressively empty?” A tripod lamp adds height, texture, and a cool designer look without requiring designer-level money. Better yet, it is one of those rare home projects that feels impressive but is actually beginner-friendly when you keep the design simple.
This guide walks you through how to make an easy DIY tripod lamp using basic lumber or dowels, a prewired lamp kit, and a shade that suits your room. The result is a stylish floor lamp with a custom feel, a smaller price tag, and the deeply satisfying glow of something you made yourself. Literally. It glows.
If you can measure, drill, sand, and resist the temptation to eyeball everything, you can make this lamp. Let’s build one that looks polished, works safely, and does not wobble like a nervous flamingo.
Why a DIY tripod lamp is such a smart project
A tripod floor lamp is a favorite in modern, rustic, industrial, coastal, and Scandinavian spaces because the shape is simple and architectural. Three legs create visual interest without making the room feel heavy. Compared with boxy furniture, the open base keeps the lamp looking airy, which is especially helpful in smaller rooms or awkward corners.
It is also a practical DIY project. Unlike building a full table or cabinet, you are making a slim vertical piece with a straightforward structure. The most beginner-friendly version uses a lamp kit with a socket, cord, and plug already designed for lamp projects. That means you can focus more on the woodwork and less on pretending you suddenly became an electrical engineer over the weekend.
Another perk is flexibility. You can make your tripod lamp tall and dramatic for a reading nook, slightly shorter for a cozy bedroom corner, or even adapt the same idea for a tabletop lamp. Choose stained wood for a warm farmhouse vibe, black paint for a more modern look, or a natural finish if you want something that whispers, “I have taste,” instead of shouting it.
What you need to make an easy DIY tripod lamp
Materials
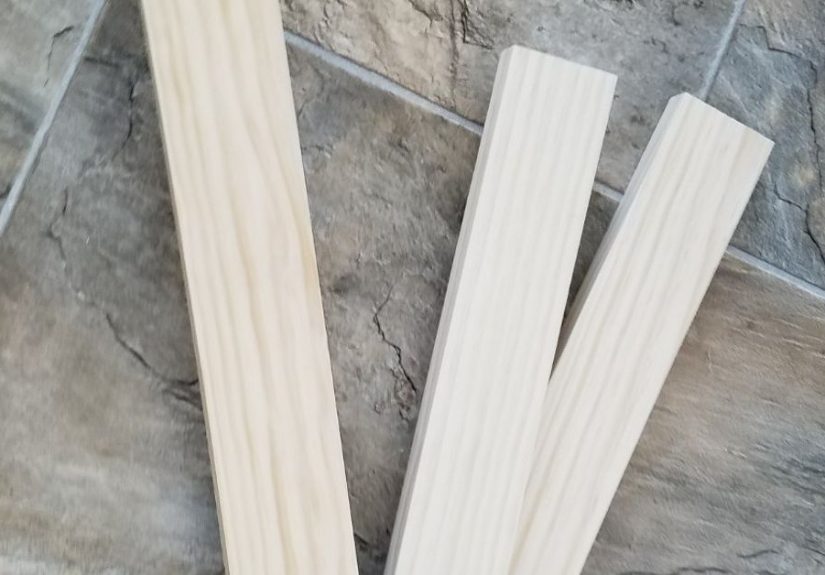
- 3 wooden legs, such as 1×2 boards, round dowels, or tapered furniture legs
- 1 small wood block or round wood plate for the top hub
- 1 prewired lamp kit with socket, cord, and polarized plug
- 1 threaded lamp pipe or lamp nipple if your kit requires it
- Wood screws
- Wood glue
- Sandpaper in medium and fine grit
- Wood stain or paint
- Clear protective finish, optional
- Lampshade
- LED bulb
- Felt pads or rubber feet, optional
- In-line cord switch, optional if not included in the kit
Tools
- Tape measure
- Pencil
- Miter saw or hand saw
- Drill and drill bits
- Screwdriver
- Clamps, optional but helpful
- Paintbrush or staining rag
Before you start: keep the lamp simple and safe
The easiest path is to use a listed lamp cord or lamp kit with a polarized plug and a standard socket. That lets you avoid complicated rewiring and keeps the project much more beginner-friendly. If your kit includes an in-line switch, even better. If it does not, you can add one later in an easy-to-reach spot on the cord.
For a DIY tripod lamp, stability matters just as much as style. A tall lamp with a skimpy footprint is asking for drama, and not the fun kind. Plan a wide enough stance at the bottom so the lamp feels secure. If you have pets, kids, or a habit of power-walking through your house with laundry baskets, give the base an even wider footprint.
Also, choose an LED bulb instead of a hotter bulb type. It is the simplest way to reduce heat, improve energy efficiency, and make the lamp more forgiving around fabric shades and everyday use.
How to make an easy DIY tripod lamp step by step
1. Decide on your lamp height and footprint
A good floor lamp height is usually around 58 to 66 inches overall, depending on the room and the shade you plan to use. For a beginner build, aim for something around 60 inches. It is tall enough to look intentional and useful, but not so tall that it becomes a balancing act.
Sketch the lamp before cutting anything. Decide how far apart the feet should spread at the floor. A wider stance generally means better stability. Think of it like a camera tripod: elegance is nice, but not if the whole thing looks one sneeze away from collapse.
2. Cut the three legs
Cut all three legs to the same length. This is one of those moments when accuracy matters. If one leg is even slightly off, your finished lamp may rock, tilt, or silently judge you from the corner forever.
If you want a cleaner look, you can angle the tops of the legs slightly so they meet the center hub more neatly. This is optional. A simple straight cut works fine for an easy version.
3. Make the top hub
The top hub is the piece that connects the three legs and supports the socket assembly. You can use a thick wood block, a round plaque, or a custom laminated piece of scrap wood. Drill a centered hole through the hub for the lamp pipe or threaded rod that will hold the socket in place.
Then mark three evenly spaced attachment points around the hub for the legs. Test-fit the arrangement before screwing anything in. This is your chance to fix alignment now, instead of later, when everything is stained and your mistakes suddenly feel more expensive.
4. Attach the legs
Attach each leg to the hub using wood glue and screws. Work slowly and check the angle as you go. You want the legs to spread evenly so the lamp stands level. If needed, prop the assembly up temporarily and adjust before everything fully tightens.
Once the legs are attached, set the lamp upright on the floor and test for wobble. If it rocks, adjust the feet or trim carefully until all three legs sit flat. Felt pads can help fine-tune minor unevenness on hard floors.
5. Sand everything smooth
Sand the entire frame thoroughly, starting with a medium grit and finishing with a finer grit. Focus on corners, cut ends, and any areas where glue squeezed out. The smoother the wood, the more finished the final lamp will look.
This part is not glamorous, but it is what separates “cute homemade lamp” from “wood shop accident with a lampshade.” Do not rush it.
6. Paint or stain the lamp base
Now it is time to choose the personality of your lamp. A medium walnut stain creates a warm, classic look. Matte black paint gives the lamp a modern, high-contrast edge. White paint feels coastal and airy. Natural clear-coated wood leans minimalist and works well in casual, modern spaces.
Apply your finish in thin, even coats and let it dry fully. If you want extra durability, add a clear topcoat after staining or painting. This is especially useful if the lamp will live in a high-traffic area where it may get bumped.
7. Install the lamp hardware
Feed the lamp pipe or threaded rod through the center hole in the hub and secure it according to your lamp kit instructions. Then install the socket assembly at the top. Many beginner kits are designed to make this part pretty painless.
If you are connecting wires at the socket, pay close attention to the hot and neutral sides. Lamp wire typically has one ribbed side and one smooth side. The neutral side is usually the ribbed wire, while the hot side is the smooth wire. If that sentence made your eyebrows go up, pause and double-check your kit instructions before proceeding.
8. Route the cord neatly
You can run the cord externally down one leg for the easiest build. Use small cord clips, finish-friendly fasteners, or discreet adhesive guides to keep it neat. Another option is to notch the back of one leg slightly so the cord sits closer to the wood and looks more intentional.
Place the switch in a convenient spot if you are using an in-line switch. Somewhere around knee to hip height on the cord usually works well. In other words, do not hide it in a place that requires yoga.
9. Add the lampshade
The shade can completely change the vibe of your DIY tripod lamp. A drum shade looks modern and simple. A linen shade softens the look. A tapered shade feels slightly more traditional. For a balanced appearance, choose a shade proportionate to the lamp height and base width.
If your lamp is tall and slim, the shade should not look tiny and apologetic. Likewise, a giant shade can make a tripod lamp look top-heavy. Aim for visual balance, not comedy.
10. Screw in a bulb and test the lamp
Use an LED bulb in a warm white range if you want a cozy living-room glow. If the lamp is meant for reading, choose a brighter LED with enough lumens to be functional without feeling harsh. Turn the lamp on, step back, and admire your work like the lighting visionary you now are.
Best design ideas for a DIY tripod lamp
Rustic farmhouse tripod lamp
Use lightly distressed wood, a warm stain, and a beige linen shade. This version looks right at home next to a shiplap wall, a chunky knit throw, or furniture that definitely has a basket nearby.
Modern minimalist tripod floor lamp
Paint the legs matte black or soft white and pair them with a clean drum shade. Keep the hardware simple and avoid decorative clutter. This works especially well in small apartments or home offices.
Industrial tripod lamp
Mix dark-stained wood or black-painted legs with visible metal hardware and an oversized shade. If you love the “old studio light” look but not the “price tag from another planet,” this is a good route.
Common mistakes to avoid
- Making the base too narrow: A tripod lamp needs a stable stance. Pretty is nice, but upright is nicer.
- Using the wrong bulb: Choose a bulb that matches the socket rating and shade setup. LED bulbs are the easiest low-heat choice.
- Ignoring cord placement: Do not run the cord where people will trip, and do not tuck it under rugs as a “creative solution.” It is not creative. It is a hazard.
- Rushing the finish: A blotchy stain job can make a well-built lamp look cheap.
- Choosing the wrong shade size: The wrong proportion can make the lamp look awkward even when the build itself is solid.
How to style your DIY tripod lamp in a room
A tripod floor lamp works beautifully in corners that need height, especially next to an accent chair, sofa end, console table, or bedroom reading chair. If the room has no overhead light, a floor lamp can also help layer your lighting and make the space feel more finished.
For a cohesive look, tie the lamp finish to something else in the room. Match the wood tone to your coffee table, the metal socket finish to nearby hardware, or the lampshade fabric to your curtains or upholstery. That small echo makes the lamp feel custom instead of random.
Keep the cord discreet, the surrounding area uncluttered, and the lamp close enough to an outlet that you do not need a permanent extension cord. Good lighting should improve a room, not introduce a side quest.
Real-life experiences with making a DIY tripod lamp
One of the most interesting things about making a DIY tripod lamp is how quickly the project teaches you that “simple” and “mindless” are not the same thing. On paper, it sounds wonderfully easy: three legs, one socket, one shade, done. In real life, the project has a sneaky little personality. It rewards patience, punishes sloppy measuring, and somehow turns you into a person who has strong opinions about the angle of chair-side lighting.
A common first experience is underestimating the importance of the footprint. Many DIYers start with the idea of making the lamp narrow and elegant, only to discover that elegant can also mean weirdly tippy. The best builds usually happen when people widen the stance just a bit more than they first planned. Suddenly the lamp looks intentional, grounded, and expensive. The smaller footprint might look dainty, but the wider one usually wins in both style and function.
Another lesson people often learn is that prewired hardware is the unsung hero of this project. There is a big emotional difference between “I’m making a custom lamp” and “I’m deciphering electrical parts while holding a screwdriver in one hand and regret in the other.” A simple lamp kit removes a lot of that stress. It lets the project stay fun and approachable, especially for beginners who want the satisfaction of building something beautiful without turning it into an advanced wiring seminar.
Finishing the wood is another area where experience changes the outcome. Plenty of people assume the lamp will look great no matter what once the shade is on. Then they hold up a gorgeous linen shade next to a rough, unsanded leg and realize the lamp is giving “middle school shop class.” The projects that turn out best are usually the ones where the builder slows down, sands thoroughly, and tests stain or paint first. That extra effort makes the lamp look less handmade in the messy sense and more handmade in the boutique sense.
There is also a surprising amount of joy in choosing the shade. Some people start the project thinking the lamp base is the star, only to discover the shade controls the whole mood. Swap a white drum shade for a woven tan shade and suddenly the lamp goes from modern studio to cozy farmhouse retreat. It is one of the easiest style changes you can make in a room, and it makes the lamp feel personal.
In the end, the best experience of all is flipping the switch for the first time and seeing a dark corner become useful, warm, and finished. A DIY tripod lamp is not just another craft project. It is one of those rare builds that genuinely changes a room. And every time someone asks where you bought it, you get to enjoy the extremely satisfying answer: “I made it.”
Conclusion
Making an easy DIY tripod lamp is one of the best ways to create custom lighting without spending a fortune. With three well-cut legs, a sturdy top hub, a simple lamp kit, and the right shade, you can build a floor lamp that looks stylish, works hard, and fits your room better than a random store-bought option ever could.
Take your time with the measurements, keep the base stable, use a quality cord and socket kit, and finish the wood carefully. The result is a lamp that brings height, warmth, and personality into your space. Not bad for a weekend project and a few pieces of wood.