
Table of Contents >> Show >> Hide
- What Is an Embroidery Hoop Sun Catcher, Anyway?
- Why Hometalk-Style DIYers Love Hoop Sun Catchers
- Supplies You’ll Need for a Classic Embroidery Hoop Sun Catcher
- Step-by-Step: How to Make an Embroidery Hoop Sun Catcher
- Design Ideas to Inspire Your Next Hoop Sun Catcher
- Tips, Tricks, and Troubleshooting
- How to Style Your Embroidery Hoop Sun Catcher at Home
- Real-Life “Hometalk Style” Experiences with Embroidery Hoop Sun Catchers
If you’ve ever stared at a plain, boring window and thought, “You could be so much more,” an embroidery hoop sun catcher is your new best friend.
This simple DIY turns humble craft supplies into glowing “stained glass” art that looks like something you’d see in a boutique shop, not on your kitchen table.
Hometalk-style crafters love this project because it’s affordable, customizable, and almost impossible to mess up.
Whether you’re using pressed flowers, tissue paper, contact paper, or even chicken wire and beads, embroidery hoop sun catchers are a fun way to catch the light and add personality to your home.
What Is an Embroidery Hoop Sun Catcher, Anyway?
Traditionally, an embroidery hoop is a simple frame that holds fabric taut so you can embroider more easily.
But in the DIY world, that wooden circle becomes the perfect frame for all kinds of see-through art.
When you stretch clear or translucent material inside the hoop and decorate it with color, you’ve basically created a mini window that lets sunlight do the magic.
An embroidery hoop sun catcher is usually:
- A wood or plastic embroidery hoop (any size you like)
- Some kind of transparent or translucent layer (cellophane, contact paper, wax paper, clear plastic)
- Color or texture on top (tissue paper, pressed flowers, beads, alcohol inks, sequins, etc.)
When the sun hits it, colors glow, edges sparkle, and your window suddenly looks like a happy little art gallery.
Why Hometalk-Style DIYers Love Hoop Sun Catchers
1. They’re Budget-Friendly
Most of the materials can be found in your stash already: that extra embroidery hoop from an abandoned cross-stitch, leftover tissue paper from gift bags,
or flowers you dried because they were too pretty to toss. Crafters often use wax paper or contact paper instead of fancy glass, which keeps things inexpensive
and family-friendly.
2. They’re Beginner-Friendly and Kid-Approved
Many sun catcher tutorials are designed for kids: think tissue paper squares, contact paper, and simple shapes.
That means the basic technique is easy enough for total beginners, but still fun to customize for experienced makers.
3. They’re Incredibly Versatile
One embroidery hoop sun catcher might be a soft botanical design with pressed flowers, another might be bright tissue paper “stained glass,”
and a third could be a glam beaded version using chicken wire and glass drops.
Same basic frame, completely different look.
Supplies You’ll Need for a Classic Embroidery Hoop Sun Catcher
There are lots of variations, but here’s a general supply list that works with the most popular styles (Hometalk-style tutorials often mix and match these):
- Embroidery hoop: 6–10 inches is a great starting size; wood hoops give a natural look.
- Transparent layer: clear contact paper, cellophane wrap, packing tape, or wax paper.
- Decorative elements:
- Pressed flowers and leaves
- Colored tissue paper or cellophane shapes
- Translucent beads or faux crystals
- Alcohol inks (for cellophane or plastic)
- Adhesive: hot glue gun, craft glue, or double-sided tape.
- Scissors or craft knife (for trimming the backing).
- Fishing line, ribbon, or twine for hanging.
You don’t need every item on this list. Pick one main “backing” (like contact paper) and one main decorative style (like pressed flowers or tissue paper), and you’re good.
Step-by-Step: How to Make an Embroidery Hoop Sun Catcher
Step 1: Separate and Prep the Hoop
Loosen the screw at the top of your embroidery hoop and separate the inner and outer rings.
You’ll be attaching your backing to one ring and then tightening the other over it like a sandwich.
If you want to paint or stain the hoop for extra color, now’s the time. A quick coat of acrylic paint, wood stain, or even metallic spray paint
instantly upgrades the DIY look into something more polished.
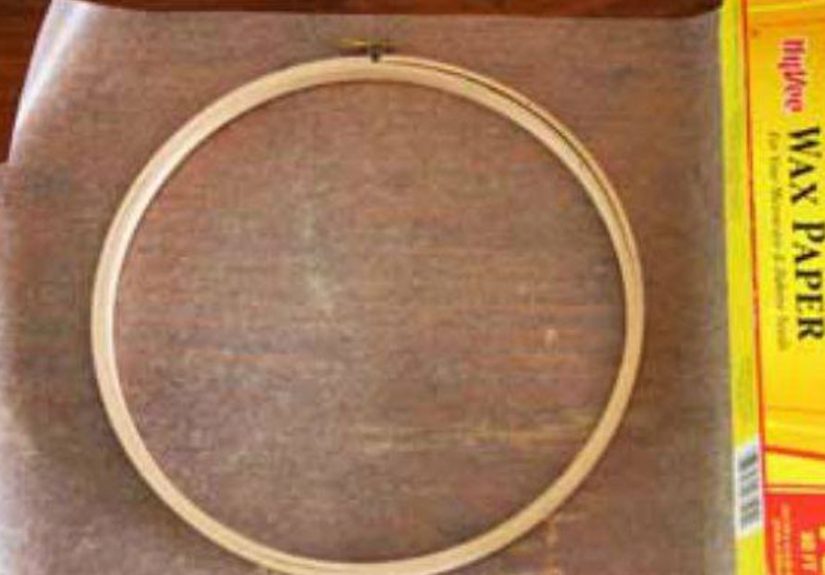
Step 2: Attach the Transparent Backing
Lay your backing material flat on your work surface. For a Hometalk-style project, contact paper, wax paper, or clear cellophane is very common.
- Place the inner hoop on top of the backing and cut a circle at least 1–2 inches larger than the hoop.
- If using contact paper, peel off the protective layer so the sticky side faces up.
- Press the hoop down onto the backing so it’s stretched tight and smooth.
- Trim off the excess around the outside edge.
Don’t worry if it’s not perfect. Once you clamp on the outer hoop, minor wrinkles magically vanish (or become “rustic charm”your choice).
Step 3: Add Color and Texture
Now the fun part: decorating. Here are three popular styles that show up again and again in DIY tutorials.
Option A: Pressed Flower Hoop
Pressed flower sun catchers are especially popular in spring and summer, and they look way more complicated than they are.
- Arrange dried, pressed flowers and leaves on the sticky contact paper (or coat wax paper lightly with clear-drying glue).
- Fill the hoop area with petals, stems, and leaves, leaving a bit of space so the light can shine through.
- When you like the design, place another layer of contact or wax paper over the top to “laminate” everything in place.
- Press out any air bubbles with your fingers or a clean cloth.
This style gives you a delicate botanical “window” that looks like something out of a cottagecore mood board.
Option B: Tissue Paper “Stained Glass”
If you’ve seen kids’ suncatchers online, this is usually the style: torn or cut pieces of tissue paper layered over a sticky backing.
- Cut or tear tissue paper into squares, triangles, or random shapes.
- Stick them directly onto the backing, slightly overlapping colors for pretty blends.
- Once the hoop area is covered, place another layer of contact paper or a light coat of glue and a thin backing sheet on top.
The end result: a low-cost “stained glass” look that glows when the sun hits it. Great for holidaystry hearts for Valentine’s Day or shamrocks for St. Patrick’s Day.
Option C: Beads, Crystal Drops & Chicken Wire
For a more dimensional look, some makers stretch chicken wire inside the hoop and attach glass beads or crystal drops to the wire openings.
- Staple or hot glue a small piece of chicken wire to the inner hoop frame.
- Use wire or fishing line to attach beads, crystals, or small charms to the wire squares.
- Vary the length and placement so some pieces hang lower and catch more light.
This style creates incredible sparkle on sunny days and looks especially magical outdoors on a porch, balcony, or in a garden.
Step 4: Close the Hoop and Trim the Edges
Once your artwork is in place:
- Fit the outer hoop over the inner hoop, lining up the screw at the top.
- Tighten the screw so everything is snug and taut.
- Trim any excess backing around the back for a neat finish.
Step 5: Add a Hanger and Display
Cut a length of twine, ribbon, or fishing line and tie it around the screw at the top of the hoop.
Hang your sun catcher in a sunny window, on a glass door, or outdoors in a protected area.
Pro tip: try different window angles throughout the day. Morning and late afternoon light can create completely different colors and shadows.
Design Ideas to Inspire Your Next Hoop Sun Catcher
Seasonal Themes
- Spring: pressed wildflowers, pastel tissue paper, and soft greens.
- Summer: bold tropical colors, sea glass-style beads, and shell accents.
- Fall: pressed leaves in gold and red, copper hoops, and warm-toned tissue.
- Winter: clear and blue cellophane, snowflake confetti, and crystal beads for an icy look.
Kids’ Crafts and Learning
Sun catchers are a favorite in kids’ craft blogs and homeschooling communities because they sneak in some science and fine-motor skill practice:
- Kids learn how light passes through translucent materials.
- They practice cutting, placing small pieces, and designing color patterns.
- They get the instant reward of seeing their art glowing in a window instead of just on paper.
Grown-Up & Gift-Worthy Designs
For a more elevated look, consider:
- Botanical arrangements with pressed ferns and tiny blossoms.
- Monochrome or ombré color palettes, like all blues or a sunset gradient.
- Layered hoops: a small hoop hanging inside a larger hoop for a mobile-style piece.
- Mixed media: combine tissue paper “glass” with a few well-placed crystals or charms.
Grouping three or five hoops in different sizes at slightly different heights makes a gorgeous display over a couch, bed, or reading nook.
Tips, Tricks, and Troubleshooting
Keeping the Backing Smooth
If your backing wrinkles or sags, try:
- Pulling the backing slightly taut as you tighten the hoop.
- Using a heavier contact paper or doubling up layers for more structure.
- Working in small sections instead of sticking the entire sheet at once.
Preventing Faded Colors
Direct sunlight is gorgeousbut it can fade some materials over time:
- Pressed flowers often fade more slowly if they’re fully sealed between two layers of plastic or paper.
- Alcohol inks on clear cellophane or plastic hold color well and give an intense stained-glass effect.
- If a hoop is a keepsake, consider placing it in a bright but indirect light spot to prolong the colors.
Safety Considerations
If you’re crafting with kids:
- Pre-cut shapes so they don’t have to handle sharp scissors or craft knives.
- Use white glue instead of hot glue, unless an adult is doing all the gluing.
- Avoid very small beads and sequins with toddlers who still taste-test everything.
How to Style Your Embroidery Hoop Sun Catcher at Home
Once you’ve made a few, the real challenge is deciding where to show them off:
- Kitchen windows: brighten up the space where you spend half your life washing dishes.
- Bathroom windows: add privacy and color with overlapping hoops in frosted colors.
- Nursery or kids’ rooms: soft colors and simple shapes for a calming, playful vibe.
- Porch or patio: hang bead-and-crystal versions where they can catch outdoor light and breezes.
You can even swap them out seasonallythink of them as jewelry for your windows.
Real-Life “Hometalk Style” Experiences with Embroidery Hoop Sun Catchers
One of the reasons an Embroidery Hoop Sun Catcher | Hometalk-style project is so appealing is the community feeling around it.
You can almost hear the comment threads: “I tried this with my kids!” “I used what I had on hand.” “My grandma’s flowers live on in my window now.”
Turning Leftovers into Light
Picture this: you open your craft drawer and it’s pure chaoshalf a pack of tissue paper, some random beads, an embroidery hoop you bought on sale because it “might be useful someday.”
An embroidery hoop sun catcher is exactly the project that pulls all those leftovers together.
Many DIYers describe starting with just one hoop “for the kitchen window” and suddenly realizing they’ve made a whole set.
It’s the kind of craft where once you understand the basic process, ideas just keep coming:
- That tiny sample of lace becomes a delicate border in one hoop.
- A few mismatched buttons become colorful “bubbles” floating across tissue paper.
- Old costume jewelry gets a second life as dangling sun-catching charms.
Family Projects and Memory Keepers
A lot of people use embroidery hoop sun catchers as a way to capture memories.
Think of pressed flowers from a wedding bouquet or petals from a favorite garden plant.
Instead of leaving them forgotten in a book, you can display them where you’ll see them every day.
One common story: grandparents crafting with grandkids using flowers from their garden.
The kids choose blooms, press them, and then return a week later to create a hoop sun catcher together.
Every time the light hits that window, the piece feels like a little frozen moment from that dayhands sticky with glue, kids proudly holding up their finished hoops,
and a grandparent quietly thrilled that their garden and their family are literally shining together.
Holiday and Party Decor on a Budget
Embroidery hoop sun catchers also show up in real homes as budget-friendly party decor.
For a birthday party, you can create a color themesay, pink and gold tissue paper or rainbow cellophane stripsand hang a cluster of hoops in a big front window.
They look especially striking in photos because the light glows through while guests stand in front.
After the party, the hoops don’t go to waste. They move to a kid’s room, a hallway window, or above a desk.
Instead of disposable decorations, you get something that can stay up for months or years and still feel special.
Small Spaces, Big Impact
If you’re in a small apartment or renting, you might not be able to paint the walls or install anything permanent.
A sun catcher is a low-commitment way to add color and personality without risking your deposit.
Because embroidery hoops are light and easy to hang with a suction cup hook or removable adhesive, they’re ideal for:
- Studio apartments where the window is the main focal point.
- Dorm rooms that need a quick, cheerful upgrade.
- Home offices, where one bright spot of color can make staring at a screen all day slightly more pleasant.
You can also layer several hoops in front of one window at different depths.
When the sun moves, their overlapping shadows and colors shift like a slow, quiet light show.
Relaxing, Low-Pressure Craft Time
Unlike some perfection-heavy crafts (looking at you, detailed painting and exact quilting), hoop sun catchers are wonderfully forgiving.
If a tissue paper piece wrinkles, it just adds texture. If a flower isn’t exactly centered, it still looks charming.
That makes it a stress-free evening projectsomething you can do while listening to a podcast or chatting with family.
Many makers describe this kind of craft as a reset button: you get to focus on small, colorful pieces and the simple act of arranging them.
When you’re done, the payoff is immediate. You hang it up, the sun shines through, and you can literally see the results glowing back at you.
Why This Project Belongs on Your Hometalk-Style To-Do List
If you love approachable DIYs that look way more impressive than they are, an embroidery hoop sun catcher is a perfect fit.
It checks all the boxes:
- Uses simple tools and easy-to-find materials
- Works for solo crafters, families, and groups
- Turns everyday light into something special
- Can be customized endlessly to match your style
Start with one hoop, experiment with flowers, tissue paper, or beads, and see how fast your windows start asking for more.
Just be warned: once you realize you can turn sunlight into art with a few scraps and a hoop, it’s hard to stop.


