
Table of Contents >> Show >> Hide
- Why Cleaning Reusable Straws Actually Matters
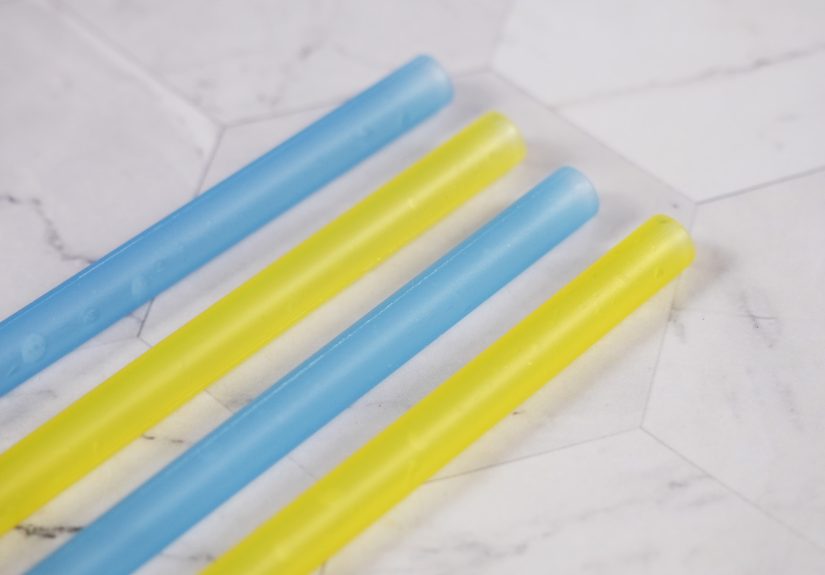
- Main Tools You’ll Want
- How to Clean Reusable Straws With a Straw Cleaner
- How to Clean Reusable Straws Without a Straw Cleaner
- How to Clean Reusable Straw Lids, Gaskets, and Mouthpieces
- Material-by-Material Cleaning Guide
- How Often Should You Clean Reusable Straws?
- Common Mistakes to Avoid
- Troubleshooting: Odor, Stains, and “What Is That?”
- Real-Life Experience Tips: What Actually Works Day to Day (500+ Words)
- Conclusion
Reusable straws are great for the planet, your iced coffee habit, and your “I brought my own cup” main-character energy. But let’s be honest: a reusable straw can go from eco-friendly hero to mystery science tube if it doesn’t get cleaned properly. The good news? Keeping reusable straws clean is easy, fast, and not nearly as dramatic as people make it sound.
In this guide, you’ll learn exactly how to clean reusable straws with a straw cleaner and without one, how to deal with odors and buildup, and how to clean different materials like stainless steel, silicone, glass, and bamboo. I’ll also share practical experience-based tips that make this routine much easier in real life (because “wash it immediately” sounds simple until you’re late for work and holding a smoothie).
Why Cleaning Reusable Straws Actually Matters
A reusable straw looks harmless, but it’s the perfect little tunnel for moisture, residue, and bacteria to hang out. If you use it for smoothies, protein shakes, iced coffee, or anything sweet, cleanup becomes even more important because sugars and oils cling to the inside walls. Even plain water bottles and straw lids can collect germs from your mouth, hands, and the tiny crevices in lids and valves.
Translation: if your straw smells weird, feels slimy, or has “something” inside that you choose not to identify, it’s time for a proper wash. A quick rinse helps, but a real clean (soap + scrubbing + drying) is what keeps reusable straws hygienic and pleasant to use.
Main Tools You’ll Want
Best-Case Setup
- Mild dish soap
- Warm water
- Straw cleaning brush (aka straw cleaner)
- Small drying rack or clean towel
- Optional: bottle brush for tumblers and lids
If You Don’t Have a Straw Cleaner
- Mild dish soap + warm water
- Dishwasher (if the straw is dishwasher-safe)
- A clean pipe cleaner or small soft brush
- String + a small knot of paper towel/cloth for a DIY pull-through clean
- Optional: white vinegar or baking soda for odors/buildup
Pro tip: the “best” cleaning setup is the one you’ll actually use. A tiny straw brush kept next to the sink beats a fancy cleaning kit buried in a drawer behind five takeout soy sauce packets.
How to Clean Reusable Straws With a Straw Cleaner
Method 1: Quick Daily Clean (The 60-Second Habit)
- Rinse right away. Run warm water through the straw as soon as you finish your drink, especially for smoothies or sweet drinks.
- Add soap. Put a drop of dish soap on the straw brush or into a bowl of warm, soapy water.
- Scrub the inside. Insert the straw cleaner and move it back and forth the full length of the straw.
- Scrub the outside. Yes, the outside gets gross tooespecially near the mouth end.
- Rinse thoroughly. Flush with warm water until there are no suds left.
- Dry completely. Stand the straw upright or lay it on a rack with airflow before storing.
That’s it. No chemistry set. No deep spiritual commitment. Just a quick scrub and dry.
Method 2: Deep Clean (For Odors, Residue, or “I Forgot for 3 Days” Situations)
- Soak first. Place the straw in warm, soapy water for 10–15 minutes.
- Brush thoroughly. Use the straw cleaner to scrub the inside several times.
- Clean any lids or attachments. If the straw goes into a tumbler lid, disassemble the lid and clean the slots, seals, and gaskets.
- Rinse and inspect. Hold the straw up to the light and check for residue.
- Air dry fully. Don’t store it while damp. Moisture trapped in drawers or travel cases is a fast track to funky smells.
Method 3: Dishwasher Clean (If Allowed)
Many metal and silicone straws are dishwasher-safe, but always check the product label or manufacturer instructions first. If they’re dishwasher-safe:
- Place straws in the cutlery basket or a small utensil holder so they don’t fall flat and block spray.
- Run a hot cycle.
- Let them dry completely before putting them away.
Dishwasher cleaning is especially useful if you’re cleaning multiple straws at once. It’s the lazy-smart method, and we respect that.
How to Clean Reusable Straws Without a Straw Cleaner
No straw brush? No problem. You can still clean reusable straws effectivelyyou just need to be a little more intentional.
Option 1: Dishwasher (Easiest No-Brush Method)
If your straw is dishwasher-safe, this is your best backup plan. Place it securely in a utensil basket, run a hot cycle, and let it dry fully. This works well for many stainless steel and silicone straws.
Option 2: Soak + Flush + Shake
- Fill a bowl or glass with warm water and dish soap.
- Soak the straw for 10–20 minutes.
- Cover one end with your finger, fill it with soapy water, then release and flush repeatedly.
- Rinse under strong warm running water from both ends.
- Dry fully before storing.
This won’t scrub as aggressively as a brush, but it’s surprisingly effective for straws used with water, iced tea, or other low-residue drinks.
Option 3: DIY Pull-Through Cleaning Trick
This one is a lifesaver when you’re missing a straw cleaner:
- Cut a piece of string longer than the straw.
- Tie a tiny piece of clean paper towel or soft cloth to one end (small enough to fit through the straw).
- Dip the cloth end in warm, soapy water.
- Pull it through the straw slowly.
- Repeat with a clean wet cloth, then once more with plain water.
- Let the straw air dry.
It’s basically flossing for your straw. Slightly ridiculous. Very effective.
Option 4: Vinegar Soak for Odors (Not a Replacement for Scrubbing)
If a straw smells funky, a vinegar soak can help loosen mineral residue and deodorize:
- Mix equal parts white vinegar and water.
- Soak the straw for a few hours or overnight.
- Rinse thoroughly with warm water.
- Wash again with dish soap if needed.
Important: vinegar is useful for cleaning and deodorizing, but it is not the same thing as disinfecting. Think of it as a cleanup helper, not a magic germ-erasing potion.
Option 5: Boiling Water (Silicone Only, and Only If Manufacturer Allows It)
Some silicone straws can handle boiling water for a short sanitizing step. This can be useful after illness or if a straw sat around too long. Always check the manufacturer’s instructions first. If approved:
- Boil water.
- Place the silicone straw in for a few minutes.
- Remove carefully and rinse.
- Air dry completely.
Do not assume all materials can be boiled. Bamboo, some plastics, and certain finishes may not appreciate your kitchen science experiment.
How to Clean Reusable Straw Lids, Gaskets, and Mouthpieces
Most people clean the straw and forget the lid. The lid is usually where the gross stuff wins. If your tumbler or bottle has a straw lid, flip-top, bite valve, or silicone gasket:
- Disassemble everything you can. Remove gaskets, seals, mouthpieces, and detachable straw parts.
- Wash all parts separately. Warm, soapy water is the baseline.
- Use a small brush for crevices. Residue loves grooves and threads.
- Rinse thoroughly. Soap trapped in seals can make the next drink taste like lemon detergent.
- Dry every part fully. Reassemble only when all pieces are completely dry.
This step matters more than people think. Many odor problems aren’t in the strawthey’re hiding in the gasket.
Material-by-Material Cleaning Guide
Stainless Steel Straws
- Usually easy to clean and durable.
- Great with a straw brush + hot soapy water.
- Many are dishwasher-safe, but verify your specific product.
- If odors or discoloration show up, a vinegar soak can help.
- Avoid harsh bleach/chlorine cleaners unless the manufacturer specifically allows them.
Silicone Straws
- Flexible and kid-friendly.
- Often dishwasher-safe.
- Can hold onto odors more than steel if not dried well.
- Use hot soapy water and scrub inside when possible.
- Some silicone straws can be boiled briefly (check brand guidance first).
Glass Straws
- Easy to inspect visually (huge advantage).
- Clean with warm soapy water and a soft straw brush.
- Handle carefully; chips or cracks mean it’s time to replace.
- Let dry fully before storing in a drawer or travel pouch.
Bamboo Straws
- Best cleaned by hand with warm soapy water.
- A straw brush is strongly recommended.
- Dishwasher use may shorten lifespan because heat and drying can age natural materials faster.
- Dry completely in an open area before storing.
How Often Should You Clean Reusable Straws?
Good Rule of Thumb
- After every use: Quick wash for the straw and mouthpiece
- Daily: If you use the same straw all day
- Weekly: Deep clean (especially lids, gaskets, and travel cases)
Clean More Often If You Use:
- Smoothies
- Protein shakes
- Sweet tea, juice, or soda
- Milk-based drinks
- Your straw while sick
Sugary and creamy drinks leave more residue, which means more buildup and faster odor. Water-only straws are lower-maintenance, but they still need regular cleaning.
Common Mistakes to Avoid
1) “I Rinsed It, So It’s Clean”
Rinsing is a good start, not a full clean. If there’s residue inside, you need soap and some friction (brush, pull-through cloth, or dishwasher).
2) Storing It While Damp
This is the number-one cause of weird smells. Drying is part of cleaning, not an optional bonus round.
3) Forgetting the Lid and Gasket
If your tumbler still smells after cleaning the straw, the lid is usually the culprit. Disassemble and clean every hidden nook.
4) Using Harsh Cleaners on the Wrong Material
Natural materials (like bamboo) and coated drinkware can wear out faster if cleaned too aggressively. Follow the manufacturer’s care notes.
5) Waiting Too Long to Deep Clean
A weekly deep clean is much easier than trying to rescue a straw that smells like old smoothie and regret.
Troubleshooting: Odor, Stains, and “What Is That?”
If It Smells Bad
- Wash with hot soapy water.
- Soak in a vinegar-and-water mix.
- Rinse thoroughly.
- Dry completely before storing.
If It Still Smells Bad
- Clean the lid, gasket, and mouthpiece (seriously, this is usually the issue).
- Check for trapped moisture in the storage case.
- Inspect for residue in bends or flexible sections.
- Replace the straw if it’s cracked, damaged, or permanently funky.
If You See Mold
Stop using it immediately. Disassemble everything, clean thoroughly, and sanitize only in ways the manufacturer allows. If mold is deep in a damaged part, replacement is the safest move. Reusable straws are affordable enough that this is not the place to be heroic.
Real-Life Experience Tips: What Actually Works Day to Day (500+ Words)
Here’s the part most cleaning guides skip: the difference between a reusable straw you love and one that ends up abandoned in a kitchen drawer is rarely the straw itself. It’s the cleaning routine. In everyday life, people usually fail at reusable straw maintenance for one of three reasons: they don’t clean it right away, they lose the straw brush, or they clean the straw but ignore the lid. If that sounds familiar, welcome to the club.
A very practical habit is to create a “post-drink rinse rule.” The moment you finish a smoothie, iced coffee, or protein shake, rinse the straw before you even sit down. This one tiny habit saves so much scrubbing later. Thick drinks dry fast and turn into sticky residue, which is why a straw used for a green smoothie at 8 a.m. somehow feels like concrete by lunch. People who say reusable straws are “hard to clean” are usually describing delayed cleaning, not actual cleaning.
Another big lesson: keep a backup straw brush. Not one. Two. Maybe three. One by the sink, one in the dishwasher utensil bin, and one in a travel pouch. Straw cleaners are small and mysteriously disappear with the same energy as hair ties and charging cables. A backup brush turns “I can’t find it” into “problem solved in 30 seconds.”
For families, a simple system works best: assign colors or materials. For example, adults use stainless steel, kids use silicone. That makes it easier to know which straws can go in the dishwasher, which ones need gentler cleaning, and whose straw is whose. It also reduces the odd household debate of, “Wait, was this mine or the one from yesterday’s chocolate milk?”
If you use a tumbler with a straw lid every day, the lid needs scheduled attention. A lot of people scrub the straw and feel done, but the smell usually lives in the gasket or mouthpiece. A good routine is a quick daily wash for the straw and a “Sunday reset” for the lid: disassemble, scrub all parts, rinse, and let everything air dry overnight. It takes maybe 10 minutes, but it prevents the dreaded mystery odor on Monday morning.
Travel cases are another sneaky issue. A clean straw placed into a damp case can come out smelling stale. The fix is simple: let the straw dry completely before it goes into a pouch, and wash the pouch itself once in a while. People often assume the case is “just storage,” but it can trap moisture and become part of the problem.
For office use, the easiest approach is to keep one reusable straw at work and one at home instead of carrying the same one back and forth. At work, rinse it immediately after use and stand it in a mug to air dry. At home, do a proper clean in the evening. This removes the hassle factor, which is usually what breaks good habits.
Finally, don’t overcomplicate it. You do not need a seven-step sanitizing ritual after every sip of water. For most people, warm soapy water, a good scrub, and thorough drying are enough for routine care. Use deeper cleaning when there’s odor, visible residue, or you’ve been sick. The goal is consistency, not perfection. A reusable straw that gets cleaned regularly is better than one fancy straw that gets “special treatment” once a month and spends the rest of its life fermenting in a cup holder.
The real win is making the routine easy enough that it happens automatically. Once it becomes part of your normal kitchen flow, reusable straw cleaning stops feeling like a chore and starts feeling like brushing your teeth: basic, quick, and absolutely worth doing.
Conclusion
Cleaning reusable straws is simple once you know the system: wash with warm soapy water, scrub the inside when possible, clean the lid and gaskets, and let everything dry completely. If you don’t have a straw cleaner, a dishwasher-safe cycle, a soak-and-flush method, or a DIY pull-through cloth trick can still get the job done. Match your cleaning method to the straw material, follow manufacturer instructions, and deep clean when odors or buildup show up.
In short: reusable straws are absolutely worth itjust don’t treat them like they clean themselves while you sleep. (If you invent that version, call me.)


