
Table of Contents >> Show >> Hide
- Before You Paint: The “Make It Last” Game Plan
- 1) Color-Blocked Dresser: Instant “Designer Collab” Energy
- 2) Two-Tone Frame + Drawers: Classic, Clean, Always Works
- 3) Dipped Legs: The Furniture Version of a French Tip
- 4) Ombre Fade: A Soft Gradient That Looks Way Harder Than It Is
- 5) Striped Drawer Fronts: Tailored, Graphic, and Timeless
- 6) Checkerboard Tabletop: Playful, Retro, and Surprisingly Chic
- 7) Stenciled “Wallpaper” Drawers: Pattern Without the Commitment
- 8) Painted Cabinet Interiors: A Hidden Pop That Feels Custom
- 9) Half-Painted “Color Dip” Body: Modern Art, but Make It Furniture
- 10) Faux Woodgrain (Faux Bois): For When You Want Texture Without the Tree Drama
- 11) Milk Paint “Chippy” Distress: Cottagecore’s Favorite Shortcut
- 12) Matte Black Makeover: Instant Modern (and It Hides a Lot of Sins)
- 13) High-Gloss “Lacquer Look”: Shiny, Bold, and Worth the Patience
- 14) Painted Hardware (Yes, Really): Budget-Friendly Transformation
- 15) Patterned Drawer “Frames”: A Small Detail With Big Impact
- 16) Painted Upholstery Accent: For Brave Souls and Fun Chairs
- Finishing Touches That Make Painted Furniture Look “Done”
- Real-World DIY Experiences: What People Learn After Painting Furniture
- Conclusion
Painting furniture is the closest thing adults have to a “character creator” screen. That thrift-store dresser? It can be a sleek, modern showpiece. That
tired end table? With the right paint job, it suddenly looks like it has a skincare routine and a passport.
The best part: you don’t need a full workshop, a reality TV contract, or a mysterious European accent. You need a plan, a little prep, and one key mindset:
thin coats win. This guide pulls together the most reliable, tried-and-true tips from reputable U.S. home and paint expertsthen turns them
into 16 painted furniture ideas you can actually pull off (even if your last DIY ended with you Googling “how to remove paint from eyebrows”).
Before You Paint: The “Make It Last” Game Plan
Great painted furniture isn’t magicit’s adhesion. Paint likes clean, lightly scuffed surfaces, the right primer, and enough dry time to cure into a tough
finish. Here’s the quick roadmap.
1) Pick the right paint for the job
- Furniture/cabinet enamels (water-based alkyd or acrylic enamel) are durable and level nicely for a smoother look.
- Chalk-style paint is forgiving and matte, great for vintage or relaxed stylesusually needs a sealer or wax for durability.
- Milk paint is ideal for a naturally distressed, “chippy” lookalso benefits from sealing on high-use pieces.
- Spray paint is fast and smooth on smaller items, spindles, and metalbest in multiple light coats.
2) Prep like a pro (your future self will send a thank-you note)
- Remove hardware (or tape it off like you mean it).
- Clean thoroughlyfurniture collects oils and mystery grime that paint hates.
- Scuff sand glossy finishes so primer can grip (often 100–150 grit to start; finer for between coats).
- Prime when needed: slick surfaces, big color changes, stains, knots, or laminate.
- Paint in thin coats, sanding lightly between coats if you want an extra-smooth finish.
- Seal for heavy-use pieces (tables, desks, kid furniture). Give it time to cure before “real life” happens.
3) Safety note (quick but important)
If you’re sanding or scraping older paint on vintage pieces from a pre-1978 home (or you’re working inside a pre-1978 home), lead dust can be a real risk.
Use wet methods when possible, contain dust, wear proper protection, and consider lead-safe practices when you’re unsure.
1) Color-Blocked Dresser: Instant “Designer Collab” Energy
Color blocking is bold, modern, and surprisingly forgiving. Use painter’s tape to create big geometric sections across drawer frontsthink two or three
colors max for a clean look.
How to do it
- Paint the base color first and let it dry fully.
- Tape off shapes, burnish tape edges, then apply accent colors in thin coats.
- Peel tape back slowly at an angle for crisp lines.
Pro tip: Slightly “seal” tape edges with the base color before the accent coat to reduce bleed.
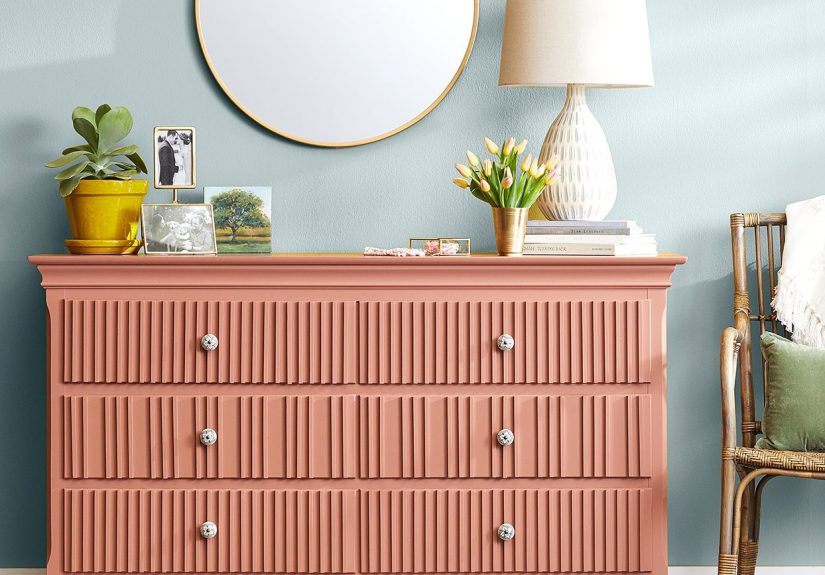
2) Two-Tone Frame + Drawers: Classic, Clean, Always Works
Paint the dresser frame one color and the drawers anotheran easy way to make a builder-basic piece look intentional. Try creamy white + warm wood tones,
navy + brass hardware, or sage + light gray.
Pro tip: Swap hardware at the endnew pulls can make a $40 dresser look like a $400 “boutique find.”
3) Dipped Legs: The Furniture Version of a French Tip
Dipped legs look playful and modernperfect on stools, side tables, chairs, and nightstands. Paint the piece one color, then “dip” the bottom third of each
leg in a second color.
How to do it
- Measure and mark an even height around each leg.
- Tape a crisp line, then paint the dipped portion.
Pro tip: Metallic dipped legs (gold, brass, copper) add glam without feeling like a disco ball.
4) Ombre Fade: A Soft Gradient That Looks Way Harder Than It Is
Ombre works beautifully on drawer stacks (light at top, deeper at bottom) or on chair backs. Use 3–5 shades in the same color family and blend while the
paint is still workable.
How to do it
- Paint each section its color, then feather edges with a slightly damp brush (or a dry brush for chalk-style paint).
- Work quickly in thin layers instead of one heavy “blend-a-thon.”
Pro tip: The gradient looks best when the piece has repeated sectionsdrawers, slats, spindles, or panels.
5) Striped Drawer Fronts: Tailored, Graphic, and Timeless
Stripes can feel coastal, preppy, modern, or vintage depending on color. Try thin pinstripes for subtle style, or chunky stripes for a statement.
How to do it
- Paint the base coat, dry fully, then tape stripes with consistent spacing.
- Apply stripe color in thin coats and remove tape before it fully hardens.
Pro tip: Use a small foam roller over taped sections for a smoother stripe finish.
6) Checkerboard Tabletop: Playful, Retro, and Surprisingly Chic
Checkerboard works on coffee tables, side tables, and tray tops. Keep it neutral (cream + tan) for a grown-up vibe, or go bold (black + white) for graphic
punch.
Pro tip: Finish with a durable clear topcoattabletops get the most abuse from mugs, keys, and the laws of physics.
7) Stenciled “Wallpaper” Drawers: Pattern Without the Commitment
Use a stencil to create a repeating design across drawer frontsdamask, geometric tile, or modern scallops. It’s the easiest way to add pattern without
learning to freehand like a Renaissance painter.
How to do it
- Paint the base color and let dry.
- Use minimal paint on your stencil brush (dab off excess) to prevent bleeding.
Pro tip: Metallic stencil paint over a matte base looks expensive-fast.
8) Painted Cabinet Interiors: A Hidden Pop That Feels Custom
Keep the outside neutral, then paint the interior (or the back panel) a surprise coloremerald, sunflower yellow, or soft blush. It’s a “peekaboo” detail
that makes built-ins and hutches feel bespoke.
Pro tip: This is also a great way to test bold colors without committing to painting the whole piece.
9) Half-Painted “Color Dip” Body: Modern Art, but Make It Furniture
Paint only the bottom half (or top third) of a dresser or console, leaving the rest in a neutral. It’s clean, trendy, and makes chunky pieces feel lighter.
Pro tip: A slightly wavy “hand-drawn” line can look artsy; a crisp taped line looks modern.
10) Faux Woodgrain (Faux Bois): For When You Want Texture Without the Tree Drama
Faux bois uses a wood-graining tool (or a stiff brush) to mimic woodgrain over paint. It’s perfect for bland flat surfaces and looks great in earthy tones.
How to do it
- Apply a base coat, then a thin glaze/tinted top layer.
- Drag the graining tool through the wet glaze to create a natural pattern.
Pro tip: Practice on cardboard firstyour first attempt should not be on Grandma’s buffet.
11) Milk Paint “Chippy” Distress: Cottagecore’s Favorite Shortcut
If you love authentically distressed furniture, milk paint is famous for a naturally worn, chippy lookespecially on older pieces. Seal it when you’re done
so the charm doesn’t become “flakes in your socks.”
Pro tip: Use it on accent pieces (frames, small cabinets, benches) if you’re newdistress is easier to love in smaller doses.
12) Matte Black Makeover: Instant Modern (and It Hides a Lot of Sins)
Matte black makes almost anything feel intentional: nightstands, bookcases, chairs, console tables. It’s dramatic without being loudand it pairs with every
metal finish.
Pro tip: A smooth matte finish depends on prep and leveling paint. Sand lightly between coats for a cleaner look.
13) High-Gloss “Lacquer Look”: Shiny, Bold, and Worth the Patience
High gloss is the “sports car” of painted furniturestunning, but it shows every bump. This works best with thorough prep, a leveling enamel, and careful
sanding between coats.
Pro tip: Let it cure fully before stacking décor on top. Glossy finishes scratch easily when they’re still curing.
14) Painted Hardware (Yes, Really): Budget-Friendly Transformation
If new hardware isn’t in the budget, paint existing knobs and pulls. Matte black, soft brass, or even the same color as the piece can look modern and
cohesive.
How to do it
- Remove hardware, clean it, scuff sand lightly, then use a primer made for metal if needed.
- Finish with a clear protective coat for durability.
15) Patterned Drawer “Frames”: A Small Detail With Big Impact
Paint the dresser one color, then add a thin painted border around each drawer front (like a picture frame). It’s subtle, sophisticated, and gives even
plain furniture a tailored look.
Pro tip: Use a small angled brush and painter’s tape for crisp edges, especially if your hands get “artistic” under pressure.
16) Painted Upholstery Accent: For Brave Souls and Fun Chairs
This is more niche, but it’s a clever style boost: using fabric paint (or paint mixed with fabric medium) to add a pattern to upholstered chair seats or a
padded bench. Think stripes, simple geometrics, or a stencil motif.
How to do it
- Vacuum the fabric, test in an inconspicuous spot, and tape off clean lines.
- Use thin layers and let it dry completely between passes.
Pro tip: This works best on tightly woven fabrics and low-wear accent seating.
Finishing Touches That Make Painted Furniture Look “Done”
Seal smart
For heavy-use pieces, a clear topcoat is your best friend. Many finishes recommend multiple coats for durability, plus light sanding between coats for a
smoother feel. Be patient with cure timepaint and topcoats can feel dry long before they’re truly tough.
Respect the cure (aka: don’t put a plant on it immediately)
Dry-to-touch isn’t the same as fully cured. Water-based finishes can take weeks to reach full hardness, while oil-based products can take even longer. Treat
fresh pieces gently at firstno dragging décor, no sticky bumpers, no “just one quick wipe with a chemical cleaner.”
Upgrade the “extras”
- Hardware: new pulls can change the whole personality.
- Feet/legs: add tapered legs to mid-century-ize almost anything.
- Liners: wallpaper or patterned paper inside drawers is an easy wow factor.
Real-World DIY Experiences: What People Learn After Painting Furniture
Most first-time furniture painters start with a powerful belief: “It’s just paint.” And honestly, that confidence is adorablelike a golden retriever
convinced it can drive a car. The experience usually goes something like this: you pick a piece that looks simple, then discover it has 47 grooves, 12
spindles, and hardware installed by someone who apparently hated future generations.
The first big lesson is that cleaning isn’t optional. DIYers often report that the “weird sticky spots” they ignored become the exact areas
where paint fisheyes, peels, or looks patchy. Furniture lives a hard lifehands, oils, furniture polish, cooking residue, and that one mystery spill from
2014. When people take time to clean and scuff sand, their finish looks smoother and holds up longer. When they skip it, they get an unplanned “distressed”
look (and not the cute kind).
The second lesson: primer is not a personal insult. A lot of DIYers want to avoid primer because it feels like extra work, but primer is
basically the translator between your furniture and your paint. It helps paint stick to slick surfaces (like laminate) and blocks stains or tannins that can
bleed through lighter colors. Many people learn this the hard way after their crisp white turns faintly yellow in blotcheslike the furniture is blushing
from embarrassment.
Next comes the “thin coats” revelation. Beginners often apply paint the way you’d frost a cupcake: generously, confidently, and with enthusiasm. But thick
coats take longer to dry, show brush marks, and can wrinkle or chip more easily. DIYers who switch to thin, even coatsespecially with light sanding between
coatsusually see their finish level out and look more professional. It’s not as instantly satisfying, but it’s the difference between “handmade” and “made
with care.”
Then there’s the hardest lesson of all: dry time is not cure time. People touch the surface, think “dry,” and immediately put everything
back on it. A week later, they discover a perfect ring where a decorative bowl satlike the furniture got a tattoo without consent. Experienced DIYers learn
to treat fresh paint gently for days (sometimes weeks) so the finish can fully harden. That patience pays off with fewer scratches, fewer dents, and fewer
dramatic sighs in your kitchen at midnight.
Finally, the fun part: most DIYers say the biggest “aha” is that painted furniture is where personality lives. Once you finish one piece,
you start seeing possibilities everywhere: a dip-dyed stool, a color-blocked nightstand, a stenciled dresser, a bold interior cabinet pop. Suddenly you’re
not just decoratingyou’re editing your space like it’s a magazine spread. And yes, you will start using sentences like, “It needed more contrast.”
Congratulations. You’re one project away from having a favorite type of brush.
Conclusion
Painted furniture is one of the fastest ways to upgrade your home’s style without upgrading your rent. Whether you go bold with color blocking, classic with
two-tone, or artsy with stencils and ombre, the secret is the same: prep well, paint in thin coats, and let it cure like you’re raising a tiny baby finish
into a strong adult finish. Pick one idea from this list, start with a smaller piece, and give your space a DIY style boost that looks custombecause it is.


