
Table of Contents >> Show >> Hide
- Before You Start: 5 Rules That Make Cleanup Safer
- Method 1: Use Dish Soap and Warm Water for Fresh Spills
- Method 2: Try Rubbing Alcohol for Stubborn Color
- Method 3: Use Nail Polish Remover Sparingly on Tough Spots
- Method 4: Freeze and Gently Scrape Dried Globs
- Which Method Should You Try First?
- Floor-by-Floor Advice
- Common Mistakes to Avoid
- What If the Stain Will Not Budge?
- Real-World Experiences: What People Learn the Hard Way
- Final Thoughts
Spilling nail polish on the floor has a special talent for happening at the worst possible moment. Usually it strikes when you are already in a weird yoga pose, one foot is wet, the other foot is negotiating with gravity, and the bottle performs a dramatic swan dive onto the floor. Then comes the panic: Do I wipe it? Scrub it? Cry softly into a paper towel?
Good news: in many cases, you can remove nail polish from the floor without turning your living room into a chemistry experiment. The trick is choosing the right method for the type of floor you have and resisting the urge to attack the spill like it personally insulted you. Some floors can handle a little rubbing alcohol or nail polish remover. Others, especially hardwood and laminate, need a gentler touch and far less moisture.
In this guide, you will learn four simple ways to remove nail polish from the floor, how to decide which method to try first, and which mistakes can make a small beauty blunder turn into a flooring nightmare. Whether the spill is fresh, dry, smeared, or stubborn enough to deserve its own villain soundtrack, these steps can help.
Before You Start: 5 Rules That Make Cleanup Safer
Before diving into the four methods, slow down for 30 seconds and do these basics. They make a big difference.
1. Figure out what kind of floor you have
Tile and porcelain are usually the easiest to clean. Vinyl and laminate can often handle light spot treatment, but not heavy scrubbing. Hardwood is the pickiest because too much moisture or harsh solvent can dull or damage the finish. Natural stone, such as marble or travertine, is even fussier and may need a stone-safe cleaner instead of DIY solvent tricks.
2. Blot, do not smear
If the polish is still wet, gently blot with a paper towel or clean cloth. Do not rub in circles like you are buffing a car hood. That only spreads the stain and pushes pigment farther into seams, grout lines, or textured surfaces.
3. Use a white cloth if possible
A colored rag can transfer dye while you clean. It is a terrible time to discover that your “cute cleaning towel” also bleeds magenta.
4. Test first in a hidden spot
Whether you use dish soap, rubbing alcohol, or nail polish remover, dab a tiny amount in a closet corner or behind a piece of furniture first. If the finish dulls, gets sticky, or changes color, stop and switch methods.
5. Open a window
If you use rubbing alcohol or nail polish remover, ventilation matters. Gloves are smart too, especially if you have sensitive skin.
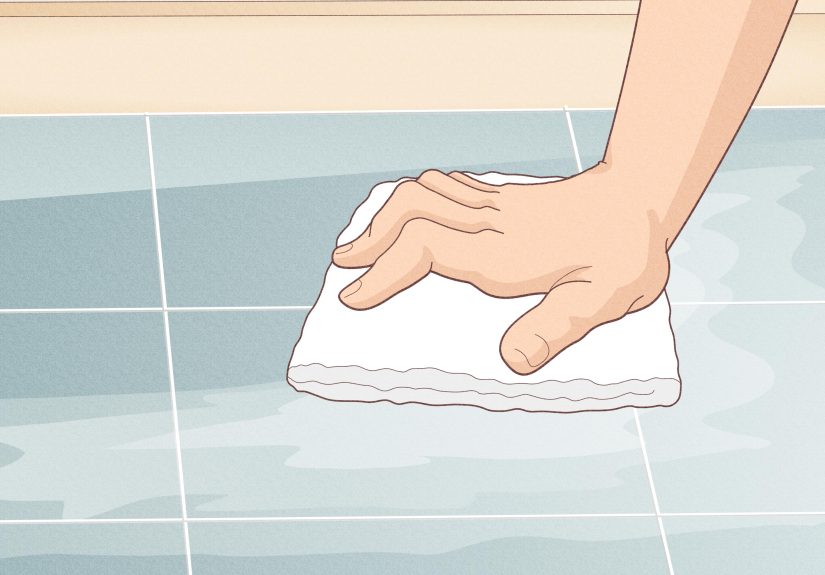
Method 1: Use Dish Soap and Warm Water for Fresh Spills
If the nail polish has not fully dried, this is the best place to start. It is the gentlest option and often enough for a small spill on sealed tile, vinyl, or a floor finish that has not absorbed much pigment yet.
What you need
- Paper towels or a soft cloth
- Warm water
- A few drops of dish soap
- A clean microfiber cloth
How to do it
- Blot up as much wet polish as possible with a dry paper towel.
- Mix a small bowl of warm water with a few drops of dish soap.
- Dampen a microfiber cloth with the solution. The cloth should be damp, not dripping.
- Blot the stained area gently, working from the outside toward the center.
- Wipe again with a clean cloth dampened with plain water.
- Dry the spot thoroughly.
This method works best when you catch the spill quickly. It is especially helpful on floors where you do not want to introduce stronger solvents right away. On hardwood or laminate, keep water to an absolute minimum and dry the area immediately. Think “lightly damp” rather than “mini indoor flood.”
Best for: fresh spills on tile, sealed vinyl, and cautious first-pass cleanup on laminate or finished wood.
Method 2: Try Rubbing Alcohol for Stubborn Color
If dish soap removes the goo but leaves behind color, rubbing alcohol is a strong next step. It is often gentler than acetone-based remover and can help lift leftover pigment without being quite so aggressive.
What you need
- Isopropyl rubbing alcohol
- Cotton balls or a soft white cloth
- Microfiber cloth
- Plain water
How to do it
- Put a small amount of rubbing alcohol on a cloth or cotton ball. Do not pour it directly onto the floor.
- Dab the stained area gently.
- As the color transfers, switch to a clean section of the cloth so you do not redeposit the polish.
- Once the stain lightens, wipe the area with a damp cloth to remove residue.
- Dry the floor completely.
Rubbing alcohol is a smart “middle lane” option: stronger than soap, milder than full-on nail polish remover. It is often a good choice for laminate, engineered wood, and some vinyl surfaces when used sparingly. The key word here is sparingly. You are spot-cleaning, not marinating the floor.
Best for: leftover tint, smudges, and small dried spots on laminate, vinyl, and some finished wood floors after patch testing.
Method 3: Use Nail Polish Remover Sparingly on Tough Spots
This is the method most people think of first, and yes, it can work. But it should not always be your first move. Nail polish remover, especially acetone-based remover, can be very effective on stubborn polish. It can also dull or damage certain floor finishes if you get too enthusiastic. In other words, it is helpful, but it is not a permission slip to scrub like a maniac.
What you need
- Non-acetone or acetone nail polish remover
- Cotton swabs or a white cloth
- Plain water
- Dry microfiber cloth
How to do it
- Test the remover in an out-of-sight spot first.
- Apply a tiny amount to a cotton swab or cloth.
- Dab directly on the stain. Let it sit for a few seconds, not several minutes.
- Wipe gently until the polish lifts.
- Follow up right away with a lightly damp cloth to remove any residue.
- Dry the area completely.
For many tile and resilient floors, this method can be the hero of the story. On laminate, it can also work in very small amounts. On hardwood, proceed with extra caution. If your wood floor has a delicate or aging finish, even a little remover may leave a dull patch. When in doubt, try rubbing alcohol first and reserve nail polish remover for the tiniest possible spot treatment.
Also note that not all vinyl floors play by the same rules. Some manufacturers say a little acetone can lift stubborn stains, while others warn against harsh chemicals on luxury vinyl. That means patch testing is not optional. It is the difference between “problem solved” and “why does this plank now look tired?”
Best for: stubborn dried nail polish on tile, some laminate, and some vinyl after careful testing.
Method 4: Freeze and Gently Scrape Dried Globs
When nail polish dries into a raised blob, a scraper-first approach can be smarter than immediately reaching for liquid cleaner. The goal is to remove the bulk without grinding pigment deeper into the surface.
What you need
- A bag of ice or an ice pack
- A plastic scraper, old gift card, or credit card
- Dish soap solution, rubbing alcohol, or a tiny amount of remover for the residue
- Soft cloth
How to do it
- Place ice over the dried blob for a few minutes to harden it.
- Use a plastic card or scraper to gently lift the raised polish.
- Do not use a metal blade unless you enjoy creating brand-new floor problems.
- Once the thick layer is gone, treat any remaining stain with Method 1, 2, or 3 depending on your floor type.
- Wipe clean and dry the area well.
This method is especially useful for laminate and wood-look floors because it reduces the need for soaking the area with liquid. It also helps on tile where the polish has pooled and hardened into a tiny glossy mountain of regret.
Best for: dried blobs, raised drips, and polish that hardened before you noticed it.
Which Method Should You Try First?
If you want the quick version, here is the safest order:
- Fresh spill? Start with dish soap and warm water.
- Color remains? Move to rubbing alcohol.
- Dried, stubborn stain? Try freeze-and-scrape first.
- Still there? Use a tiny amount of nail polish remover after spot testing.
This gentle-to-strong progression lowers the odds of damaging the finish while still giving you a solid chance of removing the stain.
Floor-by-Floor Advice
Hardwood floors
Use the least moisture possible. Start with gentle blotting and mild soap, then try rubbing alcohol if needed. Be very cautious with nail polish remover because it can dull the finish. Always dry immediately.
Laminate floors
Laminate usually hates standing water, steam, and rough scrubbing. A damp cloth, rubbing alcohol, or a tiny amount of remover on a cloth can help with spot cleanup, but always wipe dry right away.
Vinyl or luxury vinyl plank
Many homeowners have success with mild soap first and a tiny amount of remover for stubborn polish. Still, check the manufacturer’s care recommendations if you have them. Some luxury vinyl products are less thrilled about harsh chemicals than others.
Tile and porcelain
These are generally the easiest. Soap, alcohol, or carefully used remover often works well. If color lingers in grout, a more specialized grout-safe cleaner may be needed.
Natural stone
Proceed carefully. Stone can react poorly to the wrong cleaner, and polished surfaces can etch or dull. A stone-safe product or professional help may be the smarter move for a large spill.
Common Mistakes to Avoid
- Scrubbing too hard: this spreads the stain and can scratch the finish.
- Pouring solvent directly on the floor: always apply it to a cloth or swab first.
- Using a metal scraper: one slip and you have traded a stain for a gouge.
- Leaving moisture behind: wood and laminate do not appreciate puddles.
- Skipping the patch test: even “safe” cleaners are not universal.
What If the Stain Will Not Budge?
If you have tried the mild methods and the spot still remains, pause before escalating into random internet potion mixing. A stubborn stain may be less about the polish itself and more about how the floor finish reacted to it. On hardwood, the polish may have affected the finish rather than simply sitting on top of it. On grout or textured tile, pigment may have settled into tiny pores. In those cases, a flooring-safe specialty cleaner or professional advice may save you from making the area worse.
And if the stain is tiny but the finish looks dull, you may not need more cleaning. You may need a touch-up product designed for that flooring type. Different problem, different solution, same irritating bottle of nail polish.
Real-World Experiences: What People Learn the Hard Way
Anyone who has ever done an at-home manicure without a proper table has probably lived some version of this story: you set the bottle down “just for a second,” reach for the top coat, and suddenly a stripe of deep berry polish is racing across the floor like it pays rent there. The first lesson people usually learn is that speed matters, but panic does not help. The people who save their floors are not always the fastest. They are the ones who blot instead of smearing, stop to identify the surface, and use the gentlest method before escalating.
A common experience on laminate floors is that the polish seems to disappear at first, then reappears as a faint pink or red haze after the area dries. That is usually the leftover pigment talking. Homeowners often think the first cleanup “didn’t work,” when in reality the soap-and-water pass removed the wet layer and exposed what still needed spot treatment. That is where rubbing alcohol often earns its applause. It is not flashy, but it can quietly rescue the situation without the drama that acetone sometimes brings.
Hardwood floor experiences tend to be the most nerve-racking. People are often surprised to find that the biggest danger is not only the stain itself, but overcleaning. In the rush to get polish off the floor, they scrub too aggressively or use too much liquid, and the finish ends up looking cloudy. The real takeaway from those stories is simple: hardwood likes restraint. A soft cloth, minimal moisture, and a patient approach usually beat brute force.
Vinyl floor mishaps tell a slightly different story. Many people report success with a tiny amount of nail polish remover, especially on sealed surfaces where the spill sat on top instead of sinking in. But the important word is tiny. The folks who run into trouble are usually the ones who soak a rag, rub too long, or assume every vinyl floor is built exactly the same. One luxury vinyl plank may shrug off a small solvent spot-cleaning, while another may lose a bit of shine. Patch testing sounds boring until it saves your floor finish, and then suddenly it feels brilliant.
Tile owners often have the least dramatic cleanup, which is probably why tile gets to act smug in these conversations. If the surface is smooth and sealed, polish often lifts with basic cleanup plus a little targeted solvent for the stain. The frustrating part is usually grout. Once color settles into those porous lines, the cleanup gets less glamorous. People often discover that the tile itself looks perfect while the grout keeps a faint reminder of their “quick five-minute pedicure.” That is a humbling experience, but it also teaches a useful lesson: surfaces in the same floor do not always respond the same way.
There is also the universal emotional arc of the nail polish spill. First comes denial. Then aggressive wiping. Then regret. Then the internet search. Then, with luck, the realization that the mildest approach often works best. In that sense, removing nail polish from the floor is oddly similar to cooking with garlic or assembling flat-pack furniture: confidence helps, but patience saves the day.
The most helpful experience-based lesson of all is this: the floor is usually more fixable than it looks in the first 60 seconds. A fresh spill can look catastrophic, especially when the polish color is dramatic enough to qualify as a personality trait. But if you pause, blot carefully, match the method to the floor type, and dry the area thoroughly, the odds are better than most people think. The bottle may win the opening scene, but it does not have to win the whole movie.
Note: Always test any cleaner or solvent in a hidden spot first, and stop immediately if the finish becomes dull, sticky, discolored, or soft.
Final Thoughts
Removing nail polish from the floor is one of those chores that feels catastrophic for about three minutes and then becomes very manageable once you know the order of operations. Start mild, work carefully, and match the method to the floor. Dish soap and warm water are your opening move. Rubbing alcohol is your cleanup specialist. Nail polish remover is the stronger backup plan, not the star of the show. And for dried blobs, a little ice plus a plastic scraper can save you from unnecessary scrubbing.
So the next time a manicure goes rogue, you do not need to panic or accept a new “abstract art” feature in your hallway. With a careful hand and the right cleaner, your floor can recover just fine.


