
Table of Contents >> Show >> Hide
- Why Ladder Shelves Are Having a Moment
- Choose Your DIY Ladder Shelf Style
- Planning Your DIY Ladder Shelf
- Tools and Materials You’ll Need
- Step-by-Step: Build a Simple Leaning Ladder Shelf
- Styling Your Ladder Shelf Like a Pro
- Common DIY Ladder Shelf Mistakes (and How to Avoid Them)
- How Much Will a DIY Ladder Shelf Cost?
- Real-Life DIY Ladder Shelf Experiences and Tips
If you’ve ever looked at an empty wall and thought, “You deserve better,” a DIY ladder shelf is your answer. It’s part bookshelf, part display stand, and part “Wow, you built that?” bragging rights. Inspired by the clever, budget-friendly projects you see on Hometalk and other DIY sites, this guide walks you through planning, building, and styling a ladder shelf that looks custom-made for your homewithout custom-furniture prices.
Why Ladder Shelves Are Having a Moment
Ladder shelves are basically the Swiss army knife of storage. They lean or stand against the wall, take up very little floor space, and give you multiple tiers for books, plants, baskets, and decor. DIYers love them because they:
- Maximize vertical space – Perfect for small apartments, hallways, or awkward corners.
- Look stylish in almost any room – Rustic, modern, farmhouse, bohoyou can adjust the finish to match your style.
- Are beginner-friendly builds – Most ladder shelf projects can be done with basic power tools in a weekend, as many online tutorials show.
- Can be made from new lumber or upcycled ladders – Think: thrift store finds, flea markets, or that old paint ladder in your garage.
On Hometalk and similar platforms, people regularly turn old wooden ladders into country-chic shelving just by adding boards and a coat of paint or stain. It’s proof that you don’t need a fancy shop to get a Pinterest-worthy piece.
Choose Your DIY Ladder Shelf Style
Before you start cutting wood, decide what kind of ladder shelf fits your space and skill level. The most popular options are:
1. Repurposed Step Ladder Shelf
Take a vintage wooden step ladder, open it up, and lay boards across the rungs. Boom, instant shelving. You can secure the boards with brackets or screws for extra stability. This is a great option if you love rustic or farmhouse style and don’t want to build from scratch.
2. Leaning Ladder Bookshelf
This version is built with two angled legs and several shelves that get shallower as they go up. Many plans from home improvement stores and DIY bloggers follow this style because it looks sleek and modern and hugs the wall nicely.
3. Floating Ladder Shelves
Instead of leaning on the floor, “ladder” legs mount to wall studs, and shelves attach between them. These are awesome for small rooms because the floor stays open and easy to clean. They do require more precise measuring and stud-finding, but the result is super sturdy and custom-looking.
4. A-Frame Ladder Shelf
An A-frame or trestle style resembles two legs joined at the top, with shelves spanning between them. It has a sculptural look and can act as a focal point in a living room or home office.
For this guide, we’ll focus on a classic leaning ladder shelf that you can adapt to your favorite style and finish.
Planning Your DIY Ladder Shelf
Good planning saves you time, frustration, and “uh-oh” holes in your wall. Ask yourself a few questions:
- Where will the shelf go? Measure wall width, ceiling height, and any nearby outlets, vents, or baseboards.
- What will you store? Books and heavier items need deeper, sturdier lower shelves; decor and plants can go on shallower upper shelves.
- How tall and wide? A common ladder shelf height is 6–7 feet, with the bottom shelf around 20–30 inches wide.
- What’s your style? Rustic (stain, visible grain), modern (crisp white or black), or something fun like color blocking?
Sketch a quick front view: draw two legs leaning against a wall and three to five shelves that gradually get less deep toward the top. This doesn’t need to be artjust enough to give you a cutting plan.
Tools and Materials You’ll Need
You can adjust sizes, but here’s a sample shopping list for a 6-foot leaning ladder shelf:
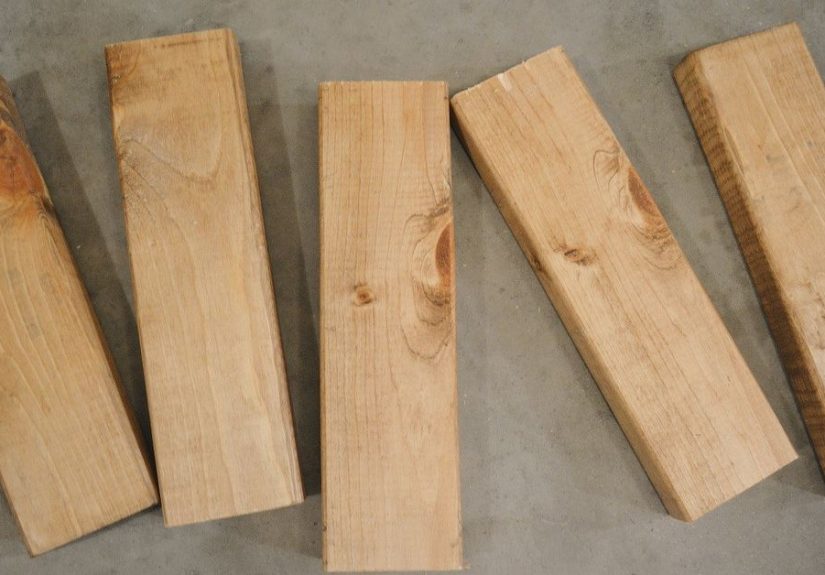
- Two 1×3 or 1×4 boards, 8 feet long (for the legs)
- Three to five 1×10 or 1×12 boards (for shelves, cut to length)
- Wood screws (#8 x 1¼" and #8 x 2" are typical)
- Wood glue
- Sandpaper (120–220 grit) or a sander
- Paint or stain plus clear topcoat
- Drill/driver and bits
- Miter saw or circular saw
- Stud finder (if anchoring to wall)
- Level, tape measure, pencil
- Optional: pocket hole jig for cleaner joinery
- Optional: anti-tip wall anchors or furniture straps
Many ladder shelf plans from big-box home centers rely on simple butt joints and screws, so you don’t need advanced joinery for a strong, safe piece.
Step-by-Step: Build a Simple Leaning Ladder Shelf
Step 1: Cut the Ladder Legs
Decide on the final height of your laddersay, 72 inches. Cut both leg boards to that length. To help the ladder lean correctly, cut the bottom of each leg at a slight angle (around 10 degrees) so they sit flat on the floor while the top rests against the wall. Cut the top ends at a matching angle, or leave them square if you prefer a simple look.
Step 2: Plan and Cut the Shelves
Choose how many shelves you wantfour or five is typical. Then decide on the depths. For example:
- Bottom shelf: 14 inches deep
- Next shelf: 12 inches
- Middle shelf: 10 inches
- Upper shelf: 8 inches
- Top shelf: 6 inches
Cut each shelf board to the same width (for example, 24–28 inches) so they line up nicely between the legs. Sand the cut edges to remove splinters.
Step 3: Mark Shelf Positions on the Legs
Lay both legs on a flat surface, side by side, as they will stand. From the bottom, mark where each shelf will attach. A simple layout might be:
- Bottom shelf: 8 inches up from the floor
- Each additional shelf: 14–16 inches apart
Make sure your marks line up across both legs so your shelves are level. Use a square or a straight edge to draw light lines where the shelves will sit.
Step 4: Attach Shelf Supports (Optional but Strong)
For extra strength, you can add small support pieces under each shelf. Cut short blocks from scrap 1×3 or 1×4 at the correct angle where they meet the legs. Glue and screw these supports to the legs at your shelf marks, then place shelves on top later. This is especially helpful if you’ll be storing heavy books or equipment.
Step 5: Attach the Shelves
With the legs lying flat, position the bottom shelf between them, flush with the back edges (the side that will be against the wall). Clamp it in place if you can. Drill pilot holes through the legs into the shelf ends, then drive screws. Repeat for each shelf, making sure the back of each shelf remains aligned with the “wall side” of the legs so the whole unit sits neatly when leaned.
If you’re using pocket holes, drill them into the underside of each shelf, then drive screws into the legs for a hidden, cleaner look.
Step 6: Sand and Finish
Stand the ladder shelf upright and check for wobble. Lightly sand the whole piece, rounding over sharp edges. Wipe away dust, then:
- Apply stain for a warm, wood-rich look, followed by a clear topcoat, or
- Prime and paint in your favorite color for a modern, clean finish.
Let everything dry completely before styling or loading it up.
Step 7: Anchor for Safety
A leaning ladder shelf looks casual, but you do not want it casually tipping over. For homes with kids, pets, or clumsy adults (no judgment), anchoring is a must.
- Locate wall studs with a stud finder.
- Install L-brackets, angle brackets, or furniture straps between the top of the ladder shelf and the stud.
- Adjust straps or brackets so the shelf is snug but still flush to the wall.
Anti-tip straps and metal brackets are widely recommended by safety guides and furniture retailers, especially for tall, narrow pieces like ladder shelves and bookcases.
Styling Your Ladder Shelf Like a Pro
Once your DIY ladder shelf is dry and anchored, it’s time for the fun part: styling. Think of each shelf as its own little vignette.
- Mix heights and textures: Combine books, plants, baskets, picture frames, and small sculptures.
- Use the “rule of three”: Group decor pieces in threes for a natural, balanced look.
- Go heavy at the bottom: Put heavier items like storage baskets or large books on lower shelves for both visual and physical stability.
- Leave breathing room: Don’t pack every inch. A bit of empty space makes the shelf look intentional, not cluttered.
- Add greenery: Trailing plants like pothos or ivy look amazing cascading from an upper shelf.
If you’re inspired by Hometalk-style projects, don’t be afraid to layer in seasonal decorpumpkins in fall, garlands at the holidays, bright florals in spring. The ladder shelf can become your rotating “mantel” in rooms that don’t have a fireplace.
Common DIY Ladder Shelf Mistakes (and How to Avoid Them)
Even simple builds have a few gotchas. Watch out for these:
- Skipping the angle cuts: If the bottoms of the legs are cut square but you lean the shelf, it may rock or dig awkwardly into the floor.
- Mismatched shelf spacing: Eyeballing shelf positions can lead to crooked or uneven spacing. Measure, mark, and double-check with a tape measure and level.
- Using warped boards: Twisted or bowed boards don’t magically straighten once screwed together. Pick the straightest boards you can find.
- Not anchoring to the wall: The shelf may look stable when empty, then become wobbly once loaded. Anchors are cheap insurance.
- Overloading top shelves: Keep the heaviest items low to reduce tipping risk and strain on the joints.
How Much Will a DIY Ladder Shelf Cost?
Prices vary by region and lumber type, but for a basic pine ladder shelf, you’re often looking at:
- Lumber: $30–$60
- Screws, anchors, and hardware: $10–$20
- Finish (stain/paint and topcoat): $15–$30
So for roughly the cost of a dinner out, you can build a customized, solid-wood ladder shelf that would easily cost much more at a furniture store. Upcycling an old ladder can drop that cost even furthersometimes down to the price of a quart of paint.
Real-Life DIY Ladder Shelf Experiences and Tips
One of the reasons Hometalk projects are so fun to scroll through is that every DIY ladder shelf has a story. The builds might use similar steps, but the detailsand the lessons learnedare very human. Here are some experience-based tips drawn from typical projects and common real-world situations.
From “Old Paint Ladder” to Living Room Star
Many DIYers start with what they already have: a battered wooden ladder that’s seen one too many paint jobs. The transformation process usually goes like this:
- Deep clean: Scrape off loose paint, sand away drips, and tighten any wobbly rungs or hinges.
- Color choice: A lot of people stick with white for a clean farmhouse look, but charcoal gray or muted green can be surprisingly sophisticated.
- Add shelves: Instead of permanently fixing boards, some folks simply lay them across the rungs so they can rearrange or remove them as needed.
The big “aha” moment usually comes when they realize how much display space they just gained in a tiny footprintsuddenly there’s room for framed photos, a trailing plant, and that candle they bought three years ago and never burned.
Learning the Hard Way About Anchoring
Another common real-life story involves underestimating how tippy tall furniture can be. A leaning ladder shelf fully loaded with books and decor feels solidright up until a toddler decides the bottom shelf is a step stool or the cat launches itself onto the third shelf like it’s auditioning for an action movie.
That’s when DIYers often share “wish I’d done this sooner” advice about wall anchors. Simple anti-tip straps or L-brackets, attached to studs, turn a ladder shelf from “hopefully fine” into “rock-solid”. If you rent, removable wall anchors or anchors that reuse existing holes are popular tricks to keep both your deposit and your sanity.
Customizing for Small Spaces
Small-space dwellers love ladder shelves because they can scale the depth and width to fit. A few common tricks:
- Using narrower boards (1×8 instead of 1×12) to keep the shelf from jutting too far into a hallway.
- Building a shorter version that fits under a window yet still gives three tiers of storage.
- Combining two narrow ladder shelves on either side of a TV or desk to create a built-in look without actual built-ins.
These tweaks let you copy the overall ladder shelf concept while tailoring it to your actual life, not some staged photo in a catalog.
Finishes That Hide Real Life
In real homes, shelves meet coffee mugs, plant water, and the occasional mystery scuff. That’s why many experienced DIYers recommend:
- Medium-toned stains that hide dust better than very dark or very light finishes.
- Matte or satin topcoats that are easier to touch up than high-gloss finishes.
- Durable paints labeled for furniture or cabinets, which resist chipping and cleaning better than basic wall paint.
Some even embrace imperfectionsdistressing edges on purpose so future dings look intentional, not tragic.
Why DIY Ladder Shelves Keep Showing Up
After building one ladder shelf, a lot of DIYers end up building more: one for the bathroom, one for the entryway, maybe a mini version for a kid’s room. The basic structure is simple, but endless variations keep it interesting. Change the dimensions, swap the finish, add a rail for hanging blankets, or include hooks on the sides for bags and hats.
And that’s very much in the spirit of a platform like Hometalk: you start with inspiration from someone else’s ladder shelf, then tweak the design until it feels like yours. Before you know it, you’re the one posting photos and answering questions from people who want to build their own.
So whether you’re working with a thrifted ladder, fresh lumber, or a floating design, your DIY ladder shelf is more than just storageit’s a small piece of functional art that tells the story of your style, your space, and your weekend well spent.
SEO JSON


