Table of Contents >> Show >> Hide
- Why Custom Table Border Colors Matter In Word
- Before You Start: Know What You Want To Change
- Method 1: Use Table Design To Apply A Custom Border Color
- Method 2: Use Borders And Shading For More Control
- Method 3: Use Border Painter For Individual Lines
- Using Custom RGB Colors For Brand Consistency
- How To Change Only The Outside Border Color
- How To Change Only The Inside Border Color
- How To Make A Minimalist Table With Custom Borders
- Troubleshooting: Why Your Custom Border Color Is Not Showing
- Best Practices For Custom Table Border Colors
- Custom Table Border Ideas For Different Documents
- Experience Notes: What Actually Works In Real Word Documents
- Conclusion
Tables in Microsoft Word are supposed to make information easier to read, but let’s be honest: the default black grid can sometimes make your document look like it was designed during a very serious office emergency. The good news is that Word gives you more control than many users realize. You can change table border colors, create a custom color using RGB values, adjust the line weight, choose where borders appear, and even reuse the same border style across multiple tables.
Whether you are formatting a business proposal, a school report, an invoice, a branded company template, or a polished downloadable guide, learning how to use a custom color for table borders in Microsoft Word can make your document look cleaner, more professional, and more intentional. A small color change can separate sections, highlight totals, match brand guidelines, or soften a table that feels too heavy on the page.
This guide walks through the full process step by step, with practical examples, troubleshooting tips, design advice, and real-world experience from working with Word documents that need to look good both on screen and in print.
Why Custom Table Border Colors Matter In Word
Table borders are not just decoration. They guide the reader’s eye. They help people understand where rows begin, where columns end, and which information belongs together. A black border can work perfectly in a legal document or basic worksheet, but it is not always the best choice for modern documents.
A custom border color can help you:
- Match your company or personal brand colors.
- Create a softer, more elegant table design.
- Emphasize important rows, such as totals or deadlines.
- Improve visual hierarchy without adding clutter.
- Make reports, forms, and templates feel more polished.
- Coordinate table borders with headings, logos, or section dividers.
For example, a financial report might use a dark navy border instead of black. A wedding planning checklist might use a soft sage green. A marketing proposal could use the exact RGB value from a brand style guide. In each case, the table still does its job, but it looks like it belongs in the document instead of being dropped in from a spreadsheet with trust issues.
Before You Start: Know What You Want To Change
Before changing table border colors in Microsoft Word, decide exactly what part of the table needs the custom color. This matters because Word lets you apply border formatting to the entire table, selected cells, specific sides of cells, inside borders, outside borders, or individual lines.
Common Border Color Choices
You may want to change:
- All borders: Every visible table line uses the same custom color.
- Outside borders only: The table frame changes color while inside lines remain lighter.
- Inside borders only: Internal gridlines change while the table outline stays bold.
- Header row border: A colored line separates the table header from the data.
- Bottom border only: Useful for minimalist forms and modern reports.
- Specific cells: Great for totals, warnings, categories, or callout sections.
Thinking this through first prevents the classic Word problem where you change one line, then another disappears, then suddenly your table looks like it lost an argument with the ribbon menu.
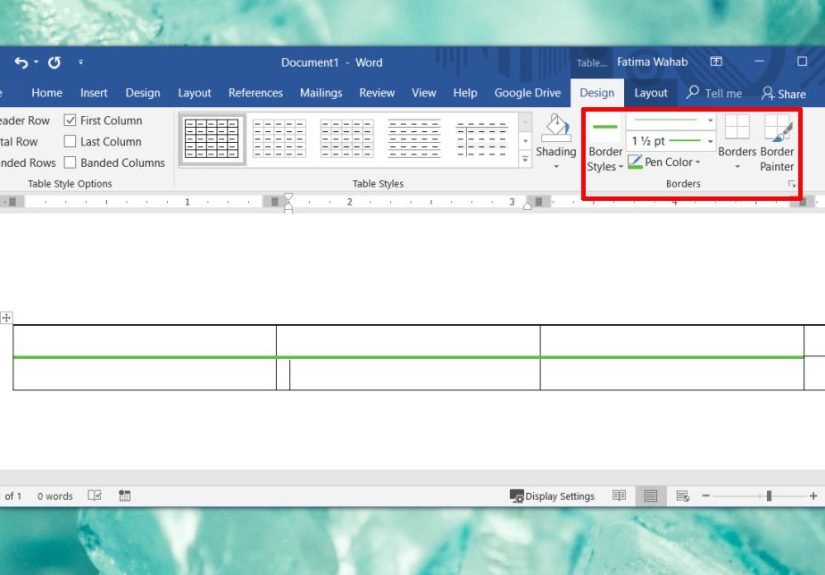
Method 1: Use Table Design To Apply A Custom Border Color
The most direct way to use a custom color for table borders in Microsoft Word is through the Table Design tab. This tab appears when your cursor is inside a table.
Step 1: Select The Table Or Cells
Click inside the table. If you want to format the whole table, select the entire table by clicking the table move handle in the upper-left corner. If you only want to change certain cells, click and drag across those cells.
Selection is important because Word applies border formatting to whatever is selected. If only one cell is selected, only that cell may change. If the whole table is selected, the formatting can apply across the entire table.
Step 2: Open The Table Design Tab
After selecting your table or cells, look at the ribbon at the top of Word. You should see a tab called Table Design. In some older versions, this may appear under Table Tools as Design.
Step 3: Choose Pen Color
In the Draw Borders group, open Pen Color. This controls the color Word will use for borders you apply next. You can choose a theme color, a standard color, or select a custom option for more precise control.
Step 4: Select More Colors
To create a custom table border color, choose More Colors. This opens a color dialog where you can pick from a broader range of colors. Depending on your version of Word, you may see standard colors, a color wheel, sliders, or a custom tab with values such as RGB.
If you have a brand color, enter the exact RGB values. For example:
- Navy blue: RGB 22, 55, 92
- Soft gray: RGB 217, 217, 217
- Forest green: RGB 46, 125, 50
- Warm gold: RGB 196, 145, 55
Using RGB values is the best option when consistency matters. If your logo, website, or brand guide uses a specific color, entering the exact numbers keeps your Word document visually aligned.
Step 5: Set Pen Weight And Line Style
Color is only one part of the border. You can also adjust Pen Weight to control thickness and Pen Style to choose solid, dashed, dotted, or double lines.
For most professional documents, a thin or medium solid line works best. Thick borders can be useful for section breaks or totals, but using them everywhere can make the table feel crowded. A good rule: if the table starts looking like a tiny prison, reduce the line weight.
Step 6: Apply The Border
After choosing your custom color, use the Borders menu to apply it. You can choose options such as:
- All Borders
- Outside Borders
- Inside Borders
- Top Border
- Bottom Border
- Left Border
- Right Border
- No Border
If you want every table line to use your custom color, select the table and choose All Borders. If you want a more refined look, try applying a darker custom color to the outside border and a lighter version of the same color to the inside borders.
Method 2: Use Borders And Shading For More Control
The Borders and Shading dialog is the better choice when you want precise control over where borders appear. It is especially useful when the ribbon buttons do not behave the way you expected.
How To Open Borders And Shading
Select your table or cells, then open the Borders menu and choose Borders and Shading. You may also be able to access it by right-clicking selected table cells and choosing a border-related option from the context menu.
Choose Style, Color, And Width
Inside the dialog, use the Borders tab. Select your line style, choose your custom color from the color menu, and set the width. Then use the preview box to click the exact border lines you want to turn on or off.
This preview box is more powerful than it looks. You can click the top, bottom, left, right, inside vertical, and inside horizontal lines. The preview gives you a clear picture of what Word will apply before you click OK.
Best Use Cases For Borders And Shading
Use this method when you need to:
- Create a colored outside frame with no inside borders.
- Apply a custom color to only the header row border.
- Remove unwanted borders from selected cells.
- Fix borders that look inconsistent after copying a table.
- Apply different colors to different parts of the same table.
For example, you might create a project timeline table with a dark teal outside border, light gray internal borders, and a bold orange bottom border under the header row. That sounds fancy, but in Word it is mostly a matter of selecting the right cells and applying the right border settings in the right order.
Method 3: Use Border Painter For Individual Lines
Border Painter is useful when you want to paint border formatting onto specific table lines. It works a bit like Format Painter, but for table borders.
How Border Painter Works
First, choose your border color, line weight, and line style from the Table Design tab. Then activate Border Painter. Your cursor changes, allowing you to click or drag over table borders to apply the selected formatting.
This method is great for formatting individual lines, such as the bottom border of a header row or a vertical divider between two important columns. It is less ideal for changing a large table all at once, unless you enjoy clicking tiny lines like you are defusing a document-formatting bomb.
Using Custom RGB Colors For Brand Consistency
If you are preparing a professional document, RGB values are your best friend. RGB stands for red, green, and blue. Each value usually ranges from 0 to 255, and together they define a specific digital color.
Suppose your company’s primary brand color is RGB 0, 95, 115. You can enter those values in Word’s custom color dialog, then apply that color to table borders. This helps your Word document match your website, logo, slide deck, or PDF materials.
Example: A Branded Invoice Table
Imagine you are creating an invoice. You could format the table like this:
- Outside border: dark brand blue, 1.5 pt
- Inside borders: light gray, 0.5 pt
- Header row bottom border: dark brand blue, 1 pt
- Total row top border: dark brand blue, 1.5 pt
The table remains easy to read, but it also feels designed. The custom color adds identity without turning the invoice into a carnival flyer.
How To Change Only The Outside Border Color
To change only the outside border color of a Word table, select the whole table, choose your custom color from Pen Color, select the desired line weight, and then choose Outside Borders from the Borders menu.
This creates a clean frame around your table. It is a strong choice for resumes, reports, checklists, pricing tables, and executive summaries. If you want a subtle modern look, use a medium gray, navy, muted green, or deep burgundy instead of pure black.
How To Change Only The Inside Border Color
To change only the internal gridlines, select the table, choose your custom color, then apply Inside Borders. This affects the lines between cells while leaving the outside frame alone.
A practical design trick is to make inside borders lighter than outside borders. For example, use a dark blue outside border and a pale blue-gray inside border. This makes the table structure visible without overwhelming the content.
How To Make A Minimalist Table With Custom Borders
Minimalist tables often look more modern than full-grid tables. Instead of showing every line, you can remove most borders and use only horizontal rules.
Minimalist Table Formula
- Remove all borders first.
- Add a custom-colored bottom border to the header row.
- Add light horizontal borders between rows.
- Avoid vertical borders unless the data truly needs them.
- Use shading carefully, if at all.
This approach is excellent for proposals, editorial calendars, content plans, meeting notes, and comparison tables. It gives the table enough structure without making the page feel boxed in.
Troubleshooting: Why Your Custom Border Color Is Not Showing
Sometimes you choose a custom color, click around confidently, and nothing seems to happen. Before blaming Word, your mouse, or the entire history of office software, check these common issues.
You Selected The Wrong Cells
Word applies borders to the selected area. If only one cell is active, your changes may affect only that cell. Select the full table or the exact cell range before applying the border.
The Border Was Not Turned On
Choosing a color does not automatically apply a visible border. You must also choose where the border should appear, such as All Borders, Outside Borders, or Bottom Border.
The Line Weight Is Too Thin
A very light custom color with a very thin line may be hard to see, especially on high-resolution screens or after printing. Try increasing the line weight slightly or choosing a darker color.
Table Styles Are Overriding Your Formatting
Some built-in table styles may reapply formatting when you change style options such as Header Row, Banded Rows, or First Column. If your custom border disappears, reapply the border after choosing the table style.
Printed Colors Look Different
Colors on screen and colors on paper rarely match perfectly. A soft pastel border may look elegant on your monitor but nearly invisible after printing. Always print a test page when the final document matters.
Best Practices For Custom Table Border Colors
A custom color can improve a Word table, but too many colors can make it chaotic. The best table designs are usually simple, consistent, and easy to scan.
Use One Main Border Color
Choose one primary border color for the table. If needed, use lighter or darker versions of that same color. This creates visual harmony and avoids the “rainbow spreadsheet” problem.
Keep Contrast In Mind
Color should support readability. If your table has shaded cells, make sure the borders, text, and background have enough contrast. Word’s accessibility tools can help identify low-contrast issues in a document.
Do Not Use Color As The Only Signal
If a border color is meant to show something important, such as overdue items or priority tasks, also use text labels, bold formatting, or clear headings. Some readers may not distinguish colors easily.
Use Thicker Borders Sparingly
Thick custom borders are useful for section breaks, header rows, and totals. They are not ideal for every cell. When every line is shouting, no line is important.
Save A Clean Template
If you regularly create similar documents, build one table with your preferred custom border colors and save the document as a template. This saves time and keeps future files consistent.
Custom Table Border Ideas For Different Documents
Business Reports
Use dark blue, charcoal, or muted green for outside borders. Keep inside borders light gray. This creates a professional look without distracting from the data.
Invoices And Estimates
Use your brand color for the table frame and total row. Keep the itemized rows simple so clients can read amounts quickly.
Academic Papers
Use subtle gray or black borders unless your instructor or style guide allows color. In academic work, clarity matters more than decoration.
Event Plans
Use soft colors that match the event theme. A custom border color can make schedules, seating charts, and vendor lists feel more organized.
Marketing Documents
Use brand-approved colors. Match table borders with section headings, callout boxes, and visual accents for a polished campaign document.
Experience Notes: What Actually Works In Real Word Documents
After working with many Word documents, one lesson becomes obvious: the best custom table border color is usually the one people barely notice. That may sound strange, but it is true. A good border quietly supports the content. It does not leap off the page wearing tap shoes.
For most professional documents, I have found that dark neutral colors work better than bright colors. Navy, charcoal, deep green, muted plum, and warm brown often look more refined than bright red, neon blue, or electric purple. Bright colors can be useful for internal drafts or training handouts, but they often feel too loud in proposals, reports, or client-facing documents.
Another practical habit is to test the table at different zoom levels. A border color that looks perfect at 150 percent zoom may appear too faint at 100 percent. If the document will be printed, the test print matters even more. Light gray borders can look beautiful on screen and then disappear on paper like they had somewhere better to be.
I also recommend setting the border color before applying the border placement. Many users pick a border location first, then change the color, and then wonder why only part of the table updated. Word usually behaves better when you follow this order: select the cells, choose the color, choose the weight, choose the line style, and then apply the border location.
When designing tables for longer documents, consistency is everything. If the first table uses a navy outside border and pale gray inside borders, the second and third tables should follow the same pattern. Readers may not consciously notice consistent borders, but they will feel that the document is organized. Inconsistent borders, on the other hand, make a document feel patched together, even when the writing is strong.
For branded documents, I like keeping a small note near the working file with the exact RGB values. For example, write down “Primary blue: RGB 22, 55, 92” or “Accent gold: RGB 196, 145, 55.” This prevents guessing later. Guessing brand colors by eye is how you end up with seven slightly different blues in one document, which is technically impressive but visually unfortunate.
One more experience-based tip: do not overuse borders when spacing can do the job. Sometimes a table looks busy not because the color is wrong, but because there are too many visible lines. Removing vertical borders and keeping only horizontal lines can make the same information look cleaner. Add a custom-colored bottom border under the header row, use light dividers between rows, and let white space help. White space is free, elegant, and never complains.
Finally, when you copy tables from websites, PDFs, emails, or old documents, expect formatting weirdness. The fastest fix is often to remove the borders, clear unnecessary shading, and rebuild the border style yourself. It may feel slower at first, but it usually saves time compared with wrestling mysterious inherited formatting. Word tables can be dramatic, but with the right custom color workflow, you can bring them back to civilization.
Conclusion
Using a custom color for table borders in Microsoft Word is a simple upgrade that can make your document look more professional, readable, and brand-consistent. The core process is straightforward: select the table or cells, open the Table Design tab, choose Pen Color, select More Colors, enter or pick your custom color, choose the line weight and style, and apply the border where you want it.
For basic formatting, the Table Design tab is usually enough. For more precise control, use the Borders and Shading dialog. For individual lines, Border Painter can be a handy tool. The real secret is not just knowing which buttons to click, but knowing when to use color, how much color to use, and how to keep the table easy to read.
A custom border color should make your table feel intentional, not overdecorated. Choose colors with enough contrast, use consistent formatting, test your document on screen and in print, and save your best design as a reusable template. Your tables will look cleaner, your documents will feel more polished, and your readers will not have to squint at a grid that looks like it was assembled during lunch break.