
Table of Contents >> Show >> Hide
- Before You Begin: Know Your Bow Type
- Tools and Gear You Need
- Step 1: Inspect Everything First
- Step 2: Attach the Limbs Correctly
- Step 3: String the Recurve Bow Safely
- Step 4: Set Brace Height
- Step 5: Install the Arrow Rest
- Step 6: Set the Nocking Point
- Step 7: Check Draw Weight
- Step 8: Set Tiller on Adjustable Recurves
- Step 9: Check Limb Alignment
- Step 10: Set Center Shot
- Step 11: Match Your Arrows to the Bow
- Step 12: Shoot and Do a Basic Tune
- Common Recurve Bow Setup Mistakes
- Maintenance After Setup
- Field Notes: Real-World Experience Setting Up a Recurve Bow
- Conclusion
Setting up a recurve bow can feel a little like assembling furniture from a boxexcept this furniture launches arrows, rewards patience, and makes a very judgmental “twang” when something is off. The good news? A basic recurve bow setup is not mysterious. Once you understand the order of operationsinspect, assemble, string, measure, adjust, tuneyou can turn a collection of limbs, string, riser, rest, and arrows into a smooth-shooting archery setup.
This guide walks you through how to set up a recurve bow for target archery, whether you have a simple takedown recurve, a traditional bow, or an Olympic-style ILF recurve. We will cover brace height, nocking point, tiller, center shot, arrow rest, plunger setup, safety checks, beginner tuning, and the little practical details that separate “my bow shoots fine” from “my arrows are finally acting like they attended flight school.”
Before You Begin: Know Your Bow Type
Not every recurve bow is built the same way, so your first job is to identify what you are setting up. A one-piece traditional recurve arrives as a single bow body. A takedown recurve has a riser and two removable limbs. An ILF recurve, short for International Limb Fitting, uses a more adjustable limb-and-riser system common in Olympic recurve and barebow archery.
The setup principles are similar, but the level of adjustment changes. A basic takedown bow may only require attaching limbs, stringing the bow, setting brace height, installing an arrow rest, and adding a nocking point. An ILF recurve may also require limb alignment, draw weight adjustment, tiller adjustment, plunger setup, stabilizer installation, and sight mounting.
Tools and Gear You Need
You do not need a full archery shop in your garage, although that is how many archers accidentally become “gear people.” For a beginner-friendly recurve bow setup, gather the following:
- Bow stringer
- Bow square or T-square
- Allen wrenches for limb bolts and accessories
- Nocking pliers or serving thread
- Arrow rest
- Finger tab or glove
- Arm guard
- Bow string wax
- Correct arrows for your draw weight and draw length
- Safe target and backstop
The bow stringer is not optional. It is the seatbelt of recurve setup. Stringing a recurve by stepping through the bow or using the push-pull method can twist limbs, damage the bow, or give you a surprise physics lesson you did not request.
Step 1: Inspect Everything First
Before you assemble the bow, inspect every part. Look for cracks in the limbs, loose limb tips, damaged limb bolts, frayed string strands, worn serving, bent arrows, cracked nocks, and loose points. If anything looks suspicious, do not shoot it. Recurve bows are simple machines, but simple machines still deserve respect.
Check the string carefully. A fuzzy string is normal if it needs wax; a string with broken strands is not. Check your arrows by flexing carbon shafts gently while listening for clicking or cracking. Examine nocks because damaged nocks can fail during release. This is also a good time to confirm that your arrows match your bow’s draw weight. Incorrect arrow spine can cause poor arrow flight, inconsistent grouping, and plenty of dramatic head-scratching.
Step 2: Attach the Limbs Correctly
If you are using a takedown recurve, identify the top and bottom limbs. Most limbs are marked. If not, look for writing or manufacturer markings; they typically face away from the archer on many modern bows, but always follow your bow manual. Attach each limb to the riser using the supplied limb bolts or ILF fittings.
For screw-in takedown limbs, tighten the bolts firmly but do not over-torque them like you are fixing a tractor. For ILF limbs, insert the limb butt into the pocket and push until the dovetail fitting seats properly. The limb should feel secure and centered, not wobbly or half-committed.
Step 3: String the Recurve Bow Safely
Place the larger string loop over the top limb and slide it down the limb. Place the smaller loop into the string groove on the bottom limb tip. Then attach your bow stringer: usually the large pocket goes over the bottom limb tip, while the smaller saddle or pocket goes near the top limb tip.
Step on the bow stringer with both feet, pull the riser upward, and slide the top string loop into the upper limb groove. Lower the bow slowly and check that both string loops are seated perfectly in their grooves. If a loop is crooked, do not shoot. Fix it before drawing the bow.
Once strung, look down the bow from behind. The string should run cleanly through the limb tips and align reasonably with the center of the riser. A small visual check now can prevent a big tuning headache later.
Step 4: Set Brace Height
Brace height is the distance from the deepest part of the grip, often called the throat or pivot point, to the bowstring. It affects noise, vibration, arrow flight, and how the bow feels during the shot. Too low, and the string may slap your wrist or create erratic flight. Too high, and the bow may lose efficiency and feel tight or harsh.
Use a bow square or tape measure to check brace height. Always start with the manufacturer’s recommended range. Many recurves fall somewhere around 7 to 9.5 inches, depending on bow length and design, but your owner’s manual wins every argument.
How to Adjust Brace Height
To increase brace height, unstring the bow and add twists to the string. To lower brace height, remove twists. Make small changes, usually three to five twists at a time, then restring and measure again. New strings stretch during the first shooting sessions, so recheck brace height often. A bow that was perfect yesterday may wake up today with different opinions.
After you reach the recommended range, shoot a few arrows and listen. A well-matched brace height usually produces a quieter, smoother shot and cleaner arrow flight. Many archers call this the bow’s “sweet spot.” It is not magic; it is just the place where your string length, limb timing, and arrow launch agree to stop arguing.
Step 5: Install the Arrow Rest
Most beginner takedown recurves use a simple stick-on plastic rest. Olympic and barebow setups often use a wire rest combined with a cushion plunger. The rest supports the arrow consistently before the shot, so placement matters.
For a stick-on rest, clean the riser surface first. Line up the rest with the threaded plunger hole or the manufacturer’s recommended location. Press it firmly in place and make sure the arrow sits level and stable. If the rest arm sticks too far out or too far in, arrow clearance can suffer.
For a plunger setup, install the plunger through the riser so it contacts the arrow shaft. Start with medium spring tension. At this stage, do not chase perfect tune. You are building a reliable starting point.
Step 6: Set the Nocking Point
The nocking point marks where the arrow clips onto the string. It keeps every arrow in the same vertical position, which is essential for consistency. Without a proper nocking point, your arrows may porpoise up and down in flight, as if they are auditioning for a dolphin documentary.
Clip your bow square to the string and rest it on the arrow rest. A common starting point for many Olympic recurve and traditional setups is about 3/8 inch above square. Some traditional shelf-shooting bows may start closer to 1/2 inch above the shelf. Many guides also describe the starting range as roughly 1/8 to 3/8 inch above level, depending on release style, rest type, and arrow setup.
One Nocking Point or Two?
You can use one nocking point above the arrow nock, but two nocking pointsone above and one belowhelp prevent the arrow from sliding during the draw. Leave a tiny gap below the arrow nock, about 1/16 inch, to avoid nock pinch. If you use brass nocking points, clamp them gently. If you use tied nocking points, serving thread is lighter, adjustable, and kinder to the string.
Step 7: Check Draw Weight
Draw weight is how much force it takes to pull the bow to your draw length. Beginners often choose too much draw weight because the number sounds impressive. Then their form collapses, their shoulders protest, and the target remains emotionally distant.
Use a bow scale if available. Draw the bow with an arrow pointed safely downrange and measure at your actual draw length. If your ILF recurve has adjustable limb bolts, turning them clockwise usually increases draw weight, while turning them counterclockwise decreases it. Make equal adjustments to the top and bottom limb bolts unless you are deliberately adjusting tiller. Stay within the manufacturer’s safe bolt range.
A comfortable bow is better than a heroic bow. If you can hold at full draw with relaxed alignment and repeat clean shots, you are in the right neighborhood.
Step 8: Set Tiller on Adjustable Recurves
Tiller is the difference between the distance from the string to the top limb and the distance from the string to the bottom limb, measured near where the limbs meet the riser. Since most archers draw with one finger above the arrow and two below, the string is not pulled exactly from the center. A slight positive tiller helps the limbs work together.
Many Olympic recurve setups start with the top tiller about 1/8 inch greater than the bottom tiller. Barebow archers who string-walk may use a different tiller, including even or negative tiller, depending on technique and bow behavior. Traditional one-piece recurves usually have tiller set by the manufacturer, so do not try to “adjust” what cannot be adjusted unless your plan includes buying another bow.
Step 9: Check Limb Alignment
Limb alignment means the string travels through the center line of the bow. Poor alignment can cause sideways string travel, noisy shooting, clearance issues, and inconsistent arrow flight. On an ILF riser, limb alignment is usually adjusted with small lateral screws or alignment blocks in the limb pockets.
Set the bow on a stand or hold it safely. Look from behind the string toward the riser. The string should line up through the limb centers and down the center of the riser. If you use a long stabilizer, it can help reveal whether the string is tracking straight. Make small adjustments, tighten locking screws afterward, and recheck. Never leave alignment screws loose.
Step 10: Set Center Shot
Center shot describes how the arrow sits left or right relative to the string. For a right-handed recurve shooter using fingers, a common starting point is to have the arrow point sit just slightly outside the string line when viewed from behind. For left-handed archers, the direction reverses.
If you use a plunger, adjust it so the arrow is not buried inside the bow and not pointing dramatically outward. The goal is a small, sensible starting offset. Later, bare-shaft tuning or paper tuning can refine it. Do not expect perfect arrow flight from center shot alone; arrow spine, nocking point, brace height, and release quality all join the conversation.
Step 11: Match Your Arrows to the Bow
Correct arrows are crucial. Arrow spine refers to stiffness. If the arrow is too weak, it flexes too much. If it is too stiff, it does not flex enough. Either way, the arrow leaves the bow with less forgiveness and may group poorly.
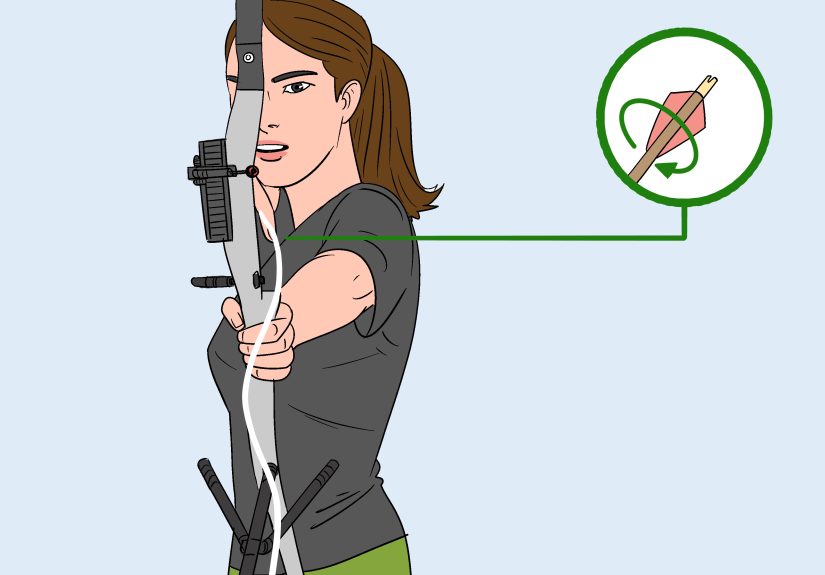
Choose arrows based on your measured draw weight, draw length, arrow length, point weight, and shooting style. Most arrow manufacturers provide spine charts, and archery shops can help you select a safe match. For target practice, use field points, not broadheads. Broadheads belong in specialized hunting setups and should not be used for casual tuning at a standard target range.
Step 12: Shoot and Do a Basic Tune
Now comes the fun part: shooting enough arrows to see what the bow is telling you. Start at a short distance, such as 10 to 15 yards. Focus on clean form, consistent anchor, relaxed bow hand, and safe follow-through. Do not change five settings after every arrow. That is not tuning; that is panic with Allen keys.
If arrows fly tail-high or tail-low, adjust the nocking point in small increments. If the bow is loud or slaps your arm, revisit brace height and form. If arrows consistently group left or right, check center shot, plunger tension, arrow spine, and your release. If a bare shaft lands far from fletched arrows, your tune may need refinement.
A Simple Beginner Tuning Order
- Confirm the bow is safe and correctly assembled.
- Set brace height within the recommended range.
- Set a reasonable nocking point.
- Check draw weight and tiller if adjustable.
- Set center shot and plunger to a neutral starting point.
- Shoot groups with good form before making changes.
- Adjust one variable at a time.
Common Recurve Bow Setup Mistakes
Using Too Much Draw Weight
The best setup is the one you can shoot repeatedly with control. If your bow makes you shake like a leaf in a thunderstorm, reduce draw weight.
Ignoring Brace Height
Brace height is one of the easiest measurements to check and one of the most commonly ignored. Keep a bow square in your case and use it.
Skipping the Bow Stringer
A bow stringer protects the limbs and protects you. Use it every time.
Changing Everything at Once
When tuning, change one thing, test, record the result, and then decide what to do next. Your future self will thank you.
Forgetting to Record Measurements
Write down brace height, tiller, nocking point height, plunger setting, arrow spine, arrow length, and draw weight. A setup notebook is not nerdy. It is a time machine for your best tune.
Maintenance After Setup
Once your recurve bow is set up, keep it that way. Wax the string when it looks dry or fuzzy. Store the bow in a cool, dry place. Unstring traditional wooden recurves when not in use, especially for long storage. Check brace height before each session because strings can stretch and weather can affect materials.
Inspect arrows regularly. Replace cracked nocks, damaged vanes, loose inserts, and questionable shafts. A safe setup is not a one-time event; it is a habit.
Field Notes: Real-World Experience Setting Up a Recurve Bow
The first time you set up a recurve bow, expect the process to feel slower than the instructions suggest. That is normal. The bow may look simple, but every measurement has a personality. Brace height, for example, is not just a number. It changes the sound, feel, and rhythm of the shot. Many beginners set it once and forget it, only to discover later that their new string stretched after a few shooting sessions. The bow gets louder, the arrows start acting strange, and the archer blames everything except the ruler sitting quietly in the bow case.
A practical habit is to measure brace height at the beginning of every range session for the first few weeks. Write it down. If your bow shoots best at 8 1/4 inches, that number becomes your home base. When the brace height drops to 8 inches, add a few twists to the string and bring it back. This tiny ritual can save you from chasing imaginary problems in your release, arrows, or sight.
Another lesson: nocking point adjustments should be small. Beginners often move the nocking point too much after one bad arrow. But one bad arrow may simply be one bad shot. Shoot groups, not guesses. If three or four arrows show the same tail-high flight, then adjust. A tied nocking point is helpful because you can rotate it up or down the serving without crushing the string. Brass nocks work, but they can be heavier and less forgiving if clamped aggressively.
When installing a stick-on rest, take your time. Clean the riser surface first and align the rest carefully before pressing the adhesive down. A crooked rest can make your arrows behave like they are leaving from a tiny ski jump. If you are using a plunger, start with a medium tension and avoid the temptation to “micro-tune” before your form is consistent. A plunger cannot fix a collapsing release, a floating anchor, or a bow hand that grabs the riser like it owes you money.
Draw weight is another area where experience teaches humility. A 35-pound recurve may sound moderate, but holding it at full draw repeatedly is different from pulling it once in a shop. If your shoulder rises, your release gets jerky, or you cannot finish a practice session with clean form, the bow is too heavy for now. There is no shame in lighter limbs. In fact, lighter limbs often help archers progress faster because they allow more quality repetitions.
For ILF bows, record every adjustment. If you turn limb bolts, count turns. If you change tiller, measure before and after. If you adjust limb alignment, make sure all locking screws are secure. A small notebook or phone note can prevent the classic archery mystery: “Why did this bow shoot beautifully last week and now feel like a haunted banjo?”
Finally, do not tune alone forever. A coach or experienced shop technician can spot setup and form issues quickly. Sometimes the bow is fine and the archer is torquing the grip. Sometimes the archer is fine and the arrow spine is wrong. Sometimes everything is almost right, and the solution is three string twists and a calmer attitude. Recurve setup rewards careful observation. The more you listen to the bow, measure honestly, and change one thing at a time, the more predictable your arrows become.
Conclusion
Learning how to set up a recurve bow is one of the most useful skills in archery. It helps you shoot more consistently, understand your equipment, and solve problems without guessing wildly. Start with safety, assemble the bow correctly, use a bow stringer, set brace height, install the rest, place the nocking point, check draw weight, adjust tiller and alignment if your bow allows it, and tune patiently.
A recurve bow does not need to be complicated. It needs to be consistent. When the string is seated, the brace height is right, the nocking point is stable, the arrows match the bow, and the archer repeats good form, the whole setup begins to feel less like equipment and more like an extension of the shot. And yes, when the arrows finally group tightly, you are allowed to stare at the target like you personally invented accuracy.
Note: This article is intended for recreational target archery education. Always follow your bow manufacturer’s manual, local range rules, and qualified coaching guidance when setting up or tuning archery equipment.


