
Table of Contents >> Show >> Hide
- Why Motorcycle Detailing Matters
- 11 Essential Motorcycle Detailing Tips
- 1. Start With a Cool Motorcycle in the Shade
- 2. Gather the Right Motorcycle Detailing Supplies
- 3. Use a Gentle Pre-Rinse, Not a Pressure-Washer Attack
- 4. Wash From Top to Bottom With the Two-Bucket Method
- 5. Treat Bugs, Tar, and Road Grime Before They Become Permanent Guests
- 6. Clean Wheels, Spokes, and Brake Dust Carefully
- 7. Clean and Re-Lube the Chain After Washing
- 8. Dry Thoroughly With Microfiber and Air
- 9. Polish Paint Only When Needed, Then Protect It
- 10. Detail Chrome, Metal, Plastic, Rubber, and Leather Separately
- 11. Finish With an Inspection and a Maintenance Mindset
- Common Motorcycle Detailing Mistakes to Avoid
- How Often Should You Detail a Motorcycle?
- Best Practical Routine for a Clean Motorcycle
- Real-World Experiences With Motorcycle Detailing
- Conclusion
A clean motorcycle does more than make your garage look like a showroom with better lighting. Proper motorcycle detailing helps protect paint, chrome, plastics, leather, rubber, and exposed metal from grime, moisture, UV damage, corrosion, road salt, bug splatter, brake dust, and the mysterious black film that seems to appear after one “quick” ride around town. In other words, motorcycle detailing is not just vanity. It is preventive care with a microfiber towel.
Unlike cars, motorcycles leave many important parts exposed. The engine, chain, controls, cables, wheels, spokes, fasteners, exhaust, brakes, and electronics are all closer to the cleaning process. That means the best motorcycle detailing tips are not simply “soap it up and blast it with water.” A bike needs a smarter, gentler, more targeted approach. Use the wrong cleaner on matte paint, spray slick dressing on a seat, or pressure-wash the chain like you are cleaning a driveway, and your detail day can become a lesson in regret with a side order of squeaks.
This guide walks through 11 essential motorcycle detailing tips for riders who want a cleaner, better-protected bike without turning the process into a six-hour chemistry experiment. Whether you ride a cruiser, sport bike, touring motorcycle, adventure bike, café racer, or weekend garage queen, these tips will help you wash, polish, protect, and inspect your motorcycle the right way.
Why Motorcycle Detailing Matters
Motorcycle detailing is different from a basic wash. A wash removes surface dirt. Detailing goes deeper by cleaning tight areas, choosing the right product for each material, protecting vulnerable finishes, and spotting small maintenance issues before they become expensive. A careful detail can reveal loose fasteners, worn brake pads, chain grime, small leaks, chipped paint, cable wear, tire damage, and corrosion hiding in places you normally ignore.
Think of detailing as a close conversation with your motorcycle. The bike says, “Hey, my rear wheel has chain fling,” and you reply, “I noticed, buddy.” That level of attention helps preserve resale value, extends the life of finishes, and makes every ride feel a little more satisfying.
11 Essential Motorcycle Detailing Tips
1. Start With a Cool Motorcycle in the Shade
The first rule of motorcycle detailing is simple: do not wash a hot bike. Hot metal, warm paint, and direct sunlight can cause soap and cleaning chemicals to dry too quickly, leaving streaks, water spots, and residue. Cold water on hot metal can also create unnecessary stress on heated components. Give the motorcycle time to cool down before washing, then move it into the shade or a covered area.
A shaded workspace gives you more control. Products stay wet longer, microfiber towels glide better, and you are less likely to chase water spots like a detective in a bad soap opera. Before you begin, remove jewelry, watches, belt buckles, or anything else that could scratch paint while you lean over the tank.
2. Gather the Right Motorcycle Detailing Supplies
A good detail starts before the first rinse. Gather your supplies so you are not wandering around with wet hands looking for a clean towel. At minimum, you will want motorcycle-safe wash soap, two buckets, grit guards if available, microfiber wash mitts, soft detailing brushes, wheel brushes, microfiber drying towels, a gentle degreaser, chain cleaner, chain lubricant, bug remover, glass or plastic cleaner, wax or sealant, chrome or metal polish, and leather cleaner or conditioner if your bike has leather parts.
Avoid harsh household cleaners, dish soap, abrasive pads, and mystery sprays from the back of the cabinet. Motorcycles use many surfaces in a small space: painted panels, matte finishes, polished metal, coated wheels, rubber grips, clear windscreens, vinyl seats, leather saddlebags, and exposed fasteners. The right product for one surface may be a terrible idea for another. When in doubt, test on a small hidden area first.
3. Use a Gentle Pre-Rinse, Not a Pressure-Washer Attack
Before touching the bike with a mitt, loosen dirt with a gentle rinse. Use a garden hose with normal pressure or an adjustable nozzle. The goal is to float away grit, not force water into bearings, seals, switches, electronics, chain links, or exhaust openings. A motorcycle may be built for weather, but that does not mean it wants to be pressure-washed like patio furniture.
Pay special attention to wheels, lower fairings, fenders, and areas behind the front tire. These spots collect road grime, sand, brake dust, and bug debris. If your exhaust is angled upward or likely to collect water, cover or plug the opening before rinsing. That tiny step can prevent a lot of unnecessary moisture from ending up where it does not belong.
4. Wash From Top to Bottom With the Two-Bucket Method
The two-bucket method is one of the easiest ways to reduce swirl marks. One bucket holds clean soapy water. The second bucket is for rinsing your dirty mitt. Wash a small section, rinse the mitt in the clean-water bucket, then reload it with soap. This keeps grit from being dragged across paint, chrome, and plastic.
Work from the top down. Start with cleaner areas like the tank, upper fairings, handlebars, and front cowl, then move to dirtier lower sections. Use straight, gentle passes rather than aggressive scrubbing. If your mitt touches chain grease, brake dust, or gritty lower panels, do not take it back to the fuel tank like nothing happened. Switch towels or mitts. Your paint deserves better friends.
5. Treat Bugs, Tar, and Road Grime Before They Become Permanent Guests
Bug splatter is not just ugly. It can be acidic and may stain or etch paint and windshields if left too long. Tar, oil film, and road grime can also bond to surfaces, especially around the front fairing, forks, lower frame, wheels, and exhaust area. Use a motorcycle-safe bug and tar remover when ordinary soap is not enough.
Let the product dwell according to its directions, then wipe gently with microfiber. Do not scrape with fingernails, razor blades, rough sponges, or “I saw this online” confidence. For stubborn grime, repeat the process patiently. Detailing rewards patience and punishes dramatic gestures.
6. Clean Wheels, Spokes, and Brake Dust Carefully
Motorcycle wheels take a beating. Brake dust, chain lube, road film, mud, and salt can all build up quickly. Use a wheel cleaner that is safe for your wheel finish, whether painted, chrome, polished aluminum, powder-coated, anodized, or clear-coated. Some products that are safe for one finish may be too aggressive for another, so read labels carefully.
Use soft brushes to reach spokes, hubs, rims, and tight corners. For rear wheels with chain fling, a mild degreaser can help, but keep strong degreasers away from sensitive finishes unless the product specifically says it is safe. After cleaning, rinse thoroughly and dry the wheels. A light wheel-safe wax or sealant can make future brake dust and grime easier to remove.
7. Clean and Re-Lube the Chain After Washing
If your motorcycle has a chain drive, detailing is not complete until the chain is clean and lubricated. Soap and water can remove or weaken existing lubricant. Use a motorcycle chain cleaner and a suitable brush to loosen grime from the rollers and side plates. Rotate the rear wheel by hand when the bike is safely supported and in neutral. Never run the engine to spin the wheel while cleaning the chain. Fingers are more valuable than convenience.
Once the chain is clean and dry, apply motorcycle chain lubricant evenly. Give it time to set, then wipe away excess lube to reduce fling. Chain maintenance improves appearance, reduces corrosion risk, and supports smoother operation. It also keeps the rear wheel from looking like it lost a fight with a grease monster.
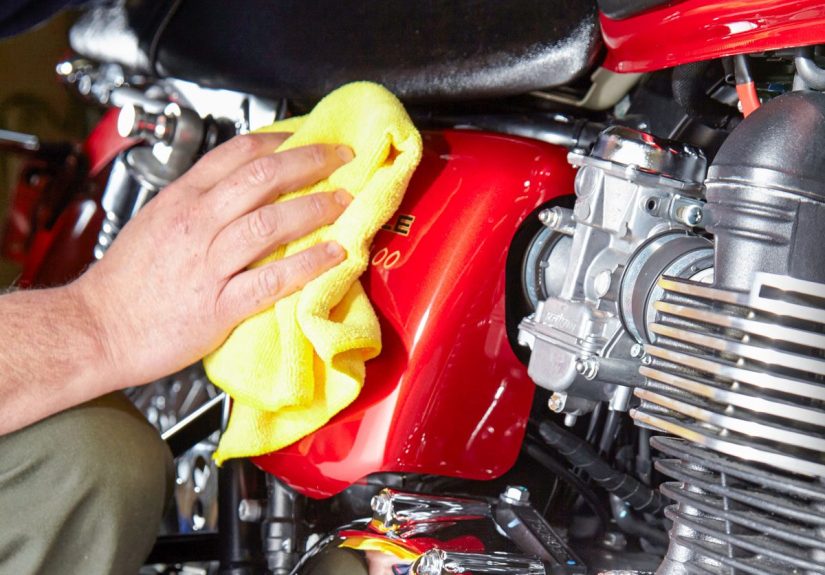
8. Dry Thoroughly With Microfiber and Air
Drying is more important than many riders think. Water left in crevices can cause spots, streaks, and corrosion, especially around fasteners, spokes, switches, mirrors, engine fins, and under trim. Use plush microfiber drying towels for painted and polished surfaces. Pat or glide gently instead of dragging a dry towel across the finish.
For tight areas, use filtered compressed air, a motorcycle dryer, or a leaf blower on a gentle setting. Blow water out of mirrors, controls, badges, seams, foot pegs, and engine fins. Then follow with a towel. Drying well is the difference between “freshly detailed” and “why are there mineral spots shaped like tiny islands?”
9. Polish Paint Only When Needed, Then Protect It
Polishing and waxing are not the same. Polish corrects or improves the surface by removing light oxidation, haze, or fine defects. Wax, sealant, or ceramic protection adds a protective layer. If your motorcycle paint is already glossy and smooth, you may only need wax or sealant. If it feels rough after washing, a clay bar with proper lubricant may remove bonded contaminants. If the paint has swirls or dullness, a mild polish may help.
Use polish carefully. Modern clear coat is not infinite. Apply light pressure, work small sections, and avoid edges where paint can be thinner. For matte or denim finishes, do not use normal polish or wax unless the product is specifically designed for matte paint. Gloss-building products can create shiny spots, which is exactly what matte paint did not sign up for.
After paint is clean and corrected, apply a thin, even layer of wax, paint sealant, or ceramic spray. Thin layers are easier to buff and less likely to leave residue around badges, seams, and trim.
10. Detail Chrome, Metal, Plastic, Rubber, and Leather Separately
A motorcycle is a rolling buffet of materials, and each one likes a different kind of care. Chrome benefits from a dedicated chrome polish and a soft microfiber towel. Aluminum may need a different polish depending on whether it is raw, polished, coated, brushed, or anodized. Stainless exhaust parts can often be cleaned with metal polish, but heat staining and carbon deposits may require special exhaust-safe products.
Plastic windscreens and gauge covers should be cleaned with plastic-safe products, not harsh glass cleaners that may damage coatings. Rubber grips and foot pegs should be clean but not slippery. Avoid shiny dressings on tires, seats, grips, pedals, or contact surfaces. A seat that looks glossy but feels like a slip-and-slide is not a luxury upgrade. It is a comedy sketch waiting for a stoplight.
Leather seats and saddlebags need leather-safe cleaner and conditioner. Clean first, condition lightly, and wipe away excess product. Vinyl seats need vinyl-safe care instead. The goal is protection, not greasiness.
11. Finish With an Inspection and a Maintenance Mindset
The best motorcycle detailing tip is to use the process as an inspection. While the bike is clean and dry, check tire tread, tire pressure, brake pads, chain slack, loose bolts, cable condition, fork seals, fluid leaks, lights, controls, mirrors, and fasteners. A clean motorcycle makes small problems easier to see.
Look under the engine, around the brake calipers, near the axle, under the seat, and along cable routes. If something looks cracked, loose, wet, worn, or rusty, investigate before your next ride. Detailing should make your motorcycle shine, but it should also make you more familiar with the machine. That familiarity is part of safer, smarter riding.
Common Motorcycle Detailing Mistakes to Avoid
Using Dish Soap as a Regular Wash
Dish soap may remove grease, but it can also strip wax and dry out certain surfaces. Use a pH-balanced automotive or motorcycle wash soap instead.
Spraying Water Directly Into Sensitive Areas
Avoid blasting water into switches, gauges, bearings, exhaust openings, air intakes, and electrical connectors. Gentle water flow is your friend.
Using One Towel for Everything
Do not use the same towel for paint, wheels, chain grime, and chrome. Separate towels reduce scratches and contamination.
Applying Tire Shine to Motorcycle Tires
Motorcycle tires rely on their contact patch for grip. Slick dressings on tire tread or sidewalls can be dangerous if they migrate. Keep tires clean, not glossy.
Forgetting to Re-Lube the Chain
After washing, always check whether the chain needs lubrication. A shiny bike with a dry chain is like wearing a tuxedo with wet socks.
How Often Should You Detail a Motorcycle?
The answer depends on how often you ride, where you ride, and how much dirt your motorcycle collects. A light wipe-down after rides can keep dust and bugs from bonding to the surface. A proper wash may be needed every few weeks for regular riders, or sooner after rain, mud, salt, or long highway trips. A deeper detail with paint protection, chrome care, leather treatment, and chain cleaning may be useful every few months or before long-term storage.
If you ride in winter conditions or on roads treated with salt and sand, wash the motorcycle as soon as practical. Salt accelerates corrosion, especially on exposed metal and fasteners. After cleaning and drying, protective sprays and waxes can help shield vulnerable areas.
Best Practical Routine for a Clean Motorcycle
For most riders, a smart routine looks like this: cool the bike, pre-rinse gently, wash with the two-bucket method, clean wheels and lower areas, treat bugs and grime, rinse thoroughly, dry completely, clean the chain, apply chain lube, protect paint and chrome, condition leather if needed, and inspect the bike before putting tools away.
You do not need to make every detail session complicated. Some days, a gentle wash and dry are enough. Other days, especially before a trip or after a messy ride, the full treatment is worth it. The secret is consistency. A motorcycle that is maintained regularly is easier to clean, easier to inspect, and much less likely to develop stubborn stains or corrosion.
Real-World Experiences With Motorcycle Detailing
Anyone who has detailed motorcycles for more than one season learns a few lessons the memorable way. The first is that dirt always hides in places you did not know existed. You can wash the tank until it reflects clouds, then crouch down and discover the underside of the fender looks like it has been hosting a mud festival. That is why lighting matters. A shaded workspace is ideal, but good side lighting helps reveal streaks, missed grime, and water trapped around badges or engine fins.
Another experience many riders share is the “quick wash” that becomes a full afternoon. It starts innocently: rinse the bike, wipe the tank, clean the windshield. Then you notice chain fling on the rear wheel. Then the spokes look dull. Then the chrome needs a little polish. Suddenly you are cleaning under the seat and questioning your life choices. The trick is to decide your goal before starting. If you only have thirty minutes, do a safe maintenance wash: rinse, wash, rinse, dry, lube the chain, and inspect. Save the deep polishing session for a day when you are not racing sunset.
One of the most useful habits is keeping separate microfiber towels by job. Paint towels should stay paint towels. Wheel towels should stay wheel towels. Chain-area towels should be considered retired from polite society. This simple system prevents grit and grease from migrating to delicate surfaces. It also makes cleanup faster because you are not trying to remember which towel touched the rear sprocket.
Riders also learn that product restraint is a virtue. More wax does not mean more protection. More leather conditioner does not mean happier leather. More metal polish does not mean faster shine. In many cases, thin and even beats thick and dramatic. Heavy product application usually creates extra buffing, white residue in seams, or a slippery surface where grip matters. A motorcycle is compact, so a little product often goes a long way.
Detailing also teaches you how your bike ages. A commuter motorcycle may show grime around the chain, wheels, and lower engine cases. A touring bike may collect bugs across the windshield, mirrors, and front fairing. A cruiser with chrome may need more frequent polishing around exhaust and wheel areas. An adventure bike may laugh at your microfiber towel and ask for a soft brush first. Each style of motorcycle has its own cleaning personality.
The most rewarding experience comes after the detail, when the motorcycle is clean, dry, protected, and ready to ride. Controls feel better. The seat looks fresh. The paint has depth. The chrome catches light. Even the engine seems a little prouder of itself. More importantly, you know the bike better. You have checked the tires, looked at the chain, noticed the fasteners, and seen the machine from angles you usually ignore. That confidence is worth more than shine alone.
The best advice from experience is simple: do not wait until the motorcycle looks terrible. Light, regular detailing is easier than heroic rescue cleaning. Keep bugs from baking onto the front end. Keep chain fling off the rear wheel. Keep salt and grime away from exposed metal. Keep leather conditioned before it dries out. Keep plastic protected before it fades. A clean motorcycle is easier to love, easier to sell, easier to maintain, and much more fun to walk away from slowly while pretending you are in a movie.
Conclusion
Motorcycle detailing is part cleaning, part protection, and part mechanical awareness. The right process helps preserve paint, chrome, leather, plastic, rubber, wheels, and exposed metal while giving you a closer look at your motorcycle’s condition. Start with a cool bike in the shade, use gentle water pressure, wash with clean microfiber, treat each surface correctly, dry thoroughly, clean and lubricate the chain, and finish with a careful inspection.
When done well, detailing makes your motorcycle look better and helps it last longer. It also turns routine cleaning into a useful habit that connects you with your machine. And yes, the shine is nice too. Nobody ever complained that their motorcycle looked too good, unless they were standing next to it with a dirty helmet.


