
Table of Contents >> Show >> Hide
- Why a Milk Jug Birdhouse Works (and When It Doesn’t)
- Materials and Tools
- Step-by-Step: Build the Milk Jug Birdhouse
- Step 1: Clean and prep the jug
- Step 2: Mark the entrance hole
- Step 3: Cut the entrance hole (size mattersseriously)
- Step 4: Add ventilation near the top
- Step 5: Add drainage holes in the bottom
- Step 6: Make hanging holes and attach the twine
- Step 7: Skip the perch (most of the time)
- Step 8: Weatherproof the entrance (optional but smart)
- Design Upgrades That Make a Big Difference
- Where to Hang Your Milk Jug Birdhouse
- Will Birds Actually Nest in It?
- Cleaning and Maintenance
- Troubleshooting: Quick Fixes for Common Problems
- Common Experiences and “Lessons Learned” From DIY Milk Jug Birdhouses (Extra 500+ Words)
- Experience 1: “I made it cute… and the birds ghosted me.”
- Experience 2: “It got HOT inside, so I upgraded the design.”
- Experience 3: “I added a perch, and then things got weird.”
- Experience 4: “The wind turned it into a spinning carnival ride.”
- Experience 5: “Cleaning was the part I didn’t think about.”
- Conclusion
If you’ve ever looked at an empty plastic milk jug and thought, “You’re too majestic for the recycling bin,” congratulations:
you are exactly the kind of person who ends up running a tiny bird real-estate empire from their backyard.
A milk-jug birdhouse is inexpensive, quick, and weirdly satisfyinglike solving a puzzle, but the prize is a family of wrens
who will yell compliments at the sunrise.
This guide walks you through a simple eHow-style milk jug birdhouse build, then upgrades it with the stuff experienced bird folks
care about: safe entry-hole sizing, ventilation, drainage, heat management, and placement. The goal isn’t just “cute craft,”
it’s “safe nesting option” (with a side of “wow, I made that from trash”).
Why a Milk Jug Birdhouse Works (and When It Doesn’t)
A plastic milk jug is naturally roomy, weather-resistant, and easy to hang. It’s also easy to cut, which is both a blessing
and a “please keep fingers attached” moment. But plastic has a big downside: it can trap heat, especially in direct sun.
That means your design needs extra ventilation, and your placement needs shade.
The sweet spot: “upcycled” + “bird-safe”
- Best for: small cavity nesters (think wrens or chickadees) in mild-to-warm climates where you can place it in shade.
- Not ideal for: hot, full-sun locations or areas where the box would bake for hours a day.
- Bottom line: it can workif you treat heat and drainage like non-negotiable features, not optional accessories.
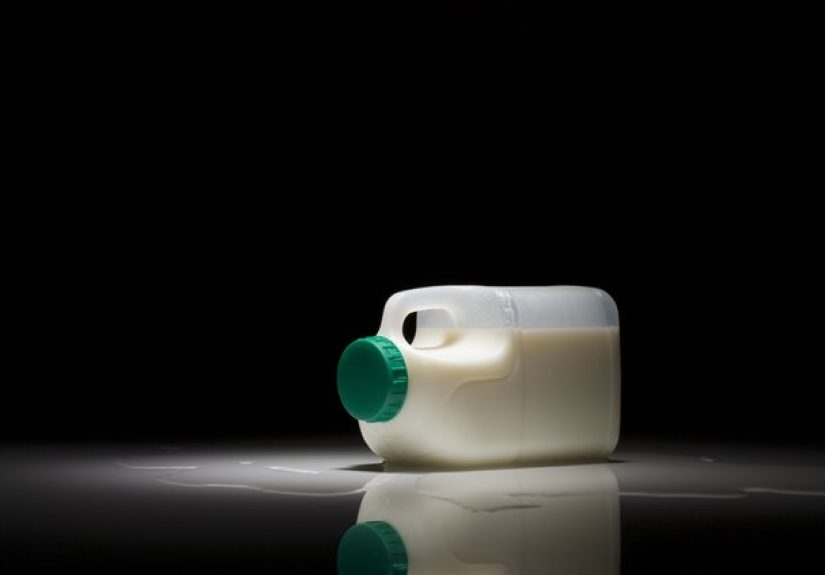
Materials and Tools
What you’ll need
- 1 clean plastic milk jug with cap (gallon jugs are easiest)
- Scissors and/or a craft knife/utility knife (adult use recommended)
- Twine, paracord, or sturdy string (about 18 inches, more if you’re hanging high)
- Hole punch, awl, nail, or heated screwdriver (for making hanging/vent/drain holes)
- Sandpaper or an emery board (to smooth sharp edges)
- Optional: non-toxic outdoor paint (light color), duct tape, or weatherproof tape
- Optional: a small piece of thin wood or sturdy plastic as an “entry plate” to reinforce the hole
Safety first (because blood is not birdseed)
- Wash the jug thoroughly and let it dry completely.
- Cut away from your body and keep the jug stable while cutting.
- Smooth any sharp plastic edges so birds don’t scrape feet or wings.
- Never use jugs that held chemicals (detergent jugs are a “no”). Stick to food-grade containers.
Step-by-Step: Build the Milk Jug Birdhouse
Step 1: Clean and prep the jug
Rinse the jug with warm soapy water, remove all milk residue (old milk smell is not the “rustic woodland vibe” you want),
and let it dry. If the jug is translucent, consider painting or wrapping itnesting birds generally prefer darker interiors,
and a clear plastic “sunroom” can heat up fast.
Step 2: Mark the entrance hole
On one flat side of the jug, mark the entrance location. A simple method (similar to the classic eHow approach) is to center the opening
on the side panel. But we’ll be slightly more strategic:
- Height: place the hole so its bottom edge sits at least 5–6 inches above the “floor” of the jug (the bottom).
- Why: that buffer helps keep nest material drier and makes it harder for predators to reach in.
Step 3: Cut the entrance hole (size mattersseriously)
Carefully cut a circular entrance hole. Many quick craft versions use a large opening (sometimes around 2 inches), but for an actual birdhouse,
you’ll usually want a smaller, species-appropriate entrance. For common small cavity nesters, an entrance around
1-1/8 inch is often recommended.
If you’re not sure which birds you’re trying to attract, aim for the “small bird” range rather than “open invitation to every creature
with shoulders.”
Step 4: Add ventilation near the top
Plastic holds heat. So give that warm air somewhere to go.
Punch 2–4 small ventilation holes near the top on the sides (just below the shoulder of the jug).
Keep them small enough to discourage wasps and keep rain from blowing straight in.
Step 5: Add drainage holes in the bottom
A birdhouse should never double as a bird bathtub. Punch 4–6 drainage holes in the bottom.
If the jug has molded “feet,” put holes in the lowest points where water would collect.
Step 6: Make hanging holes and attach the twine
Remove the cap. Then poke two holes opposite each other about 1 inch below the top of the jug (near the neck/shoulder area).
Thread the twine through the holes so both ends come out the top opening. Tie the ends together in a solid knot.
Put the cap back on.
This creates a simple, sturdy handle that keeps the house upright. If your knot looks like it was tied by a raccoon in a hurry,
redo it. Gravity is patient.
Step 7: Skip the perch (most of the time)
Many kid-craft birdhouses add a cute little perch. In real nest boxes, perches are usually unnecessary and can make it easier
for predators or aggressive birds to harass the nest.
If your goal is bird safety, you can proudly embrace a perch-free minimalist aesthetic.
Step 8: Weatherproof the entrance (optional but smart)
Plastic edges can flex and wear. If you want to upgrade:
- Sand the cut edge smooth.
- Add a thin “entry plate” (a small piece of wood or sturdy plastic with the same hole size) over the entrance using outdoor-safe adhesive.
- Make sure nothing sharp sticks out inside.
Design Upgrades That Make a Big Difference
1) Control heat like you’re running a tiny nursery (because you are)
- Choose shade: hang it where it gets morning light and midday shade.
- Go light-colored: if you paint it, use a light exterior color and non-toxic paint.
- Add airflow: more ventilation holes are better than fewer, as long as rain can’t blow directly in.
2) Keep the inside dark and calm
If your jug is semi-clear, paint the outside or wrap it with a light-colored layer. Birds generally prefer a sheltered interior,
and darker interiors also help reduce the “solar oven” effect.
3) Add a “clean-out plan” from day one
Traditional wooden birdhouses open for cleaning. Yours probably doesn’t. So build in a cleaning strategy:
- Make the entrance large enough for you to remove old nesting material later.
- Or, cut a flap on the back side and tape it shut securely during the season (only if it’s predator-resistant and weather-tight).
- Plan to take it down after nesting season for a full clean and dry-out.
Where to Hang Your Milk Jug Birdhouse
Height and location
- Height: about 5–10 feet is a common range for many small backyard birds.
- Stability: avoid spots where it will swing wildly in wind (nobody wants a “storm ride” nursery).
- Predator awareness: keep it away from easy jumping points for cats and raccoons.
- Direction: if possible, face the entrance away from prevailing winds and harsh afternoon sun.
A practical example
If you have a tree line or a fence that casts shade after late morning, hang the jug on the shaded side.
That gives birds a safer temperature window while still keeping the house visible enough for adults to find it.
Will Birds Actually Nest in It?
Sometimes, yes. But success depends on whether the birdhouse behaves like a safe nest cavity:
right entrance size, proper ventilation and drainage, and a placement that doesn’t cook the interior.
Also, birds are picky. They don’t read your craft blog. They follow instincts and convenience.
Common reasons birds ignore a milk jug birdhouse
- The entrance hole is too big (inviting competitors and predators).
- The house is in direct sun and gets too hot.
- It swings too much in wind.
- It smells strongly of paint/chemicals (always let paint cure fully before hanging).
- It’s placed too close to heavy human activity or noisy spots.
Cleaning and Maintenance
Cleaning helps reduce parasites and disease risks. The general routine is:
remove old nesting material, scrub, disinfect (if needed), rinse well, and dry completely before rehanging.
A simple seasonal routine
- After the nesting season, take the house down (wear gloves).
- Remove old nesting material and debris.
- Scrub with hot soapy water.
- Disinfect using a diluted bleach solution (commonly 1 part bleach to 9 parts water), then rinse thoroughly.
- Let it dry completely in the sun before storing or rehanging.
Troubleshooting: Quick Fixes for Common Problems
Problem: The jug gets too hot
- Move it to a shadier spot.
- Add more ventilation holes near the top.
- Paint the exterior a light color (and let it fully cure).
Problem: Water collects inside
- Add more drainage holes on the bottom.
- Make sure the jug hangs upright (adjust the twine knot position if needed).
- Move it to a less wind-driven-rain location.
Problem: Bigger birds (or squirrels) take over
- Reduce entrance hole size with an entry plate.
- Avoid perches.
- Relocate the house away from feeder chaos (nesting is different from snack time).
Common Experiences and “Lessons Learned” From DIY Milk Jug Birdhouses (Extra 500+ Words)
People who make milk jug birdhouses tend to have the same emotional arc:
“This is adorable,” followed by “Why is nobody moving in?” followed by “WAITIS THAT A BIRD?” followed by
“I will now whisper near this tree like I’m in a nature documentary.”
Here are some experiences DIYers often reportand what those stories teach you.
Experience 1: “I made it cute… and the birds ghosted me.”
This is the most common outcome for first-time builds, and it’s usually not personal. Birds often reject houses that are too bright,
too exposed, or too breezy inside. Many milk jugs are translucent, which can make the interior feel unsafe and overly lit.
DIYers who repaint the exterior (light color, non-toxic paint) or wrap it to darken the inside often see better interest.
Another common fix is simply moving the birdhouse: a spot that seems “pretty” to humans may be “wide open to predators” in bird logic.
Experience 2: “It got HOT inside, so I upgraded the design.”
This is where the milk jug birdhouse becomes an unexpectedly educational project. People often notice condensation, warm plastic,
or just that the jug feels like a tiny greenhouse in sun. The best “upgrade stories” include:
adding extra ventilation holes near the top, making sure drainage exists, and relocating the house so it gets shade during the hottest
part of the day. DIYers in warmer climates often learn quickly that “full sun” is great for tomatoes and terrible for nestlings.
Some even add a simple “roof” by taping a small piece of plastic or thin wood above the entrance as a sun shieldanything to reduce
direct solar heating.
Experience 3: “I added a perch, and then things got weird.”
Perches look charming, and kids love adding them. But a lot of DIYers later notice that perches can invite trouble: bigger birds
may harass the entrance, and predators sometimes get a little extra advantage. Some people remove the perch after noticing increased
bullying at the entrance or too much “traffic” from species they weren’t hoping to host.
The lesson: a birdhouse is not a front porch swing. It’s more like a locked apartment building with one controlled doorway.
Experience 4: “The wind turned it into a spinning carnival ride.”
Hanging a milk jug from a single string can make it swing and twist. DIYers who get the best results usually stabilize the house:
either hang it from a sturdier hook, shorten the drop length, or secure the bottom with a second tie to keep it from spinning.
Birds want a stable nest siteimagine trying to sleep in a hammock during a windstorm. Cozy for you, maybe. For eggs? Nope.
Experience 5: “Cleaning was the part I didn’t think about.”
A surprising number of people build the house, hang it up, and then realize months later they can’t easily clean it.
The DIYers who stick with the hobby usually develop a routine:
they take the jug down after the season, remove old nesting material, scrub it, disinfect (when appropriate), rinse thoroughly,
and let it dry completely. The big lesson here is that birdhouses aren’t “set it and forget it.”
They’re more like seasonal gearlike patio cushions, but with higher stakes and more chirping.
The most encouraging pattern across these experiences is that small changes often make a big difference.
A little more shade, a little more ventilation, a better-sized entrance hole, and a steadier hang can turn a “cute recycled craft”
into something birds actually choose. And if birds still don’t move in? You still made something useful, learned real wildlife design
principles, and gave your milk jug a second life that’s way better than being crushed into a cube somewhere.
Conclusion
Making a birdhouse from a plastic milk jug is a fun, low-cost DIY that can genuinely help backyard birdsif you build it with bird needs
in mind. Focus on the essentials: a properly sized entrance hole, solid ventilation and drainage, a stable hang, and shaded placement.
Keep it perch-free, keep it clean between seasons, and treat heat management as the difference between “birdhouse” and “bird sauna.”
Do that, and your recycled jug can become a tiny, well-ventilated starter home for some very loud (and very grateful) neighbors.


