
Table of Contents >> Show >> Hide
- What You’ll Need Before You Start
- How to Pack a Parcel for Delivery: 13 Steps
- Step 1: Do a Quick “Can This Even Ship?” Check
- Step 2: Pick the Right Box (Size MattersA Lot)
- Step 3: Use a Sturdy Container (Not a Box That’s Seen Things)
- Step 4: Prep the Item (Because Loose Parts Love Chaos)
- Step 5: Wrap the Item Like It’s Going to Meet Gravity
- Step 6: Cushion the Bottom of the Box First
- Step 7: Center the Item and Add Cushioning on All Sides
- Step 8: Fill All Empty Space (Then Do the Shake Test)
- Step 9: Seal the Box with the “H” Taping Method
- Step 10: Protect Against Weather (Because Rain Has No Mercy)
- Step 11: Label Clearly and Place the Label on the Largest Flat Surface
- Step 12: Remove or Cover Old Labels and Barcodes
- Step 13: Final CheckWeight, Photos, and Drop-Off Readiness
- Special Packing Scenarios (Where People Usually Get Burned)
- Common Packing Mistakes (And the Simple Fixes)
- Quick Pre-Drop Checklist
- FAQ
- Real-World Packing Experiences: Lessons People Learn the Hard Way (Extra )
- Conclusion
Packing a parcel sounds easyuntil your “simple” shipment arrives looking like it lost a wrestling match with a conveyor belt.
The good news: you don’t need mystical powers or a warehouse full of supplies to pack a package that survives real-world delivery.
You just need the right box, the right padding, and the right amount of “please don’t let this open mid-transit” energy.
This guide walks you through 13 practical steps to pack a parcel for deliverywhether you’re mailing a sweater,
a coffee mug, or something fragile enough to make you whisper, “Be careful, my precious,” before sealing the box.
Along the way, you’ll get carrier-friendly packing habits, clear examples, and a few laughsbecause shipping is stressful enough.
What You’ll Need Before You Start
Think of this as your “packing toolbox.” If you have most of these items, you’re already ahead of the “I used tape that came
from a junk drawer in 2009” crowd.
- A sturdy box (new or clean, rigid used box with intact flaps)
- Cushioning: bubble wrap, foam, packing paper, air pillows, or packing peanuts
- Void fill: crumpled paper, peanuts, air pillows (something to stop shifting)
- Strong packing tape (typically at least 2 inches wide)
- Scissors or a box cutter
- A shipping label (printed or handwritten neatly with permanent marker)
- Optional but smart: plastic bag for moisture protection, “Fragile” labels, a marker, and a scale
How to Pack a Parcel for Delivery: 13 Steps
Step 1: Do a Quick “Can This Even Ship?” Check
Before you touch the box, confirm what you’re shipping is allowedand whether it needs special handling.
The classic “surprise problem children” are lithium batteries, aerosols, alcohol,
perfumes, cleaning chemicals, and anything labeled flammable.
If your item includes a battery or liquid, don’t guess. Carrier rules can require specific markings, surface-only transport,
or special packaging. When in doubt, check the carrier’s restricted items guidance.
Step 2: Pick the Right Box (Size MattersA Lot)
Choose a box that fits your item with room for padding on all sides. A box that’s too small forces you to skimp on
protection. A box that’s too big invites shifting (and “shifting” is how breakage begins).
Rule of thumb: you want enough space for cushioningespecially if the item is fragile. If the item can’t survive a gentle bump
on a countertop, it definitely can’t survive a sorting facility.
Step 3: Use a Sturdy Container (Not a Box That’s Seen Things)
A clean, rigid box with intact flaps is ideal. Reused boxes can work if they’re still strong and not crushed, torn, damp, or
bending like a tired piece of lasagna.
If you’re shipping anything heavy or valuable, choose a stronger corrugated box. Many boxes have a “certificate stamp” printed
on the bottom showing the strength rating. It’s not just box triviastronger boxes reduce the chance of crushing in transit.
Step 4: Prep the Item (Because Loose Parts Love Chaos)
Prepare the item so it’s less likely to shift, leak, or scratch:
- Disassemble what you can (e.g., remove detachable lids, cords, or fragile accessories).
- Bag it if moisture or dirt could be a problem (electronics, fabrics, paper goods).
- Cap and seal liquids tightly; consider taping the cap shut and placing the container in a sealed bag.
- Bundle small parts in a sealed pouch or container, then pad them so they don’t rattle.
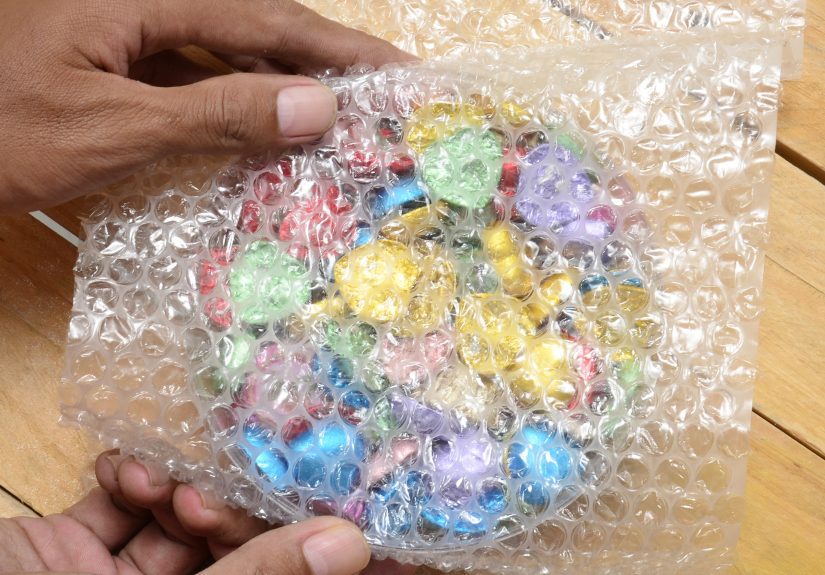
Step 5: Wrap the Item Like It’s Going to Meet Gravity
Your item should be wrapped before it goes into the box. If it’s fragile, wrap it generouslycarriers commonly recommend
thick cushioning for breakables.
Example (shipping a ceramic mug): Wrap the mug in multiple layers of bubble wrap, especially around the handle.
Tape the bubble wrap so it stays snug. If the mug can wiggle inside its wrap, add more wrapmovement is the enemy.
Step 6: Cushion the Bottom of the Box First
Don’t drop your item onto bare cardboard and hope for the best. Add a cushion “base layer” on the bottombubble wrap, foam,
crumpled paper, or peanuts. This helps absorb impact if the box gets set down hard.
Step 7: Center the Item and Add Cushioning on All Sides
Place the wrapped item in the center of the box and surround it with cushioning on every side.
The goal is “floating,” not “touching the walls.”
Pro move: If you’re shipping something fragile, consider the box-in-box method: put the item in a smaller padded
inner box, then cushion that inside a larger outer box. It adds time and materials, but it’s one of the best ways to protect
breakables and electronics.
Step 8: Fill All Empty Space (Then Do the Shake Test)
Empty space inside a package turns into momentum. Fill voids with paper, peanuts, air pillows, or foam until the item can’t move.
Then do a simple test: close the flaps (don’t tape yet) and gently shake the box.
If you hear or feel movement, open it and add more fill. The ideal sound is: nothing.
The second-best sound is: also nothing.
Step 9: Seal the Box with the “H” Taping Method
Use strong packing tape (commonly at least 2 inches wide) and seal like you mean it.
The “H” method is popular for a reason: you tape the center seam and both edge seams, forming an “H.”
- Place one long strip along the center seam where the flaps meet.
- Add two strips across the side seams (the edges) to reinforce.
- Repeat on the bottom of the box if you haven’t already sealed it.
Skip masking tape, cellophane tape, duct tape, string, or rope. They can fail, peel, snag, or cause processing issues.
Step 10: Protect Against Weather (Because Rain Has No Mercy)
Delivery trucks, loading docks, and porches all have one thing in common: water exists there.
If your contents hate moisture (clothes, paper products, electronics), put the item in a sealed plastic bag before boxing,
or line the box with plastic.
Bonus: place a strip of clear packing tape over the label (without covering barcodes in a way that makes them unreadable),
helping prevent smears or scuffs.
Step 11: Label Clearly and Place the Label on the Largest Flat Surface
Put the shipping label on the largest surface of the box and keep it flat and unobstructed.
Avoid placing the label over seams or edges where it might tear.
If you’re handwriting the address, use a permanent marker, print neatly, and include a full return address.
Pro tip: include a duplicate label or note with both addresses inside the package in case the outer label gets damaged.
Step 12: Remove or Cover Old Labels and Barcodes
Reusing a box? Great for the planet. Potentially confusing for scanners.
Remove or fully cover old shipping labels, barcodes, and hazmat markings.
You want exactly one scannable identity on the package: the current label.
Step 13: Final CheckWeight, Photos, and Drop-Off Readiness
Before you hand it off:
- Weigh and measure the parcel after it’s fully packed (rates depend on packed size and weight).
- Check the seal on all seams, especially the bottom.
- Take quick photos of the packed item and sealed box (helpful if a claim is ever needed).
- Confirm services like tracking, signature, or insurance for valuables.
Now you’re ready to drop it off, schedule a pickup, or hand it to a carrier employee who will place it into the great package
ecosystemwhere it will travel far, be scanned often, and hopefully arrive looking exactly like it left.
Special Packing Scenarios (Where People Usually Get Burned)
Fragile Items (Glass, Ceramics, Frames)
Fragile items do best with thick cushioning, zero movement, and often a box-in-box approach.
Don’t rely on “Fragile” stickers as a force field. They’re helpful, but physics still clocks in for every shift.
Liquids (Skincare, Sauces, Shampoo)
Seal the lid, tape it shut, bag it, and add absorbent material if possible. Then cushion it so it can’t slam into the box walls.
If it leaks, it should leak into containmentnot into a cardboard sponge.
Electronics and Batteries
Use anti-static protection when relevant, pad generously, and keep accessories from pressing into the device.
If lithium batteries are involved, follow carrier-specific rules on markings, quantity limits, and permitted services.
Soft Goods (Clothes, Linens)
Soft goods ship well, but still need structure. If you use a box, fill it to reduce crushing.
If you use a poly mailer, consider adding an inner bag for water resistance and extra tape for closure.
Odd Shapes (Sporting Goods, Tools, Cylinders)
Odd shapes snag on equipment and get banged around. If possible, put the odd item inside a standard box.
If you must ship it as-is, reinforce protrusions, pad sharp edges, and make sure the outer surface won’t catch or tear.
Common Packing Mistakes (And the Simple Fixes)
- Mistake: “It’s snug, so it’s safe.” Fix: Snug without cushioning still breaksadd padding on all sides.
- Mistake: Label over a seam. Fix: Place the label on the largest flat surface, away from edges/seams.
- Mistake: Old barcode still visible. Fix: Remove or fully cover old labels and markings.
- Mistake: Cheap tape or narrow tape. Fix: Use strong packing tape (often 2 inches wide) and H-tape seams.
- Mistake: Packing peanuts with a heavy item loose in the box. Fix: Wrap the item, stabilize it, and prevent settling/shift.
Quick Pre-Drop Checklist
- Item wrapped and protected (and bagged if moisture-sensitive)
- At least one cushioning layer beneath the item
- No movement when gently shaken
- Seams sealed with the H-taping method (top and bottom)
- Label flat, clear, and not across seams; return address included
- Old labels/barcodes removed or fully covered
- Valuables: photos taken + tracking/insurance considered
FAQ
How much cushioning do I really need?
Enough that the item can’t move and won’t touch the box walls. Fragile items typically need thicker cushioning than people expect,
especially around corners and handles.
Can I reuse a box?
Yesif it’s rigid, clean, dry, and the flaps are intact. Cover or remove all old labels and barcodes, and avoid reused boxes for
very heavy, valuable, or fragile shipments.
Should I write “Fragile” on the box?
It can help, but it’s not a substitute for good packing. Assume the box will be stacked, bumped, and handled by machines.
Pack accordingly, then label for clarity.
Real-World Packing Experiences: Lessons People Learn the Hard Way (Extra )
Ask anyone who ships regularlysmall-business sellers, people sending holiday gifts, or that friend who always “knows a cheaper way”
(and later pays for it)and you’ll hear the same pattern: most packing problems aren’t dramatic. They’re tiny decisions that stack up.
One common story: someone ships a mug with “just a little bubble wrap” because the box fits perfectly. It arrives as ceramic confetti.
The lesson isn’t “bubble wrap is bad”it’s that contact with the box wall is a silent deal with disaster.
A box that hugs an item too tightly leaves no room for shock absorption. Even a small drop onto a hard surface can transfer force
straight through cardboard into breakables.
Another classic: packing peanuts used with a heavier item, where the item settles to the bottom during transit.
At drop-off, it’s centered. After a day of vibration and movement, it’s sitting on the bottom corner like it paid rent there.
The fix is simple: wrap the item, use a stable base layer, and combine peanuts with other materials (paper, foam, or a snug inner box)
so the contents can’t “sink.”
Then there’s the “label tragedy.” Plenty of packages get delayed because old barcodes weren’t removed. A box gets scanned,
a machine sees the wrong code, and suddenly your parcel is auditioning for a road trip it never wanted.
People learn quickly: one box, one label identity. If you reuse packaging, cover old markings like you’re
starring in a witness protection program for cardboard.
Tape is another underestimated villain. A parcel may be packed beautifully inside, but sealed with flimsy tape or a single strip
down the middle. In transit, seams flex, tape peels, and the box opens just enough to spill contentsor invite moisture.
Experienced shippers tend to “overdo” tape not because they love spending money, but because they’ve seen how a box fails:
corners pop, seams split, and gravity wins. The H-taping method isn’t fancy; it’s just consistent seam reinforcement.
Weather sneaks up, too. People imagine packages traveling through a climate-controlled paradise. In reality, boxes sit on porches,
loading docks, or in trucks where condensation and rain happen. That’s why many frequent shippers automatically bag moisture-sensitive
items and use tape that stays put. If you’ve ever received a package with a soft, wrinkled corner, you’ve met water’s favorite hobby:
turning cardboard into a sad sponge.
The biggest “experienced shipper” mindset shift is this: pack for the journey, not the handoff. At the counter, the parcel looks fine.
But the shipping world includes belts, chutes, stacking, and weight on top. When you pack with that reality in mindcushioning,
no movement, strong seams, clean labelingyou’re not being paranoid. You’re being accurate.
Conclusion
Packing a parcel for delivery is mostly about controlling three things: movement, impact, and
confusion. Stop the item from shifting, cushion it so bumps don’t become breakage, and label it clearly so scanners
and humans know exactly where it’s going. Follow the 13 steps above, and your package has a much better chance of arriving like it
leftintact, readable, and not starring in an “unboxing fail” story.


