
Table of Contents >> Show >> Hide
- Why a Shipping Crate Makes a Great Planter (and When It Doesn’t)
- Tools and Materials
- Step-by-Step: Turn a Shipping Crate into a Planter
- 1) Inspect, clean, and de-splinter
- 2) Reinforce the crate (especially the bottom)
- 3) Add feet (this is the secret to longer crate life)
- 4) Drill proper drainage holes
- 5) Line it the right way (protect the wood without trapping water)
- 6) Choose the right “soil” (spoiler: it’s usually not garden soil)
- 7) Plant with intention (aka, don’t cram 12 tomatoes into a crate)
- The Science-y Part (But Make It Useful): Drainage, Watering, and Root Health
- Design Ideas: Make Your Crate Planter Look Like It Belongs on Purpose
- Make It Last: Rot Prevention and Seasonal Care
- Troubleshooting: When Your Crate Planter Gets Dramatic
- Real-World Experiences (): What DIYers Learn After the First Crate Planter
- Conclusion: Your Crate’s Second Act Starts Now
- SEO Tags
Somewhere in the world, a shipping crate is living its best life: hauling something fancy, collecting a few travel stories,
and picking up that “I’ve seen things” patina. Then it retires… and gets turned into a planter. Honestly? Icon behavior.
If you’ve got a wooden shipping crate (or even a sturdy “industrial” box that once held who-knows-what), you’re holding a
ready-made container garden with built-in character. But before you toss in soil and start naming your basil plant,
let’s do this the smart way: safely, with proper drainage, and with a setup that won’t rot into a sad pile of splinters
by July.
Why a Shipping Crate Makes a Great Planter (and When It Doesn’t)
The good stuff: instant structure, rustic style, and easy DIY
Crates are basically planter boxes that already did the hardest part: existing. They’re square-ish, sturdy-ish, and
usually designed to survive bumps and stacking. That makes them perfect for patios, porches, balconies, and “I swear I’ll
garden this year” corners.
The reality check: you need to confirm it’s safe for plants (and you)
Not all crates are created equal. Some are made from untreated wood (great). Others may be painted, stained, or exposed
to chemicals (less greatespecially for herbs or veggies). Here’s the crate safety checklist:
- Avoid mystery coatings: Skip crates that are heavily painted, oily, sticky, or smell like chemicals.
- Look for stamps/marks: International shipping wood may be marked to show how it was treated (more on that below).
- When in doubt, use it for ornamentals: If you can’t confirm the crate’s history, grow flowers instead of food.
Quick guide to common shipping-wood stamps (the “plant safety detective” moment)
Many shipping materials follow international phytosanitary standards and may be stamped with codes. The one you’ll often
see is HT, which stands for heat treateda process used to kill pests. That’s generally the
stamp DIYers like to see for garden reuse.
If you see MB, that can indicate methyl bromide fumigation. Because it’s a pesticide
treatment, a conservative approach is to avoid using MB-marked wood for plantersespecially for edibles.
(And yes, this is the part where we all agree your parsley deserves better than “pesticide crate chic.”)
Tools and Materials
Keep it simple. You don’t need a full workshopjust the basics:
- Shipping crate (sturdy, not falling apart, ideally untreated)
- Drill + drill bits (for drainage holes and pilot holes)
- Sandpaper or a sanding block (80–120 grit)
- Screws (exterior-rated) and/or corner brackets (optional reinforcement)
- Staple gun or small nails (for attaching liner)
- Landscape fabric, burlap, or planter liner fabric
- Optional: thin plastic liner for the sides (not the bottom), or pond liner offcuts
- Potting mix (container mixlightweight and well-draining)
- Slow-release fertilizer (optional but helpful)
- Feet or risers (scrap wood strips, small blocks, or even pot feet)
Step-by-Step: Turn a Shipping Crate into a Planter
1) Inspect, clean, and de-splinter
First: check for protruding nails, staples, cracked boards, and weak corners. Remove hardware that looks like it’s
auditioning to stab you. Then scrub off dust and grime with a stiff brush. Let it dry completely.
Sand rough edges and splinters. You don’t need furniture-level smoothjust “won’t snag your sweater and turn you into a
human pincushion.”
2) Reinforce the crate (especially the bottom)
Soil is heavy. Wet soil is heavier. “I added rocks to the bottom” soil is basically a gym membership.
If your crate bottom is thin slats, consider:
- Adding two support boards underneath (front-to-back), screwed into the base slats
- Installing corner brackets inside the crate for extra strength
- Replacing missing slats or adding a thin wood panel inside the base (with drainage holes drilled through)
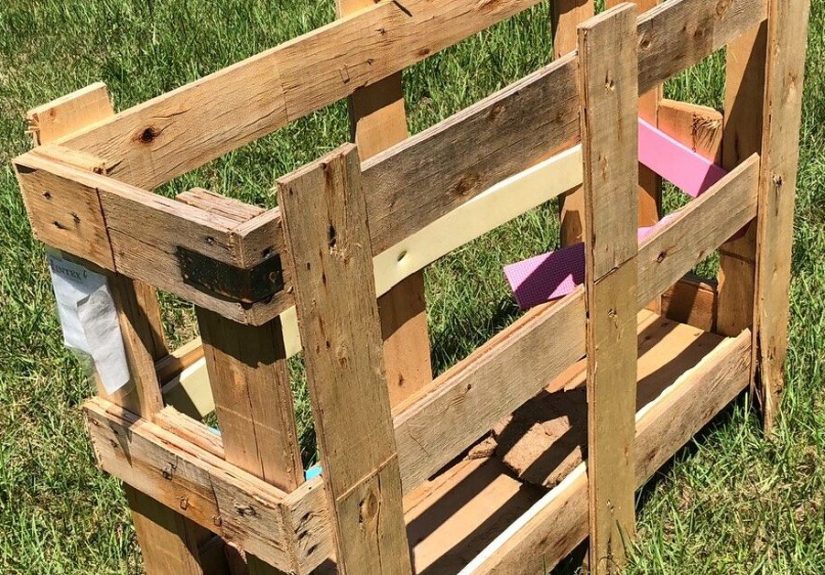
3) Add feet (this is the secret to longer crate life)
Wood rots fastest when it sits flat on a wet surface. Elevate your crate so air can circulate underneath and water can
drain freely. Screw on simple feet blocks, attach two runners, or set the finished planter on pot feet/pavers.
4) Drill proper drainage holes
Plants don’t want “a cute swamp.” They want oxygen around their roots. Drill several holes in the bottom of the crate,
spaced evenly. If your crate has gaps between slats, you still want deliberate drainage paths (especially if you’ll add
any lining).
Aim for multiple medium holes rather than one giant hole. More holes = better chance water exits instead of pooling.
5) Line it the right way (protect the wood without trapping water)
Lining keeps soil from spilling out and slows rot by reducing constant wet soil contact with wood. The best liner choice
depends on what you’re planting and where the crate will live:
- For most planters: Landscape fabric or burlap works wellholds soil, allows water through.
- For maximum wood protection: You can add plastic to the sides only, but keep the bottom breathable.
- For edibles: Choose liners you’re comfortable using around food plants; avoid unknown chemical liners.
How to install: cut liner to fit, leaving extra to fold over the rim. Staple it along the inside edges. Then poke or cut
holes in the liner exactly where your drainage holes are. (Drainage holes covered by liner = surprise bathtub.)
6) Choose the right “soil” (spoiler: it’s usually not garden soil)
Containers do best with a high-quality potting mix designed to drain well and stay airy. Garden soil is heavy and tends
to compact in containers. A good potting mix also makes watering easier and helps roots get oxygen.
Optional upgrade: mix in a slow-release fertilizer at planting time. Container plants often need extra nutrients because
watering flushes nutrients out over time.
7) Plant with intention (aka, don’t cram 12 tomatoes into a crate)
Match your plant choices to the crate’s depth and the amount of sun you have:
- Shallower crates: lettuce, spinach, radishes, herbs, pansies, marigolds
- Deeper crates: peppers, bush beans, strawberries, compact tomatoes (with support), dwarf perennials
- Shade-friendly options: mint (in its own cornermint has main-character energy), some greens, impatiens
Water thoroughly after planting until water runs out the bottom. That first deep watering helps settle the mix and
eliminates dry pockets.
The Science-y Part (But Make It Useful): Drainage, Watering, and Root Health
Drainage isn’t optionalyour plants breathe down there
Without drainage holes, water fills the air spaces in potting mix, and roots can suffocate. If you’ve ever wondered how a
plant can “drown,” it’s usually an oxygen problem, not a scuba-diving problem.
Skip the “rocks at the bottom” myth
A common DIY instinct is to add gravel or rocks at the bottom “for drainage.” In containers, that can actually create a
water-holding layer effect and reduce usable root space. Your best drainage strategy is: holes + a well-draining mix.
How often should you water?
It depends on sun, heat, wind, crate size, and what you planted. In hot weather, containers can dry quicklysometimes
daily. The easiest test is low-tech: stick a finger into the soil. If the top inch or two is dry, it’s usually time to
water.
Design Ideas: Make Your Crate Planter Look Like It Belongs on Purpose
Option A: “Fill and plant” (the classic)
Fill the crate with potting mix and plant directly. Great for seasonal displays, herbs, and salad greens.
Option B: “Pot-in-crate” (the low-commitment method)
Keep plants in their nursery pots and nestle them into the crate. This reduces moisture contact with the wood and makes
swapping plants ridiculously easy. It’s also the best option if your crate depth is limited.
Option C: Vertical crate planter (small-space hero)
Turn the crate on its side, add internal supports (or smaller pots), and use it for trailing flowers or herbs. Just make
sure each planting pocket has drainage and the whole structure is stable.
Make It Last: Rot Prevention and Seasonal Care
- Keep it elevated: feet/runners prevent the bottom from staying wet.
- Use a liner: fabric liner protects the wood and keeps soil where it belongs.
- Place smart: avoid areas where sprinklers blast it daily like it owes them money.
- End-of-season TLC: remove dead roots, refresh potting mix, and check screws/boards each season.
If you live somewhere with freezing winters, containers can take a beating. You can move the crate to a protected spot,
cluster containers together for shelter, or choose hardy plants appropriate for your climate.
Troubleshooting: When Your Crate Planter Gets Dramatic
Problem: Soil stays soggy
- Confirm drainage holes are open (and not blocked by liner).
- Switch to a lighter potting mix or add perlite for extra aeration.
- Make sure the crate is elevated so water can actually exit.
Problem: Plants dry out constantly
- Use a larger crate (more soil volume holds moisture longer).
- Add mulch on top (straw, shredded leaves, or fine bark).
- Water deeply (quick splashes don’t help roots).
Problem: Yellow leaves and slow growth
- Container plants often need fertilizerconsider a slow-release plus occasional liquid feeding.
- Check sun exposure; “full sun” usually means 6+ hours.
Real-World Experiences (): What DIYers Learn After the First Crate Planter
Turning a shipping crate into a planter looks simple (and it can be), but people who’ve done it a few times tend to
report the same “aha” momentsusually while holding a drill, a bag of potting mix, and a slightly panicked expression.
Here are the most common lessons from real-life crate-to-planter adventures, so you can skip the messy middle.
1) The crate is always lighter than you think… until it isn’t. Before soil, a crate feels easy to move.
After you add potting mix and water it thoroughly, it becomes a compact, charming boulder. A lot of DIYers end up
wishing they’d decided on the planter’s final location before filling it. The simple fix: place the empty crate
where you want it, confirm it gets the right sunlight, then build and fill it in place. If you’ll need portability,
plan for a plant caddy, sturdy casters, or the “pot-in-crate” method so you can lift pots out individually.
2) Drainage is the difference between thriving herbs and a science experiment. Many first-timers assume
the crate’s gaps will handle drainage. Sometimes they dountil a liner blocks them or soil compacts into the spaces.
People often discover the problem after a heavy rain when the crate turns into a soggy sponge. The best habit is to
drill clear drainage holes, then poke matching holes through the liner. When DIYers do this consistently, plants stay
healthier and the crate lasts longer.
3) Lining the crate is less about “waterproofing” and more about smart moisture management. A fully
plastic-lined box can trap moisture against wood, which is not the longevity boost it sounds like. DIYers often land on
a happy medium: breathable fabric to hold soil, optional plastic on the side walls only (never blocking the bottom),
and elevation so the base dries out between waterings. That combination tends to reduce rot without turning the planter
into a wet cave.
4) Potting mix matters more than beginners expect. People sometimes try to use garden soil because it’s
“real dirt.” In crates, it can compact, drain poorly, and make plants struggle. DIYers who switch to a container potting
mix usually notice better growth, easier watering, and fewer mystery problems. Many also add slow-release fertilizer at
planting time and then supplement as the season goes onespecially for hungry plants like tomatoes or big flowering
annuals.
5) The best-looking crate planters are usually the ones that embrace imperfection. Small cracks, nail
holes, and scuffs are part of the charm. DIYers who try to over-sand and over-finish sometimes end up fighting the
crate’s personality. The crate wants to be rustic. Let it. A quick sand for safety, a solid build, and a thoughtful
planting design (a “thriller, filler, spiller” combo or a tight herb mix) tends to look intentional without needing a
showroom-level finish.
In short: pick a safe crate, plan for drainage, use the right mix, and put it where it’s happiest before you fill it.
Do that, and your crate doesn’t just become a planterit becomes a recurring seasonal feature you’ll actually want to
reuse (and brag about).
Conclusion: Your Crate’s Second Act Starts Now
A shipping crate planter is equal parts practical and charming: it keeps plants contained, adds structure to small
spaces, and looks like you have your life together (even if you’re googling “why is my basil sad” at midnight).
Focus on safety, drainage, and a good potting mix, and you’ll end up with a planter that thrivesand a crate that
finally gets the cozy retirement it deserves.


