
Table of Contents >> Show >> Hide
- Why hair dye sticks to walls (and why your paint finish matters)
- Before you start: a 60-second prep that prevents a bigger mess
- Way 1: Gentle soap-and-water lift (best for fresh or light stains)
- Way 2: Baking soda paste “polish” (for dried dye without harsh chemicals)
- Way 3: Spot-treat with hydrogen peroxide or diluted rubbing alcohol (for stubborn stains)
- What not to do (unless you enjoy repainting)
- If the stain still won’t budge: fade, disguise, or touch up
- How to prevent the next hair-dye wall cameo
- FAQ
- Experience-Based Tips: What People Learn After Their First “Hair Dye on the Wall” Incident
- Conclusion
Hair dye has a special talent: it can turn your hair into “mystical midnight blue” and your wall into “modern art you didn’t order.”
The good news? Most hair dye wall stains can be removed (or at least seriously faded) without repaintingif you pick the right method
for your wall finish and you don’t panic-scrub like you’re trying to buff out a scratch on a car.
Below are three tried-and-true ways to remove hair dye from a wall, starting gentle and leveling up only when needed. You’ll also get
paint-safe prep tips, common mistakes to avoid, and a long, experience-based section at the end (because hair dye spills have a way of
becoming a life lesson).
Why hair dye sticks to walls (and why your paint finish matters)
Hair dye isn’t just “color.” It’s a mix of pigments (the color), plus helpers (like developers and alkalizing agents) designed to
penetrate and bind to keratin in hair. When dye hits a wall, it can seep into tiny pores in the paintespecially if your wall has a
lower-sheen finish like flat, matte, or eggshell. Those finishes look gorgeous, but they’re less forgiving when it comes to stains.
Higher-sheen paintssatin, semi-gloss, and high-glosstend to be more washable because they form a tighter, less porous film. That’s why
the same dye splatter can wipe off a semi-gloss bathroom wall but cling to a flat-finish hallway like it signed a lease.
Before you start: a 60-second prep that prevents a bigger mess
1) Identify what you’re cleaning
- Painted drywall: Most common. Usually safe for mild cleaners, but easy to scuff if the finish is flat/matte.
- Wallpaper: Riskiertoo much moisture can lift seams or stain the paper.
- Glossy enamel/trim paint: More washable, but can dull if you use abrasives.
2) Do the “test patch” (non-negotiable)
Pick a hidden spot (behind a picture, near the baseboard, or inside a corner). Try your chosen method there first. If the paint changes
color, gets shiny, dulls, or rubs off onto your cloth, stop and switch to a gentler approach.
3) Gather the right tools (soft wins here)
- Microfiber cloths or soft white rags (white = you can see if paint is transferring)
- A small bowl/bucket of warm water
- Cotton swabs (for tiny splatters or textured walls)
- Soft sponge (non-scratch)
- Optional: a soft toothbrush (only for textured paint, used gently)
4) If the wall was freshly painted, be extra gentle
New paint needs time to cure. If your wall was painted recently, use the lightest touch possible and avoid strong cleaners. If you don’t
know when it was painted, assume “recent” and treat it like a delicate pastry.
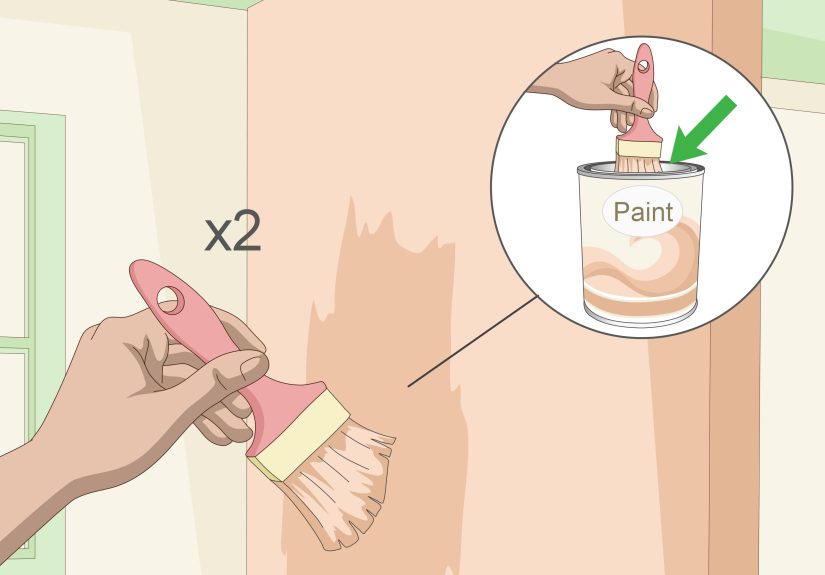
Way 1: Gentle soap-and-water lift (best for fresh or light stains)
This is your first move because it’s the least likely to damage paint. It works best on fresh dye (minutes to a few hours old), light
smudges, and walls with washable finishes. Even if the stain is older, start hereyou’d be surprised how often “simple” gets it done.
What you’ll need
- Warm water
- Mild dish soap (a few drops)
- Microfiber cloth or soft sponge
- Optional: a second cloth dampened with plain water for rinsing
Step-by-step
- Blot first, don’t rub. If the dye is wet, lightly blot with a dry cloth to lift excess. Rubbing spreads pigment.
-
Mix a mild solution. Add a few drops of dish soap to warm water. You want “cleaning solution,” not “bubble bath for an
elephant.” -
Wring your cloth until it’s barely damp. Too much water can leave streaks or raise the paint film, especially on matte
finishes. - Wipe gently in small circles. Work from the outside of the stain toward the center to avoid spreading.
- Rinse and dry. Wipe once with a clean cloth dampened with plain water, then dry with a soft towel.
Pro tips and examples
- For a drip line: Clean from top to bottom so you don’t create a streak trail. Dry as you go.
- For textured walls: Use a soft sponge and dab into the texture rather than scrubbing across it.
-
If the stain lightens but won’t disappear: Stop while you’re ahead and move to Way 2. Over-scrubbing can burnish paint
(leave shiny spots).
Way 2: Baking soda paste “polish” (for dried dye without harsh chemicals)
Baking soda is a gentle abrasivethink “soft polishing,” not “sandpaper.” It can lift dried dye without relying on stronger solvents.
This method is especially useful on scuffs, smudges, and stains that resisted soap and water.
What you’ll need
- Baking soda
- Warm water
- Soft cloth or sponge
- Optional: a drop of dish soap (helps emulsify oily residue)
Mix it right
Combine baking soda with a small amount of water to form a pastethick enough to stay put, but not so dry it crumbles. If you add dish
soap, use one tiny drop.
Step-by-step
- Test patch first. Baking soda can dull some finishes if you scrub too hard.
- Apply the paste in a thin layer. Use a damp sponge or cloth to spread it over the stain.
- Gently buff in small circles. Use light pressureimagine you’re cleaning a smartphone screen, not sanding a deck.
- Let it sit briefly if needed. If the stain is stubborn, let the paste sit for 2–5 minutes.
- Wipe clean, rinse, dry. Remove all residue with a clean damp cloth, then dry the area.
What “success” looks like
You may not get a perfect erase on the first pass. Often, two gentle rounds beat one aggressive round. If you see paint color on your
cloth, stop immediately and switch to a less abrasive approach (or move to a controlled spot-treatment in Way 3).
Way 3: Spot-treat with hydrogen peroxide or diluted rubbing alcohol (for stubborn stains)
This is the “precision tools” option: targeted, minimal moisture, minimal rubbing. It can be very effective on pigment-heavy stains, but
it also carries the highest risk of changing the paint (lightening, dulling, or softening it). That’s why you’ll use a cotton swab or
small cloth and work slowly.
Safety rules (quick but important)
- Ventilate the room.
- Wear gloves if you have sensitive skin.
- Never mix chemicals. If you try peroxide, rinse and dry before trying anything else.
- Use the smallest amount possible. You’re treating a stain, not washing the entire wall.
Option A: 3% hydrogen peroxide dab (paint-lightening risk)
Hydrogen peroxide (the common 3% kind) can help fade dye because it has mild bleaching action. The catch: it can also lighten paint,
especially colored paint. That’s why this option is best for white or very light wallsafter a test patch.
- Test patch. Dab peroxide on a hidden spot, wait 5 minutes, blot dry, and let it fully dry to see any change.
- Apply with a cotton swab. Dab only the stained areadon’t spread it outward.
- Wait 1–3 minutes. Blot (don’t rub) with a damp cloth.
- Rinse and dry. Wipe with a cloth dampened with plain water, then dry immediately.
- Repeat once if needed. If it’s working, a second gentle pass is okay. If paint shifts, stop.
Option B: Diluted isopropyl rubbing alcohol dab (paint-dulling risk)
Rubbing alcohol can dissolve some dye residues, especially if the stain is relatively fresh but set. However, alcohol can discolor or
damage some painted surfacesparticularly flat paintso treat this as a “use carefully and sparingly” option.
- Dilute it. Mix equal parts rubbing alcohol and water for a gentler approach.
- Test patch thoroughly. Let it dry completely before deciding it’s safe.
- Dab, don’t scrub. Use a cotton swab or corner of a soft cloth and dab the stain.
- Immediately wipe with plain water. Follow with a water-damp cloth to remove residue.
- Dry the wall. Pat dry so the paint isn’t left wet.
Optional last resort: A melamine sponge (Magic Eraser) used with feather-light pressure
Melamine sponges work because they’re micro-abrasive (basically super-fine “scrubbing foam”). They can lift stubborn marks, but they can
also dull, scratch, or remove paint if used aggressively. If you try this, do it like you’re polishing an eggshell: minimal water, minimal
pressure, minimal strokes.
- Wet the sponge and wring it out well (it should be barely damp).
- Test patch first (seriouslythis one can change sheen fast).
- Use 2–4 very light passes, then stop and assess.
- Wipe with a clean damp cloth and dry.
What not to do (unless you enjoy repainting)
- Don’t soak the wall. Too much moisture can streak, soften paint, or leave water marks.
- Don’t use abrasive scrub pads. They can remove paint or leave shiny burnished spots.
- Don’t jump straight to strong chemicals. Many will discolor paint or weaken the finish.
- Don’t mix cleaners. Rinse and dry between methodschemical combos can be unsafe and unpredictable.
- Don’t “power scrub” flat/matte paint. It’s the easiest finish to damage during cleaning.
If the stain still won’t budge: fade, disguise, or touch up
Sometimes dye has penetrated the paint filmespecially if the wall is matte, older, or porous. If you’ve tried the methods above gently
and the stain is still faintly visible, you have three realistic options:
- Accept a faint shadow. In many rooms, you’ll only notice it because you know it’s there (like a tiny dent in your phone).
-
Spot-prime and touch up. If you have leftover paint, use a small artist brush or foam brush. Lightly feather the edges to
blend. (Pro tip: let it dry fully before judgingfresh touch-ups often look darker until cured.) -
Repaint a small section (or the whole wall). Worst case, you get a refresh. Best case, you finally pick the color you
wanted all along.
How to prevent the next hair-dye wall cameo
- Create a “splash zone.” Tape up plastic sheeting or hang an old towel behind your dye area.
- Use a cape and a high collar towel. Dye drips love bare shoulders and nearby walls equally.
- Wipe splatters immediately. Fresh dye is dramatically easier to remove than dried dye.
- Upgrade high-risk paint finishes. Bathrooms and vanity areas do well with satin or semi-gloss paint.
- Keep cotton swabs nearby. Small splatters are easier to dab up than to chase with a big cloth.
FAQ
Will hair dye permanently stain paint?
It canespecially on flat or matte paint. But “permanent” often means “stained the paint film,” not “impossible.” Many stains can be lifted
or faded enough that you won’t notice from normal viewing distance. When you can’t remove it completely, a small touch-up usually solves it.
Can I use vinegar?
Some wall-cleaning recipes include a small amount of diluted vinegar for general grime. For hair dye, vinegar isn’t usually the star of the
show. If you try it, keep it diluted, use it sparingly, and rinse well. Avoid using vinegar on surfaces where acids are known to cause issues.
When in doubt, stick with dish soap and water first.
How long should I wait before cleaning newly painted walls?
If you can, wait at least two weeks for the paint to cure before washing with soap and water. If an urgent spill happens sooner, clean it
gently once the paint is fully dryusing minimal moisture and avoiding harsh cleaners.
Experience-Based Tips: What People Learn After Their First “Hair Dye on the Wall” Incident
Let’s talk about the part no one includes on the box: the real-life chaos. Hair dye doesn’t spill in a neat, photogenic droplet like a
shampoo commercial. It launches itself onto walls in the exact shape of your regretusually right before you’re supposed to leave the house.
Here are the most common “experience lessons” people run into (and how to handle them with less drama and fewer repainting supplies).
Lesson #1: The panic wipe makes everything worse. A lot of people’s first instinct is to swipe fast with a wet paper towel.
That quick swipe can spread pigment into a bigger, lighter haloespecially on matte paint. The smarter move is to blot first, then clean
outward-to-inward. Think “contain the spill,” not “smear it into modern art.”
Lesson #2: Matte paint is a sweetheart until you stain it. If your wall finish is flat or matte, even gentle scrubbing can
change the sheen. People often “remove the stain” but end up with a shiny clean spot that catches light like a spotlight. The fix is to
reduce friction: use soft cloths, barely damp solutions, and fewer passes. Sometimes the best result is “slightly faded stain, unchanged
finish,” which looks better than “no stain, weird shiny patch.”
Lesson #3: Textured walls hide stainsand also hide dye. Orange-peel or knockdown texture can trap pigment in tiny grooves.
Folks will clean the surface and think it’s gone…until the wall dries and the dye reappears in the texture like a jump scare. In these
cases, a cotton swab (or a very soft toothbrush used gently) can help you dab into the texture without sandpapering the whole area.
Patience wins: short sessions, dry, reassess, repeat.
Lesson #4: “Stronger cleaner” isn’t the same as “better cleaner.” A common story goes like this: dish soap didn’t work,
so someone grabs a super-strong product and scrubs hard. The stain fades…along with the paint. Then the wall looks blotchy, and the stain
is replaced by a bigger problem. That’s why the escalation ladder matters: mild soap first, then baking soda paste, then controlled spot
treatments. Your wall is not a frying pan; it doesn’t need to be “deglazed.”
Lesson #5: Sometimes touch-up is the grown-up solution. There’s a point where you’re no longer cleaning dyeyou’re removing
paint to chase dye. When the stain is faint but persistent, many people get the cleanest final look by stopping early and doing a small
touch-up. If you have leftover paint, it’s often faster than a 45-minute chemical experiment. And if you don’t have leftover paint, the
“grown-up move” is taking a small paint chip (or a close match photo) to a paint store and getting a sample pot. It’s not defeat. It’s
strategy.
Lesson #6: Prevention is hilariously cheap compared to repainting. After one wall-stain adventure, people become fans of
simple routines: hanging an old towel behind the dye zone, taping up a strip of plastic, keeping cotton swabs nearby, and cleaning splatters
immediately. These tiny habits feel boringuntil you compare them to the thrilling alternative: Googling “how to repaint one wall without it
looking like a patchwork quilt.”
If you take only one experience-based truth from this section, let it be this: slow, gentle cleaning usually beats aggressive scrubbing.
You’re trying to remove pigment while keeping the paint’s finish intact. That’s less like “battle” and more like “negotiation.” And in most
homes, negotiation is how you keep the security deposit.
Conclusion
Removing hair dye from a wall is mostly about two things: choosing a method that matches your paint finish, and resisting the urge to scrub
like you’re trying to erase time itself. Start with warm water and dish soap. If the stain is stubborn, step up to a baking soda paste.
For the truly persistent marks, use careful spot treatments (peroxide or diluted alcohol) and consider a feather-light melamine sponge as a
last resort. When all else fails, a small touch-up can be the cleanest win.


