Table of Contents >> Show >> Hide
- The 30-Second Science of Why Carpet Gets Gross
- Golden Rules Before You Touch Any Stain
- The #1 Hack: Vacuum Like You Mean It
- Build a “Carpet First Aid Kit” (So You Don’t Panic-Clean)
- DIY Carpet Cleaner Recipes That Don’t Leave a Sticky “Come Back Soon, Dirt!” Residue
- Stain-Specific Carpet Cleaning Hacks (The Ones Homeowners Actually Need)
- Deep Cleaning Hacks: When Vacuuming Isn’t Enough
- Carpet Cleaning “Don’ts” That Save You From Expensive Mistakes
- How Often Should You Deep Clean Carpet?
- Pro-Level “Looks Cleaner” Hack: Groom the Pile
- When to Stop DIY and Call a Pro
- Conclusion: Cleaner Carpet, Less Drama
- Real-Life Carpet Cleaning Experiences (500+ Words of “Yep, Been There”)
Carpets are basically the “white sneakers” of your house: cozy, stylish, and somehow magnetized to every spill, crumb, pet accident, and mysterious sticky
spot that appears the second company rings the doorbell. The good news? You don’t need a chemistry degree (or a professional truck-mounted machine on speed dial)
to keep carpets looking fresh.
This guide pulls together the most reliable, real-world carpet cleaning practiceswhat works, what backfires, and what actually helps your carpet last longer.
You’ll learn smart maintenance routines, fast stain triage, DIY spot-cleaning formulas, and a few weird-but-true hacks (yes, ice cubes are involved).
The 30-Second Science of Why Carpet Gets Gross
Most carpet “dirt” is a mix of dry particles (grit, dust, soil) and oily stuff (skin oils, cooking residue, lotions). Dry grit is the sneaky villain: it acts
like sandpaper, grinding fibers down every time you walk across it. Oily residue is the clingy villain: it grabs and holds onto more soil, making traffic lanes
look darker and “perma-dirty.”
The best carpet cleaning strategy isn’t “panic-clean once a year.” It’s a simple system:
remove dry soil often, treat spots correctly, rinse residue when needed, and dry thoroughly. That’s how you get cleaner carpet and fewer repeat stains.
Golden Rules Before You Touch Any Stain
1) Blot. Don’t rub. (Rubbing is how stains become a lifestyle.)
Rubbing forces the mess deeper into the fibers and spreads it outward. Blotting pulls it up. Use a clean white cloth or paper towel and press firmlylike you’re
trying to convince the stain to move out.
2) Start from the outside and work inward
If you scrub the center first, you push the stain into a bigger ring. Work the perimeter inward to keep it contained.
3) Don’t over-wet the carpet
Too much liquid can soak the backing and pad, which makes odors linger and can lead to wicking (the stain “returns” as it dries). Your goal is controlled
moisture, not a carpet swimming pool.
4) Always spot-test first
Even “gentle” cleaners can discolor certain fibers (especially wool or specialty dyes). Test in a hidden corner, blot with a white cloth, and check for color
transfer before you commit.
The #1 Hack: Vacuum Like You Mean It
If you do only one thing, do this: vacuum consistently. Frequent vacuuming removes the gritty particles that wear carpet down and cause that dull, flattened look.
It’s the cheapest way to make carpet last longerand it works because it targets the dry soil that makes up a huge portion of what you see as “dirty.”
Vacuuming technique that actually helps
- Go slow. Fast vacuuming is like speed-mopping: emotionally satisfying, physically ineffective.
- Use overlapping passes in high-traffic lanes.
- Change directions (north-south, then east-west) to lift crushed fibers and pull embedded debris.
- Clean edges with a crevice tooldust loves baseboards like it pays rent.
- Keep the vacuum maintained: empty the bin, unclog brush rolls, and replace filters as recommended.
Build a “Carpet First Aid Kit” (So You Don’t Panic-Clean)
The best carpet cleaning hacks are the ones you can execute in under 60 secondsbecause speed matters. Keep a small kit in a closet or laundry room:
- White microfiber cloths or thick paper towels
- Spray bottle of plain water
- Spray bottle of DIY cleaner (recipe below)
- Small soft-bristle brush (or old toothbrush)
- Baking soda (odor absorber + gentle abrasive)
- Enzyme cleaner (for pet accidents and organic stains)
- Disposable gloves
- Fan (or at least access to one)
DIY Carpet Cleaner Recipes That Don’t Leave a Sticky “Come Back Soon, Dirt!” Residue
Everyday DIY spot cleaner (safe starter formula)
Mix in a spray bottle:
- 2 cups warm water
- 1 teaspoon mild dish soap
- 1–2 teaspoons white vinegar (optional boost for odors and some stains)
Lightly mist a cloth (not the carpet), blot the stain, then blot with plain water to rinse. Finish by pressing dry cloths on top to pull out moisture.
Baking soda “dry shampoo” for odor and greasy mystery spots
- Sprinkle baking soda generously on the area.
- Let it sit at least 15 minutes (overnight is even better for odors).
- Vacuum slowly and thoroughly.
This is excellent for general freshening and low-grade funkthink “mudroom carpet that’s seen things.”
Hydrogen peroxide paste (use with care)
For some tough organic stains on many synthetic carpets, you can make a paste with baking soda and 3% hydrogen peroxide. Apply, wait 10–20 minutes, then blot
and rinse lightly. Important: hydrogen peroxide can lighten dyesspot-test and avoid on wool/silk.
Stain-Specific Carpet Cleaning Hacks (The Ones Homeowners Actually Need)
Coffee stains
- Blot immediately.
- Use the dish soap + water mix. Blot, don’t rub.
- If it lingers, use the vinegar solution, then rinse with water.
- Dry thoroughly to prevent a brown “shadow” from wicking back.
Pro tip: coffee + milk/creamer needs extra rinsing because fats cling to fibers.
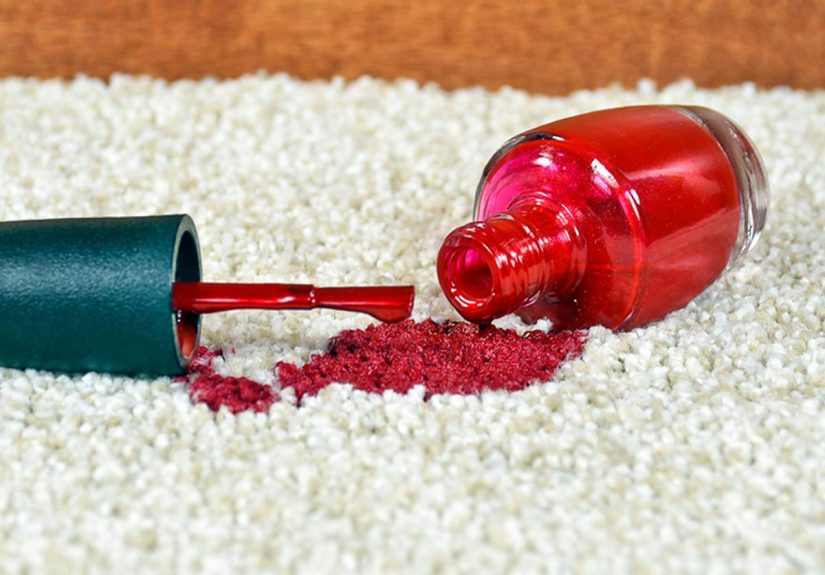
Red wine (aka the carpet’s villain origin story)
- Blot fast.
- Use dish soap + water, blotting repeatedly.
- If it’s set in, try a stronger dish soap + vinegar + water mix and keep blotting.
- Enzyme detergent can help with sticky residues.
Avoid dumping a whole salt mine on it and walking away for “Pinterest magic.” Blotting and controlled cleaning wins.
Grease and oily food stains
- Lift solids with a spoon (don’t smear).
- Cover with baking soda or cornstarch to absorb oil; wait 15–30 minutes.
- Vacuum.
- Follow with a small amount of dish soap solution to break remaining grease, then rinse lightly.
Mud
This hack requires patience, which is annoying… but effective:
- Let mud dry completely.
- Vacuum the dry particles (this removes most of the mess without spreading it).
- Then spot-clean what remains with a mild dish soap solution.
Pet accidents (urine/vomit/“a situation”)
The key is enzyme cleaner. Regular soap can clean the surface, but enzymes break down the organic compounds that cause lingering odor.
- Blot up as much as possible.
- Apply enzyme cleaner per label directions (don’t freestyleenzyme products are timing-sensitive).
- Blot and rinse lightly only if the product instructions say to.
- Dry completely with airflow.
If odor persists, it may be in the pad. That’s when deep extraction or professional cleaning is worth it.
Ink
Dabdon’t scrubwith a cloth lightly moistened with rubbing alcohol (spot-test first). Keep moving to a clean part of the cloth so you don’t redeposit ink.
Rinse lightly with water and blot dry.
Wax (candles, crayons, and the “cozy season” curse)
- Let wax harden completely.
- Gently chip up what you can with a dull edge.
- Place a paper towel over the wax and briefly press with a warm iron (low setting, no steam).
- Move to clean paper towel sections as wax transfers.
Finish with a small amount of dish soap solution if there’s dye residue.
Gum
Ice cube hack: freeze the gum with ice, then gently snap and lift it off. Any leftover residue can be dabbed with a small amount of rubbing alcohol (spot-test).
Blood or protein-based stains
Use cold water (hot water can set protein stains). Blot with cold water first. If needed, try diluted hydrogen peroxide on suitable synthetic
carpetspot-test and use sparingly.
Deep Cleaning Hacks: When Vacuuming Isn’t Enough
1) Do “dry soil removal” first (yes, this is a real principle)
Before any wet cleaningwhether a rental machine or professional hot water extractionvacuum thoroughly. Removing dry soil first prevents turning grit into
muddy paste.
2) Pre-treat traffic lanes and spots
A light pre-spray (following product directions) helps loosen oily soil. This is especially useful in hallways and living room “runways.”
3) Use fewer suds than you think you need
Too much detergent can leave residue that attracts dirt later. You want clean fibers, not a sticky carpet that re-soils in two weeks and gaslights you into
thinking your house is haunted.
4) Slow passes + extra dry passes
If you’re using a carpet cleaner machine, move slowly and do multiple dry passes. The dry passes help pull out moisture so the carpet dries faster and odors
don’t set up camp.
5) Drying is not optional
After any wet cleaning, increase airflow: fans, open windows (weather permitting), and/or a dehumidifier. Faster drying helps prevent wicking, musty smells,
and the dreaded “why does it smell worse now?” moment.
Carpet Cleaning “Don’ts” That Save You From Expensive Mistakes
- Don’t scrub aggressively: it frays fibers and spreads stains.
- Don’t mix random chemicals: besides damaging carpet, some combinations create harmful fumes.
- Don’t soak the carpet: overwetting increases mold/odor risk and causes wicking.
- Don’t ignore repeated stains: if it keeps coming back, there’s residue or moisture below the surface.
- Don’t assume “steam” fixes everything: heat can set certain stains and can be risky for some fibers.
How Often Should You Deep Clean Carpet?
There’s no one schedule for every home, but a solid baseline is a professional deep clean about once every 12–18 monthssooner if you have kids, pets, allergies,
or heavy traffic. If your carpet looks dull quickly after cleaning, the issue is often leftover residue (too much soap) or insufficient dry soil removal (not
vacuuming enough).
A practical schedule most homeowners can follow
- Daily/near-daily: vacuum high-traffic lanes if you have pets/kids.
- Weekly: vacuum everywhere; spot-treat fresh spills.
- Monthly: baking soda deodorize or “dry shampoo” in problem zones.
- Every 6–18 months: deep clean (DIY machine or pro) depending on lifestyle.
Pro-Level “Looks Cleaner” Hack: Groom the Pile
After spot-cleaning or deep cleaning, lightly brush the carpet fibers in one direction with a soft brush. This helps the pile stand up, reduces visible
watermarking, and makes the carpet look more uniformlike you gave it a haircut and it finally learned how to behave in public.
When to Stop DIY and Call a Pro
DIY carpet cleaning hacks are fantasticuntil they aren’t. Consider professional help when:
- The stain has soaked into the pad (strong odors, repeated wicking).
- You have wall-to-wall carpet in high-traffic areas with heavy darkening.
- You’re dealing with delicate fibers (wool, silk blends) or specialty rugs.
- Water damage or musty smells suggest moisture below the surface.
A good professional will evaluate carpet type and condition, use appropriate methods, and prioritize proper dryingbecause “clean” without “dry” is just
“temporarily wet.”
Conclusion: Cleaner Carpet, Less Drama
The best carpet cleaning hacks for homeowners aren’t about exotic productsthey’re about timing, technique, and consistency. Vacuum often (slowly), treat stains
by blotting (not scrubbing), avoid overwetting, rinse away residue when needed, and dry thoroughly. Keep a simple carpet first aid kit ready, and you’ll handle
most messes before they become permanent carpet folklore.
Real-Life Carpet Cleaning Experiences (500+ Words of “Yep, Been There”)
The Great Coffee Spill That Taught Me the “Two-Cloth Rule”
Coffee spills are sneaky because they look “mostly handled” after a quick blot… until the next day when the stain oxidizes and you notice a beige-brown shadow
that resembles a small weather system. The biggest difference-maker wasn’t a fancy cleanerit was using two cloths: one for blotting up liquid
and loosening the stain, and a second one dedicated to “rinse blotting” with plain water. When I skipped the rinse step, the carpet felt slightly tacky after it
dried, and that tackiness attracted dirt like a magnet. The traffic lane looked grimy again way too fast. Once I started rinse-blotting, stains lifted more
completely, and the area stayed cleaner longer. It’s not glamorous, but it’s real: residue control is the quiet hero of carpet stain removal.
The Mud Incident That Proved Patience Is a Cleaning Tool
Mud on carpet triggers an instinct to scrub immediatelybecause it looks like a crime scene for shoes. But scrubbing wet mud is how you grind grit into the
fibers and spread the stain outward. The first time I tried to “fix it fast,” I ended up with a larger, dingier spot that took multiple rounds to correct.
The better approach felt emotionally wrong but worked: let it dry fully, vacuum slowly, then spot-clean the leftover discoloration. The dry vacuum step removed
far more mud than I expected, and the remaining stain was smaller and easier to treat. Lesson learned: sometimes the fastest way to clean is to wait for physics
to do its part.
The Pet Accident That Converted Me to Enzyme Cleaner Forever
If you’ve ever dealt with pet urine on carpet, you know the worst part isn’t always the initial cleanupit’s the “surprise sequel” odor that appears later,
especially on humid days. Early on, I tried dish soap and warm water alone. It looked clean, but the smell came back because the problem wasn’t just surface
grimeit was organic material in the fibers (and sometimes the pad). Using an enzyme cleaner with the correct dwell time was the turning point. The label
directions felt overly specific (wait this long, blot this way, don’t overwet), but following them worked. Afterward, the final step was airflowfan pointed at
the spot until fully dry. That combination didn’t just mask odor; it removed the cause. Now, enzyme cleaner is non-negotiable in my “carpet first aid kit.”
The “Too Much Soap” Mistake That Made My Carpet Dirtier
A common DIY trap is thinking more cleaner = more clean. I once made a spot-cleaning mixture that was basically “bubbles with a side of water.” It removed the
stain quickly… and then the area got dirty again faster than the rest of the carpet. The fibers felt slightly stiff, and dust clung to that patch like it was
wearing Velcro. The fix was simple but annoying: I had to go back, rinse-blot several times with plain water, and dry thoroughly. After that, the texture
normalized and the rapid re-soiling stopped. Now I treat soap like hot sauce: a little can be amazing; too much ruins the whole experience.
The Deep Clean Day That Became “Drying Day”
The first time I used a home carpet cleaner machine, I was proud of how much dirty water it pulled upuntil hours later when the carpet still felt damp.
That’s when I realized deep cleaning success is mostly about extraction and drying. The second time, I vacuumed more thoroughly beforehand, pre-treated traffic
lanes, moved the machine slowly, and did multiple dry passes. Then I set up fans and kept air moving. The carpet dried faster, smelled fresher, and didn’t
develop those weird “reappearing” stains that show up when moisture pulls leftover soil back to the surface. It was the same machinebetter method. Deep
cleaning isn’t just washing; it’s rinsing, extracting, and drying like you’re on a mission to remove every last drop of “yesterday.”