
Table of Contents >> Show >> Hide
- What VMware Workstation Actually Does
- Before You Install: Requirements and Setup Checklist
- Creating Your First Virtual Machine (Step-by-Step)
- Everyday Tasks: Power, Snapshots, and Clones
- Handy Features That Make Life Easier
- Performance and Security Best Practices
- Troubleshooting Common Gotchas
- Conclusion & SEO Recap
- Bonus: Real-world VMware Workstation Experiences & Tips
Imagine having a whole collection of extra computers hidden inside your main PCeach with its own operating system, apps, and settingswithout needing a warehouse of hardware. That’s exactly what VMware Workstation gives you: a powerful, user-friendly way to run multiple virtual machines (VMs) on a single desktop or laptop.
Whether you’re a developer testing different environments, an IT pro building lab scenarios, a cybersecurity learner breaking things on purpose, or just curious about Linux without nuking your Windows install, VMware Workstation can be your sandbox, playground, and lab bench all in one.
This guide walks you through what VMware Workstation is, how to install it, how to create your first VM, and how to use essential features like snapshots and cloneswithout drowning you in jargon. We’ll keep things friendly, a little bit funny, and very practical.
What VMware Workstation Actually Does
VMware Workstation is a “hosted” (Type 2) hypervisor. In normal-person language, that means it’s an app you install on your existing operating systemlike Windows or Linuxthat lets you run other operating systems inside virtual machines on top of it.
Key things VMware Workstation can do for you
- Run multiple OSes at once: Windows 11, various Linux distributions, and many older systems can happily coexist in separate VMs on a single host.
- Create safe “sandboxes”: Test software, patches, scripts, or even malware (carefully!) in an isolated VM without risking your main machine.
- Simulate complex setups: Spin up a mini lab with multiple servers, clients, and networks for learning or demos.
- Use snapshots and clones: Freeze a VM in time, roll it back instantly, or duplicate it instead of reinstalling everything from scratch.
VMware Workstation Pro runs on 64-bit Windows and Linux systems and supports a wide range of guest operating systems. As of recent licensing changes, Workstation Pro has been made free to use, with commercial licensing and support options previously available but later discontinued.
Before You Install: Requirements and Setup Checklist
Before you click “Next” like a speedrunner, let’s make sure your system can actually handle running virtual machines.
1. Check your host machine
At a minimum, you’ll want:
- 64-bit host operating system: Modern versions of VMware Workstation Pro only support 64-bit Windows or Linux as the host.
- Hardware virtualization support: Intel VT-x or AMD-V usually needs to be enabled in your BIOS/UEFI.
- Plenty of RAM: 8 GB is the bare minimum for light use; 16 GB or more is much more comfortable if you’re running multiple VMs.
- Fast storage: An SSD dramatically improves VM performance compared to a traditional hard drive.
2. Decide which edition fits your needs
Historically, VMware offered:
- VMware Workstation Player: A simpler, more limited desktop virtualization tool mainly for running a single VM at a time.
- VMware Workstation Pro: The full-featured powerhouse with advanced networking, snapshots, clones, and multi-VM management.
The modern Workstation Pro lineup focuses on giving everyone the powerful feature set, with updated licensing that has transitioned it to a free model for many use cases, simplifying the choice for most users.
3. Download and install VMware Workstation
The basic install process is straightforward:
- Go to the VMware Workstation product page and download the installer for your host OS (Windows or Linux).
- Run the installer as an administrator (on Windows) or using appropriate privileges (on Linux).
- Accept the license terms, pick your install options (the defaults are usually fine), and complete the setup.
- Restart your system if prompted.
After installation, launch VMware Workstation. You’re now standing at the entrance to your own little virtual data center.
Creating Your First Virtual Machine (Step-by-Step)
Let’s build your first VMfor example, a Windows or Linux guest. The process is similar no matter which OS you’re installing.
Step 1: Prepare your installation media
You’ll need one of the following:
- An ISO file for the operating system (Windows, Ubuntu, etc.).
- A physical installation disc (less common these days) and a compatible drive.
Many tutorials recommend downloading ISO images directly from the OS vendor (Microsoft, Ubuntu, Fedora, etc.) for clean, legal installs.
Step 2: Start the New Virtual Machine Wizard
- Open VMware Workstation.
- Click Create a New Virtual Machine on the home screen.
- Choose Typical (recommended) if you’re a beginner; Custom (advanced) gives more granular control and is great once you’re comfortable.
Next, you’ll be asked where to install the operating system from. Point to your ISO file, or choose to install later if you just want to define the VM first.
Step 3: Pick your guest operating system
Select whether you’re installing Windows, Linux, or another type of OS, and choose the exact version from the list. This helps VMware optimize default settings for that OS and choose the right virtual hardware profile.
Give your VM a name (like “Windows 11 Lab” or “Ubuntu Dev Box”) and choose where its files should be stored on your hostideally on a fast SSD.
Step 4: Configure CPU, memory, and disk
The wizard will ask you how many virtual processors and how much RAM to assign. As a rule of thumb:
- Allocate 2–4 vCPUs for typical desktop workloads, if your host has enough cores.
- Give a modern desktop OS at least 4 GB of RAM; 8 GB is smoother if your host can spare it.
For storage, you’ll typically:
- Create a new virtual disk (VMDK file).
- Choose a size that fits your OS and apps (e.g., 60–80 GB for a comfortable Windows 11 install).
- Decide whether to store the disk in a single file (slightly faster) or split into multiple files (easier to move/copy on some file systems).
You can click Customize Hardware before finishing the wizard to tweak virtual NICs, add extra disks, or attach USB controllers later.
Step 5: Install the guest operating system
Once you finish the wizard:
- Click Power on this virtual machine.
- The VM boots from your ISO and starts the OS installationjust like a real computer.
- Follow the on-screen prompts from Windows or Linux to complete setup.
Workstation supports a large number of guest operating systems, from modern Windows and Linux to many older versions, making it a flexible test platform.
Step 6: Install VMware Tools (don’t skip this!)
After the OS is installed and running, install VMware Tools inside the guest. This package includes special drivers and utilities that:
- Improve display performance and let you resize the VM window smoothly.
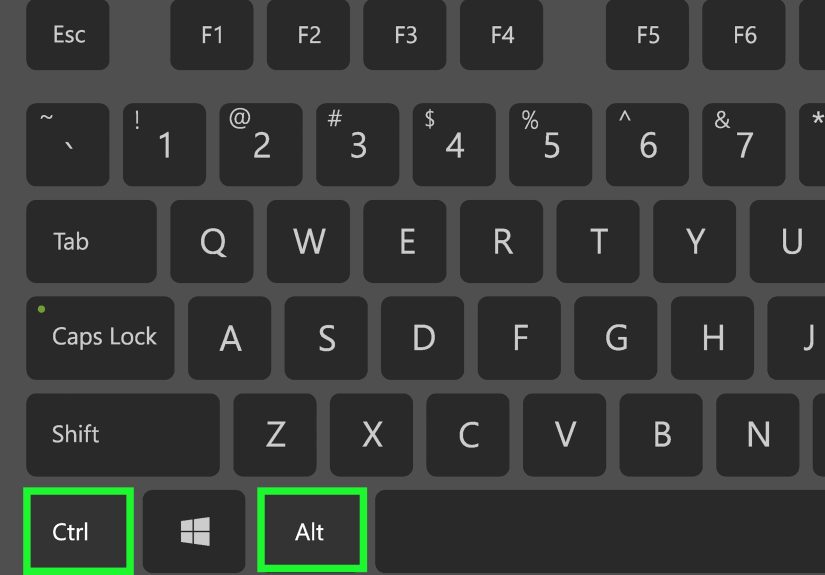
- Enable seamless mouse integration (no more “click to grab, Ctrl+Alt to release”).
- Allow copy/paste and drag-and-drop between host and guest.
- Support shared folders and time synchronization.
In most versions of Workstation, you can install VMware Tools via the menu: VM > Install VMware Tools, then run the installer inside the guest OS.
Everyday Tasks: Power, Snapshots, and Clones
Power controls: Treat your VM like a real PC
Inside the VM, you can shut down, restart, or log off just like any physical machine. From the Workstation interface, you’ll see options to:
- Power On – Boot the VM.
- Shut Down Guest – Sends a proper shutdown signal to the OS (preferred).
- Suspend – Saves the VM’s state to disk so you can resume it later, like hibernation.
Snapshots: Your magical “undo” button
A snapshot captures the state of a running VM at a specific point in timedisk, memory, and hardware configuration. You can later revert to that snapshot if an update, driver, or experiment goes horribly wrong.
Good snapshot habits:
- Take a snapshot before major OS updates, application installs, or risky testing.
- Give snapshots clear names like “Before SQL install” or “Clean Win11 base image.”
- Don’t hoard dozens of snapshots per VM; they consume disk space and can impact performance if left unchecked.
You can create and manage snapshots from the VM > Snapshot menu and use the Snapshot Manager to see the snapshot tree for each VM.
Clones: Copy-paste entire virtual machines
A clone is a new VM created from an existing one, so you don’t have to reinstall the OS and apps every time. VMware Workstation offers:
- Full clones: A complete copy of the VM and its virtual disksself-contained but larger on disk.
- Linked clones: A space-saving clone that shares virtual disks with the parent, relying on snapshots and copy-on-write mechanisms.
Linked clones are perfect for short-lived test environments or classroom labs. Just remember: if you delete or break the parent VM, the linked clones can become unusable.
Handy Features That Make Life Easier
Shared folders and drag-and-drop
Shared folders let you expose a directory on your host machine to the guest OS. Combined with drag-and-drop and copy/paste, this makes moving scripts, installers, or documents between host and VM painless.
USB devices and peripherals
You can attach USB flash drives, external disks, or some specialized hardware directly to a VM. This is extremely handy for:
- Testing bootable USB tools.
- Working with removable storage in isolated environments.
Networking modes in plain English
- NAT: The VM shares the host’s IP address and goes out to the internet through it. Great default choice.
- Bridged: The VM appears as a separate device on the physical network, with its own IP. Perfect for server labs.
- Host-only: A private network between host and VMs onlyno direct internet. Useful for contained test environments.
Multi-VM labs and folders
VMware Workstation allows you to group VMs in folders and power them on or off together. That’s ideal for scenarios like “one domain controller + two clients + a file server” you want to spin up for testing.
Performance and Security Best Practices
Performance tips so your VMs don’t crawl
- Don’t oversubscribe RAM: Leave enough memory for the host OS; if your host is paging, everything slows down.
- Use SSDs for VM storage whenever possibleVMs are much more responsive.
- Disable unnecessary services inside the guest OS to reduce overhead.
- Right-size your vCPUs: More isn’t always better; giving a small VM 8 vCPUs on a 4-core host can actually hurt performance.
- Keep VMware Tools updated to benefit from performance and compatibility improvements.
Security basics you should not ignore
- Treat each VM like a real machine: install antivirus or endpoint protection where appropriate.
- Patch guest operating systems and applications regularly.
- Use isolated or host-only networks when testing untrusted software or malware.
- Remember: snapshots are not backups. They’re great for fast rollbacks, but you still need proper backups of critical data.
Troubleshooting Common Gotchas
“This host supports Intel VT-x, but it’s disabled”
If VMware complains about virtualization support, reboot your host, enter the BIOS/UEFI, and enable Intel VT-x, AMD-V, or SVM. After saving and rebooting, VMware Workstation should be able to run 64-bit guests properly.
64-bit guest won’t install
Check three things:
- Host CPU supports hardware virtualization.
- Virtualization is enabled in BIOS/UEFI.
- You created the VM with the correct 64-bit guest type.
No internet in the VM
Try switching the network adapter mode (NAT vs Bridged), or use the Virtual Network Editor (on supported platforms) to reset network settings. Sometimes just removing and re-adding the virtual NIC solves it.
Weird resolution or mouse lag
Usually this means VMware Tools is missing or outdated. Reinstalling or updating VMware Tools in the guest fixes most display and mouse integration quirks.
Conclusion & SEO Recap
VMware Workstation turns a single PC into an entire fleet of virtual machines. With a little setup, you can spin up different operating systems, experiment safely with software, build multi-VM labs, and roll back bad decisions with a couple of clicks.
Once you’re comfortable with creating VMs, taking snapshots, and using clones, you’ll wonder how you ever tested anything without virtualization. The tool is powerful enough for professionals but still friendly enough that a curious beginner can learn it step by step.
SEO summary for this article
sapo: VMware Workstation lets you run multiple operating systems on a single computer, turning one desktop into a powerful virtual lab. This user-friendly guide walks you through everything from installation and system requirements to creating your first virtual machine, installing VMware Tools, and using essential features like snapshots, clones, shared folders, and networking modes. Along the way, you’ll pick up practical performance and security tips, troubleshooting tricks, and real-world examples so you can confidently use VMware Workstation for testing, development, training, or just exploring new OSes without risking your main system.
Bonus: Real-world VMware Workstation Experiences & Tips
Guides and checklists are great, but VMware Workstation really starts to shine when you see how people use it in everyday scenarios. Here are some practical “from the trenches” experiences to help you think about how to apply this tool in your own workflow.
1. Building a personal lab on a laptop
One of the most common use cases is the “all-in-one lab” on a single laptop. Picture this: a developer or sysadmin with a 16 GB (or 32 GB) RAM laptop and a decent SSD runs two or three VMs at oncea domain controller, a Linux app server, and a Windows client. Using folders and snapshots, they can practice joining machines to a domain, configure SSH and firewalls, and test login policies without touching any production environment.
The magic trick here is to create a clean base image first: install the OS, patch it, install core tools, then take a snapshot called “Golden Image.” Any time the lab gets messy, just revert to the golden snapshot or clone a new VM from it. This approach saves hours of reinstalling and keeps your experiments reproducible.
2. Safe software and patch testing
IT teams often use VMware Workstation as a “pre-production proving ground.” Before rolling out a big Windows update, driver, or new app version, they test it on a handful of representative VMsmaybe one for Windows 11, one for an older Windows 10 build, and one for a Linux desktop. If the update misbehaves, they simply revert to a snapshot and adjust their deployment plan.
Even for solo users, this is incredibly handy. Want to try a beta browser, experimental toolkit, or registry tweak that might break things? Do it inside a VM first. If it works, greatyou can apply it on your real machine with more confidence. If it doesn’t, revert the snapshot and pretend it never happened.
3. Learning Linux without fear
A lot of people want to learn Linux but are understandably nervous about dual-booting or wiping their existing Windows install. VMware Workstation removes that fear. You can create a Linux VM, experiment with commands, install and remove packages, break the desktop environment, and learn how to repair itall without ever touching your main OS.
A practical tip: create two snapshots early onone right after a fresh install, and one after you’ve customized the desktop and installed your favorite tools. When you’re learning something risky (like playing with system services or firewall rules), snapshot first. That way, you can roll back if you lock yourself out or break networking.
4. Practicing cybersecurity and incident response
Cybersecurity learners love VMware Workstation because they can run intentionally vulnerable targets alongside attack tools in a tightly controlled environment. For example, you can spin up a Linux server running a deliberately insecure web app and a separate Kali Linux VM with security tools. Using host-only networking keeps all the traffic contained so it never touches your real network.
Snapshots are especially powerful here. You can snapshot a “clean but vulnerable” state, try an exploit, observe the results, then revert and try a different technique. It’s like having an endlessly resettable training range in your backpack.
5. Cross-platform development and testing
Developers who ship apps on multiple platforms use VMware Workstation to keep compact, dedicated environments for each target. Instead of cluttering their main OS with conflicting SDKs, compilers, and frameworks, they maintain a Windows VM, a couple of Linux VMs, and even older OS versions for regression testing.
A common pattern is:
- Keep a small “clean build VM” with only the essentials.
- Use shared folders to exchange source code between host and VM.
- Snapshot before installing major toolchain upgrades or new dependencies.
If a build environment gets messy, they revert or reclone the VM instead of spending days trying to debug a broken toolchain.
These real-world workflows show that VMware Workstation is far more than just “that thing that runs a second OS.” Used well, it becomes a safety net, a lab, a classroom, and a productivity boosterletting you experiment aggressively while keeping your real machine calm, clean, and very hard to break.


