Table of Contents >> Show >> Hide
- Before You Start: Quick Reality Check (So You Don’t Make It Worse)
- What You’ll Need (Most of This Is Already in Your House)
- Step 1: Vacuum Like You Mean It (Yes, This Counts as Cleaning)
- Step 2: Pick the Right Cleaner (Match the Weapon to the Battle)
- Step 3: Pre-Treat the Stain (Small Area First, Always)
- Step 4: Agitate, Blot, and Extract (This Is Where the Magic Happens)
- Step 5: Rinse Lightly, Feather Edges, and Dry Completely
- Stain-Specific Cheat Sheet (Because Not All Stains Are Created Equal)
- Common DIY Mistakes (AKA “How Stains Become Permanent Roommates”)
- When to Stop DIY and Call for Backup
- How to Keep Seats Cleaner Longer (Without Turning Into a “No Drinks in My Car!” Person)
- Real-World DIY Experiences: What People Learn After Cleaning Car Seats the Hard Way (500+ Words)
- Conclusion
Car seats are basically giant, padded “catcher’s mitts” for coffee, ketchup, sunscreen, muddy shoes, and whatever that mystery sticky spot is (you know the one).
The good news: you don’t need a detailing shop, a chemistry degree, or a ritual sacrifice to get seats looking decent again.
You just need a smart, low-water approach, the right cleaner for your seat material, and a little patience (the stain did not appear overnight, even if it feels personal).
This five-step DIY method works for most common stains on cloth, leather, and vinyl car seats. It’s designed to lift grime without soaking the foam underneath
because “clean seats” shouldn’t come with “mildew smell” as a bonus feature.
Before You Start: Quick Reality Check (So You Don’t Make It Worse)
- Identify the seat material. Cloth and leather don’t play by the same rules. Vinyl is the easygoing cousin.
- Spot test first. Pick a hidden area (seat edge or underside) and test your cleaner for colorfastness.
- Use as little liquid as possible. Oversaturating seats can push stains deeper and slow dryingplus modern seats may have heaters/sensors.
- Blot, don’t rage-scrub. Aggressive scrubbing can fuzz fabric, spread stains, or damage leather’s finish.
- Ventilate. Open doors/windows. If you’re using solvents like isopropyl alcohol, take it seriously: airflow matters.
What You’ll Need (Most of This Is Already in Your House)
Tools
- Vacuum (hand vac works) with crevice tool and/or brush attachment
- Soft-to-medium upholstery brush (an old toothbrush works for seams)
- Microfiber towels (severalstains are greedy)
- Spray bottle
- Bucket or bowl
- Optional but amazing: wet/dry vacuum or small upholstery extractor
Cleaners (Choose Based on Stain + Material)
- Mild dish soap + warm water (general grime on cloth)
- Foaming upholstery cleaner (great for cloth; foam helps lift without flooding)
- White vinegar + water (odor + some stains on cloth; use carefully and rinse)
- Baking soda (odor control, light abrasion for some cloth stains; vacuum thoroughly)
- Isopropyl alcohol (ink/dye transfer; use sparingly; be extra cautious on leather)
- Enzyme cleaner (protein stains: milk, vomit, pet accidents)
- Leather cleaner + conditioner (for leather seatsdon’t “wing it” with harsh cleaners)
Step 1: Vacuum Like You Mean It (Yes, This Counts as Cleaning)
Before you apply any liquid, remove dry debris. If you skip vacuuming, you’ll turn crumbs and grit into a wet pasteand then you’ll be cleaning your cleaner.
- Slide the seats forward/back to expose creases and rails.
- Use the crevice tool for seams, piping, and the “French fry trench” between seat and console.
- If you have a brush attachment, use it to loosen embedded dirt and pet hair.
Fresh spill tip: If the stain is new (coffee still warm, soda still fizzy), blot immediately with a clean towel.
Don’t rubunless you’re trying to permanently introduce the stain to the seat foam.
Step 2: Pick the Right Cleaner (Match the Weapon to the Battle)
The fastest way to lose an afternoon is using the wrong cleaner and having to “fix the fixing.” Here’s a simple decision guide:
If You Have Cloth Seats
- General dirt, food, most drink spills: dish soap suds or a dedicated upholstery cleaner.
- Grease/oil: upholstery cleaner + gentle agitation; avoid dumping degreaser directly into fabric.
- Protein stains (milk, vomit, pet mess): enzyme cleaner.
If You Have Leather Seats
- Use a leather cleaner. Leather can be durable, but harsh chemicals can strip finish or dry it out.
- Use minimal water. Damp cloth is fine; soaking is not.
- Plan to condition afterward. Cleaner removes grime; conditioner helps keep leather supple.
If You Have Vinyl Seats
- Usually a mild detergent solution and a microfiber towel does the trick. Avoid abrasive scrubbing that dulls the surface.
Rule of thumb: Start mild, step up only if needed. You can always clean again; you can’t “un-bleach” fabric.
Step 3: Pre-Treat the Stain (Small Area First, Always)
Spot-treating gives you control. You’re not shampooing the entire seat (yet); you’re convincing one specific stain to move out.
Option A: Dish Soap Suds for Cloth (Low-Water, High-Control)
- Mix warm water with a small amount of dish soap in a bowl or bucket until you get lots of suds.
- Dip a brush or microfiber towel into the suds (not the watery bottom).
- Work suds into the stain using gentle circular motions.
- Let it sit for 5–10 minutes to loosen grime.
Option B: Foaming Upholstery Cleaner (Cloth Seats)
- Lightly spray foam onto the stained area (don’t soak it).
- Let it dwell per label instructions.
- Gently brush to lift the stain up and out of the fibers.
Option C: Baking Soda Paste (Cloth + Odors)
- Mix about 2 parts baking soda to 1 part water to form a paste.
- Apply to the stain, lightly scrub, and let sit briefly.
- Wipe away with a damp towel, then dry.
Important: If the stain is dye-based (some drinks, markers), stop when you see color transfer spreadingswitch strategies (see the stain cheat sheet below).
Step 4: Agitate, Blot, and Extract (This Is Where the Magic Happens)
You’re not trying to “scrub the seat into submission.” You’re lifting the stain, then removing it from the fabric before it settles back in.
For Cloth Seats
- Brush gently to lift grime out of fibers.
- Blot with a clean microfiber towel. Flip to a clean side often (don’t redeposit dirt).
- If you have a wet/dry vac or extractor, use it nowthis pulls dirty solution out of the foam and speeds drying.
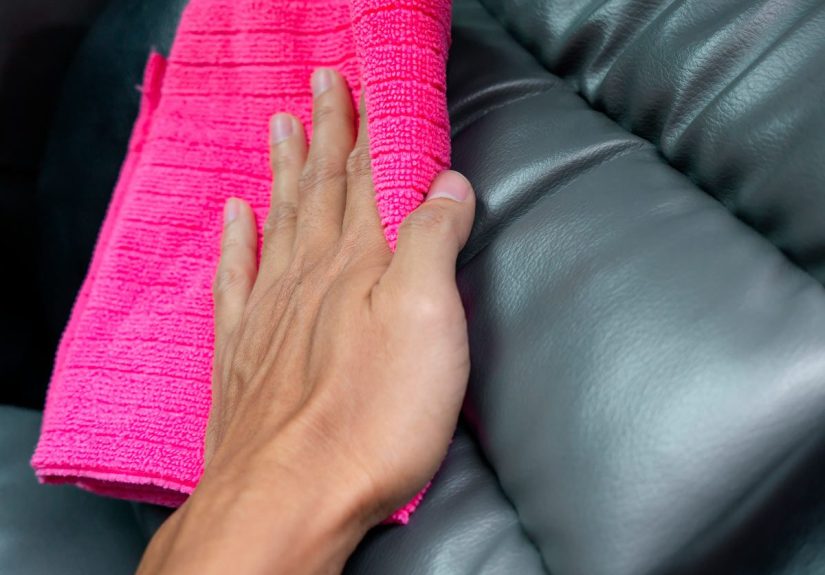
For Leather Seats
- Apply leather cleaner to a microfiber towel (not directly onto the leather if the product recommends otherwise).
- Wipe gently, working panel by panel.
- Use a soft brush for stitching and creases, then wipe dry.
Pro move: Work from the top of the seat down. Gravity is undefeatedmake it help you.
Step 5: Rinse Lightly, Feather Edges, and Dry Completely
This is the step that prevents water rings and that “wet dog in a raincoat” interior smell.
Light Rinse (Cloth Seats)
- Dampen a clean microfiber towel with plain water (ideally distilled if your tap water is mineral-heavy).
- Wipe the cleaned area to remove leftover cleaner.
- Blot dry with another towel.
Feather the Edges (For Water Rings or “Clean Spot Halo”)
If you cleaned a small area and it dried with a faint ring, lightly mist the surrounding area with distilled water and gently blend outward,
then blot. The goal is to avoid a sharp “clean island” edge.
Dry Fast
- Leave doors open in a safe place or crack windows.
- Run a fan toward the seats if possible.
- Park in a sunny spot if weather allows (but avoid baking leather for hours).
- Don’t sit on the seat until it’s dryunless you enjoy the sensation of damp denim fused to upholstery.
Stain-Specific Cheat Sheet (Because Not All Stains Are Created Equal)
Coffee and Soda
- Blot immediately.
- Use dish soap suds or upholstery foam.
- Rinse lightly and blot dry to prevent sticky residue that attracts new dirt.
Grease, Fast Food Oil, Lotion, Sunscreen
- Blot excess with a dry towel.
- Use a foaming upholstery cleaner or a small amount of dish soap suds.
- Avoid heavy wateroil and water don’t mix, and you’ll just spread it.
Mud
- Let it dry (seriously). Wet mud smears.
- Vacuum thoroughly, then clean remaining discoloration with suds or upholstery cleaner.
Ink (Ballpoint Pen, Marker)
- Test first in a hidden spot.
- Dab (don’t rub) with a cloth lightly dampened with isopropyl alcohol.
- Work from the outside in to avoid spreading.
- On leather: be extremely conservativefollow with conditioner once cleaned.
Milk, Vomit, Pet Accidents
- Blot immediately and remove solids.
- Use an enzyme cleaner to break down odor-causing proteins.
- Extract if you can; lingering moisture + protein = lingering regret.
Common DIY Mistakes (AKA “How Stains Become Permanent Roommates”)
- Soaking the seat. If you can wring liquid out of it, you used too much.
- Using harsh chemicals blindly. Bleach and strong solvents can discolor fabric and damage leather finishes.
- Skipping the rinse. Cleaner residue attracts dirt like a magnet.
- Not drying thoroughly. Moisture trapped in foam leads to odor and can encourage mildew.
- Scrubbing aggressively. You’ll fuzz fabric, distort texture, or wear leather’s top layer.
When to Stop DIY and Call for Backup
DIY works for most everyday stains, but consider a professional detailer or upholstery cleaner if:
- The stain soaked deep into seat foam and keeps resurfacing.
- You’re dealing with mold/mildew smells that won’t quit.
- Leather is cracked, peeling, or heavily stained (it may need restoration, not cleaning).
- You’ve tried twice and the stain is still laughing at you.
How to Keep Seats Cleaner Longer (Without Turning Into a “No Drinks in My Car!” Person)
- Keep a small “spill kit” in the trunk: microfiber towel, travel-size upholstery cleaner, and a trash bag.
- Vacuum once a week if you have kids/pets; once a month if you’re a normal human.
- Use washable seat covers for high-chaos seasons (sports, beach trips, toddler years).
- Condition leather periodically to help resist stains and drying.
Real-World DIY Experiences: What People Learn After Cleaning Car Seats the Hard Way (500+ Words)
If you’ve ever cleaned a car seat stain and thought, “That’s… not worse, so I’ll call it a win,” you’re in good company.
The most common DIY experience is discovering that the stain isn’t the only problemthere’s also the story behind it.
Coffee stains usually come with a rushed morning, grease stains show up after a drive-thru “I’ll be careful” moment,
and mystery stains arrive courtesy of passengers who say, “It was like that when I got in,” with the confidence of a courtroom attorney.
One of the biggest “aha” moments people report is how much vacuuming changes the game. Not the casual, two-minute “good enough” vacuum
the real one that gets into seams, pulls out grit, and removes the invisible crumbs that turn into muddy streaks the second you add cleaner.
Once you vacuum properly, the cleaning step stops feeling like you’re smearing dirt around and starts feeling like actual progress.
It’s the difference between wiping a countertop before you sweep and sweeping before you wipe. Order matters.
Another common experience: learning to respect water. Many first-time DIYers treat car seats like a kitchen floorjust add more water and “rinse it out.”
Then they close the doors, go inside, and come back the next day to a seat that’s still damp and smells like a gym bag.
Car seats have layers (fabric + foam), and foam is basically a sponge with ambitions. People who get the best results usually use a “less liquid, more blotting”
approach: suds instead of buckets, light misting instead of pouring, towels instead of drenched rags. If someone has access to a wet/dry vac or a small extractor,
they often describe it as a “why didn’t I buy this sooner?” momentbecause extraction removes dirty solution instead of hoping towels can absorb it all.
Then there’s the “ring of doom”that faint halo that shows up after spot cleaning. It’s a classic DIY rite of passage.
The fix is almost always the same: feather the edges. Instead of cleaning a perfect circle in the middle of the seat and walking away,
blend outward gently so the transition isn’t sharp. People who master this trick start to feel like upholstery whisperers.
People who don’t… start shopping for seat covers.
Leather owners often have their own storyline. Many go in confidentbecause leather looks toughthen realize leather is more like skin:
it can handle a lot, but it doesn’t appreciate being stripped or soaked. A common “lesson learned” is that leather cleaner plus conditioner
isn’t a fussy extra stepit’s the difference between “clean and nice” and “clean but now it feels dry and looks sad.”
Folks also notice that quick maintenance (a wipe-down before grime builds up) is dramatically easier than rescuing neglected leather.
Finally, the most universal DIY experience: the second stain. Not because you failedbecause life happened again.
That’s when the process becomes valuable. Once you have a simple five-step routine (vacuum, choose the right cleaner, pre-treat, agitate/extract, dry),
the next spill doesn’t feel like a crisis. It feels like an annoying chore you can actually finish in under an hour,
instead of a weekend-long saga with “maybe I should just sell the car” energy.
Conclusion
Getting stains out of car seats isn’t about brute forceit’s about smart steps: remove dry debris, choose the right cleaner, pre-treat with restraint,
lift and remove the stain (not just smear it), then dry thoroughly. Do that, and your seats can bounce back from everyday chaoscoffee, kids, pets, and all.
And if you still find a mystery stain tomorrow? Congratulations. Your car is officially a car.