Table of Contents >> Show >> Hide
- First, a quick reality check: induction is cooler, not cold
- What you’ll need (keep it simple)
- Step 1: Let it cool, then do a “crumb check”
- Step 2: Degrease gently with soap and water (or a mild vinegar mist)
- Step 3: Remove stuck-on residue with a scraper + cleaner (the safe way)
- Step 4: Buff to a streak-free shine (and make next time easier)
- Stain playbook: what to do when life happens
- What NOT to use on an induction cooktop
- A low-effort routine that keeps it looking new
- FAQ: quick answers to common induction cooktop cleaning questions
- Conclusion: clean, shiny, and still scratch-free
- Extra: Real-World Cooktop Experiences ()
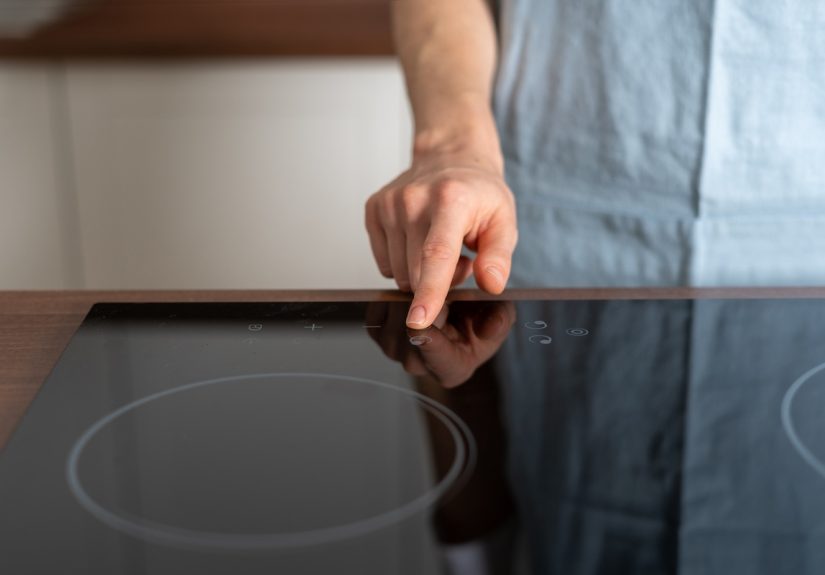
Induction cooktops are the overachievers of the kitchen: fast, efficient, and sleek enough to make your countertop feel underdressed.
The only problem? That glossy ceramic-glass surface loves to show every fingerprint, splash, and mystery smudge like it’s starring in a crime documentary.
The good news is that cleaning an induction cooktop is genuinely easyif you use the right tools and avoid the “I’ll just scrub harder” trap.
Below you’ll find a practical, no-drama method that works for daily wipe-downs and for those “How did pasta sauce get there?” moments.
We’ll stick to gentle cleaners, smart timing, and a few techniques that keep the surface shiny without scratching it.
First, a quick reality check: induction is cooler, not cold
Induction heats the pan, not the cooktopbut the glass can still get hot from contact with the cookware and from hot spillover.
Translation: don’t clean a blazing surface, and don’t assume it’s safe just because the burner isn’t glowing.
A little patience prevents streaks, burns, and cleaner residue baking itself into your next dinner.
What you’ll need (keep it simple)
Gather these once, and you’ll stop treating cooktop cleanup like an extreme sport:
- Microfiber cloths (at least 2: one for cleaning, one for buffing)
- Non-abrasive sponge or soft pad (no scratchy side)
- Mild dish soap + warm water
- White vinegar (optional, great for streaks and mineral spots)
- Baking soda (optional, for stuck-on messes)
- Cooktop cleaning cream made for ceramic/glass/induction surfaces (optional but helpful)
- Cooktop scraper (a razor-style scraper designed for glass cooktops)
If you only keep three things under your sink, make them: mild soap, microfiber cloths, and a proper cooktop scraper.
Those three solve most messes without risking damage.
Step 1: Let it cool, then do a “crumb check”
Turn everything off and wait until the surface is cool to the touch (or at most slightly warm if you’re only removing loose debris).
Next, remove any dry crumbs or grit before you wipebecause dragging tiny crumbs across glass is basically “DIY sandpaper.”
Use a dry microfiber cloth or a soft brush attachment on a handheld vacuum if you have one. The goal is to lift the grit, not smear it.
This one minute of prep is a big deal for scratch prevention.
Step 2: Degrease gently with soap and water (or a mild vinegar mist)
For everyday messoil specks, splatters, fingerprintsstart with warm, soapy water.
Dampen a microfiber cloth or non-abrasive sponge, wring it out well, and wipe the cooktop in smooth passes.
You’re aiming for “clean,” not “wave pool.”
If you get streaks (common on glossy black surfaces), lightly mist a 50/50 mix of white vinegar and water on the cool cooktop,
then wipe with a clean microfiber cloth. Vinegar helps cut haze and mineral residue without heavy scrubbing.
Pro tip: don’t let liquids flood the edges
Keep your cloth dampnot drippingespecially near seams, knobs, or control areas.
Induction cooktops are tough, but electronics prefer staying un-marinated.
Step 3: Remove stuck-on residue with a scraper + cleaner (the safe way)
Burnt-on spots, boiled-over starch, and “that one splash that turned into concrete” need a two-part approach: soften, then lift.
The biggest mistake is reaching for something abrasive. The better move is controlled scraping and a cooktop-safe cleaner.
3A) Soften the mess
Lay a warm, damp cloth over the stuck-on area for a few minutes to soften residue. If it’s oily or sugary, a drop of dish soap in the water helps.
For extra-stubborn spots, sprinkle a small amount of baking soda on the cool cooktop and mist with vinegar to create a gentle fizz,
then let it sit briefly.
3B) Scrape at a low angle (no “shovel mode”)
Hold a cooktop scraper at a low anglethink “almost flat,” not “digging for treasure.”
Use short, light strokes to lift residue. Let the blade do the work.
If you feel like you need a lot of pressure, stop and soften againpressure is how scratches happen.
3C) Finish with cooktop cleaner
Apply a small amount of ceramic/glass cooktop cleaning cream and rub gently with a soft pad or microfiber cloth.
This helps remove the last haze and leaves a protective, polished finish.
Wipe away residue and buff dry.
Special note for sugary spills (like syrup, candy, or sweet sauces): clean them as soon as it’s safe.
Sugar can harden aggressively and may leave marks if ignored too long.
Step 4: Buff to a streak-free shine (and make next time easier)
Once everything is clean, buff the surface with a dry microfiber cloth.
This step is the difference between “clean” and “wow, did you replace your cooktop?”
It also removes any cleaner film that could bake on later.
If you used a cleaning cream, keep buffing until the surface looks evenly glossy with no cloudy patches.
If you used soap and water, a final pass with a barely damp cloth followed by a dry microfiber wipe usually eliminates streaks.
Stain playbook: what to do when life happens
Burn marks and cooked-on starch (pasta water’s greatest hits)
Soften first (warm damp cloth), scrape gently at a low angle, then use cooktop cleaner to polish.
Repeat in rounds instead of escalating to harsh tools. Two calm passes beat one angry scrub.
Hard-water spots and mineral haze
Use the 50/50 vinegar-water mix and wipe with microfiber. For stubborn mineral spots, let vinegar sit briefly, then wipe and buff dry.
Avoid leaving vinegar pooled for long periodsquick treatment is best.
Metal marks (gray streaks from cookware)
These marks often come from sliding pans instead of lifting them.
Use cooktop cleaner and gentle pressure with a soft cloth. Then change the habit: lift, don’t slide.
(Your cooktop would like to retire from being a runway.)
Melted plastic (the “I set the spatula down for one second” problem)
Turn the burner off and let everything cool completely. Once hardened, gently scrape the plastic away using a cooktop scraper at a low angle,
then clean and polish as usual. Don’t try to wipe melted plastic while it’s gooeyyou’ll spread it and say words you can’t publish on the internet.
What NOT to use on an induction cooktop
Induction surfaces are durable, but they hate abrasives and harsh chemistry. Skip these to avoid scratches, haze, and permanent damage:
- Steel wool, scouring pads, abrasive sponges, or gritty powders
- Harsh chemicals like bleach, ammonia-heavy cleaners, or oven cleaner
- Rust removers or aggressive descalers not rated for glass cooktops
- Steam cleaners (heat + moisture + electronics is a risky combo)
- Random blades (use a proper cooktop scraper tool so you control angle and pressure)
A low-effort routine that keeps it looking new
After each cooking session (2 minutes)
- Once cool: wipe with a damp microfiber cloth and a drop of dish soap.
- Dry buff with a clean microfiber to prevent streaks.
- Spot-treat any stuck bits before they harden into a geology exhibit.
Weekly (5–10 minutes)
- Use cooktop cleaning cream to polish the surface and remove faint haze.
- Check edges and control areas for buildup; wipe gently with a barely damp cloth.
- Inspect cookware bottoms. A dirty, gritty pan bottom can scratch glass faster than you can say “brand-new appliance.”
FAQ: quick answers to common induction cooktop cleaning questions
Can I use Windex or regular glass cleaner?
Some manufacturers caution against ammonia-based window cleaners on cooktops.
If you want to play it safe, stick to dish soap + water, vinegar + water, or a cleaner labeled for ceramic/glass/induction cooktops.
Is baking soda safe on induction cooktops?
In small amounts, baking soda is often used as part of a gentle paste or with vinegar to loosen residue.
The key is to avoid aggressive scrubbing and to wipe everything clean and buff dry afterward so no gritty residue is left behind.
Do I really need a scraper?
If you cook more than toast, yesit’s the safest way to remove stuck-on residue without grinding it into the surface.
Just use the right angle and light pressure, and always soften first when needed.
Why does my cooktop look cloudy even after cleaning?
Cloudiness usually comes from cleaner residue, hard-water minerals, or micro-scratches from abrasive tools.
Try a vinegar-water wipe followed by thorough buffing. For persistent haze, use a cooktop cleaning cream to polish.
If it’s scratched, cleaning won’t fully remove the lookprevention matters.
Conclusion: clean, shiny, and still scratch-free
The secret to cleaning an induction cooktop isn’t brute forceit’s the right order of operations.
Let it cool, remove grit, degrease gently, and treat stubborn messes with controlled scraping and a cooktop-safe polish.
Do that consistently, and your cooktop stays sleek without turning your cleaning routine into a weekly workout.
And remember: the cooktop isn’t judging you for boiling over. It’s just documenting it in glossy black.
Now you know how to erase the evidence in four easy steps.
Extra: Real-World Cooktop Experiences ()
If you’ve owned an induction cooktop for more than a week, you’ve probably met its favorite party trick: making tiny messes look enormous.
A single fingerprint can appear like you just hosted a fried chicken convention. That doesn’t mean induction is high-maintenanceit just means it’s honest.
The surface is smooth and easy to wipe, but it also reflects light like a mirror, so you notice everything.
One very common experience is the “invisible grit problem.” You wipe quickly after cooking, the cooktop looks fine, and thenunder the right angle
you spot faint swirl marks. Most of the time, this comes from wiping crumbs or salt grains around instead of lifting them off first.
The fix is simple: do the crumb check in Step 1. That tiny habit change is the difference between “five years later, still glossy” and
“why does it look slightly frosted?”
Another classic induction moment is the starchy ring left by pasta water or rice boil-overs. It hardens into a dull outline that laughs at basic wiping.
The temptation is to scrub harder with a rough sponge. The better move is to soften it like you’re negotiating with it:
warm damp cloth for a few minutes, then a low-angle scrape. The first time you do this correctly, you’ll wonder why you ever tried to “muscle” it off.
The scraper feels dramatic, but it’s actually the gentle option when used properly.
Many people also discover the “metal mark mystery”those gray streaks that show up after sliding a pan. It can look like damage, but it’s often
cookware transfer rather than a permanent scratch. A cooktop cleaning cream usually removes it, but the real lesson is behavioral:
lift the pan, don’t slide it. If you’re used to shuffling cookware like you’re working a busy diner line, induction will retrain you fast.
Finally, there’s the confidence-building experience: the day you realize induction cleanup can be a two-minute routine.
Once you stop using too much water, stop using abrasive tools, and keep microfiber cloths nearby, you’ll notice something satisfying:
messes don’t “age” as badly. Wipe shortly after cooking (when it’s safe), buff dry, and you rarely need a deep clean.
Induction doesn’t demand perfectionit rewards consistency. Think of it as a shiny countertop that occasionally makes you practice good habits.