Table of Contents >> Show >> Hide
- Why Uber Driver Ratings Matter (And What They Actually Measure)
- Way #1: Check the Rating Right After a Driver Accepts (The “Before They Arrive” Method)
- Way #2: Check the Rating from Trip Details While You’re Waiting (Or Even During the Ride)
- Way #3: Check the Rating After the Trip in Your Activity (The “Receipt & History” Method)
- Bonus: What to Look at Besides the Rating
- Conclusion: Use Ratings as a Quick FilterNot a Crystal Ball
- Real-World Rider Experiences (500+ Words)
If you’ve ever requested an Uber and immediately played the world’s quickest game of “Is this a good idea?”you’re not alone.
The Uber app actually gives you several chances to see your driver’s star rating, open their profile, and make a calm,
grown-up decision (or a frantic “nope” decision) before you’re buckled in.
In this guide, you’ll get three simple, practical ways to check an Uber driver’s ratingplus how to interpret what you’re seeing,
what a “good” rating usually looks like in the real world, and a few safety-minded habits that go beyond stars.
(Because a 4.97 doesn’t magically prevent weird vibes, and a 4.84 doesn’t automatically mean the driver is a villain in a trench coat.)
Why Uber Driver Ratings Matter (And What They Actually Measure)
Uber driver ratings are a five-star average based on rider feedback. They’re designed to help Uber maintain quality and identify patterns:
safe driving, professionalism, clean vehicle, respectful communication, and overall trip experience. The key word is average.
A driver can do hundreds (or thousands) of great rides and still catch the occasional low rating for things that weren’t their fault
like traffic, surge pricing frustration, or a passenger who’s mad at the universe.
Still, ratings are useful as a quick “signal.” Think of them like a movie review score: not perfect, but often directionally helpful.
Your goal isn’t to demand a flawless 5.00 (which can also mean the driver is new and hasn’t collected many ratings yet).
Your goal is to spot obvious red flags and give yourself peace of mind.
A quick reality check on “perfect” ratings
- 5.00 can be amazingor it can mean the driver is newer with fewer rated trips.
- 4.90–4.99 is commonly considered very solid in many areas.
- Below ~4.80 is where many riders start paying closer attention to details in the profile.
Ratings don’t tell you everything, so it helps to combine the star number with other visible details in the driver profile
(like number of trips, compliments, and how long they’ve been driving). That’s where the methods below come in.
Way #1: Check the Rating Right After a Driver Accepts (The “Before They Arrive” Method)
This is the most common and most useful time to check a driver’s rating because you still have options.
Once a driver accepts your request, the app typically shows a card with the driver’s name, photo, car details,
and their star rating. This is your first chance to quickly assess the match.
How to do it (iPhone & Android)
- Request your ride as usual.
- After a driver accepts, look at the trip status screen (the one that shows the driver coming to you).
- Find the driver’s rating next to (or under) their name.
- Tap the driver’s card/profile area to open the Driver Profile for more detail.
What you can usually see in the Driver Profile
- Star rating
- Number of trips completed (helpful context)
- Compliments or badges (when available)
- Basic “about” details (varies by driver)
If the rating is lower than you’re comfortable with, you can cancel and request another ride.
Just keep in mind that cancellation fees may apply depending on timing and local rulesso decide quickly, not after they’ve arrived and waved.
A smart way to interpret the number
Don’t judge the rating in a vacuum. A 4.88 with 8,000 trips may be more reassuring than a 5.00 with 25 trips.
Experience doesn’t guarantee perfection, but it often correlates with consistency.
Pro tip: If you’re riding late at night, traveling solo, or leaving a crowded venue, consider using Uber’s built-in safety tools
(like trip sharing or PIN verification) in addition to checking the rating.
Way #2: Check the Rating from Trip Details While You’re Waiting (Or Even During the Ride)
Sometimes you’re in a hurry and only think about ratings after you’ve already matched.
The good news: you can usually pull up your trip details again while you’re waitingand often while you’re in the car.
This lets you re-check the driver’s rating and confirm you’re looking at the right person and vehicle.
How to do it from the “trip details” panel
- Open the Uber app while your ride is active (driver en route or currently in-progress).
- Tap the trip bar or the white trip panel to expand details (the UI varies by app version).
- Look for the driver cardrating is typically shown there.
- Tap the driver card to open the full profile.
Why this method is underrated
Ratings are useful, but identity verification is essential. Before you get in, match:
license plate, car make/model, and driver photo with what your app shows.
The rating is part of that “confidence check,” but it shouldn’t replace the basics.
Combine rating-checking with a simple safety routine
- Verify the car: plate, make, model, color.
- Verify the driver: photo and name in-app.
- Confirm pickup: ask “Who are you here to pick up?” instead of saying your name first.
- Share trip status with a friend if you’re uneasy or it’s late.
Here’s the main benefit: even if the rating looks fine, this routine helps protect you from the rare but serious problem of getting into the wrong car.
Stars don’t stop impersonatorsmatching details does.
Way #3: Check the Rating After the Trip in Your Activity (The “Receipt & History” Method)
Sometimes you want to check a driver’s rating after a ridemaybe to remember who gave great service,
confirm details for an expense report, or file feedback if something felt off.
Uber keeps a history of your trips in the app, where you can revisit trip details and receipts.
How to find past trips (and the driver details attached)
- Open the Uber app.
- Go to Activity (sometimes labeled “Your Trips”).
- Select the trip you want to review.
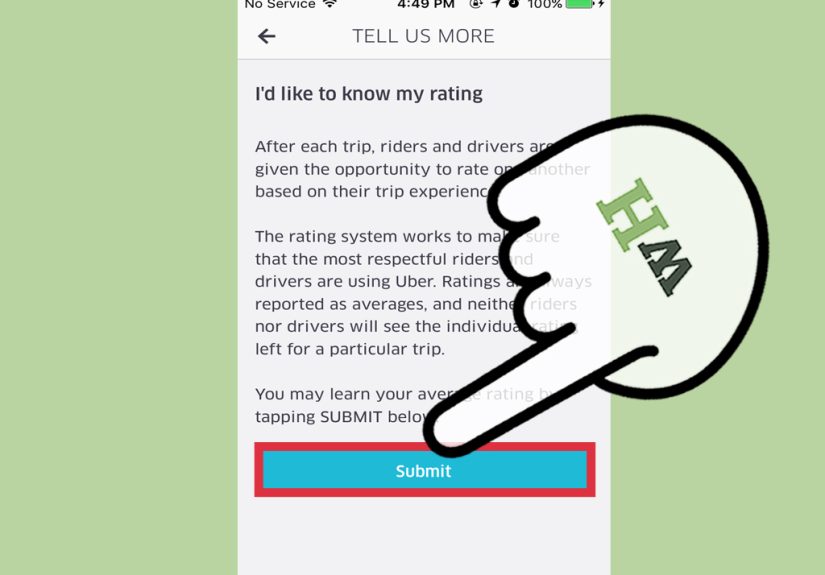
- Open the trip details and tap Receipt for full information.
What you can do from the receipt screen
- Review ride basics (date/time, pickup, dropoff, route map).
- See the fare breakdown (helpful for budgeting or business expenses).
- Access rating/tipping prompts (depending on timing and location).
- Resend or download receipts when available.
Important note: Uber generally doesn’t show you a “per-trip rating outcome” (like “this driver got a 4.92 because of ride X”).
Ratings are averaged and designed to protect privacy. But your trip history is still useful for confirming who drove you,
and it’s the cleanest path if you need to report an issue or follow up with support.
When this method is the best choice
- You want to remember a great driver for future reference.
- You need a receipt for reimbursements or bookkeeping.
- You’re documenting details for safety or support reasons.
- You want to adjust a rating/tip (where the app or emailed receipt allows it).
Bonus: What to Look at Besides the Rating
If ratings were the whole story, we’d all just ride with 5.00 drivers and call it a day.
But a smart rider uses ratings as one data pointthen checks the context.
1) Number of trips
A high trip count can indicate experience and consistency. A newer driver can still be excellentjust recognize that their rating may be based on fewer rides.
2) Driver profile details and compliments
Many profiles include compliments (like “Great conversation” or “Clean car”) and sometimes badges.
These help translate a star number into something more human: what riders actually appreciated.
3) Your own comfort level and the situation
If you’re leaving a bar at 1:00 a.m., traveling alone, or you simply feel uneasy, treat comfort as a legitimate factor.
Use safety tools. Share trip status. Sit in the back seat when possible. Trust your gut without being rude about it.
4) Safety tools that pair well with rating checks
- “Check Your Ride” habits: match plate, vehicle, and driver photo every time.
- PIN verification: helpful in busy pickup areas or late-night rides.
- Share Trip Status: sends your ride details and live location to someone you trust.
- Safety Toolkit: quick access to in-app safety options (availability varies).
Conclusion: Use Ratings as a Quick FilterNot a Crystal Ball
Checking an Uber driver’s rating is easy once you know where to look, and you can do it at multiple points:
right after the driver accepts, from trip details while waiting (or riding), and later in your Activity and receipts.
The rating is a helpful signalbut pairing it with identity checks and safety features is what actually makes you a confident rider.
Your goal isn’t to become a rideshare detective with a corkboard and red string. It’s to take 10 seconds to confirm:
“Yep, this looks right,” or “Nope, I’ll try another match.” Quick, calm, and in control.
Real-World Rider Experiences (500+ Words)
Let’s talk about how this plays out in real lifebecause “check the rating” sounds simple until you’re juggling a suitcase,
a melting iced coffee, and the social pressure of a car that’s already turning the corner toward you.
Scenario 1: The Airport Dash
Imagine you’ve landed late, your phone is at 18%, and the baggage carousel has turned into a competitive sport.
You request a ride and immediately see the driver’s rating and profile card pop up. This is where Method #1 shines:
you’re still inside, still safe, and still able to decide. A lot of riders find comfort in seeing a strong rating paired with a high trip count,
especially when they’re tired and just want a smooth ride home. Even if the rating is fine, many people use the driver profile as a “sanity check”
to confirm the driver photo and car details match before stepping outside.
Scenario 2: The Crowded Concert Pickup
Crowded pickup zones are where confusion thrives. You see three cars that look identical, everyone is staring at their phones,
and someone yells, “Uber for Jessica?” like it’s a roll call at a chaotic summer camp. This is when Method #2 becomes your best friend.
Riders often open the trip details panel again to double-check the driver’s rating, but more importantly, they verify the license plate and car model.
Many experienced riders will wait a few steps away from traffic, then approach only when the plate matches. If the rating is lower than expected,
some riders will cancelthough plenty of people also weigh practical factors like surge pricing and availability. The key is that the rating is one more piece
of reassurance in a noisy environment where mistakes are easy.
Scenario 3: The “Something Felt Off” Ride
Sometimes nothing objectively bad happens, but a rider gets that uncomfortable feeling: the driver seems unusually irritated,
the car is messy, or the conversation crosses a line. After the ride, riders often go straight to Activity to review the trip details and receipt.
That’s Method #3 in action. They may confirm the driver’s name and trip time, then use in-app options to leave feedback.
Even if they don’t file a report, many riders say that reviewing the trip record helps them feel organized and groundedespecially if they want to share
what happened with a friend or keep notes for themselves.
Scenario 4: The “Great Driver” Repeat Memory
On the positive side, riders also use trip history to remember excellent drivers. Maybe someone helped with heavy bags,
kept the car spotless, or navigated a confusing pickup like a GPS wizard with emotional intelligence.
Later, riders may open the past trip to tip, leave a compliment (when available), or just remind themselves what good service looks like.
This is where ratings aren’t about fearthey’re about reinforcing the kind of experience you want more of on the platform.
The common theme in all these experiences is that riders feel best when they combine a quick rating check with a simple verification routine:
match the car, match the plate, match the driver, and use safety features when the situation calls for it.
In other words: use the stars, but don’t worship them.