Table of Contents >> Show >> Hide
- Why This Method Works
- Recipe at a Glance
- Ingredients
- Equipment You’ll Be Glad You Used
- Step-by-Step: Oven-Fried Whole Chicken Legs
- How to Get It Extra Crispy (Without Deep-Frying)
- Flavor Variations
- What to Serve With Oven-Fried Chicken Legs
- Storage and Reheating
- FAQs
- Kitchen Stories & Real-Life Lessons (The 500-Word “Experience” Part)
- SEO Tags
If you love fried chicken but don’t love (1) splattering oil, (2) smelling like a state fair, or (3) the tiny
existential crisis that happens when you realize you’re now the caretaker of a pot of hot grease… welcome.
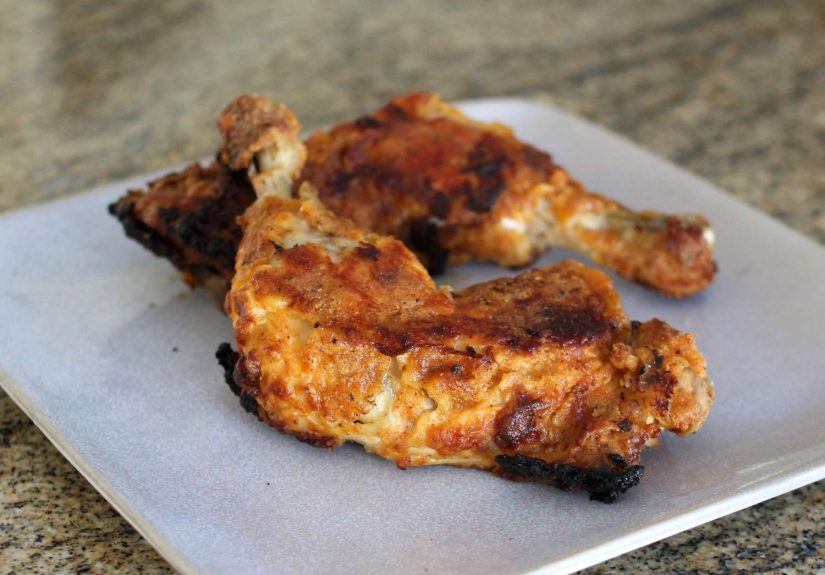
This oven-fried whole chicken legs recipe delivers that crunchy, craggy, “did you secretly deep-fry this?”
vibeusing your oven, a wire rack, and a few smart tricks.
The goal is simple: juicy dark meat + crispy coating. Whole chicken legs (a thigh + drumstick)
are basically built for this. Dark meat is more forgiving than breasts, the skin can crisp beautifully, and the shape
gives you lots of crunchy edges. (Crunchy edges are a love language.)
Why This Method Works
- Buttermilk brine tenderizes and seasons the chicken so it tastes great even under all that crunch.
- Two-part coating (flour + crunchy crumbs) gives you a crisp shell that browns well in the oven.
- Wire rack baking lets hot air circulate, so the bottom doesn’t turn into a sad, soggy breading blanket.
- A little oil (spray or drizzle) helps the coating brown like it means it.
Recipe at a Glance
Prep time: 20 minutes (plus brining time)
Cook time: 45–60 minutes
Total time: About 1 hour active
Servings: 4 (makes 4 whole chicken legs)
Ingredients
Chicken + Brine
- 4 whole chicken legs (about 3 to 3½ pounds total), skin-on recommended
- 2 cups buttermilk
- 1½ teaspoons kosher salt
- 1 teaspoon hot sauce (optional, but highly encouraged)
- 1 teaspoon Dijon mustard (optional, adds tangy depth)
- 2 cloves garlic, grated or minced
- ½ teaspoon black pepper
Crispy Coating
- ¾ cup all-purpose flour
- 1 cup panko breadcrumbs (or crushed cornflakes for extra crunch)
- ⅓ cup finely grated Parmesan (optional, for savory browning)
- 1½ teaspoons baking powder (helps the coating crisp and brown)
- 1½ teaspoons paprika (smoked paprika is great)
- 1 teaspoon garlic powder
- 1 teaspoon onion powder
- ¾ teaspoon kosher salt
- ½ teaspoon black pepper
- ¼–½ teaspoon cayenne (optional, depending on your bravery)
For Baking
- Cooking spray or 2–3 tablespoons neutral oil (avocado, canola, vegetable)
- 2 rimmed baking sheets (or 1 large)
- 1–2 wire racks that fit inside your baking sheet(s)
Equipment You’ll Be Glad You Used
- Wire rack: The difference between “crispy” and “why is the bottom wet?”
- Instant-read thermometer: The only reliable way to know your chicken is done without drying it out.
- Rimmed baking sheet: Catches drips, saves your oven from becoming a smoke machine.
Step-by-Step: Oven-Fried Whole Chicken Legs
1) Brine for Flavor + Juiciness (Minimum 2 hours, best 8–24)
- In a large bowl or zip-top bag, whisk together buttermilk, salt, hot sauce (if using), Dijon (if using), garlic, and pepper.
- Add the chicken legs, turning to coat. Cover and refrigerate at least 2 hours. Overnight is ideal for maximum flavor.
Quick note: If you’re short on time, even 30–60 minutes helps. If you’re not short on time, overnight is how
you get that “wow, the meat tastes seasoned all the way through” moment.
2) Prep the Oven Like You Mean It
- Heat oven to 425°F. (If using convection, use 400°F.)
- Set a wire rack inside a rimmed baking sheet. Spray the rack generously with cooking spray.
- Optional power move: Put the empty rack-and-pan in the oven while it preheats. A hot rack starts crisping sooner.
3) Mix the Coating
-
In a shallow dish, mix flour, panko, Parmesan (if using), baking powder, paprika, garlic powder, onion powder, salt,
pepper, and cayenne. -
For extra crunch and deeper color: toast the panko in a dry skillet for 3–5 minutes until lightly golden, then cool
and use it in the coating mixture.
4) Coat the Chicken (The “Press, Don’t Sprinkle” Rule)
- Remove chicken from the buttermilk brine and let excess drip off. Don’t rinse.
-
Dredge each leg in the coating mixture, pressing firmly so it sticks. For thick pieces, coat in sectionsthigh first,
then drumsticklike you’re giving it a crunchy jacket tailor-made to its curves. - Place coated chicken on a plate while you finish the rest. Let it sit 5–10 minutesthis helps the coating hydrate and adhere.
5) Bake Until Crispy and Safe
- Arrange chicken legs on the prepared wire rack with space between pieces. (Crowding = steam = sadness.)
- Lightly spray the tops with cooking spray or drizzle a little oil over the coating. This boosts browning dramatically.
- Bake 25 minutes, then flip each leg and spray the second side lightly with oil.
-
Bake another 20–30 minutes, until the coating is deep golden and the thickest part hits
165°F on an instant-read thermometer (avoid touching bone with the probe). - Rest 5–10 minutes before serving. The crust sets and the juices calm down, like after a dramatic group chat.
Timing reality check: Whole legs vary in size. Start checking around 45 minutes total, but plan for up to 60.
The thermometer is the boss here.
How to Get It Extra Crispy (Without Deep-Frying)
Use a Wire Rack (Seriously)
A rack keeps hot air moving around the chicken so the underside browns instead of steaming in its own drippings.
If you don’t have a rack, you can bake on a preheated sheet panbut flip carefully and expect slightly less crunch.
Don’t Skip the Oil Assist
Oven “frying” needs a little help. A light spray of oil on the coating encourages browning and that fried-style crisp.
You’re not deep-fryingyou’re just giving the crust a supportive friend.
Let the Coating Set Before Baking
That 5–10 minute rest after breading helps the coating bind. It’s like letting paint drytouch it too soon and your
fingerprints live there forever.
Want Next-Level Skin Crisp?
If you’re cooking skin-on legs and want extra crisp skin under the coating, add a tiny pinch of baking powder
to your salt (or keep it in the coating, as written). Baking powder can improve browning and crispness by changing surface
chemistry. Use baking powder, not baking soda (baking soda can taste… not cute).
Flavor Variations
1) Classic “Sunday Dinner” Herb
- Add 1 teaspoon dried thyme and 1 teaspoon dried rosemary to the coating.
- Serve with mashed potatoes and something green so everyone feels virtuous.
2) Spicy Nashville-ish (Oven Edition)
- Increase cayenne in the coating to 1 teaspoon.
- After baking, brush with a mix of 2 tablespoons melted butter + 1 tablespoon hot sauce + ½ teaspoon cayenne.
3) Tangy Mustard-Coat Shortcut
- Swap the brine: use ¾ cup buttermilk + ¼ cup Dijon (or yellow mustard) for a punchy, egg-free binder vibe.
- It adds tang and helps the coating clingespecially good if egg prices are doing their thing again.
4) Gluten-Free Crunch
- Use gluten-free panko or crushed rice cereal.
- Swap flour for a gluten-free all-purpose blend or rice flour.
What to Serve With Oven-Fried Chicken Legs
- Bright + crunchy: coleslaw, cucumber salad, pickles
- Comfort classics: mac and cheese, mashed potatoes, biscuits
- Fast weeknight: corn on the cob + bagged salad + “I cooked” confidence
Storage and Reheating
Storing
Cool leftover chicken, then refrigerate in an airtight container for up to 3–4 days.
Reheating (Best for Crisp)
- Heat oven to 400°F.
- Place chicken on a wire rack over a baking sheet.
- Reheat 15–20 minutes (depending on size), until hot throughout and the crust re-crisps.
Microwaving works, but it turns “crispy” into “steamed breading.” If you must microwave, finish with a quick oven
blast to bring the crunch back.
FAQs
Do I have to use buttermilk?
Buttermilk is a classic because it tenderizes gently and helps the coating stick. No buttermilk? Mix 2 cups milk with
2 tablespoons lemon juice or vinegar, let sit 5 minutes, and use it like buttermilk. Yogurt thinned with water also works.
Can I remove the skin?
Yes. You’ll still get a crunchy coating, but skin helps protect the meat and adds richness. If you go skinless, watch
closely and don’t overbakedark meat is forgiving, but it’s not immortal.
Why is my coating pale?
- Not enough oil on the surface (spray lightly next time).
- Oven temp too low (425°F helps with browning).
- Rack not used or chicken crowded (steam is the enemy).
Why did the breading fall off?
- Too much brine dripping off (let it drip, but don’t let it puddle).
- Not pressing the coating firmly.
- Skipping the 5–10 minute “set” before baking.
- Flipping too aggressivelyuse tongs and a gentle touch.
Kitchen Stories & Real-Life Lessons (The 500-Word “Experience” Part)
The first time you make oven-fried whole chicken legs, you’ll probably have one very specific thought around minute
twelve of baking: “Is this… doing anything?” That’s normal. Oven-frying is a slow-burn relationship. Deep-frying
is a whirlwind romanceloud, dramatic, and immediately impressive. Oven-frying is more like a dependable friend who
shows up early, brings snacks, and never sets off your smoke alarm on purpose.
You may also learnquicklythat the wire rack is not a “nice-to-have.” It’s a “save-your-crust” device. Without it,
the bottom of the chicken tends to trap steam, and you’ll peel up the coating like you’re removing a sticker from a
new phone. With a rack, the coating stays intact and the chicken browns more evenly, which feels like a small kitchen
miracle you didn’t have to manifest on a vision board.
Another classic experience: the breading confidence curve. At first, you’ll sprinkle coating on gently, like you’re
afraid of offending the chicken. Then you’ll realize the chicken needs you to be assertive. Press the coating on.
Pat it like you mean it. The chicken is not fragile. It’s a whole leg. It can handle a little commitment.
There’s also the “golden-brown timing gap” where you stare through the oven door hoping for instant crunch. Here’s what
usually happens: the crust looks pale… then suddenly it’s golden… then, if you wander off to scroll your phone for “just
one minute,” it’s aggressively brown. So yes, set a timer. And if the coating is browning faster than the chicken is
cooking, you’ll discover the gentle power of foilloosely tenting the top to prevent over-browning while the inside
catches up. That’s not cheating. That’s adulthood.
You’ll probably experiment with crumbs, too. Panko gives a lighter, crisper crunch; crushed cornflakes feel extra nostalgic,
like something your favorite aunt would bring to a potluck and casually dominate the entire buffet. Some nights you’ll go
spicy with cayenne and hot sauce. Other nights you’ll dial it back and let gravy do the talking. And once you realize how
adaptable this recipe is, you’ll start using the same method for thighs, drumsticks, and even pork chopsbecause when a
crunchy coating meets a wire rack and a hot oven, good things happen.
The best experience, though, is the payoff: pulling out a tray of chicken legs that actually crunch when you tap them with
tongs, then watching people take a bite and do that involuntary “mmm” pause. You didn’t deep-fry. You didn’t babysit hot oil.
You used your oven like a grown-up wizard. And you still got the crispy chicken energy. That’s a win worth repeating.