Table of Contents >> Show >> Hide
- What Is Inspect Element in Chrome?
- Step 1: Open the Page You Want to Inspect
- Step 2: Open Chrome DevTools
- Step 3: Understand the DevTools Layout
- Step 4: Select the Element You Want to Inspect
- Step 5: Read the HTML and CSS for the Selected Element
- Step 6: Make Temporary Edits to HTML and CSS
- Step 7: Use Inspect Element for Responsive and Advanced Checks
- Common Use Cases for Inspect Element
- Best Practices and Safety Tips
- Conclusion
- Real-World Tips and Experiences with Inspect Element
If you’ve ever stared at a web page and thought, “How did they do that?”, Chrome’s Inspect Element tool is your new best friend. It lets you peek behind the scenes of any page, see the HTML and CSS in real time, and even make temporary editsno hacking skills or black hoodie required.
In this guide, you’ll learn how to Inspect Element on Chrome in 7 simple steps. We’ll walk through opening Developer Tools, selecting elements, reading the HTML and CSS, and testing quick changes like a pro. We’ll also describe what each screenshot or “picture” would show, so you can easily follow along while you’re in Chrome.
Whether you’re a web developer, a marketer tweaking a landing page, or just curious why that button looks so good, this tutorial will help you get comfortable with Chrome DevTools and use Inspect Element with confidence.
What Is Inspect Element in Chrome?
Inspect Element is part of Chrome’s built-in Developer Tools (DevTools). It lets you:
- View the live HTML structure of any web page.
- See the CSS rules that style each element.
- Temporarily edit content and styles to experiment with layout and design.
- Debug layout issues, broken buttons, or weird spacing.
Think of it as a real-time “X-ray” for websites. You’re not changing the real site on the serverjust how it looks in your browser at that moment. Refresh the page, and everything goes back to normal.
Step 1: Open the Page You Want to Inspect
First, open Google Chrome and navigate to the page you want to explore. It could be your own site, a competitor’s landing page, or your favorite blog.
Example: Let’s say you want to know how a site styles its big hero headline. Load the home page, scroll until you see that headline on screen, and get ready to inspect it.
Picture idea: A screenshot of Chrome with a normal web page openno DevTools yet, just the page you’re about to dissect.
Step 2: Open Chrome DevTools
There are several ways to open DevTools. Use whichever feels most naturalmouse, menu, or keyboard shortcut.
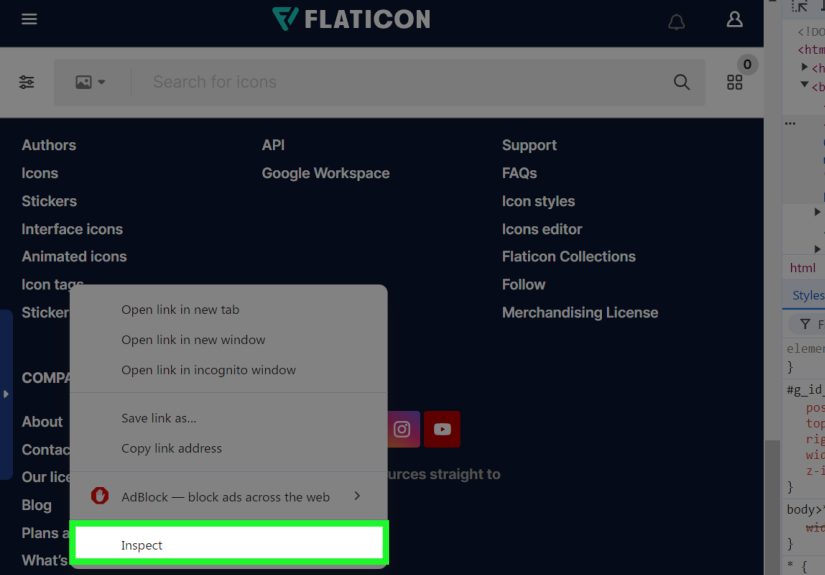
Option A: Right-click > Inspect
This is the easiest way:
- Right-click directly on the element you’re curious about (for example, a headline or button).
- In the context menu, click Inspect.
This instantly opens DevTools and selects that exact element in the Elements panel.
Option B: Use the Chrome Menu
- Click the three vertical dots in the top-right corner of Chrome.
- Go to More tools.
- Click Developer tools.
This opens DevTools, usually docked on the right side or bottom of your window. You can still select any element on the page afterward.
Option C: Use Keyboard Shortcuts
If you like shortcuts (and saving time):
- Windows / Linux:
Ctrl + Shift + IorF12 - Mac:
Command + Option + I
These open DevTools directly. To go straight into “inspect mode” (where your mouse selects elements), you can use:
- Windows / Linux:
Ctrl + Shift + C - Mac:
Command + Shift + CorCommand + Option + C
Picture idea: A screenshot showing DevTools docked on the right side with the Elements panel visible.
Step 3: Understand the DevTools Layout
When DevTools opens, you’ll see several panels. For Inspect Element, the two most important areas are:
- The Elements panel (left side): shows the page’s HTML as a nested tree of tags (
<div>,<h1>,<p>, etc.). - The Styles panel (right side): shows the CSS rules applied to whichever element is selected in the Elements panel.
As you move your mouse over different HTML elements in the Elements panel, Chrome highlights the corresponding area on the page with a colored overlay. This is how you know which code maps to which piece of the page.
Picture idea: The Elements panel with one line of HTML highlighted, and the corresponding button on the page outlined in blue.
Step 4: Select the Element You Want to Inspect
Now let’s actually inspect something.
Method 1: Use the Element Picker
- In DevTools, click the small icon that looks like a mouse pointer over a square (the Inspect or element picker tool).
- Move your mouse over the page. As you hover, different elements are highlighted.
- Click the element you want to inspectmaybe a button, a headline, or an image caption.
DevTools will automatically select the matching HTML node in the Elements panel.
Method 2: Hover Over HTML in the Elements Panel
You can also:
- Move your mouse over different lines of HTML in the Elements panel.
- Watch the page as Chrome highlights each element in turn.
This is great for figuring out which <div> is controlling that weird padded box you’ve been fighting with.
Step 5: Read the HTML and CSS for the Selected Element
Once your element is selected, you’ll see:
- Its HTML tag and attributes (like
classandid) in the Elements panel. - Its CSS rules in the Styles section on the right, including color, font-size, margin, padding, borders, and more.
Here’s what to look for:
- Classes and IDs: These appear in the tag, e.g.
<button class="btn btn-primary">. They’re the hooks your CSS uses to style the element. - Styles panel: You’ll see sets of CSS rules grouped by the file or stylesheet they come from. You can check which rule is actually winning when multiple rules target the same element.
- Box model: Many themes show the margin, border, padding, and content sizes in a visual “box model” diagram.
Picture idea: A screenshot of the Styles panel showing font-size, color, and padding for a selected headline.
Step 6: Make Temporary Edits to HTML and CSS
Here’s where the fun starts. You can edit HTML and CSS directly in DevTools to preview changes without touching the real site.
Editing HTML
- In the Elements panel, right-click the element’s HTML tag.
- Select Edit as HTML, or double-click the text you want to change.
- Type your changesmaybe change a headline from “Sale Ends Soon” to “Sale Ends Right Now”.
- Press Enter or click outside the field.
You’ll see the page update instantly.
Editing CSS
- In the Styles panel, click on a CSS value (for example,
font-size: 24px;). - Type a new value, like
32px, and press Enter. - Try changing
color,background-color, ormarginto see how the layout responds.
You can also add new CSS properties by clicking into an empty line in the Styles panel and typing something like border-radius: 9999px; to make a button fully rounded.
Important: These changes are temporary. Refresh the page and everything resets to how it was.
Step 7: Use Inspect Element for Responsive and Advanced Checks
Inspect Element is powerful for more than just fonts and colors. Here are a few advanced tricks you can try:
Test Responsive Layouts with Device Toolbar
- With DevTools open, click the small device icon (it looks like a phone next to a tablet).
- The page will switch into a responsive view where you can choose device presets like iPhone, Pixel, or an arbitrary width.
- Resize the viewport and watch how elements reflow.
This is perfect for checking if your navigation, buttons, and text look good on small screens.
Check Pseudo-Classes and States
Many sites have styles that change on :hover, :active, or :focus. DevTools can simulate these states:
- With an element selected, look in the Styles panel for an option like :hov or Toggle Element State.
- Check
:hoverto see how the element looks when hovered, even without moving your mouse.
Debug Layout Issues
If something on the page is overlapping, misaligned, or randomly floating into outer space, you can:
- Inspect the element and look at the Box model section for padding and margin values.
- Temporarily set
border: 1px solid red;in the Styles panel to visualize element boundaries. - Disable suspicious CSS rules by unchecking the checkbox next to them.
Picture idea: A screenshot showing the responsive Device Toolbar with the page previewed as a mobile screen.
Common Use Cases for Inspect Element
Once you know how to inspect element on Chrome, you’ll find yourself using it constantly. Some popular use cases:
- Design tweaks: Experiment with new fonts, colors, and sizes before updating your actual CSS.
- Copy snippets: Grab the HTML structure or classes for a card layout or button you like on your own site.
- Debugging: Investigate why a specific section is hidden, overlapped, or styled incorrectly.
- Learning: Study how other sites structure their HTML and organize their CSS.
Best Practices and Safety Tips
- Remember it’s temporary: DevTools changes don’t touch the live server, so you can safely experiment.
- Don’t assume copied code is production-ready: Layouts you copy might depend on other styles or scripts you haven’t grabbed.
- Respect privacy and terms of use: Inspecting code is fine; reusing copyrighted content, not so much.
- Use it as a learning tool: Take notes on interesting patterns and improve your own projects.
Conclusion
Inspect Element in Chrome looks intimidating at first, but once you’ve walked through these 7 steps, you’ll see it’s really just a powerful, visual way to understand how web pages work. You now know how to open DevTools, select elements, read HTML and CSS, test design tweaks, and even preview responsive layoutsall in your browser.
Whether you’re fixing a stubborn layout bug, previewing a new color scheme, or just satisfying your curiosity, learning how to inspect element on Chrome will make you faster, more confident, and a lot harder to confuse with mysterious “website issues.”
Real-World Tips and Experiences with Inspect Element
Once you start using Inspect Element regularly, you realize it’s more than a “nice-to-know” trickit becomes part of your daily workflow. Here are some practical experiences and scenarios that show how powerful it can be in real life.
1. Quick client “magic” during calls. If you work with clients, Inspect Element can make you look like a wizard. Imagine a client says, “Can we make that button a little bigger and more eye-catching?” Instead of saying, “I’ll get back to you,” you can open DevTools, tweak the font-size, padding, and background color live, and say, “Something like this?” They see the change instantly on their screen share, and you collect feedback before touching the actual codebase.
2. Debugging mystery white space. Every developer eventually meets “the gap from nowhere”a random white strip under the header or extra space on the right side. With Inspect Element, you can click around elements until you find the culprit: maybe a large margin, a fixed-width element, or an overflowing image. Instead of guessing, you visually see the box model, turn off suspicious rules one by one, and pinpoint the exact property causing trouble.
3. Learning layout techniques from other sites. Inspect Element is like free continuing education for web design. When you see a layout you lovemaybe a responsive card grid or a clever sticky headeryou can inspect it and see how it’s built. You might discover a neat flexbox trick, a grid template pattern, or a clever use of position: sticky;. You don’t copy-paste blindly, but you do learn patterns you can adapt in your own projects.
4. Testing accessibility improvements. Inspect Element also helps when you’re working on accessibility. You can test higher contrast colors, larger font sizes, and different focus states right in the Styles panel. Try adjusting colors to meet contrast guidelines, or enlarging buttons and link text to see how the layout holds up. Once you have changes that work visually and practically, you can bake them into your real code with confidence.
5. Speeding up collaboration with designers and devs. Instead of sending long messages like “The blue in the hero looks slightly darker than the mockup,” you can inspect the element, grab the exact hex color, and share it. Or, if you’re a designer, you can mock up an alternative spacing or font-size directly in DevTools and send a screenshot plus the exact CSS values to your developer. This cuts down on back-and-forth and avoids the dreaded “That’s not what I meant” loop.
6. Safely experimenting on live pages. When you’re nervous about changing a live page, Inspect Element gives you a sandbox right inside production. You can test a new headline length, different button copy, or a more compact form layout before updating your CMS or pushing code. If it looks terrible, no one’s the wiseryou just refresh. If it looks great, you know exactly what to implement.
7. Getting comfortable with code as a beginner. If you’re new to HTML and CSS, Inspect Element is an incredibly friendly way to learn. You see real-world code, not isolated textbook examples. You can change a value, see what happens, and build intuition about how properties interact. Over time, you’ll start recognizing common patternslike how flexbox containers behave, or how utility classes are stacked in modern frameworks.
In short, Inspect Element is one of those tools that grows with you. At first, it’s a fun way to change text on a page and prank your friends. Later, it becomes essential for debugging, design exploration, responsive testing, and even learning best practices from top-tier websites. The more you practice the 7 steps in this guide, the more natural it will feeland soon, you’ll catch yourself opening DevTools almost automatically whenever something looks even a little bit “off.”