Table of Contents >> Show >> Hide
- Why Stain Hardwood Floors Instead of Replacing Them?
- Step Zero: Is Your Floor a Good Candidate for Stain?
- Tools and Materials You’ll Need
- Choosing the Right Stain and Finish
- Project Summary: How to Stain Hardwood Floors Step by Step
- Pro Tips and Common Mistakes to Avoid
- How to Care for Your Newly Stained Hardwood Floors
- Real-World Experiences: What DIYers Learn the Hard Way
If your hardwood floors look more “before photo” than “dream home,” staining them can be the makeover that saves your budget and your sanity. Instead of ripping everything out or covering beautiful wood with vinyl, a weekend staining project can deepen the color, hide years of small scratches, and make the whole room feel upgraded.
This project summary brings together classic Bob Vila–style know-how with advice from flooring pros, paint brands, and real-life DIYers across the U.S. to give you a clear, realistic guide to staining hardwood floors without losing your mindor your living room.
Why Stain Hardwood Floors Instead of Replacing Them?
Staining hardwood floors is one of the most cost-effective ways to change the look of a room. When done correctly, you:
- Refresh worn wood by masking light scratches, dull spots, and uneven sun fading.
- Change the mood of a space by going from honey oak to rich walnut or from orange-toned to a cooler, modern brown.
- Boost perceived home value with floors that look custom, even if your house was built during the “wall-to-wall carpet” era.
- Extend the life of existing hardwood by sanding and sealing instead of replacing it entirely.
Most pros and guides agree that staining and finishing hardwood floors can often be completed in a long weekend if you plan well and use the right products.
Step Zero: Is Your Floor a Good Candidate for Stain?
Before you rent a sander and start ripping into your Saturday, make sure your floors are actually stainable:
- Solid hardwood? Great. You can usually sand and stain multiple times over its life.
- Engineered hardwood? Check the wear layer. If the top hardwood layer is thin, aggressive sanding can burn right through it.
- Deep water damage, pet stains, or cupping? Severely damaged boards may need replacing, or you may have to accept some imperfections even after staining.
If the floor is soft, crumbling, badly warped, or patched with non-wood materials, talk to a flooring pro before you commit to a full DIY refinishing project.
Tools and Materials You’ll Need
Good prep equals good results. Most U.S. floor refinishing guides recommend gathering everything before you sand the first board.
Tools
- Random orbital floor sander (rented)
- Edge sander or detail sander for corners
- Shop vacuum with a good filter
- Tack cloths or microfiber cloths
- Lambswool applicator, pad applicator, or high-quality stain brush
- Paint tray or metal pan for stain
- Respirator or mask rated for fumes and dust
- Knee pads (trust me, your future self will thank you)
Supplies
- Sandpaper discs in multiple grits (typically 60, 80, 100–120)
- Wood filler for gaps and nail holes
- Mineral spirits (for cleaning oil-based stain residue)
- Your chosen floor stain (oil-based or water-based)
- Polyurethane or other clear finish (again, oil-based or water-based)
- Painter’s tape and plastic sheeting for masking adjacent areas
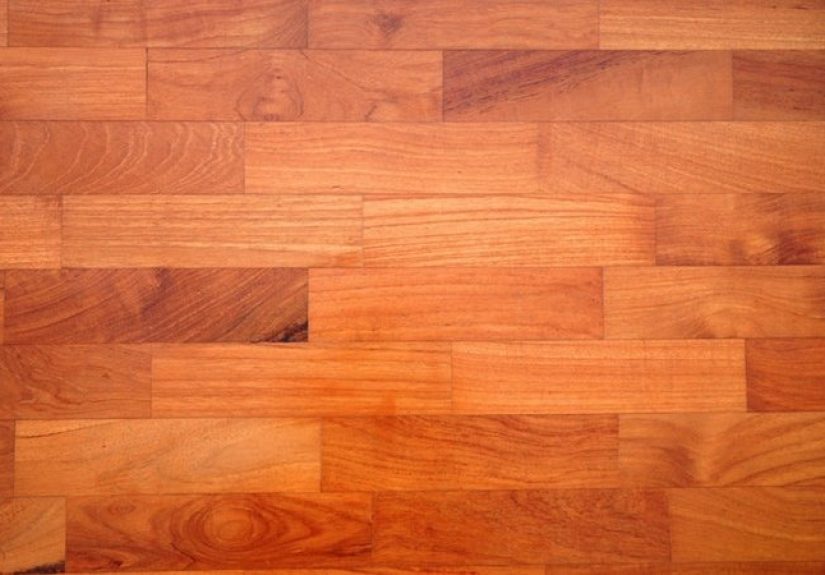
Choosing the Right Stain and Finish
This is where homeowners spiral down the internet rabbit hole of “espresso vs. provincial vs. special walnut.” Take a breath. Let’s simplify it with what pros say.
Oil-Based Stain
- Pros: Rich, deep color; a bit more working time; tends to penetrate deeply.
- Cons: Stronger odor; longer drying time; higher VOCs (volatile organic compounds).
- Best for: Classic looks, darker tones, people who don’t mind airing out the house for a bit.
Water-Based Stain
- Pros: Faster drying; lower odor; more eco-friendly; easier soap-and-water cleanup.
- Cons: Can raise the grain, requiring a light sanding between coats; color may look more transparent or “natural.”
- Best for: Busy households that need a quick turnaround and want a lighter, more natural look.
Don’t Forget the Topcoat
The stain provides color; the polyurethane finish (or similar clear coat) provides protection. Oil-based poly tends to be slightly amber and very durable. Water-based poly stays clearer and is a favorite for modern, lighter floors.
Whatever you choose, always test the stain and finish combo in an inconspicuous corner or on a spare board before committing to the whole room. Lighting and wood species can change how a stain looks dramatically.
Project Summary: How to Stain Hardwood Floors Step by Step
Bob Vila’s classic project summary can be boiled down to a few core steps: empty, sand, clean, stain, and seal. Below is the expanded version most homeowners actually need.
Step 1: Empty the Room and Protect What’s Left
- Remove all furniture, rugs, vents covers, and doors if possible.
- Mask off doorways, built-ins, and vents with plastic and painter’s tape to contain dust.
- Remove base shoe molding if you plan to sand very close to the walls.
Think of it as moving out… but your stuff only goes as far as the next room.
Step 2: Sand the Floor (Three Passes)
Sanding is where the magicand the messhappens. Most professional and DIY guides recommend progressive grits:
- First pass: Around 60 grit to remove the old finish and level the floor.
- Second pass: Around 80 grit to refine the surface and take out swirl marks.
- Final pass: 100–120 grit for a smooth, even surface ready to accept stain.
Always sand with the grain or on a slight diagonal; keep the machine moving to avoid “dips” and “gutters.” Use an edge sander or detail sander to tackle corners and along walls.
Step 3: Repair and Fill
After sanding, vacuum thoroughly and inspect.
- Fill nail holes, deep scratches, or small gaps with a stainable wood filler that matches your planned color.
- Let filler dry completely, then sand those spots smooth with fine-grit sandpaper.
Skip this step, and your “character marks” might turn into “what happened there?” once the stain goes on.
Step 4: Clean Like a Pro
Every expert agreesdust is the enemy of a smooth stain job.
- Vacuum the floor slowly and methodically, including cracks and along baseboards.
- Use a damp (not wet) microfiber mop or tack cloth to pick up remaining fine dust.
- If you’re using oil-based stain, many pros wipe the floor with rags lightly dampened in mineral spirits to catch remaining dust and open the grain slightly (follow product and safety instructions).
Let the floor dry completely before you stain. Any leftover dust will become tiny, permanent “sprinkles” in your project.
Step 5: Apply the Stain in Manageable Sections
Now for the satisfying part. Following the Bob Vila method and other pro guides, work in small sectionsabout 2-foot-wide stripsfrom the far corner of the room back toward the door.
- Stir the stain thoroughly (don’t shake, which adds bubbles).
- Pour a small amount into a paint tray or pan.
- Using a lambswool applicator, pad, brush, or roller, apply stain with the grain in even strokes.
- Maintain a “wet edge” as you move so you don’t get lap marks.
Don’t panic if the color looks a bit intense at first; you’ll be wiping off the excess.
Step 6: Wipe Off Excess and Let It Dry
Stain needs time to penetrate but not so much that it becomes sticky or uneven.
- Allow the stain to sit for the time recommended on the can (often 5–15 minutes).
- Wipe off the excess with clean, lint-free cloths, moving with the grain.
- Check for lap lines, missed spots, and streaks as you gofix them while the stain is still workable.
Drying time depends on whether your stain is oil-based or water-based, as well as temperature and humidity. Many products need at least 24 hours before you apply a finish; some fast-drying water-based stains are ready sooner.
Step 7: Seal with Polyurethane (or Another Clear Finish)
Once the stain is fully dry, it’s time for the protective coating that makes your floors truly durable.
- Lightly buff the surface with a very fine abrasive or sanding screen (220 grit) if recommended by the finish manufacturer.
- Vacuum and wipe the floor again to remove all dust.
- Apply your first coat of polyurethane using a pad, brush, or roller, working with the grain.
- Let it dry fully, then lightly sand, clean again, and apply a second coat. Some high-traffic areas may benefit from a third coat.
Most finishes need several days to cure fully, even if they’re dry to the touch sooner. Follow label directions before dragging furniture back in or rolling office chairs across your freshly stained hardwood floors.
Pro Tips and Common Mistakes to Avoid
1. Skipping Grits While Sanding
Jumping from very coarse to very fine sandpaper leaves deep scratches that stain will highlight, not hide. Progress through at least three grits, as recommended by many refinishing guides.
2. Not Cleaning Between Steps
Dust left after sanding or between coats of finish will show up as bumps or roughness in your final result. Always vacuum and wipe before stain and before each coat of polyurethane.
3. Over-Wetting the Floor When Cleaning
Too much water on hardwood can cause warping or long-term damage. Cleaning experts recommend dampnot soakingmops and wood-safe cleaners. Avoid steam cleaners on hardwood floors altogether.
4. Forgetting to Test the Color
Stain colors can look wildly different across oak, maple, pine, and other species. Always test your chosen stain on a hidden section or scrap board before committing to the entire room.
5. Rushing Dry Times
Yes, you want your house back. But walking on stain or finish too soon can leave footprints, dull spots, or smears. Respect the manufacturer’s drying and curing times, even if that means a couple of nights on the couch.
How to Care for Your Newly Stained Hardwood Floors
Once the hard work is done, you want your floors to stay beautiful as long as possible. Flooring experts and cleaning pros offer a few consistent maintenance rules:
- Use doormats and rugs at entry points to trap dirt and grit before it scratches the finish.
- Add felt pads under furniture legs to prevent gouges and drag marks.
- Skip harsh cleaners like bleach, ammonia, and strong vinegar solutions, which can dull or strip the finish.
- Dust mop regularly with a microfiber pad and use a cleaner labeled safe for hardwood floors.
- Wipe up spills immediatelyespecially pet accidents, coffee, and wineto prevent deep stains.
With basic care, a well-stained and sealed floor can stay gorgeous for many years before you ever need to refinish it again.
Real-World Experiences: What DIYers Learn the Hard Way
Every professional-looking hardwood floor has a backstory, and it usually involves at least one minor freak-out. Pulling together real-world experiences from DIY bloggers and floor specialists, here are some honest lessons you won’t always see on the back of the stain can.
The Dust Situation Is Real
First-time DIYers almost always underestimate sanding dust. Once you turn on the sander, you’ll understand why pros tape plastic over doorways, vents, and even built-ins. Fine dust drifts onto everything: window sills, ceiling fans, and the family cat if they wander through.
One homeowner documented vacuuming three times, wiping with damp microfiber towels, then doing a final pass with mineral spiritsand still finding a bit of dust in corners. The takeaway: build extra time into your schedule for cleaning. It’s not overkill; it’s insurance for a smooth, professional-looking finish.
Lighting Can Trick You
Stain color isn’t just about the product name; it’s about how that color looks in your room. Many DIYers report that the “perfect neutral brown” they saw online looked too red, too gray, or too dark once it hit their actual floor and natural light.
That’s why testing is so essential. Try your stain sample near a window, in the middle of the room, and in a darker corner. Check it in the morning, afternoon, and at night under artificial light. If you only look once and say “close enough,” you might regret it every time the sun hits the floor at 4 p.m.
Water-Based vs. Oil-Based Isn’t Just a Technical Choice
In forums and blog posts, you’ll see passionate debates about using oil-based or water-based stain and finish. Beyond technical differences like drying times and VOCs, there’s a lifestyle angle:
- Oil-based systems often mean a stronger smell and longer time out of the room, but the finish can be extremely durable and forgiving.
- Water-based systems usually offer shorter downtime and less odorgreat if you’ve got kids, pets, or sensitive lungsbut require more attention to technique and timing because they dry quickly.
Many DIYers with small children or limited ventilation choose water-based products to avoid days of heavy fumes. Others love the classic look of oil-based poly and are willing to open windows, run fans, and spend a couple of nights avoiding that room. There’s no single right answer; it’s about what fits your home and your tolerance for temporary chaos.
Expect a “What Have I Done?” Moment
Nearly every honest project diary has a moment when the floor looks worse in the middle of the process than it did at the beginning. Bare sanded wood can look patchy and raw; the first coat of stain may seem too dark; the room is torn apart and dusty. It’s normal to panic a little.
The key is to trust the sequence: sand → clean → stain → wipe → dry → seal. If you carefully follow the product directions and fix small issues as you go (like drips or missed spots), the floor almost always pulls together beautifully by the time the final coat of polyurethane dries.
Plan Your Life Around Drying Time
Real-world experience says the actual labor might be one long weekendbut the inconvenience can last longer. You may need to:
- Move your living room into the dining room for a week.
- Block off hallways and make detours through less glamorous paths (hello, garage entrance).
- Keep pets out of the area completely until the finish cures.
DIYers who go into the project with a realistic planair mattresses, temporary workspaces, and a sense of humorreport much less stress than those who assume they’ll be “back to normal” by Monday morning.
The Payoff Is Huge
Despite the dust masks, sore shoulders, and temporary chaos, most homeowners say that staining hardwood floors is one of the most satisfying DIY projects they’ve taken on. You literally watch a dull, tired surface transform into something rich, glossy, and custom to your home.
When you finally move the furniture back in and see the way your stained floors catch the light, the whole room feels intentional and finishedas if you secretly upgraded your house while keeping the same address.
If you respect the process, follow the steps, and give yourself time for cleanup and drying, you can absolutely get Bob Vila–worthy results from a weekend staining project.