Table of Contents >> Show >> Hide
- Why a Driftwood Mirror Frame Works (Even If You Don’t Own a Beach House)
- Two Approaches: Real Driftwood vs. Driftwood Look
- Materials and Tools (No Nails, No Screws Edition)
- Step 1: Measure Like You Mean It
- Step 2: Pick Your Driftwood Finish (That Looks Like the Real Deal)
- Step 3: Cut Your Frame Pieces
- Step 4: Dry Fit Everything (Before the Sticky Commitment)
- Step 5: Prep the Mirror Surface So Tape Actually Sticks
- Step 6: Attach the Frame Without Nails or Screws
- Step 7: Let It Cure (This Is Not the Time to “Test It”)
- Step 8: Seal the Finish for Bathroom Humidity
- Design Ideas: Make It Look Styled, Not Just “Attached”
- Troubleshooting (Because DIY Is a Comedy Until It Isn’t)
- Quick Recap: The No-Nails, No-Screws Formula
- of Real-World Experience: What You’ll Notice Once You Actually Build One
- Conclusion
If your bathroom mirror came with your house, there’s a solid chance it also came with the personality of plain oatmeal. The good news: you can upgrade that builder-grade “hi, I’m just here to reflect your regrets” mirror into a coastal, spa-ish statement piecewithout driving a single nail or screw.
This guide walks you through a driftwood-style mirror frame that relies on smart measuring, a good adhesive plan, and heavy-duty mounting tape. The result is a frame that looks like it washed ashore in a very chic way… but actually washed ashore in your living room next to a caulk gun.
Why a Driftwood Mirror Frame Works (Even If You Don’t Own a Beach House)
Driftwood frames are popular for a reason: the finish is forgiving, the texture is instantly interesting, and the neutral tones play nicely with everything from crisp white tile to moody charcoal paint. In bathrooms, a driftwood frame also does a sneaky job of warming up hard surfaces (glass, porcelain, metal) with something that feels organic and handmade.
And yes“without nails or screws” is totally doable. The secret isn’t “hope.” It’s choosing the right sticking strategy and letting it cure long enough to earn your trust.
Two Approaches: Real Driftwood vs. Driftwood Look
You can build this project two ways. Both are nail-free and screw-free. Pick based on the vibe you want and how much chaos you’re willing to invite into your weekend.
Option A: Real Driftwood Pieces (Maximum Coastal Texture)
Best for: round mirrors, small-to-medium mirrors, boho spaces, cottage style, beachy decor. Real driftwood gives you that layered, sculptural looklike a seaside wreath, but for your face.
Option B: “Driftwood” Boards or Trim (Cleaner Lines, Easier on Large Mirrors)
Best for: big bathroom mirrors, rectangular mirrors, modern farmhouse or transitional style. You’ll cut boards/trim, apply a driftwood finish, and attach directly to the mirror using outdoor mounting tape (and optional mirror-safe adhesive for extra confidence).
This article focuses on the board/trim method because it’s the easiest way to frame a large bathroom mirror without fastenerswhile still keeping the driftwood look.
Materials and Tools (No Nails, No Screws Edition)
- Mirror-safe adhesive (or a construction adhesive specifically labeled for mirrors)
- Heavy-duty outdoor mounting tape (the kind meant for exterior conditions)
- Wood boards or trim sized to your mirror (common choices: 1×4, 1×3, or molding + flat stock)
- Wood glue (for assembling molding details without fasteners)
- Miter saw or miter box + hand saw
- Sandpaper (medium + fine grit)
- Painter’s tape (temporary “clamps” and positioning helpers)
- Level and tape measure
- Rubbing alcohol and a lint-free cloth (to prep glass)
- Driftwood finish supplies (pick your method: stain + wax, paint wash, or weathering solution)
- Optional: clamps (helpful but not required), a rubber roller (for pressing tape), a small filler/caulk (for tiny gaps)
Step 1: Measure Like You Mean It
Measure the mirror width and height. Then decide your frame “reveal”how much you want the frame to overlap the mirror edges. A common look is a subtle overlap (about 1/2 inch) so the mirror edge disappears behind the frame and everything looks intentional instead of “I made this during halftime.”
Bathroom reality check: if the mirror sits on a backsplash, the bottom frame piece may need to be thinner, notched, or omitted. Many DIYers let the bottom edge rest on the backsplash and frame only the sides and top for a clean, built-in look.
Quick Layout Trick
Use painter’s tape to outline where the frame will land on the mirror. It helps you visualize the finished size and makes it harder to “accidentally” glue something 3/4 inch off-level. (Ask me how I know. Just kidding. I don’t have personal experiences. But plenty of DIYers do, loudly.)
Step 2: Pick Your Driftwood Finish (That Looks Like the Real Deal)
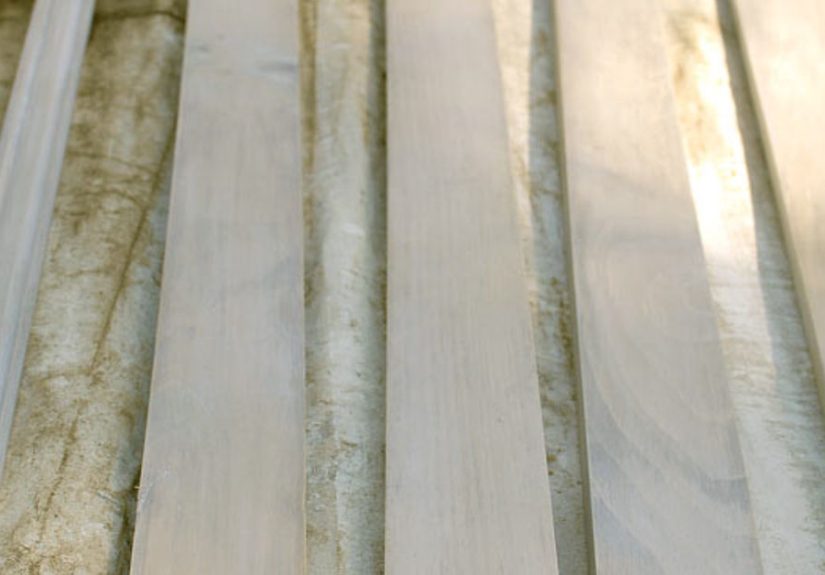
A driftwood finish is basically “sun-bleached gray-beige with depth.” You can get there in a few ways:
Method 1: Weathering Solution + Light Sanding
Some people use a simple wood-aging solution to gray out pine and other softwoods, then lightly sand to soften the contrast. Top with a matte sealer. This is great if you want a natural-looking grain that doesn’t scream “painted.”
Method 2: Layered Paint Wash
Start with a light base (off-white or pale beige), then add a thin gray-brown wash. Wipe back with a rag. The goal is unevenin a charming, beach-worn way.
Method 3: Stain + Liming Wax (Soft, Coastal, Upscale)
This is a popular “Pinterest driftwood” method: tint the wood, then apply a liming wax to leave a chalky highlight in the grain. It reads expensive without requiring expensive.
Pro tip: Make a test piece. Driftwood looks “right” when it has variation. If everything matches perfectly, it starts looking like laminate pretending to be wood (and nobody invited that energy).
Step 3: Cut Your Frame Pieces
Cut two side pieces and one top piece. If you’re adding a bottom piece, cut that toobut only if it won’t fight the backsplash. Most framed bathroom mirrors look great with three pieces (two sides + top), especially when the mirror already has a visual “base” from the vanity.
Mitered Corners vs. Straight Cuts
Mitered corners (45-degree cuts) look polished. Straight butt joints are simpler and still cute, especially with a rustic driftwood finish that doesn’t demand perfection. If you’re unsure, remember: driftwood’s whole brand is “imperfect on purpose.”
Step 4: Dry Fit Everything (Before the Sticky Commitment)
Lay your pieces on the mirror without tape or adhesive. Check:
- Even spacing and overlap around edges
- Level top piece
- Side pieces are plumb (vertical) and match in height
- Any decorative molding clears light fixtures or outlet plates
If you’re adding a decorative top molding detail, assemble it on a table first using wood glue. Painter’s tape can act like a clamp while it dries. Once assembled, you’ll mount that decorative piece to the frame with mounting tape (still no nails, still no screws, still no courtroom drama).
Step 5: Prep the Mirror Surface So Tape Actually Sticks
Mounting tape is only as good as the surface prep. Bathroom mirrors collect invisible stuff: hairspray mist, toothpaste micro-splatter, the general aura of humidity. Clean the glass where the tape will sit using rubbing alcohol and a lint-free cloth. Let it dry fully.
Important: Don’t touch those cleaned areas with your fingers afterward. Skin oils are basically anti-adhesion lotion.
Step 6: Attach the Frame Without Nails or Screws
Here’s the approach that works well for nail-free framing: use heavy-duty outdoor mounting tape as the main attachment, and optionally add a mirror-safe adhesive in small amounts for extra securityespecially in humid bathrooms.
The “Tape First” Method (Fast, Clean, No Mess)
- Apply strips of outdoor mounting tape to the back of each frame piece (the side that will touch the mirror).
- Press the tape firmly onto the wood (pressure matters).
- Peel the backing off the tape.
- Carefully position the piece on the mirror using your painter’s tape guide lines.
- Press firmly for 30–60 seconds along the full length. Use a roller if you have one.
- Use painter’s tape to “strap” the piece in place while the bond strengthens, especially on the top corners.
The “Tape + Mirror-Safe Adhesive” Method (Extra Hold for Bigger Frames)
If your frame is thicker, heavier, or you simply enjoy sleeping at night, add small dabs or thin vertical lines of a mirror-safe adhesive in addition to tape. The tape gives immediate grab and positioning control; the adhesive adds long-term strength.
How to do it cleanly: keep adhesive a little away from the edge so it doesn’t ooze out where everyone can see it. If you’ve ever tried to scrape cured adhesive off glass, you already know that regret is an adhesive tooit just sticks to your soul.
Assembly Order That Makes Life Easier
- Bottom (if used): place it first, letting it rest on the backsplash for support.
- Sides: align them to the bottom edge and press into place.
- Top: set last so it caps everything and hides the upper mirror edge neatly.
Step 7: Let It Cure (This Is Not the Time to “Test It”)
Most tape and adhesives gain strength over time. Keep painter’s tape supports in place, avoid steamy showers for a bit if you can, and don’t tug on the frame to “see if it worked.” That’s like poking a cake mid-bake. You don’t get a better cake; you get sadness.
Step 8: Seal the Finish for Bathroom Humidity
Bathrooms are basically indoor rainforests with better lighting. Protect your driftwood finish with a clear, matte (or satin) sealer that won’t yellow over time. A thin coat is usually enough. If you used wax, make sure it’s fully buffed and cured before exposing it to frequent moisture.
Design Ideas: Make It Look Styled, Not Just “Attached”
- Pair driftwood with brushed brass or matte black fixtures for contrast.
- Add one warm element nearby: a woven tray, a small plant, or a linen hand towel.
- Keep wall art minimalyour new frame is already doing the most (in a good way).
Troubleshooting (Because DIY Is a Comedy Until It Isn’t)
My frame looks crooked
Don’t panic. If you used tape only, you may have a short window to reposition. If adhesive is involved, repositioning becomes… less of a hobby and more of a negotiation. Use painter’s tape guide lines and a level next time, and place the top piece last so you can visually “square” everything.
The tape won’t stick well
This is usually surface prep. Clean the glass again with alcohol, let it dry, and press the tape hard onto the wood before peeling the backing. Also, make sure you’re using a heavy-duty outdoor tape intended for more demanding environments.
Gaps between wood and mirror edges
Slight gaps can look natural with driftwood finishes. If a gap bugs you, use a tiny amount of paintable caulk in the gap between frame and mirror edgebut don’t seal the entire mirror perimeter if moisture ventilation is a concern in your bathroom.
Can I hang the mirror itself without drilling?
For small, lightweight mirrors, some removable hanging systems exist, but heavy mirrors are a different category. If you’re mounting a large mirror, prioritize safety: proper mirror clips, anchors, or professional installation are often worth it. This tutorial is focused on a frame upgrade without nails or screwsnot on taking risks with a heavy sheet of glass above hard tile.
Quick Recap: The No-Nails, No-Screws Formula
- Measure and plan your overlap.
- Create a convincing driftwood finish with depth and variation.
- Dry fit everything and mark alignment lines.
- Clean the mirror surface thoroughly.
- Mount with heavy-duty outdoor tape (plus optional mirror-safe adhesive).
- Support with painter’s tape until cured.
- Seal the wood for bathroom humidity.
of Real-World Experience: What You’ll Notice Once You Actually Build One
The most surprising “experience” people report with a driftwood mirror frame is how quickly it turns into a personality test. If you love crisp lines and perfect symmetry, you’ll gravitate toward the driftwood-look board approach, where you control every cut and every corner. If you love texture and organic charm, you’ll start collecting driftwood pieces like you’re auditioning for the role of “Beach Goblin with Great Taste.” Either way, you’ll learn something about yourselfmainly that you have opinions about wood that you didn’t know existed.
Another common experience: the dry fit feels unnecessary… right up until it saves you. Mirrors in real homes are rarely perfectly “simple.” There’s a backsplash lip, a vanity that isn’t level, a wall that leans ever so slightly (like it had one margarita too many). When you dry fit your frame pieces and mark your placement with painter’s tape, you’re not being extrayou’re doing the boring work that prevents the dramatic work later. The DIY version of this lesson is: ten minutes of planning is cheaper than buying a second tube of adhesive and pretending that was always the plan.
People also notice how much humidity affects your timeline. Bathrooms are humid by default, and steam from showers can make adhesives cure differently than they would in a dry workshop. That’s why the “tape + optional mirror-safe adhesive” combo feels so reassuring: the tape gives immediate holding power while everything sets. A lot of DIYers end up using painter’s tape as temporary straps across cornersnot because the tape can’t hold, but because it’s the easiest way to stop the top piece from sliding a hair while the bond strengthens. It’s basically a seatbelt for your frame: maybe you won’t need it, but you’ll be glad it’s there.
There’s also the very real experience of realizing that “driftwood” is a color family, not a single color. The best-looking frames usually have variationwarm undertones, cooler gray streaks, a little bit of chalky highlight in the grain. When everything is one flat gray, it can read like craft-store “weathered wood” in the least flattering way. The fix is simple: layer. Add a wash, wipe it back, sand lightly, and step away for five minutes. DIYers often mention that the finish looks too strong while it’s wet and then mysteriously perfect once it dries. That’s why test pieces are gold; they let you find your driftwood vibe without committing your entire frame to a shade called “Storm Cloud Regret.”
Finally, most people are shocked by how much a framed mirror changes the whole room. It’s not just the mirrorit’s the edges. Builder-grade mirrors often feel unfinished because the edge has no story. Once you add a driftwood frame, the mirror becomes an intentional design element, not a default feature. It’s one of those projects that makes guests say, “Waitdid you remodel?” and you get to say, “Nope. I just gave my mirror a glow-up.” Which is the adult version of putting a sticker on something and calling it upgraded… except this time it looks genuinely good.
Conclusion
A DIY driftwood mirror frame is one of those rare projects that’s high-impact, low-dramaespecially when you skip nails and screws and lean on the right tape-and-adhesive strategy. Take your time on measuring, build a finish with real depth, and let everything cure properly. When you’re done, you’ll have a mirror that looks custom, coastal, and confidently not from the “basic bathroom mirror” starter pack.