
Table of Contents >> Show >> Hide
- Before You Extinguish: A 20-Second Safety Check
- Method 1: Blow It Out (The Classic, If You Do It Gently)
- Method 2: Use a Candle Snuffer (Clean, Calm, Low-Mess)
- Method 3: Use a Wick Dipper (The “Almost No Smoke” Trick)
- Method 4: Smother It with a Lid (Great for Containers, If the Lid Is Right)
- What NOT to Do When Putting Out a Candle
- After You Extinguish: Set Yourself Up for a Better Next Burn
- Troubleshooting: Common Candle Extinguishing Problems
- of Real-World Candle Extinguishing Experiences (So This Feels Like Real Life)
Candles are wonderful. They make your living room feel like a spa, your bathroom feel like a hotel, and your dinner table feel like you have your life together.
The only problem? Fire is famously enthusiastic and occasionally rude.
Learning how to extinguish a candle the right way isn’t just about avoiding that little ribbon of smoke that smells like “campfire, but indoors.”
It’s also about preventing wax splatter, keeping your wick in good shape for the next burn, and making sure “cozy ambiance” doesn’t become “unexpected siren soundtrack.”
Below are four practical ways to put out a candlefrom the classic blow-out to the cleaner, low-smoke methods candle people quietly brag about.
I’ll also show you what not to do (spoiler: water is not your friend here), plus a 500-word “real-life candle moments” section at the end to make this feel like a proper blog article you’d actually want to read.
Before You Extinguish: A 20-Second Safety Check
If you do nothing else, do this: keep burning candles within sight and put them out when you leave the room.
Yes, even if you’re “just grabbing something quick.” The flame does not respect your optimism.
Quick checklist
- Clear the “candle danger zone.” Move paper, curtains, decor, loose sleeves, and anything flammable at least a foot away.
- Stabilize the candle. Make sure it’s on a sturdy, heat-resistant surface so it can’t tip.
- Have a tool nearby. If you own a snuffer or wick dipper, this is their moment to shine.
- Pause for drafts. Fans and vents can make flames flicker, smoke more, and splash wax.
Now, let’s talk methods. There’s no single “best” option for every candle typetapers, pillars, tealights, and jar candles all behave a little differentlyso think of this as your candle-extinguishing toolkit.
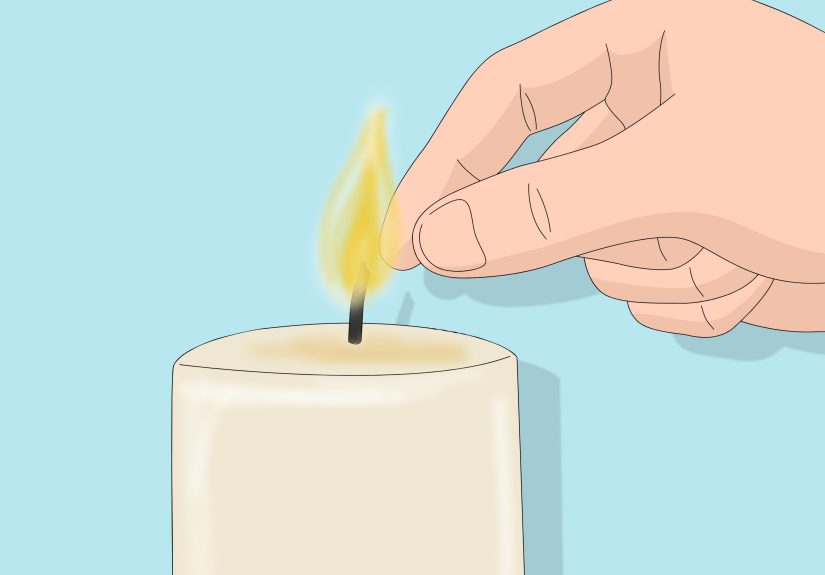
Method 1: Blow It Out (The Classic, If You Do It Gently)
Blowing out a candle is the most common method, and it works fineespecially for tapers or smaller candlesif you avoid doing it like you’re trying to launch a sailboat.
The secret is a controlled, gentle exhale.
Best for
- Taper candles
- Birthday candles (obviously)
- Tealights (with carewax can be shallow and splashy)
How to do it without the smoke show
- Lean in slightly from the side (not directly above the flame).
- Purse your lips and give a short, steady puff rather than a hurricane blast.
- Watch the wick. If it’s glowing like a tiny lava rock, it may still be hot enough to smoke.
- Wait 2–3 seconds. If smoke is heavy, the wick may be too long or “mushroomed.” Plan to trim before the next burn.
Why blowing sometimes backfires (pun intended)
When you blow hard, you can:
(1) splatter hot wax,
(2) shove the wick into molten wax (making relighting annoying),
and (3) create more soot/smoke than necessary.
If your candle is in a jar, blowing can also push smoke against the inside rim, leaving that black “campfire eyeliner” ring.
Example
You’ve got two tapers on the dining table. A gentle side puff puts them out cleanly.
But if you blast them, you might send wax droplets onto your table runnerturning “romantic dinner” into “DIY fabric waxing session.”
Method 2: Use a Candle Snuffer (Clean, Calm, Low-Mess)
If you want to feel like you live in a period drama (in a good way), use a candle snuffer.
It’s basically a small bell-shaped tool that covers the flame and cuts off oxygenwhich extinguishes the candle with less disturbance.
Best for
- Pillars and tapers
- Jar candles (especially if you hate smoky jars)
- Anytime you want less wax splatter risk
Step-by-step
- Hold the snuffer above the flame and lower it until the bell fully covers the flame.
- Pause for 2–5 seconds so the flame fully dies out (no glowing flame hiding underneath).
- Lift the snuffer straight up to avoid brushing the wick or sloshing wax.
- Check the wick emberyou want “off,” not “quietly plotting a comeback.”
Why snuffing is so popular
Snuffers reduce the blast of air that causes wax to flick and soot to float.
They’re especially handy for candles that sit in places you’d rather not clean oftenlike near curtains, bookshelves, or that one decorative tray you only bought because the internet convinced you it was “minimalist.”
Method 3: Use a Wick Dipper (The “Almost No Smoke” Trick)
If you’ve ever wondered how some people put out a candle with barely any smoke at all, they may be using a wick dipper.
This tool lets you push the burning wick into the melted wax pool, snuffing the flame quickly, then bring it back upright for an easy relight later.
Best for
- Jar candles with a melted wax pool
- Scented candles (less smoke = less “burnt wick cologne”)
- People who like neat, repeatable candle routines
How to do it safely
- Let the candle burn long enough to create a small melted wax pool around the wick.
- Use a wick dipper (or a heat-safe metal tool)avoid plastic or anything that can melt.
- Gently push the wick tip into the melted wax until the flame goes out.
- Immediately lift the wick back up and center it so it’s ready for your next burn.
- Wipe the tool carefully (once cool) to keep it from building up wax and soot.
What makes this method different
Dipping the wick stops the flame fast and reduces the amount of time the wick smoldersso you often get less lingering smoke.
It can also help prevent the wick from bending or getting buried in wax (a classic “why won’t you relight” candle problem).
Common mistake to avoid
Don’t stab the wick like you’re spearing an olive. A gentle dip is enough.
If you splash hot wax, you’ll learn a lesson you didn’t ask for.
Method 4: Smother It with a Lid (Great for Containers, If the Lid Is Right)
Many container candles come with a lid, and yessmothering the flame is a real method.
When you cover the candle, you reduce oxygen and the flame goes out.
But you need to do it thoughtfully, because not every lid is heat-safe, and some lids can trap smoke/soot.
Best for
- Jar candles with a heat-resistant lid (metal, thick glass, ceramic)
- Situations where you want to minimize air movement (drafty rooms)
How to smother a candle correctly
- Confirm the lid is heat-resistant. If it’s plastic, has a rubber gasket, or feels questionableskip this method.
- Approach slowly. Hover the lid above the flame for a second to avoid a sudden “whoosh” of smoke.
- Place the lid on top until the flame goes out.
- Wait a moment before removing the lid so smoke can settle.
- Check the wick to confirm it’s fully extinguished, not just temporarily offended.
Pro tip
If you notice the candle gets sooty or the lid traps a strong burnt smell, switch to a snuffer or wick dipper.
Lids are convenient, but they’re not always the cleanest option for fragrance lovers.
What NOT to Do When Putting Out a Candle
Some mistakes are common because they seem logical in the moment. Let’s save you from “logical moment regret.”
Don’t use water
Pouring water onto a candle can cause hot wax to splatter and may even crack glass containers due to sudden temperature changes.
If your flame is too high, use smothering methods (snuffer or lid) instead of water.
Don’t pinch it out with your fingers
Yes, some people do it. No, your fingers are not made of cast iron.
Wax can cling, heat lingers, and burns are a terrible accessory.
Don’t move a candle while the wax is liquid
Sloshing hot wax is how “I’ll just relocate it” becomes “why is there wax on the cat?”
Let the wax harden and the container cool before moving.
After You Extinguish: Set Yourself Up for a Better Next Burn
Extinguishing is only half the candle game. The other half is making sure the next lighting is clean, safe, and not weird.
Do these quick aftercare steps
- Confirm it’s out. No flame, no glowing ember.
- Center the wick. Especially after using a wick dippercentered wicks burn more evenly.
- Trim before the next burn. A common guideline is around 1/4 inch to reduce soot and keep flames controlled.
- Don’t over-burn. Many brands and safety guidelines recommend limiting long sessions (often around a few hours) to reduce overheating and soot.
- Stop before the bottom. For safety, don’t burn container candles down to nothingleave a little wax rather than overheating the vessel.
A quick “which method should I use?” comparison
- Blowing: fastest, no tools, but can smoke/splatter if done aggressively.
- Snuffer: clean, controlled, great all-around choice.
- Wick dipper: often the least smoky for jar candles; requires a tool and a steady hand.
- Lid: convenient for containers if the lid is heat-safe; can trap soot/smoke depending on candle design.
Troubleshooting: Common Candle Extinguishing Problems
“Why does my candle make so much smoke when I put it out?”
Usually it’s a long wick, a draft, or an aggressive blow-out.
Try trimming the wick before lighting next time and consider using a snuffer or wick dipper for a calmer extinguish.
“My wick fell into the wax and now it won’t light.”
This often happens after blowing hard.
Let the wax cool and harden, then gently nudge the wick upright with a small tool.
If the wick is buried deep, you may need to carefully remove a bit of wax near it (once fully cooled).
“The jar is really hotshould I move it?”
No. Let it cool where it is.
Moving a hot container candle risks spills, burns, and cracked glassnone of which improve your evening.
of Real-World Candle Extinguishing Experiences (So This Feels Like Real Life)
Most people don’t start researching “how to put out a candle” because everything is going perfectly.
They start because something slightly annoying happenedlike a smoke plume that set off the hallway detector, or a jar candle that suddenly looked like it was auditioning for a dragon role.
One of the most common candle moments is the post-dinner blowout. You lean over the table, you blow, and the flame goes out… but the candle responds with a dramatic ribbon of smoke that floats directly into your face like a tiny ghost with a grudge.
That’s usually the moment people realize: “Oh. Maybe there’s a calmer way to do this.”
Switching to a snuffer often feels like upgrading from “paper towel” to “actual napkin.” It’s not mandatory, but it’s nicer.
Another real-life scenario is the jar candle soot ring. If you’ve ever had a beautiful white candle turn into a gray-rimmed science experiment, you’re not alone.
Blowing out a jar candle pushes smoke into the container and can deposit soot on the inside walls.
People who love clean jars (or who simply prefer their decor not to look “lightly haunted”) often move to a wick dipper.
The first time you dip the wick and notice the smoke drop dramatically, it feels like you discovered a secret menu item.
Then there’s the “I’ll just put the lid on it” convenience trap.
It worksuntil it doesn’t.
Some lids trap smoke so tightly that the next time you open the candle, the smell is less “vanilla orchard” and more “burnt toast with ambition.”
If you’ve experienced that, you’ve learned a key candle truth: convenience methods are only great when they don’t sabotage the next burn.
A lot of candle fans end up using the lid occasionally (especially in a drafty room), but defaulting to a snuffer or dipper when they care about fragrance quality.
The most memorable experiences usually involve unexpected flame behavior.
Maybe the wick was too long, mushroomed, or the candle burned too long and got too hot.
Suddenly the flame is taller than you’d like, and your brain offers unhelpful suggestions like “water!” because that’s how we treat many fires.
Candle safety guidance is clear here: water can splatter hot wax and create a bigger mess (and sometimes a more dangerous moment).
In those situations, the practical move is to smother the flamesnuffer, lid (heat-safe), or another oxygen-cutoff approachthen let everything cool down.
Finally, there’s the quiet, boring experience that’s actually the goal: you put the candle out cleanly, the room stays calm, the wick stays centered, and nothing smells like a campfire. It’s not dramatic, it’s not viral, and it’s exactly what you want.
Because the best candle extinguish is the one you barely noticeexcept for the fact that your home still smells amazing and your eyebrows remain fully accounted for.


