
Table of Contents >> Show >> Hide
- What a “DIY Vertical Garden Kit” Really Means
- Why Vertical Gardens Are Awesome (and a Little Sneaky)
- Types of DIY Vertical Garden Kits
- A Remodelista-Inspired Concept: “Mount It Like Art”
- Before You Drill Anything: Wall, Weight, and Waterproofing
- Light: The Make-or-Break Ingredient You Can’t “DIY” Later
- Watering Options: From “I’ll Remember” to “Automate This Immediately”
- Soil and Media: The Secret Sauce for Wall Gardens
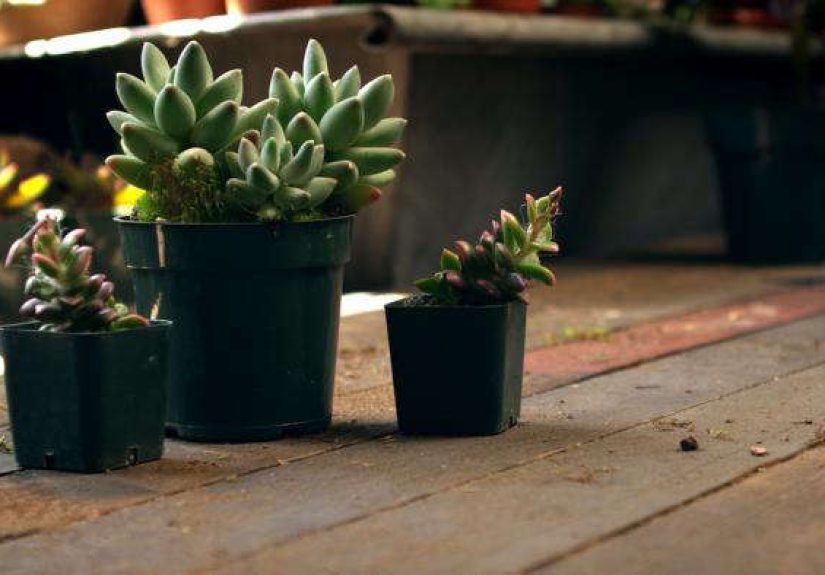
- Plant Picks That Actually Work on a Wall
- Step-by-Step: Build a Simple Wall-Mounted Vertical Garden Kit
- Maintenance: Keep It Thriving Without Turning It Into a Second Job
- Troubleshooting: Common Problems and Quick Fixes
- Budget Reality Check: What Costs What
- 500+ Words of “Experience”: What DIYers Learn After the First Month
- Conclusion
If you’ve ever looked at a blank wall and thought, “Wow… you’re really not contributing to the household,”
congratulations: you’re ready for a DIY vertical garden kit. A living wall turns unused vertical space into a
green, growing, snack-producing, mood-improving featurewithout demanding a backyard the size of a small
national park.
Remodelista’s “just add water (and a wall)” vibe captures the whole appeal: you don’t need a greenhouse, a
landscape architect, or a magical gardening lineage. You need a plan, a sturdy mounting surface, and a watering
strategy that doesn’t rely on you remembering things perfectly every day (because… humans).
This guide breaks down how DIY vertical garden kits work, the types you can build or buy, how to choose plants
that won’t instantly stage a dramatic fainting spell, and how to set up watering so your wall garden thrives.
We’ll also include a longer “real-life experience” section at the endbecause vertical gardens are simple, but
they’re never boring.
What a “DIY Vertical Garden Kit” Really Means
A DIY vertical garden kit is any system that lets you grow plants on a vertical surface using containers, pockets,
modular planters, or panels. Some kits are close to “assemble and admire.” Others are “assemble, waterproof,
mount, route tubing, test drainage, and admireafter snacks.”
Most vertical garden kits boil down to four core parts:
- A structure (frame, panel, rails, or grid) that attaches to a wall or fence.
- Plant holders (pots, pockets, troughs, baskets, or modules) that support roots and media.
- Growing media (soil mix or soilless blend; hydroponic systems use water + nutrients).
- Water management (hand watering, drip lines, reservoirs, recirculating pumps, or wicking).
Why Vertical Gardens Are Awesome (and a Little Sneaky)
They multiply your planting space
A small patio or balcony can feel cramped fast. Growing upward lets you add herbs, greens, flowers, and even some
compact fruits without taking over the entire floor plan.
They can improve plant health when designed well
Better airflow can reduce some fungal issues (not allplants still love to be complicated). Plus, you can tailor
light exposure by placing sun lovers higher and shade-tolerant plants lower.
They’re décor you can eat
A vertical herb wall is basically functional art: basil, thyme, mint, oregano, and parsley arranged like a living
kitchen backsplashexcept you don’t grout it, you harvest it.
Types of DIY Vertical Garden Kits
1) Pocket planters (felt or fabric)
These are the “shoe organizer, but make it botanical” option. Fabric pockets hang in rows and are great for herbs,
small ornamentals, and shallow-rooted plants. Pros: lightweight and affordable. Cons: they can dry out fast and need
thoughtful watering.
2) Modular wall pots (plastic or composite modules)
Snap-together modules mount to rails or directly to the wall. They’re tidy, scalable, and often designed with
drainage channels. Great for mixing foliage textures and creating patterns.
3) Trough-and-rail systems
Think of narrow planters stacked like shelves. These are ideal for herbs, strawberries, lettuce, and trailing plants.
They’re also easier to water evenly than pockets because each trough holds more media.
4) Trellis + containers (the “structure-first” approach)
You can mount pots on a panel or set containers at the base and train climbers upward. This is a strong choice for
beginners because watering is simpler and the system is forgiving.
5) Hydroponic vertical systems
No soilplants grow in inert media with nutrient-rich water. These systems can be incredibly productive, especially
indoors with good light, but require monitoring nutrients and equipment (and accepting that you now own a pump).
A Remodelista-Inspired Concept: “Mount It Like Art”
Remodelista’s featured DIY vertical garden kit concept highlights something smart: treat the garden like a wall
installation. One example they showcased was a hanging garden kit sold through a San Francisco shop, designed as a
framed arrangement with baskets on a rot-resistant framebasically a “gallery wall,” except alive and quietly
judging your interior design choices.
The takeaway is less “buy this exact kit” and more “steal the framework idea”: a sturdy frame, repeated containers,
and plants chosen for the watering style you can realistically maintain.
Before You Drill Anything: Wall, Weight, and Waterproofing
Choose the right wall
- Outdoors: fences, masonry, brick, or exterior walls with proper anchors.
- Indoors: you’ll need extra waterproofing and a drip tray/drain strategy (and a tolerance for moist air).
Know what your wall can handle
Wet soil is heavy. A modest wall garden can weigh far more than it looks once wateredespecially if you use thick
planters and water-retentive mixes. If you’re unsure, mount into studs or use a freestanding frame instead of the wall.
Plan for drainage like an adult (even if you are not feeling adult today)
Water needs a place to go. Good systems manage drainage in one of three ways:
- Catch it: drip tray or gutter at the bottom.
- Channel it: built-in drainage pathways directing water down and out.
- Recirculate it: reservoir + pump (common in hydroponics and living wall panels).
Light: The Make-or-Break Ingredient You Can’t “DIY” Later
Most vertical garden disappointment is actually “not enough light wearing a plant costume.” Before you select plants,
take a week to observe the wall:
- Full sun: 6+ hours direct light (best for many herbs, strawberries, some flowers).
- Part sun/part shade: 3–6 hours (great for leafy greens, many ornamentals).
- Shade/bright indirect: ideal for ferns, pothos, some houseplants, mint (mint will also thrive in your nightmares).
Watering Options: From “I’ll Remember” to “Automate This Immediately”
Hand watering
Works for small systems. Use a long-spout watering can and water slowly from top to bottom so the upper planters
don’t steal everything.
Simple drip irrigation (recommended for medium-to-large walls)
A common approach is to run a main line up one side and across the top, then feed smaller lines or emitters to
each row so water distributes evenly. Pairing drip with a timer reduces the “oops, I forgot” factor dramatically.
Self-watering reservoirs and wicking
Some modular systems include reservoirs or wicking paths that reduce watering frequency. This is fantastic for herbs
and ornamentals, but still check moistureself-watering doesn’t mean “never watering.”
Recirculating systems (living walls and hydroponics)
Water is pumped to the top and trickles down through media, returning to a reservoir. This can be efficient and
consistent, but requires maintenance (cleaning filters, checking pumps, monitoring algae).
Soil and Media: The Secret Sauce for Wall Gardens
Vertical gardens tend to dry out faster than in-ground beds because they’re exposed to more sun and air movement.
That means your media has to balance drainage and moisture retention.
A practical soil blend for most pocket/modular walls
- High-quality potting mix (not heavy garden soil)
- Coco coir or peat (for water-holding capacity)
- Perlite or pumice (for aeration and drainage)
- Compost in moderation (nutrition, but don’t turn pockets into soggy soup)
Pro tip: For herbs and greens, choose a mix that stays evenly moist but doesn’t compact. For succulents, use a gritty,
fast-draining mix and a system that won’t overwater.
Plant Picks That Actually Work on a Wall
Beginner-friendly edible wall garden plants
- Herbs: basil (warm season), thyme, oregano, chives, parsley, cilantro (cooler season)
- Leafy greens: lettuce, arugula, baby kale, spinach (cooler seasons do best)
- Strawberries: especially in trough systems; choose varieties suited to containers
Ornamental plants that behave well
- Trailing plants: pothos (indoors), sweet potato vine (warm outdoors), creeping Jenny
- Texture plants: small ferns (shade), heuchera (outdoors part shade), coleus (color!)
- Succulents: for sunny walls with controlled watering
Plants to treat with caution
- Mint: great in containers; will attempt world domination if given the chance.
- Large tomatoes/peppers: possible only with deep containers and strong support; pick dwarf/bush varieties.
- Thirsty plants in tiny pockets: they’ll look fine at noon and faint by 3 p.m.
Step-by-Step: Build a Simple Wall-Mounted Vertical Garden Kit
Materials (for a 3 ft x 2 ft wall garden)
- Mounting board or exterior-grade panel (or a pre-made modular rail system)
- 12–18 planters (pockets, pots, or small baskets)
- Wall anchors or lag screws (match your wall type)
- Potting mix suited to your plants
- Plants (start smallyour wall will fill in)
- Optional: drip irrigation kit + timer, catch tray, moisture meter
1) Map the layout
Arrange empty containers on the ground first. Mix textures and colors, but keep plant needs grouped:
sun lovers together, shade lovers together, and “likes it moist” away from “hates wet feet.”
2) Mount the structure securely
If you’re mounting on drywall, locate studs. For masonry, use appropriate anchors. Keep the panel levelcrooked
planters lead to crooked drainage (and crooked vibes).
3) Add a drainage plan
Outdoors, you can often let water drain freely (as long as it won’t stain walls). Indoors, use a drip tray or
bottom gutter and protect surfaces with waterproof backing.
4) Install watering (optional but very helpful)
For drip systems, place the main line along the top and run smaller lines down or across rows so each section gets
consistent moisture. Test flow before planting so you’re not “debugging” irrigation with muddy hands.
5) Fill containers and plant
Pre-moisten your mix slightly (not drenched). Plant firmly, then water gently to settle soil. In pockets, avoid overpacking;
roots need oxygen, not a soil compression experiment.
6) Water and observe for one week
The first week is your calibration period. Check moisture daily. Adjust drip timing, emitter placement, or hand-watering
routine until all pockets/rows stay evenly moist.
Maintenance: Keep It Thriving Without Turning It Into a Second Job
Watering schedule (realistic version)
- Hot weather outdoors: check daily; you may water daily for small pockets.
- Mild weather: every 2–3 days (depending on sun and media).
- Indoors: monitor closely; HVAC can dry plants faster than you expect.
Feeding your wall garden
Containers need nutrients replenished. Use a balanced fertilizer appropriate to your plants. Leafy greens and herbs
appreciate steady, moderate feeding. Succulents need far lessoverfeeding can make them weak and leggy.
Pruning and replanting
Vertical gardens look best when you prune regularly. Harvest herbs often (it makes them bushier), trim leggy growth,
and rotate seasonal plants (cool-season greens in fall/spring, heat-tolerant herbs and ornamentals in summer).
Troubleshooting: Common Problems and Quick Fixes
“The top row is lush, the bottom row is crispy.”
Water distribution is uneven. Slow down watering so it can soak in, add emitters for lower rows, or adjust drip lines
so every level receives direct moisture.
“Everything is soggy and sad.”
Drainage issue. Confirm drainage holes, lighten the soil mix with perlite, reduce watering time, and make sure water
isn’t pooling behind the system.
“Mold or fungus is showing up.”
Improve airflow, avoid wetting foliage late in the day, and don’t overcrowd pockets. Indoors, consider a small fan
and make sure you’re not creating a constant damp zone.
“Some plants are thriving, others are failing.”
Match plants to microclimates: the top can be sunnier and drier; lower rows can be shadier and wetter. Group plants
by needs and rehome the drama queens to a better spot.
Budget Reality Check: What Costs What
Vertical gardens can be surprisingly affordableunless you go full “designer living wall” with custom panels and
recirculating irrigation. A typical DIY wall setup often falls into these ranges:
- Basic pocket wall (hand-watered): lower cost, great for herbs
- Modular pots + drip timer: moderate cost, best balance of convenience and control
- Living wall panels + recirculation: higher cost, sleek look, more maintenance
If you’re aiming for “easy,” spend money on the watering system first. A timer is cheaper than replacing plants
(and cheaper than guilt).
500+ Words of “Experience”: What DIYers Learn After the First Month
Vertical garden kits have a honeymoon phase. Week one: everything looks adorable, and you keep walking by your wall
like a proud museum curator. Week two: you discover that the top row dries out faster than the restbecause gravity
is undefeated. Week three: you realize your “quick morning watering” either turns into a full-on splash zone or gets
skipped during busy days. And week four? That’s when the vertical garden stops being a project and starts being a
systemsomething you understand, tweak, and actually enjoy.
One of the most common lessons is that “even watering” is the entire game. Many DIYers start with hand watering and
assume water will naturally trickle down and hydrate everything. In reality, water often follows the easiest path,
which can mean one pocket gets drenched while another stays dry. The fix is rarely complicated: water more slowly,
add a second pass, or install a simple drip line at the top so moisture starts evenly. Once that happens, the whole
wall calms down. Plants stop acting like they’re in a survival documentary.
Another shared experience is discovering microclimates on the same wall. The top can bake in sun and wind. The middle
might be perfect. The bottom might be cooler, shadier, and consistently wetterespecially if runoff collects there.
People who keep their first plant choices static often end up frustrated, not because they “failed,” but because they
treated a vertical garden like a flat garden bed. The smarter move is to treat it like a tiny ecosystem: put the
drought-tolerant plants higher, the moisture-lovers lower, and the “medium maintenance” plants in the middle where
conditions are stable.
Plant size expectations also shift. Those cute little nursery starters? They’re not staying cute. In a wall garden,
lush growth can happen quicklyespecially with herbs. Basil can become a leafy monster if you harvest it regularly
(which is good) and a floppy mess if you don’t (which is less good). Trailing plants can turn a grid of pockets into
a green waterfallunless they shade out everything behind them. DIYers often learn to prune earlier than feels polite,
because the wall looks better when plants are shaped intentionally rather than allowed to freestyle.
The biggest “aha” moment tends to be about routines. Vertical gardens thrive when you attach care to an existing habit:
check moisture while coffee brews, harvest herbs while dinner cooks, refill the reservoir when you take out recycling.
People who rely on memory alone eventually meet the consequence: crispy leaves and the unmistakable look of a plant
that has forgiven you but will never forget.
Finally, many DIYers discover that vertical gardens are mood changers. A small green wall can make a balcony feel like
a room. A kitchen herb wall can make cooking feel more intentional, even when you’re just making eggs. And a living
wall indoorswhen done with proper waterproofing and lightingcan transform a plain corner into something that feels
alive. The garden becomes part of the home’s rhythm. You don’t just “have plants.” You have a wall that finally earns
its keep.
Conclusion
A DIY vertical garden kit is one of the best “small-space, big-impact” projects you can tackle. Start by choosing the
right wall and the right system (pockets, modules, troughs, or a trellis approach). Then make watering your priority
because a vertical garden is basically a hydration logistics puzzle with leaves. Once you dial in light, drainage,
and a realistic watering routine (ideally automated), your wall can become a living feature that’s both beautiful and
practicalwhether you’re growing herbs for dinner or turning a blank fence into a green backdrop.


