
Table of Contents >> Show >> Hide
- Why a 50-Style Self-Portrait Challenge Works (Even If You’re “Not a Portrait Person”)
- The Rules I Used (Steal Them; I Won’t Call the Art Police)
- The “Style Spine”: Keep These Constant So You Can Go Wild Everywhere Else
- Four Style Levers You Can Pull (Mix and Match for Infinite Results)
- My 50 Cartoon Style Prompts (A Menu, Not a Cage)
- Step-by-Step Workflow (Repeatable, Not Boring)
- Step 1: Start with thumbnails (tiny drawings, huge benefits)
- Step 2: Pick a single exaggeration idea
- Step 3: Build the head with simple forms
- Step 4: Ink with purpose (line weight is your subtitle track)
- Step 5: Color faster with smart layers
- Step 6: Add “life” with animation principles (even in a still image)
- Specific Example: One Face, Three Styles (How I Translated Features)
- Common Problems (and the Fixes That Saved Me)
- How to Present the Series Online (So People Actually Swipe Through)
- Conclusion: The Real Prize Wasn’t 50 DrawingsIt Was a Style Map
- Extra: of My “50 Styles” Experience (The Parts You Don’t See in the Final Grid)
The quickest way to learn “style” isn’t hunting for one perfect look and marrying it at sunset. It’s speed dating.
So I set a ridiculous, slightly unhinged goal: draw one self-portrait in 50 different cartoon styles.
Same face. Same vibe. Fifty visual dialects.
What happened next was equal parts art practice and emotional rollercoaster. One day I looked like a charming Sunday comic.
The next day I looked like a haunted sticker. Somewhere around Style #27, my hair turned into a geometry problem and I seriously
considered shaving my head in real life out of spite.
If you’ve ever wondered how artists “find their style,” or you want a fun way to improve your portraits, character design,
and cartoon drawing skills fast, this challenge is a cheat code. Not a magic wand. A cheat code. You still have to play the game.
Why a 50-Style Self-Portrait Challenge Works (Even If You’re “Not a Portrait Person”)
A self-portrait is the ultimate always-available model. No scheduling. No awkward “hold that expression” texts.
Plus, you already know what your face is supposed to look likemeaning you can focus on translation:
how to simplify, exaggerate, and stylize without losing likeness.
It trains three skills at once
- Observation: noticing what actually makes your face yours (not what you assume it looks like).
- Design: making intentional choicesshape language, line weight, proportion, and expression.
- Consistency: keeping identity while changing everything else (which is basically the job description of “style”).
Bonus: It builds confidence. Caricature and stylization are low-pressure ways to take creative risks, because “wrong” can still be “fun.”
And fun is a powerful teacher.
The Rules I Used (Steal Them; I Won’t Call the Art Police)
Rule 1: One anchor photo, one baseline sketch
I picked one clear reference photo (good lighting, simple angle) and made a neutral baseline drawing. That baseline became my “identity template”:
placement of eyes, brow line, nose length, mouth width, jaw anglemy facial landmarks.
Rule 2: Change the style, not the person
Every version had to read as me. If a style made me unrecognizable, I adjusted the exaggeration until my key traits came back.
(For me: thick brows, a slightly asymmetrical smile, and hair that behaves like it has opinions.)
Rule 3: Limit the time per style
I gave myself a time box (20–45 minutes). Time limits prevent perfection paralysis and force you to make bold decisionsexactly what cartoons love.
Rule 4: Track what changed
After each style, I wrote two quick notes: (1) what I changed, and (2) what actually made it look like me. Those notes turned into a style roadmap.
The “Style Spine”: Keep These Constant So You Can Go Wild Everywhere Else
Think of style as a costume party. You can change outfits 50 times, but your skeleton should stay inside your body.
Here’s the “style spine” that kept my likeness intact:
- Landmarks: eye spacing, nose base, philtrum, mouth corners, chin point.
- Signature shapes: my brow shape, my cheek curve, the silhouette of my hairline.
- Expression DNA: a default “friendly/skeptical” eyebrow tilt I apparently do 24/7.
Once those anchors are consistent, you can push everything elsehead shape, eye size, line style, shading, color paletteswithout losing identity.
Four Style Levers You Can Pull (Mix and Match for Infinite Results)
1) Proportion (the fastest way to scream “cartoon”)
Cartoon styles often exaggerate relationships between features: bigger eyes, smaller noses, taller foreheads, or a jawline that could cut glass.
The trick is not “make one thing huge,” but “change the relationships” so the face still feels coherent.
2) Shape language (round, square, triangle energy)
Shapes communicate personality. Round reads soft and friendly. Square reads solid and dependable. Triangle reads sharp, dynamic, mischievous.
Pick a dominant shape family and redesign your features to match it:
- Round style: cheeks become circles, brows become soft arcs, nose becomes a button.
- Square style: jaw becomes boxy, brows become blocky, nose becomes a rectangle wedge.
- Triangle style: cheekbones sharpen, brows angle, chin points.
3) Line quality (whisper lines vs. shout lines)
Line weight can carry the whole style: thick outer contours, thin interior details, tapered strokes, scratchy texture, or perfectly clean curves.
If you ink digitally, practice pressure control with simple drills (thick-to-thin lines, smooth curves, confident strokes) before you start polishing.
4) Rendering (flat, cel-shaded, painterly, or “I only own one marker”)
Rendering choices define the vibe: flat colors feel graphic; cel shading feels animated; painterly shading feels storybook; monochrome feels editorial.
You don’t need to master every methodjust pick one rendering rule per style and commit.
My 50 Cartoon Style Prompts (A Menu, Not a Cage)
These prompts are designed to be distinct without requiring you to perfectly imitate any single franchise.
Use them as practice targets and tweak as needed.
Classic & animation-inspired prompts
- Rubber-hose vintage (simple limbs, bouncy curves)
- Golden-age theatrical (big expressions, strong silhouettes)
- Saturday-morning 80s (bold shapes, limited shading)
- 90s “extreme” cartoon (spiky angles, louder eyebrows)
- Clean modern TV style (simple shapes, tidy linework)
- Cel-shaded “animated film” look (2–3 shadow shapes)
- Storyboard sketch (loose lines, gesture-first)
- Chibi (giant head, tiny body, maximum cute)
- Kawaii sticker (minimal features, blush, thick outline)
- Expressive anime-inspired (sharp lashes, simplified nose)
- Comic strip newspaper (ink-heavy, dot shading optional)
- Lineless animation (shapes-only, edge control)
- Paper-cutout style (layered shapes, simple shadows)
- Clay/stop-motion-inspired (chunky forms, soft highlights)
- “Mascot character” style (logo-ready, clean silhouette)
Comic, illustration, and graphic prompts
- Super-hero comic (angular jaw, dramatic lighting)
- Indie graphic novel (textured brush, muted palette)
- European ligne claire (even line weight, crisp shapes)
- Underground zine (messy ink, intentional “wrongness”)
- Editorial caricature (exaggerate most unique features)
- Children’s book watercolor feel (soft edges, warm colors)
- Retro pop-art (halftones, bold blocks, limited palette)
- Noir ink wash (high contrast, minimal midtones)
- Vector flat design (geometric shapes, no texture)
- Monoline icon portrait (single line, clever shortcuts)
- Graffiti character (chunky letters, spray texture vibes)
- Pixel art (tiny grid, limited colors)
- Low-poly portrait (faceted planes)
- Collage magazine cutout (torn edges, mixed textures)
- Marker sketch (bleed edges, imperfect fills)
Constraint prompts (because rules create style)
- Only circles (no sharp corners allowed)
- Only squares (hello, Minecraft-meets-me)
- Only triangles (danger eyebrows activated)
- Two-color poster (one shadow color, one base color)
- Three-value grayscale (light, mid, darknothing else)
- Thick outline only (no interior lines)
- Interior lines only (no outer contour)
- One brush only (same tool for everything)
- Five-minute scribble (gesture and attitude only)
- Negative space portrait (draw the background shapes)
- Upside-down drawing (break symbol habits)
- Mirror-flip correction (final pass after flipping canvas)
- Big head, tiny features (subtle, understated)
- Tiny head, huge features (bold, comedic)
- Exaggerate only one feature (but keep likeness)
“Vibe” prompts (style as a mood)
- Cozy Sunday vibe (soft palette, gentle lines)
- Action-hero vibe (sharp angles, dramatic shadows)
- Sleepy vibe (droopy lids, relaxed posture)
- Chaos goblin vibe (wild hair, asymmetry, big grin)
- Deadpan comedy vibe (minimal expression, perfect timing)
Step-by-Step Workflow (Repeatable, Not Boring)
Step 1: Start with thumbnails (tiny drawings, huge benefits)
Before I committed to a full sketch, I made 3–6 thumbnails per style. Thumbnails help you explore exaggeration options quickly.
If your first idea looks “fine,” make another that looks “too much.” That “too much” version often contains the fun you actually want.
Step 2: Pick a single exaggeration idea
Each style got one main exaggeration choice. Examples:
- Round style: push cheek circles and soften jaw.
- Sharp style: angle brows and narrow chin.
- Chibi: head bigger, features grouped lower, tiny nose.
Step 3: Build the head with simple forms
I treated the head like a 3D object first (ball, wedge, box), then placed features along a centerline and an eye line.
Even in cartoons, believable structure makes stylization look intentional instead of accidental.
Step 4: Ink with purpose (line weight is your subtitle track)
My rule: thicker lines for the outer silhouette and shadow-side edges, thinner lines for interior details.
If the style called for “clean,” I slowed down and aimed for confident strokes. If it called for “sketchy,” I let texture showbut still kept clarity.
Step 5: Color faster with smart layers
Digital coloring gets easier when you separate line art and flats. Then you can use masking methods (like clipping masks) to keep color inside shapes,
add shadows on a separate layer, and experiment without destroying your drawing. If you work in traditional media, you can mimic this by coloring lightly
first and saving your darkest accents for the end.
Step 6: Add “life” with animation principles (even in a still image)
You don’t need to animate to use animation thinking. Principles like squash and stretch (for soft materials), clear staging (readability),
appealing shapes, and strong arcs in hair and brows can make a still portrait feel more alive.
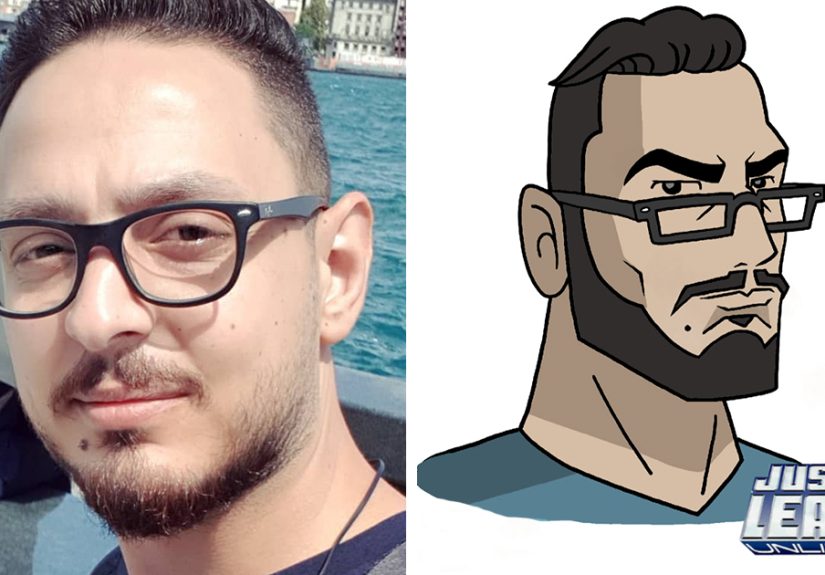
Specific Example: One Face, Three Styles (How I Translated Features)
Example A: Clean modern TV cartoon
- Eyes: simple ovals with one highlight dot
- Nose: tiny curve or dot
- Mouth: one confident line with a slight asymmetry
- Hair: big grouped shapes (no individual strands)
Example B: Editorial caricature
- Pick the “most me” feature (brows, smile, or hair silhouette)
- Change proportions (brow mass bigger, face shape stretched)
- Keep feature relationships believable so likeness survives
Example C: Retro pop-art poster
- Two-color system: base + shadow
- Halftone dots only in the shadow shapes
- Hard edges and graphic shapes for instant style
Common Problems (and the Fixes That Saved Me)
“It doesn’t look like me anymore.”
Bring back one or two signature anchors: brow shape, eye spacing, or hair silhouette. Then reduce how many other things you changed at once.
Identity usually disappears when you stack three exaggerations on top of each other and call it “style.”
“All my styles look the same.”
Pick one lever per style and push it harder. If you always use the same line brush and the same shading, you’re basically wearing 50 outfits
but refusing to change your shoes. Switch the shoes. (The shoes are line quality.)
“My line art is shaky.”
Slow down, zoom out a little, and prioritize fewer, cleaner strokes. Warm up with pressure drills and long curves.
Also: it’s okay to rotate the canvas. Your wrist isn’t a compass; it’s a human joint with opinions.
“Coloring takes forever.”
Simplify. Most cartoon styles read best with fewer shadow shapes. Try cel shading: one shadow tone, placed consistently.
Or go flat-color only and let linework carry the design.
How to Present the Series Online (So People Actually Swipe Through)
- Use a grid: 5×10 or 4×13 + cover image. The repetition is satisfying.
- Keep the framing consistent: same crop, same head size, same background value.
- Add tiny captions: “Style #14: Paper cutout” helps viewers follow the journey.
- Show a few process shots: thumbnails, roughs, and one “oops” moment make it relatable.
Conclusion: The Real Prize Wasn’t 50 DrawingsIt Was a Style Map
By the end, I didn’t magically “find my style.” I found something better: proof of what I like.
I learned which proportions feel natural in my hand, which line qualities make my drawings look confident, and which exaggerations keep likeness alive.
Style isn’t a single destinationit’s a collection of choices you repeat on purpose.
If you try this challenge, your first few might feel awkward. That’s normal. Awkward is just your brain updating its software.
Keep going. Somewhere around Style #17, you’ll surprise yourself. And around Style #33, you’ll realize you’re actually having funwhich is suspicious,
but we’ll allow it.
Extra: of My “50 Styles” Experience (The Parts You Don’t See in the Final Grid)
I started this challenge with delusional confidence, the kind that only exists before you’ve met your own expectations.
Style #1 was “easy.” Style #2 was “still fine.” By Style #5, I realized something important: my face is not a neutral object.
It is a chaotic collection of angles, curves, and tiny asymmetries that my brain politely ignores in mirrors.
The first surprise was how quickly my hand tried to drag every style back to my comfort zone. Even when I told myself,
“Today is bold, graphic poster art,” my lines sneaked back into soft sketch territory like a cat pretending it was never on the counter.
I had to set a rule: every style needed one obvious “signature,” something a stranger could identify from across the room.
Sometimes that was thick outlines. Sometimes it was lineless shapes. Sometimes it was a shadow system so simple it felt illegal.
The second surprise was how much thumbnailing saved my sanity. On days when I skipped thumbnails, I wandered. I over-rendered.
I tried to solve problems at full size that should’ve been solved in two-inch scribbles. When I did thumbnails,
I could test three head shapes in two minutes and choose the one that felt most “me” in that style. It also made me braver.
My “too much” sketches were often the best onesbecause cartoons aren’t allergic to drama, they run on it.
Around Style #21, I hit the “everything looks wrong” phase. The drawing wasn’t terrible, but it didn’t feel like progress.
That’s when I started writing tiny notes: “Likeness = brow shape + smile corner.” Those notes became my emergency kit.
If a style went off the rails, I’d bring back my brows and my asymmetrical grin, and suddenly the portrait snapped into place.
It felt like discovering the secret password to my own face.
By the end, I had favorites I didn’t expect. I loved the clean, simple styles because they forced clarity.
I loved the textured, messy styles because they forgave my perfectionism. And I learned the biggest truth of all:
style isn’t something you wait for. It’s something you doagain and againuntil your choices start sounding like your voice.
Also, I learned that drawing your own hair in 50 styles is a full-body workout. My wrist would like a formal apology.


