
Table of Contents >> Show >> Hide
- What Counts as a “Picture Book,” Anyway?
- Step 1: Start With a Story That Fits the Format
- Step 2: Read Like a Writer (AKA: Borrow Structure Without Copying)
- Step 3: Draft the Text (Short, Strong, and Read-Aloud Friendly)
- Step 4: Understand the 32-Page Reality (You Don’t Get All 32 Pages)
- Step 5: Make a Picture Book Dummy (Your Secret Superpower)
- Step 6: Storyboard the Page Turns (Where Picture Books Really Live)
- Step 7: IllustrationsPlan the Visual Story (Even If You’re Not the Illustrator)
- Step 8: Revise Like a Professional (Not Like a Person Who Loves Every Sentence)
- Step 9: Choose Your Publishing Path
- Step 10: Design and Production Basics (Trim Size, Bleed, and “Why Did My Art Get Cropped?”)
- Step 11: ISBN, Credits, and the Business Bits (Without Falling Asleep)
- Step 12: Print, Proof, Improve, Repeat
- Bonus: How to Make a Photo-Based Picture Book (Family, Classroom, or Gift)
- Common Mistakes (So You Can Skip Them Like a Pro)
- Final Thoughts: Your Picture Book Is Built, Not Sprinkled Into Existence
- Experience-Based Lessons From Real Picture-Book Making (500+ Words)
If you’ve ever thought, “I could totally make a picture bookhow hard can 32 pages be?” welcome. You are among friends. Picture books are short, yes. Easy? That’s like saying a haiku is just “a tiny poem.” Sure… until you try to make every word earn rent, every page turn land like a drumbeat, and every illustration do story work without stealing the spotlight.
This guide walks you through making a picture book from first idea to finished filewhether you’re aiming for traditional publishing, self-publishing, or a family keepsake that becomes the most-loved book on the living room floor.
What Counts as a “Picture Book,” Anyway?
In everyday conversation, “picture book” can mean anything with images and pages. In kidlit and publishing, it usually means a short, heavily illustrated book designed to be read aloud, most often built around the 32-page format. Think: big feelings in small packages.
Common picture-book types
- Story picture book: A character wants something, hits a problem, changes (or tries again), and we all cheer.
- Concept picture book: Colors, numbers, seasons, feelings, routinesoften with a light narrative thread.
- Nonfiction picture book: True information delivered with kid-friendly clarity and visual storytelling.
- Wordless picture book: The art carries the narrative. (It’s not “easier,” it’s just “harder in a different outfit.”)
- Photo-based picture book: A story or memory book using photosgreat for families, classrooms, and special gifts.
Step 1: Start With a Story That Fits the Format
A picture book is basically a mini movie: quick setup, escalating action, emotional payoff, and a satisfying landing. The best ideas for picture books usually have three things:
- A kid-sized problem (big to the character, relatable to the reader).
- A clear emotional engine (hope, worry, pride, jealousy, curiosity, joy).
- A visual world (moments you can “see,” not just explain).
A fast “picture-book idea” test
Ask yourself:
- Can I summarize the core situation in one sentence?
- Can it be shown through action (not just narrated)?
- Does it naturally create page turns (tiny cliffhangers)?
- Will a child want to hear it again (and again… and again… and again)?
Step 2: Read Like a Writer (AKA: Borrow Structure Without Copying)
Before you write, binge-read recent picture books from the library or bookstore. Notice patterns:
- How quickly the story starts (often on page 1–3 of the story pages).
- How page turns create suspense (“Uh-oh… what happens next?”).
- How repetition works (phrases kids love to anticipate).
- How the art does half the talking (sometimes more).
This isn’t about imitating one book. It’s about learning the “music” of picture books: rhythm, pacing, and payoff.
Step 3: Draft the Text (Short, Strong, and Read-Aloud Friendly)
Many modern picture books land somewhere in the neighborhood of 500–700 words, with plenty of exceptions. The key isn’t the exact numberit’s leaving room for illustrations to carry meaning and emotion. If your text is doing everything, the art becomes wallpaper (and wallpaper doesn’t get book deals or bedtime requests).
Drafting tips that actually help
- Write to be read aloud: Use natural phrasing, strong verbs, and rhythm.
- Skip camera directions: Avoid “We see…” or “The camera pans…” (this is a book, not a screenplay).
- Let the pictures handle visuals: Instead of “a red balloon,” try “a balloon” unless red matters to the plot.
- Build pattern and variation: Repetition + a twist = kid magnet.
Illustration notes: use sparingly
If you’re submitting text-only to agents/editors, illustration notes are typically minimal and only for information the illustrator can’t possibly guess (like “the character is actually in zero gravity,” or “the narrator is the family dog”). Otherwise, trust the visual storytelling.
Step 4: Understand the 32-Page Reality (You Don’t Get All 32 Pages)
Most picture books are built in page signatures, which is why 32 pages is common. But your story usually doesn’t get every page. Front matter, endpapers, title page, and copyright page eat some real estate, leaving fewer pages for the narrative beats. Translation: you’re writing a tight story, not a tiny novel.
Typical flow (simplified)
- Front matter: endpapers + title/copyright area
- Story pages: the main narrative spreads
- Back matter: sometimes an author note, extra facts, or endpapers
Don’t panic. The constraint is a feature: it forces clarity and momentum.
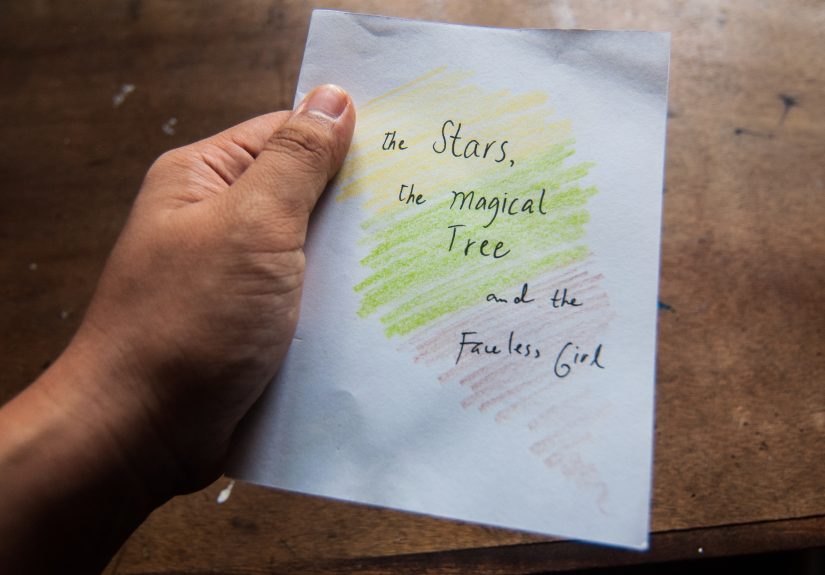
Step 5: Make a Picture Book Dummy (Your Secret Superpower)
A picture book dummy is a rough mock-up of the bookpage by pageso you can feel pacing, page turns, and where the story breathes. SCBWI and many kidlit educators treat the dummy as a key revision tool, not just an illustrator thing.
How to make a dummy (paper version)
- Fold and staple paper into a small “book” (or use a 32-page template).
- Label pages/spreads.
- Write your text in pencil where it might go.
- Sketch thumbnails (stick figures are fine; talent is not required for planning).
- Flip through it like a reader and listen for awkward pacing.
How to make a dummy (digital version)
- Create a 32-page document in your design tool (Google Slides, PowerPoint, Canva, InDesign, etc.).
- Use one slide per page (or per spread, depending on your workflow).
- Drop in rough boxes for art, text blocks, and page-turn beats.
- Export a PDF and “read” it on a tablet to simulate page turns.
Dummy rule: rough is correct. You’re testing story mechanics, not trying to win an art contest.
Step 6: Storyboard the Page Turns (Where Picture Books Really Live)
Page turns are your plot points. They’re your suspense. They’re your comedy timing. They’re also where readers go, “Ooooh!” and demand one more before bed (and then three more). Plan them deliberately.
Easy page-turn tricks
- Question → turn → answer: “Where did it go?” (turn) “Right behind you!”
- Plan → turn → problem: “This will be easy.” (turn) It is not easy.
- Build-up → turn → reveal: “I opened the box…” (turn) Surprise!
- Escalation ladder: Each turn makes the situation slightly bigger, funnier, or more urgent.
A concrete example (mini outline)
Let’s say your story is: A shy kid wants to bring a weird lunch to school but worries everyone will stare.
- Setup: Kid loves the lunch at home.
- Inciting moment: Parent packs it for school.
- Rising action: Kid hides it, swaps seats, overthinks every sound (“Is that a crunch?!”).
- Big moment: Lunch openspeople notice.
- Turn: Instead of mocking, classmates ask to try it.
- Resolution: Kid shares, feels proud, and the lunch becomes a “thing.”
Now you can map those beats to spreads in your dummy and tighten pacing until every scene earns its spot.
Step 7: IllustrationsPlan the Visual Story (Even If You’re Not the Illustrator)
Picture books are a duet: words + images. The words should leave space for the illustrations to add humor, subtext, and emotion. Even if you’re writing text-only, you can think visually:
- What changes from spread to spread? Location, mood, stakes, time of day, crowd size?
- What can the art reveal silently? A worried eyebrow, a hidden object, a background joke.
- Where can you “zoom out”? Give the reader a breather with a wide scene after a tense moment.
If you are illustrating the book
Do quick character sketches, a few environment studies, and lots of thumbnails. The goal is consistency: your character should look like the same person on page 3 and page 27 (unless page 27 is the dramatic makeover montage).
Step 8: Revise Like a Professional (Not Like a Person Who Loves Every Sentence)
Revision is where picture books become publishable. Use your dummy to diagnose problems:
- Pacing: Does the story peak too early?
- Clarity: Would a child understand what happened without an adult narrator doing extra explaining?
- Re-read value: Is there a fun pattern, a satisfying refrain, or a “spot the detail” element?
- Text-to-art balance: Are there pages that are too wordy to leave space for pictures?
Three high-impact revision moves
- Cut adjectives, keep verbs: Strong action beats fancy description.
- Replace explanation with a moment: “He was nervous” → show hands shaking, lunchbox clutched.
- Sharpen the ending: The last pages should feel inevitable and satisfying, not tacked on.
Step 9: Choose Your Publishing Path
Option A: Traditional publishing
If you’re submitting as a writer (not an author-illustrator), you typically query with a polished manuscript. Publishers generally pair writers with illustrators. Your dummy can still help you reviseeven if you don’t submit it.
If you are an illustrator or author-illustrator, a dummy can showcase pacing, page turns, and visual storytelling skill.
Option B: Self-publishing (print + distribution)
Self-publishing puts you in charge of production decisions: trim size, paper, color quality, cover finish, pricing, and distribution. Print-on-demand platforms (like Amazon KDP) make it accessible, while distributors (like IngramSpark) can expand reach to bookstores and libraries depending on your setup.
Step 10: Design and Production Basics (Trim Size, Bleed, and “Why Did My Art Get Cropped?”)
Before final art, decide your trim size (the final printed page size). That choice affects composition, typography, and illustration workflow.
Bleed and safe areas (the unglamorous heroes)
- Bleed: If your artwork goes to the edge of the page, extend it beyond the trim so printers can cut cleanly. Many print specs use a 0.125″ bleed rule of thumb.
- Safe margin: Keep important text/faces away from edges and the gutter so nothing gets trimmed or swallowed by binding.
- Gutter: The inner margin near the spine; avoid placing key details in the “book crack.”
If you’re using KDP or IngramSpark, follow their formatting guides closely for margins and bleed settings, and always order a proof. A proof is cheaper than discovering 200 copies of “The Cropped-Off Puppy Adventure.”
Step 11: ISBN, Credits, and the Business Bits (Without Falling Asleep)
If you’re self-publishing in the U.S., you’ll run into ISBN choices:
- Free platform ISBN: Some platforms provide one (convenient, but the platform may be listed as the publisher of record).
- Your own ISBN: If you want to be listed as the publisher, you can purchase ISBNs from the official U.S. ISBN agency (Bowker).
Other pages you’ll likely need
- Title page
- Copyright page
- Dedication (optional)
- About the author/illustrator (optional)
- Back matter (optional, especially for nonfiction)
Step 12: Print, Proof, Improve, Repeat
Whether you’re publishing traditionally or independently, the workflow is similar near the finish line:
- Finalize text (line-edited and read aloud multiple times).
- Finalize art (consistent character, clear composition, correct resolution).
- Lay out pages (typography + image placement + page numbering).
- Export print-ready files (usually PDF, with correct bleed/margins).
- Order a proof (check color, cropping, readability).
- Fix issues (there will be issues; that’s normal).
Quick proof checklist
- Is all text readable at actual size?
- Do any faces or important details fall into the gutter?
- Are colors darker or warmer than expected?
- Do page turns feel right in a physical book?
- Does the cover look crisp and aligned?
Bonus: How to Make a Photo-Based Picture Book (Family, Classroom, or Gift)
If your “picture book” is a photo storybaby’s first year, a classroom memory book, a grandparent tribute, a travel adventureyour process is similar, but the raw material is your image library.
A photo-book workflow that works
- Pick the theme: one trip, one year, one person, one story.
- Curate ruthlessly: choose the best 40–80 photos, not every photo ever taken since 2011.
- Outline the arc: beginning (arrival), middle (moments), end (wrap-up, reflection).
- Write short captions: one sentence per spread beats three paragraphs per photo.
- Use consistent layouts: repetition makes it feel “bookish,” not “random folder of happiness.”
- Leave white space: it’s not wasted; it’s design breathing room.
Many photo-book services offer templates and layflat options. The main quality trick is the same as picture books: pacing. Mix big “wow” spreads with quieter pages, and don’t be afraid to let one great photo carry a whole page.
Common Mistakes (So You Can Skip Them Like a Pro)
- Too much backstory: Start where the problem starts.
- Text that explains the picture: If the art shows it, your words can do something else.
- No page-turn planning: A picture book without page turns is like a joke without timing.
- Overstuffed word count: Tighten. Then tighten again.
- Ignoring print specs: Bleed, margins, and trim size are not suggestions.
Final Thoughts: Your Picture Book Is Built, Not Sprinkled Into Existence
Making a picture book is part storytelling, part engineering, part theater, and part “why is my printer doing this.” The good news: once you understand the format, you can build page turns with intention, revise with clarity, and create something kids will actually beg to rereadwhich is the highest compliment in the children’s book universe.
Now go make the dummy. Future-you will thank you. And your stapler will feel emotionally included.
Experience-Based Lessons From Real Picture-Book Making (500+ Words)
When people talk about “making a picture book,” the highlight reel usually looks like this: inspiration strikes, you write a charming draft in one sitting, illustrations appear like magic, and two weeks later you’re signing books while wearing a tasteful scarf. In reality, the most common creator experience is more like: inspiration strikes, you write a draft, you read it aloud, and your draft immediately files a complaint with the laws of pacing.
One of the biggest “aha” moments creators often describe is discovering that short text doesn’t mean less work. With fewer words, every sentence has to do multiple jobs. It needs to move the plot, reveal character, support read-aloud rhythm, and leave space for illustrations. That’s why many writers find revision more intense than drafting. Drafting can feel like dumping sand into a box. Revising is sculpting it into a sandcastle that still stands after a toddler pokes it.
Another repeated experience: the first dummy is almost always a humbling teacher. On a normal document, your story feels like it “flows.” In a dummy, you suddenly see that you set up the problem too late, or you solve it too fast, or you have three spreads in a row where the character is basically thinking quietly (which is emotionally valid, but visually it’s a lot of… standing). Many creators say the dummy turns vague discomfort into specific fixes: “Oh! I need the turning point before this page,” or “This scene should be one spread, not three.”
Creators also talk about learning to trust illustrations. Early drafts often describe everything: what the character wears, what the room looks like, what color the rug is, what the rug symbolizes, what the rug had for breakfast. Over time, many writers shift toward giving illustrators space to add humor and depth. A common experience is cutting an entire explanatory line and realizing the story gets funnierbecause now the punchline can live in the picture. The text becomes a spark; the art becomes the fireworks.
If you self-publish, a classic experience is the “proof-copy reality check.” What looked bright on your monitor prints darker. Text that looked perfectly centered now feels slightly too close to the edge. A beautiful spread loses impact because an important detail sits right in the gutter. These aren’t failures; they’re normal production lessons. Many creators say the first proof is where they truly understand bleed and safe marginsnot as abstract rules, but as “Oh, that’s where my character’s eyeball went.”
Photo-based picture books bring their own experience: the challenge isn’t finding imagesit’s choosing them. People often start with 600 photos and end up with a far better book after cutting down to 60. The experience is surprisingly emotional: selecting photos forces you to decide what the “story” really is. The best photo books don’t just document everything; they highlight what mattered. Creators frequently report that writing short captionssimple, specific, warmturns a collection of photos into something that feels like a real narrative.
Finally, many picture-book makers describe a shift in mindset: from “I’m making pages” to “I’m designing moments.” The goal isn’t to fill 32 pages. The goal is to guide a child through anticipation, surprise, laughter, worry, relief, and satisfactionoften in under ten minutes of read-aloud time. Once creators begin thinking in page turns, the process becomes clearer and more enjoyable. It still takes work. But it’s the kind of work that turns into a book kids want to live inside.


