Table of Contents >> Show >> Hide
- What “Easiest & Cheapest” Really Means (and What It Doesn’t)
- The Best Low-Cost Size: Copy-Paste These Dimensions
- Pick Your Build Style: The Cheapest Options Ranked by “Effort per Tomato”
- Option 1: The “No-Frame” Raised Bed (Cheapest, Fastest)
- Option 2: Cinder Blocks or Concrete Blocks (Cheap, Durable, No Saw Required)
- Option 3: Pine Boards (Lowest Upfront Cost Wood Frame)
- Option 4: Cedar (More Expensive, Still “Cheap” Long-Term)
- Option 5: Galvanized Stock Tanks (Easy, Not Always Cheapest)
- Option 6: Straw Bale Beds (Surprisingly Cheap, Surprisingly Useful)
- Wood Safety: What to Use (and What to Avoid) Without Panic
- The Real Budget Battle: Filling Your Raised Bed Without Going Broke
- Raised Bed Soil Mix: Simple Recipes That Work
- The Easiest Build: A Step-by-Step That Doesn’t Assume You Own 14 Saws
- Cost Examples: Three “Cheap & Easy” Setups
- How to Get More Food From a Cheap Bed
- Common Mistakes That Make Raised Beds More Expensive
- Conclusion: The Cheapest Raised Bed Is the One You Actually Use
- Real-World Experiences: What It’s Like to Garden in Cheap Raised Beds (and What You’ll Learn Fast)
Raised garden beds are the “cheat code” of backyard growing: better drainage, fewer weeds, warmer soil earlier in spring,
and a lot less time fighting whatever mystery substance your yard calls “soil.” And here’s the best part: you don’t need a
fancy kit, a carpentry degree, or a second mortgage. The easiest and cheapest raised garden beds are usually the simplest
onesbuilt with basic, widely available materials and filled with smart (not expensive) soil.
This guide breaks down what actually saves money, what’s truly easy for beginners, and how to avoid the classic raised-bed
mistake: spending more on filling the bed than building it (yep, that’s the plot twist).
What “Easiest & Cheapest” Really Means (and What It Doesn’t)
The cheapest raised bed isn’t always the one with the lowest price tag todayit’s the one that doesn’t collapse, warp,
or turn into compost before your compost does. “Easy” also means you can build it in an afternoon, using common tools (or
none at all), and still end up with straight sides, decent depth, and a layout you can actually reach.
Translation: you’re aiming for simple shapes, budget-friendly materials, and
soil strategies that keep costs down without turning your bed into a sad sandbox.
The Best Low-Cost Size: Copy-Paste These Dimensions
Width: 4 feet is the sweet spot
If you can reach the middle from either side, you won’t step into your bed (which compacts soil and defeats half the point).
Four feet wide works for most adults; if the bed is against a wall or fence, keep it narrower so you can still reach.
Length: 6–12 feet is practical
Longer beds look great, but you’ll hate them when you’re carrying mulch, dragging hoses, and trying to harvest tomatoes
without doing parkour. A 4×8 bed is popular for a reason: it’s roomy, efficient, and doesn’t overwhelm beginners.
Depth: 10–18 inches covers most vegetables
Many vegetables do well with a solid rooting zone in the 10–12 inch range, while fruiting plants and bigger growers often
appreciate more depth. If you’re building on a hard surface (patio, driveway), go deeper because roots can’t access native soil.
Pick Your Build Style: The Cheapest Options Ranked by “Effort per Tomato”
Option 1: The “No-Frame” Raised Bed (Cheapest, Fastest)
This is the minimalist approach: you mound soil into a defined bed area and edge it lightly (or not at all). It’s ideal if
you’re testing raised beds before committing to wood or blocks.
- Pros: nearly free if you already have soil/compost; no building; easiest to change later
- Cons: edges slump; weeds creep in from the sides; less tidy
- Best for: leafy greens, herbs, fast crops, first-time gardeners
Quick tip: lay overlapping cardboard under the bed area first, then mound your soil mix on top. Cardboard suppresses grass
while decomposing over timelike a biodegradable doormat for weeds.
Option 2: Cinder Blocks or Concrete Blocks (Cheap, Durable, No Saw Required)
If you want “easy” to mean “no cutting, no measuring, no splinters,” blocks are the move. You basically play adult LEGO:
outline your rectangle, level it, and stack.
- Pros: long-lasting; fast setup; great for beginners; easy to expand
- Cons: heavy; can look industrial unless you soften edges with plants
- Bonus: you can plant herbs or flowers in the block openings (hello, border marigolds)
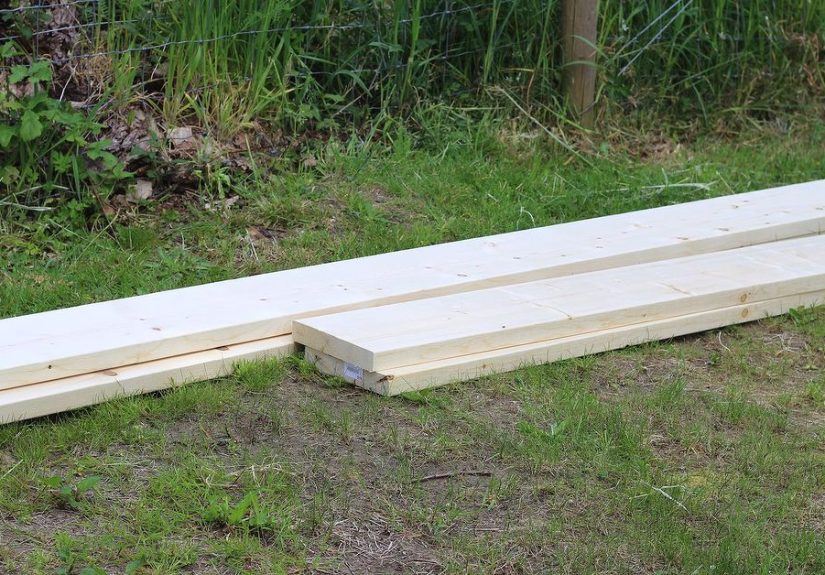
Option 3: Pine Boards (Lowest Upfront Cost Wood Frame)
Pine is often the budget wood choice. It’s easy to work with and available everywhere, but it won’t last as long as naturally
rot-resistant woods. If you’re okay rebuilding in a few seasons (or you want a starter bed), pine can be the right call.
- Pros: affordable; easy to find; easy to cut and screw together
- Cons: shorter lifespan; may warp if thin boards are used
Option 4: Cedar (More Expensive, Still “Cheap” Long-Term)
Cedar costs more than pine, but it’s naturally rot-resistant and can last significantly longer. If you want to build once and
keep gardening instead of rebuilding, cedar often wins over timeespecially for people who know this hobby is going to stick.
Option 5: Galvanized Stock Tanks (Easy, Not Always Cheapest)
Stock tanks are popular because they look great and are quick to set up, but pricing varies a lot. If you find one secondhand,
it can be a fantastic “easy” option. Just make sure it has drainage holes and consider how hot metal can get in full sun.
Option 6: Straw Bale Beds (Surprisingly Cheap, Surprisingly Useful)
Straw bales can serve as temporary walls or even as the growing medium itself. It’s not a forever solution, but it’s an
accessible, budget-friendly way to get growing quicklyespecially if you want to garden without digging.
Wood Safety: What to Use (and What to Avoid) Without Panic
The internet loves two things: drama and telling you your garden is secretly toxic. Let’s be sensible.
Avoid old “CCA” pressure-treated lumber for edible beds
Older pressure-treated wood (especially pre-2004 residential wood) may have used chromated copper arsenate (CCA). Most
residential uses were voluntarily phased out years ago, but reclaimed boards can still show up in old piles and salvage stacks.
If you can’t confirm what it is, don’t put it where you grow food.
Skip railroad ties
Railroad ties are treated for industrial use and can contain preservatives you don’t want near vegetables. They’re heavy,
messy, and usually not worth the risk or hassle.
If you’re using modern treated wood, reduce contact
Modern pressure-treated woods typically use different preservatives than CCA. Many gardeners still prefer untreated cedar or
naturally rot-resistant materials for peace of mind. If you do use treated lumber, you can line the interior wall with a
heavy plastic liner (keeping drainage free) to reduce soil contact and slow wood decay.
The Real Budget Battle: Filling Your Raised Bed Without Going Broke
Lumber and blocks are a one-time cost. Soil is the recurring villain that shows up with a receipt. Deep beds require a lot of
volumeand buying only bagged “raised bed mix” can get expensive fast.
Rule of thumb: invest in the top 10–12 inches
That’s where most feeder roots live and where your plants will do most of their work. Below that, you can use lower-cost
fillers that decompose over time (if your bed is tall enough).
Money-saving filler ideas for deep beds
- Logs and branches: slow breakdown, good for the “hugelkultur” style base
- Leaves / leaf mold: free in fall, improves structure as it breaks down
- Straw: adds bulk quickly (it will settle as it decomposes)
- Wood chips: use cautiously; better in lower layers than mixed into root zone
- Finished compost: best in the main growing zone, not as the only filler for very deep beds
Expect some settling as organic fillers break down. This isn’t a failureit’s just biology doing biology. Top up with compost
and soil each season and your bed improves over time.
Raised Bed Soil Mix: Simple Recipes That Work
Your goal is soil that holds moisture but drains well, stays fluffy, and feeds plants without turning into a brick or a swamp.
You do not need a mystical proprietary blend harvested by moonlight.
The reliable “balanced” mix (great for most vegetables)
- 50% quality compost
- 50% soilless growing mix (or a light “garden mix” designed for beds)
This blend is popular because compost provides nutrients and biology, while the soilless portion improves structure and drainage.
If your bed is at least about 16 inches deep, you can swap in a small portion of screened topsoil for extra mineral content
without making the bed heavy and compacted.
The “bulk fill” mix (when you’re filling a lot of space)
- 60% screened topsoil
- 30% compost
- 10% composted manure (optional)
This is a common approach when buying soil in bulk. The key is screening and quality: cheap fill dirt with rocks and clay clods
will punish you all season.
One underrated upgrade: mulch
A 2–3 inch layer of straw, shredded leaves, or untreated wood chips on top reduces watering, moderates temperature, and slows
weeds. Mulch is the closest thing gardening has to a “set it and forget it” feature.
The Easiest Build: A Step-by-Step That Doesn’t Assume You Own 14 Saws
Step 1: Pick the spot (sun + water access)
Most vegetables prefer 6–8 hours of sun. Being close to a hose spigot is a quality-of-life decision you’ll thank yourself for
in July.
Step 2: Mark your bed and clear the footprint
Outline a 4×8 (or 4×6) rectangle with stakes and string. Remove tall weeds and level the surface as best you can. Perfectly
level isn’t mandatory, but you want water to soak in evenly rather than run to one side like it’s late for a meeting.
Step 3: Add a weed barrier that actually makes sense
Lay overlapping cardboard or several layers of newspaper. Wet it down. This suppresses grass while allowing water to pass.
Avoid plastic sheets under beds on soilthey block drainage and can create a soggy mess.
Step 4: Build the walls (blocks or boards)
For blocks: set the first layer, check level, then stack. For boards: screw together a simple box frame. Use exterior-grade
screws and consider corner braces if boards are thin.
Step 5: Fill smart (cheap base, quality top)
If the bed is tall, add coarse organic materials at the bottom, then finish with 10–12 inches of your best soil blend on top.
Step 6: Plant like you mean it
Don’t plant timidly. Raised beds are designed for efficient spacing. Use trellises for cucumbers, pole beans, and indeterminate
tomatoes to turn vertical space into extra harvest.
Cost Examples: Three “Cheap & Easy” Setups
Prices vary by region and season, but these examples show where money typically goesand how to keep it under control.
Example A: No-frame 4×8 bed (entry-level cheap)
- Cardboard: free
- Bulk soil/compost: primary cost
- Optional edging: cheap bricks, stones, or a narrow board border
Best for beginners testing the hobby. If you love it, you can add a frame later without losing your soil investment.
Example B: Cinder block 4×8 bed (fast + durable)
- Blocks: moderate one-time cost
- Soil: still the biggest cost unless you use filler layers
- Optional: plant herbs in block holes for “free” extra growing space
Example C: Pine board 4×8 bed (classic DIY)
- Boards + screws: usually the main build expense
- Simple design saves money (no fancy corners, no decorative caps)
- Extend lifespan with thicker boards and good drainage around the bed
How to Get More Food From a Cheap Bed
Grow high-value crops
If you’re trying to “earn back” your soil cost, start with crops that are expensive at the grocery store:
salad greens, herbs, cherry tomatoes, peppers, snap peas, and cucumbers.
Succession plant like a pro
When lettuce bolts, replace it with basil. When peas finish, swap in beans. Raised beds reward gardeners who keep planting.
Feed the bed, not just the plants
Each season, top-dress with compost. Soil structure improves over time, and your bed becomes easier to maintain and more
productive year after year.
Common Mistakes That Make Raised Beds More Expensive
- Building too wide: stepping into the bed compacts soil and increases weeds
- Buying only bagged soil: convenient, but often the priciest way to fill volume
- Using poor “fill dirt”: saves money upfront, costs you in stunted plants
- Skipping mulch: leads to more watering, more weeds, and more frustration
- Overbuilding: a bed doesn’t need decorative trim to grow great tomatoes
Conclusion: The Cheapest Raised Bed Is the One You Actually Use
A raised bed doesn’t need to be perfect. It needs to be reachable, filled with decent soil in the top layer, and placed where
you’ll remember to water it. Start simple: a 4-foot-wide bed, built with blocks or basic boards, filled with a smart soil mix
and topped with mulch. You’ll spend less, harvest more, and avoid the most common beginner trapbuilding something beautiful
that’s too expensive (or annoying) to maintain.
Build one bed. Learn from it. Then, when you catch yourself planning a second bed at midnight like it’s a thrilling sequel,
congratulations: you’re a gardener now.
Real-World Experiences: What It’s Like to Garden in Cheap Raised Beds (and What You’ll Learn Fast)
Here’s the part nobody tells you when you’re standing in the aisle holding a board like you’re auditioning for a home
improvement show: the raised bed itself is only half the story. The other half is what happens after you plantwhen the bed
starts acting like a living system and not a static wooden rectangle.
First, expect your soil level to drop. A lot. If you used any kind of organic filler underneath (logs, leaves, straw), it will
settle as it decomposes. Even without filler, fresh soil blends fluff up at first and then compact slightly after watering.
Many gardeners have the same moment of confusion: “Did my bed shrink?” Noyour soil just got comfortable. Plan to top up with
compost after a few weeks and again between seasons.
Second, cheap beds teach you the true value of mulch. Without it, you’ll be watering constantly, especially during hot spells.
Raised beds drain well (that’s the point), but that also means they can dry out faster than in-ground gardens. The difference
between a mulched bed and an unmulched bed can feel like two different hobbiesone is relaxing, the other is you sprinting
outside with a hose like it’s an emergency.
Third, you’ll learn that “easy” materials have personality. Cinder blocks are wonderfully low-effort, but they’re heavy, and
you’ll get a workout leveling them. Wood frames are lightweight and classic, but thin boards can bow out under the pressure of
wet soil. The practical lesson gardeners repeat: a simple design with sturdy corners beats an elaborate design with weak joints.
Fourth, you’ll discover that raised beds are basically magnets for enthusiasm. People start with one bed and quickly decide it
needs a companion. Then the companion needs a trellis. Then the trellis needs a drip line. Suddenly you’re pricing compost in
bulk and using words like “succession planting” in casual conversation. This isn’t a warningjust a heads-up that raised beds
often turn gardening from “a weekend project” into “a seasonal lifestyle.”
Finally, cheap raised beds make you a better observer. You’ll notice where afternoon shade falls, which corner dries out
first, which plants thrive in your microclimate, and how spacing affects airflow and disease. Over time, the bed becomes less
of a structure and more of a learning tool. And that’s the best kind of “cheap”: it keeps paying you back in harvest and skill.