Table of Contents >> Show >> Hide
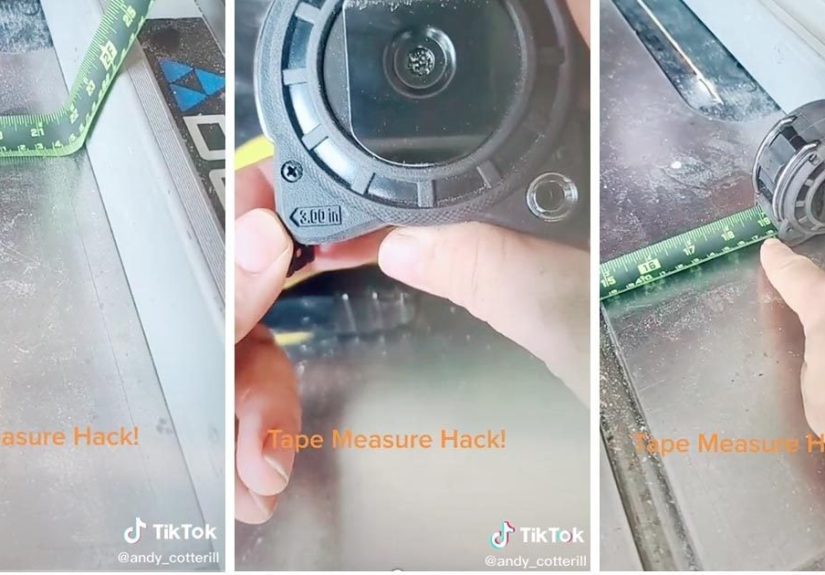
- So, What Is This Viral Tape Measure Hack?
- Hidden Tape Measure Features You’ve Probably Ignored
- How This Hack Helps on Real DIY Projects
- Pro Tips for More Accurate Measurements
- Choosing the Right Tape Measure for DIY Projects
- Bringing It All Together
- Real-World Experiences with the Viral Tape Measure Hack
Somewhere on TikTok or Instagram, a contractor pulled out a tape measure,
hooked that tiny hole on the end over a nail, and the internet collectively went,
“Wait… that’s what that little thing is for?” Welcome to the world of
tape measure hacks where a tool you’ve owned for years suddenly feels brand new.
If you love DIY projects but feel personally victimized by crooked shelves,
wobbly furniture, or gaps that shouldn’t be there, this viral tape measure hack
might be your new best friend. It’s simple, it’s clever, and it takes advantage
of features your tape measure already has: the wobbly metal hook, the nail notch,
and the serrated edge.
In this guide, we’ll break down the viral hack step-by-step, show you other hidden
tape measure tricks, and explain how to use them on real-life DIY projects. By the
time you’re done, you won’t just own a tape measure you’ll actually use
it like a pro.
So, What Is This Viral Tape Measure Hack?
The basic idea behind the viral tape measure hack is this: instead of begging
someone to “hold the other end,” you use the little hole in the tape’s metal hook
to lock onto a nail or screw. Then you stretch the tape across your workpiece or
wall and get a perfectly steady, accurate measurement all by yourself.
That tiny hole called the nail notch is not decorative.
It’s designed to slip over the head of a nail or screw so the tape stays put
while you pull it tight. Combine that with the “wobbly” hook (which is built with
a bit of play to keep inside and outside measurements accurate), and suddenly
your solo measuring game levels up.
Step-by-Step: How to Use the Viral Tape Measure Hack
-
Mark your starting point.
Decide where you want your measurement to start for example, the center of
a wall where you’ll hang a shelf. -
Drive in a nail or screw.
Put a nail or screw at that starting mark, leaving the head proud enough for
the tape’s nail notch to catch. -
Hook the nail notch.
Slip the small hole in the tape’s metal hook over the nail or screw head.
It should sit securely and act like a helper holding the tape. -
Pull the tape measure tight.
Walk the tape out to your desired length. Because the hook is designed with
a small amount of movement, it automatically compensates for the thickness of
the metal when you pull versus when you push. -
Mark your measurement.
Use a pencil to mark the measurement on your surface. If you somehow forgot
your pencil (it happens), you can lightly scratch the spot using the serrated
edge of the hook.
That’s it. No extra tools, no third hand required, and your measurement starts
exactly where you wanted it not wherever you hoped you were holding the tape.
Hidden Tape Measure Features You’ve Probably Ignored
The viral hack is just one tiny piece of the puzzle. Tape measures are loaded
with features that most DIYers never fully use, even if they’ve been building
things for years. Here’s a quick tour of the “secret menu.”
The “Wobbly” Hook That Isn’t Broken
If you’ve ever thought, “My tape measure is cheap, the end is loose,” good news:
it’s supposed to be that way.
The hook is designed with a bit of play usually about the thickness of the hook
itself. When you:
-
Hook the tape over an edge and pull (outside measurement),
the hook slides out. -
Press the hook against an inside corner and push
(inside measurement), it slides in.
That tiny movement compensates for the metal’s thickness so that “zero” is accurate
whether you’re pushing or pulling. If you tape the hook down or bend it out of shape,
your measurements can be off by as much as 1/16 inch or more which is enough to
ruin tight-fitting DIY work like trim, cabinets, or shelving.
The Nail Notch and Serrated Edge
The nail notch is the star of the viral hack, but it has a
couple of other everyday uses:
-
Hook it onto a nail to draw arcs or circles for projects like tabletops,
rounded corners, or curved shelves. -
Use it to anchor the tape in the middle of a long board when no edge is
conveniently available.
Many tape measure hooks also have a serrated edge. That rough,
saw-like edge isn’t just there to look tough. You can rub it back and forth
on wood or drywall to scratch a small mark exactly where the measurement falls
a lifesaver when you’re on a ladder and don’t want to climb down to rescue your
dropped pencil.
The Curved Blade and “Standout”
The metal blade on your tape is intentionally curved. That curve makes the blade
much stiffer so it can extend several feet before collapsing, a feature called
standout. A longer standout lets you measure across rooms, high
walls, or large sheets of plywood without a helper.
If you’re constantly measuring across big spans laying out deck boards, checking
room dimensions, or working in a garage a tape measure with good standout
(8–10 feet or more) is worth the extra few dollars.
Red Numbers and Black Diamonds
Look closely at your tape and you’ll notice:
-
Red numbers every 16 inches these help you quickly lay out
wall studs, since standard framing often uses 16-inch spacing on center. -
Little black diamonds around 19.2 inches apart these are
used for specific framing layouts (like spacing engineered floor joists evenly
over 8 feet).
Even if you’re not framing a whole house, understanding these marks helps when
you’re building shelves into studs, mounting heavy cabinets, or planning built-ins.
How This Hack Helps on Real DIY Projects
It’s fun to know what the nail notch does, but the real magic is how it simplifies
the stuff you actually want to build. Here are a few scenarios where the viral
tape measure hack shines.
1. Hanging Perfectly Level Shelves
Let’s say you’re hanging a floating shelf across a wide wall. You’ve marked the
center of the wall and you want the brackets to be exactly 18 inches left and right.
- Drive a small nail at your center mark and hook the nail notch over it.
- Pull the tape to the left to 18 inches and mark the wall.
- Repeat on the right side, without moving your nail.
Your bracket marks are now perfectly mirrored from the same starting point
no guessing, no “yeah, that looks about right” measuring.
2. Building a Simple Workbench or Bookcase
When you’re cutting multiple boards to the same length, consistency is everything.
With the viral hack:
- Put a screw at the “zero” position on your saw stand or workbench.
- Hook the nail notch over the screw and pull the tape along your cut line.
- Mark each board at the same length without re-guessing your starting point.
It’s like having a quick, improvised stop block. Your pieces end up the same length,
your project fits together better, and your future self is less annoyed.
3. Measuring Long Walls Without a Helper
Measuring across a long wall, hallway, or fence line solo can feel like an Olympic
sport. Using the nail notch:
- Drive a nail at the starting corner and hook the tape onto it.
- Walk the other end of the tape down the wall, keeping it tight.
- Read the measurement at your endpoint without the tape flying off mid-way.
This is especially handy for planning accent walls, wallpaper, trim, or
large-scale art arrangements.
Pro Tips for More Accurate Measurements
The viral hack is great, but accuracy still matters. A 1/8-inch mistake repeated
five times becomes a very real gap. Here are some pro-style habits that make
your tape measure work harder for you:
-
Test your tape’s accuracy. Compare it against a good
metal ruler or another tape. If the hook is bent or damaged, the
measurement will be off especially noticeable on finish work. -
Use the case length for inside corners. Many tape cases
have their length printed on the side. Press the tape into a corner, butt
the case against the opposite surface, and add the case length to the reading
for a more accurate inside dimension than bending the blade. -
Mark with a “V” instead of a single line. Draw a small V
pointing to the measurement. It’s easier to see later and more precise than a
random slash somewhere near your mark. -
Keep the blade straight. If the tape is bowed or angled,
your measurement will read longer than it really is. Pull it tight and
keep it flat. -
Retract slowly. Snapping the tape back at full speed not
only sounds aggressive, it can damage the hook and edge over time and make
your tool less accurate.
Choosing the Right Tape Measure for DIY Projects
You don’t need a hyper-fancy contractor tape, but a decent quality tool does
make DIY life easier. When you’re shopping, look for:
- Length: 25 feet is a great all-around size for home projects.
-
Clear markings: Large, high-contrast numbers are easier to read,
especially in dim garages or basements. -
Comfortable case: A rubberized or contoured case is easier to
grip when you’re on a ladder or working with one hand. -
Reliable lock: A smooth, positive lock keeps the tape from
creeping back while you’re marking measurements. -
Durable hook: Look for a sturdy, well-riveted hook with a
nail notch and serrated edge the stars of our viral hack.
Bringing It All Together
That viral tape measure hack isn’t just internet magic it’s your tape measure
quietly doing exactly what it was designed to do. By using the nail notch, hook
play, and serrated edge, you turn a basic measuring tool into a one-person
layout system that saves you time, frustration, and lumber.
Next time you start a DIY project, don’t just toss the tape on the bench. Give
it a job. Anchor it to a nail, let it draw arcs, mark your cut lines, and help
you measure solo with confidence. Once you get used to it, you might wonder how
you ever built anything without these “new” tricks hiding in plain sight.
Real-World Experiences with the Viral Tape Measure Hack
Theory is great, but DIY confidence really grows from experience especially
those little “aha” moments when a trick suddenly makes your life easier.
Here are some real-world style situations where people discover just how
powerful this tape measure hack can be.
The Apartment Renter and the Crooked Gallery Wall
Imagine a renter staring at a stack of frames and a blank living room wall.
The goal: a perfectly straight gallery wall that doesn’t look like it was
arranged during an earthquake. Measuring from one end of the wall to the
other was nearly impossible alone, and pieces kept ending up slightly off.
After learning about the nail notch trick, they tried something different.
They placed a small nail at what they wanted to be the center of the layout,
hooked the tape onto the nail, and pulled it out to each side to mark frame
positions. Instead of guessing from multiple starting points, every mark
referenced the same spot. The wall went from “kind of random” to “intentionally
designed.” The only regret: not knowing this hack before spackling all those
extra holes.
The Weekend Woodworker and the Wobbly Bookcase
A weekend woodworker built a bookcase that looked okay from across the room
but up close, the shelves didn’t quite line up. The lengths of the side pieces
were just a hair off from each other, and the mistake started with inconsistent
measuring. They were pulling the tape from slightly different starting points on
each board, thinking, “It’s close enough.”
On the next project, they screwed a temporary “anchor” into their workbench and
hooked the nail notch over it. Every board was measured from exactly the same
starting point. Instead of chasing tiny discrepancies with sandpaper and hope,
the pieces fit together cleanly. The difference in quality felt huge, even
though the only real change was using the tape measure the way it was meant
to be used.
The Backyard Builder and the Endless Fence Line
Measuring out a long run of fence posts alone can be surprisingly frustrating.
One DIYer had been trying to stretch the tape from one end of the yard to the
other, watching the hook slip off the starting stake again and again. Distances
were inconsistent, posts didn’t quite line up with the plan, and irritation
levels climbed with the summer heat.
Once they tried the nail notch method, things changed. They screwed a small
screw into the first post, hooked the tape onto it, and walked the line with
steady tension on the blade. Each post location was marked accurately from
the same reference point. The fence went up straighter, faster, and with far
fewer “how did that happen?” moments.
Lessons Learned from Using the Hack in Real Life
Across these experiences, a few themes repeat:
-
Consistency beats perfection. Using the nail notch to lock
in your starting point means fewer small errors that add up over a project. -
Solo work gets easier. If you’re often the only one home
when you get the urge to build something, this hack turns your tape measure
into a reliable extra hand. -
Confidence grows quickly. Once you pull off one project with
better measurements, you’re more willing to tackle bigger, more interesting
builds.
The next time you unclip your tape, take a second to notice that small hole
and that “loose” hook. They’re not flaws they’re built-in helpers. With a
nail, a bit of tension, and these viral tricks in mind, your next DIY project
can look a lot more like the inspiration photo and a lot less like the
“nailed it” meme.