Table of Contents >> Show >> Hide
- What Contour and Highlight Actually Do (No Magic, Just Geometry)
- Before You Start: The “Don’t Skip This” Prep
- Tools You Need (and What You Can Skip)
- Picking the Right Shades (So It Looks Like Bone Structure, Not Dirt)
- Step-by-Step: How to Contour and Highlight (Beginner-Friendly)
- Step 1: Map your placement (lightly!)
- Step 2: Contour the cheeks
- Step 3: Contour the forehead/hairline (optional but helpful)
- Step 4: Contour the jawline (for definition)
- Step 5: Nose contour (tiny brush, tiny amount)
- Step 6: Highlight the high points (choose 2–4 areas)
- Step 7: Blend like your Wi-Fi depends on it
- Step 8: Set and finish
- Contouring by Face Shape (Customize the Placement)
- Common Mistakes (and How to Fix Them Fast)
- Make It Camera-Friendly (Especially for Flash Photos)
- Quick Looks: Daytime Soft Sculpt vs. Full Glam
- 500+ Words of Real-World Experiences (What People Commonly Run Into)
- Conclusion
Contour and highlight sound like something you need a ring light, a makeup degree, and three uninterrupted hours to do. In reality, it’s just
light and shadowaka the same concept that makes your cheekbones look amazing in the golden hour and… mysteriously disappear under office fluorescents.
This guide breaks everything down in plain English: what products to use, where to place them based on your face shape, how to blend so you don’t look
“crispy,” and how to make it camera-friendly. We’ll keep it polished, practical, and just funny enough to keep you awake during the blending section.
What Contour and Highlight Actually Do (No Magic, Just Geometry)
Contouring creates the illusion of depth by placing a slightly deeper shade where natural shadows fallunder cheekbones, along the jaw,
around the hairline, or down the sides of the nose. The goal is to mimic shadow, so contour shades tend to look a bit cooler or more neutral than bronzer.
Highlighting does the opposite: it brings light forward by placing a brighter or more reflective product on high pointstops of cheekbones,
brow bone, bridge of the nose, cupid’s bow, and inner corners of the eyes. Think “lift and glow,” not “disco ball.”
Picture 1 placeholder: Face map (shadow zones vs. highlight zones)
Before You Start: The “Don’t Skip This” Prep
1) Start with skin prep and base
Contour and highlight look their best on a smooth base. Start with skincare (moisturizer + sunscreen in the daytime), then apply foundation and concealer.
You want an even canvas before you sculpt it.
2) Choose your finish based on your skin type
- Oily or combination skin: powder contour and powder highlighter can be easier to control and last well.
- Dry or textured skin: creams, balms, and liquid illuminators often look more skin-like (less powder sitting on texture).
- Mature skin: think soft, diffused, and strategictoo much shimmer can emphasize lines, but a satin glow can look fresh.
3) Remember the order of operations
A reliable rule: do your liquid and cream products first, then set with powders after. If you layer, you can do cream contour first
and reinforce with a light powder contour for longevitywithout piling on texture.
Tools You Need (and What You Can Skip)
You don’t need 47 brushes. You need the right kind of brush (and the patience to blend).
- Angled or small sculpting brush: for cheek contour and jaw definition
- Fluffy blending brush: to soften edges (this brush is your “erase button”)
- Damp makeup sponge: for pressing product into skin and melting lines
- Small detail brush: for nose contour and precise highlight
- Fingertips: especially for cream highlighterwarmth helps it blend naturally
Picture 2 placeholder: Tools layout (sponge + 3 brushes)
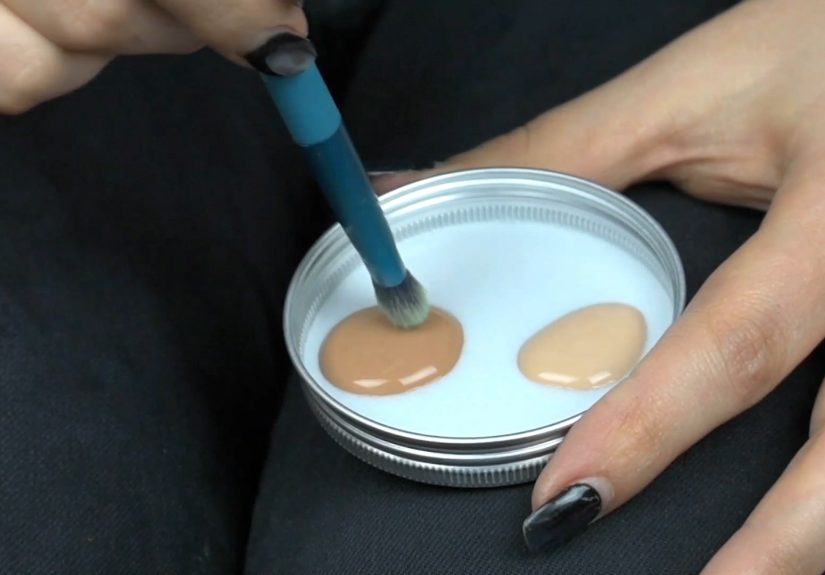
Picking the Right Shades (So It Looks Like Bone Structure, Not Dirt)
Contour shade
Pick a contour that’s 1–2 shades deeper than your skin tone and leans neutral to cool (because it’s meant to mimic a shadow).
If it looks orange, it’s probably closer to bronzer than contour.
Bronzer vs. contour (quick sanity check)
Contour: sculpt + shadow (cooler/neutral). Bronzer: warmth + “I went outside” energy (warmer).
You can use bothjust don’t make your shadow warm unless your goal is “my cheekbones are made of cinnamon.”
Highlighter shade
Highlighter should complement your undertone:
- Cool undertones: pearl, icy champagne, soft pink
- Warm undertones: golden champagne, peachy gold
- Neutral undertones: classic champagne, soft gold
- Deeper skin tones: richer golds, bronze-gold, coppery highlights, or luminous balms (avoid chalky “frost”)
Step-by-Step: How to Contour and Highlight (Beginner-Friendly)
Step 1: Map your placement (lightly!)
Use a light hand. The biggest beginner mistake is applying contour like you’re painting a fence. Start small; you can build.
If you’re unsure, place product, then step back from the mirror. If it looks intense from far away, it will look extremely intense up close.
Picture 3 placeholder: Light placement marks (contour + highlight)
Step 2: Contour the cheeks
Find the natural hollow under your cheekbone (a common trick is to gently suck in your cheeks). Place contour slightly above the deepest hollow,
then blend upward toward the ear and temple to create lift. Blending downward can drag the face.
Pro tip: Stop about two finger-widths from the corner of your mouthtoo far forward can look muddy.
Step 3: Contour the forehead/hairline (optional but helpful)
If you want balance, lightly sweep contour along the hairline (especially near the temples). This can visually “frame” the face and add dimension.
Keep it softyour hairline should not look like it’s wearing a headband made of bronzer’s cooler cousin.
Step 4: Contour the jawline (for definition)
Add contour just under the jawline, starting near the ear and blending forward slightly. Then blend down the neck a touch if needed.
This helps prevent that “face ends, neck begins” lineespecially in photos.
Step 5: Nose contour (tiny brush, tiny amount)
For a subtle nose contour, use a small brush and lightly shade the sides of the bridge. Blend well so there are no harsh lines.
Add a soft highlight down the center of the bridge to enhance the effect.
Picture 4 placeholder: Nose contour (soft side lines + center highlight)
Step 6: Highlight the high points (choose 2–4 areas)
For everyday makeup, pick a few strategic spots:
- Tops of cheekbones: lift + glow
- Brow bone: opens the eye area
- Inner corners: brightens tired eyes
- Cupid’s bow: gives a fuller-lip illusion
- Bridge of the nose: go easy; too much can look oily in photos
Apply with a small brush or fingertip, then blend the edges so the shine looks like it’s coming from your skinnot sitting on top like tinsel.
Picture 5 placeholder: Highlight map (cheekbones, brow bone, cupid’s bow)
Step 7: Blend like your Wi-Fi depends on it
Blending is what turns “lines” into “structure.” Use a fluffy brush for powders or a damp sponge for creams. Work in small motions,
and keep checking both sides of your face so one cheekbone doesn’t look like it got promoted without telling the other.
Step 8: Set and finish
If you used creams, lightly set the face with a finely milled powder (especially under eyes and around the nose). For longevity,
finish with setting spray. If you’re going to be photographed, do a quick flash test selfie before you leave.
Contouring by Face Shape (Customize the Placement)
Face shapes are guidelines, not laws. Use these as a starting point and adjust based on what you want to emphasize.
Oval face
You can keep contour minimal: soft cheek contour, a touch at the temples, and subtle jaw definition. Highlight cheekbones and brow bone.
Round face
Focus contour slightly higher on the cheeks and blend upward toward the temples for lift. Add a touch along the jawline for definition.
Keep highlight on the tops of cheekbones (not too close to the center of the face).
Square face
Soften the angles by contouring the corners of the forehead (near temples) and the jaw corners. Highlight center forehead and high cheekbones.
Heart-shaped face
Balance a wider forehead by contouring along the hairline/temples. Keep cheek contour soft. Highlight cheekbones and the center of the face.
Long/oblong face
To visually “shorten” the face, add a soft contour at the top of the forehead near the hairline and under the chin.
Keep highlight focused on cheekbones rather than a long stripe down the forehead.
Diamond face
Emphasize cheekbones with highlight and keep contour targeted under them. Use light contour near the temples if you want to balance width.
Picture 6 placeholder: Face-shape placement chart
Common Mistakes (and How to Fix Them Fast)
Mistake 1: Harsh lines
Fix: Blend edges with a clean fluffy brush or tap with a damp sponge. Add a tiny bit of foundation over the edge to soften.
Mistake 2: Contour too warm (aka “why is my shadow orange?”)
Fix: Switch to a cooler/neutral contour shade. Use bronzer for warmth and contour for structure.
Mistake 3: Highlighting everything
Fix: Pick 2–4 highlight zones. More shine isn’t always more flatteringespecially in textured areas.
Mistake 4: Texture looks emphasized
Fix: Use cream/balm formulas, apply less powder, and avoid chunky glitter. A satin finish reads smoother than sparkles.
Mistake 5: Flashback in photos
Fix: Go light on setting powder, blend well, and test with flash. Some ingredients and heavy layers can reflect light oddly in photos.
Make It Camera-Friendly (Especially for Flash Photos)
In regular lighting, you can get away with more. In flash photography, heavy powder and highly reflective products can show up as pale patches or intense shine.
A few practical habits help:
- Use powder sparingly (especially under eyes).
- Avoid over-layering shimmer on areas with texture.
- Blend thoroughly so light hits smoothly.
- Flash-test at home before an event.
Picture 7 placeholder: Before/after blending comparison
Quick Looks: Daytime Soft Sculpt vs. Full Glam
Soft sculpt (5–7 minutes)
- Light cheek contour (one pass), blend upward.
- Small contour at temples (optional).
- Tap cream highlighter on cheekbones and inner corners.
- Light powder only where needed, then setting spray.
Full glam sculpt (event-ready)
- Cream contour in key areas, blend.
- Set lightly, then reinforce with powder contour (soft, not heavy).
- Targeted highlight on cheekbones, brow bone, cupid’s bow.
- Flash test selfie, adjust powder/highlight if needed.
500+ Words of Real-World Experiences (What People Commonly Run Into)
Here’s the part nobody tells you when you watch a 12-second tutorial: contour and highlight are less about “knowing the rules” and more about
figuring out what works on your face, in your lighting, with your products. The learning curve is normaland honestly, kind of funny
once you’re past the “why is my forehead striped?” era.
One of the most common experiences beginners share is that their contour looks perfect in the bathroom mirror… and then disappears the second they step
into natural light. That usually happens for one of two reasons: either the shade is too close to the skin tone (so it blends away into nothing),
or the placement is so subtle it only reads from three inches away. The fix is not “add five more layers.” The fix is to build slowly, check your look
from a few feet back, and make sure you’re creating contrast where you actually want depthlike slightly above the cheek hollow instead of right in it.
Another classic: people try to contour their nose with the same brush they used on their cheeks, and suddenly the nose contour is… the size of a small
neighborhood. The experience here is universal: you realize that tools scale with area. A tiny detail brush feels “extra,” until you see how
much cleaner and softer the result is. And if you’re thinking, “I don’t want a dramatic nose contour,” good news: a subtle nose contour is mostly
blending and a tiny hint of shadowthen a small highlight on the bridge to bring it forward.
People also commonly notice that the same technique looks different depending on skin texture, dryness, or acne. Powders can cling to dry patches.
Creams can move around on oily skin. This is where you start learning your personal “makeup physics.” Many find that a cream contour blended into the
base (then lightly set) gives structure without looking heavy. Others prefer powder because it’s easier to control and doesn’t feel slippery.
It’s normal to go through a trial-and-error phase where you try a formula, decide it’s “bad,” and later realize it was actually the wrong tool,
the wrong amount, or the wrong order (for example, powder over un-set cream in a way that grabs and skips).
The highlight experience is equally relatable: lots of people start with a beautiful shimmery highlighter and then feel like it emphasizes texture.
That’s not you “doing it wrong”that’s simply how sparkle interacts with real skin. Many everyday wearers end up preferring a satin, finely milled
highlight or a glossy balm effect because it gives a “lit from within” look without obvious particles. A big “aha” moment is realizing you don’t have
to highlight every high point at once. If cheekbones are glowing, you can skip the nose tip. If the inner corners are bright, you might not need a
strong brow bone highlight. Balance tends to look more modern than maximum shine everywhere.
Finally, there’s the photography reality check: people often learn (the hard way) that heavy powder can look pale in flash, while strong highlight can
turn into a bright streak. The experience most people settle into is doing a quick flash selfie test before an event and making small adjustments:
buffing out powder, toning down the under-eye set, or moving highlight slightly higher on the cheekbone so it catches light without spotlighting texture.
The big takeaway? Contour and highlight are skills, not traits. Nobody is “born knowing where to put bronzer.” You learn, you tweak, and one day you
realize you’re blending automatically while thinking about what’s for dinnerwhich is the true mark of mastery.