Table of Contents >> Show >> Hide
- What “Amazon Magnetic Lights” Usually Means
- Why the $5 Ones Can Be Shockingly Useful
- How to Choose the Right Magnetic Light (and Avoid the Sad Glow Worm)
- Where These Magnetic Lights Shine (Pun Fully Intended)
- How to Install Magnetic Lights So They Don’t Fall Off at 2 a.m.
- How to Get Them for “About $5” Without Turning Into a Coupon Goblin
- What These Lights Won’t Do (So You Don’t Expect Broadway)
- The 5-Minute “Brighten Dim Corners” Checklist
- Conclusion: Tiny Lights, Big Quality-of-Life Upgrade
- Everyday Experiences With $5 Amazon Magnetic Lights (About )
Some corners in your home have two settings: mysterious cave and jump-scare storage. You know the onesunder the kitchen cabinets where your cutting board lives, the closet shelf where socks vanish, the pantry corner where the cinnamon sticks have been plotting a coup since 2019.
Here’s the good news: you don’t need to rewire your house, summon an electrician, or sell a kidney to buy “designer” under-cabinet lighting. Those tiny magnetic LED lights on Amazonoften around $5 per light when you buy multipacks or catch couponscan brighten dim corners fast, with zero drama and very little commitment (unlike that peel-and-stick wallpaper you’re still “meaning to finish”).
This guide breaks down what these magnetic lights are, where they work best, what features actually matter, and how to install them so they stay putplus a real-world “what it’s like to live with them” section at the end.
What “Amazon Magnetic Lights” Usually Means
Most budget magnetic lights fall into one of three families:
- Magnetic light bars: slim LED bars (often 8–16 inches) that mount to a magnetic strip or a metal plate stuck to your surface.
- Magnetic puck lights: small round lights that make a “pool” of lightgreat for closets and cabinets, less ideal for lighting a whole countertop evenly.
- Mini motion-sensor closet lights: compact bars or pucks that turn on when you open a door or walk by, then shut off automatically.
The “magnetic” part is usually one of two setups:
- Built-in magnet on the light that grabs onto a metal mounting strip (the strip sticks to your cabinet with adhesive).
- Magnet + adhesive metal plate for non-magnetic surfaces (common in renters’ kitchens and laminated closets).
That magnetic mount is the magic trick. It means you can pop the light off to recharge (or swap batteries), then snap it back like it’s a little lighting boomerang.
Why the $5 Ones Can Be Shockingly Useful
Home editors and product testers love under-cabinet lighting for one basic reason: it puts light exactly where your eyes and hands need it. LEDs are especially good at task lighting (translation: you can actually see what you’re doing). And the budget magnetic versions bring three advantages that fancy wired systems can’t match:
1) They’re instant upgrades (no wiring, no tools, no regrets)
Stick the plate, attach the light, turn it on. That’s the whole plot. If you’re a renteror simply not in the mood to open your wallswireless, stick-on lighting is the lowest-effort way to make a space feel upgraded.
2) They’re flexible (you can move them as your life changes)
Today it’s the pantry. Tomorrow it’s the linen closet. Next month it’s the hallway that feels like a haunted museum after 10 p.m. Magnetic lights are commitment-phobic in the best way.
3) They help you stop losing stuff to the darkness
“Organized” is easier when you can actually see. That one back corner under the sink where cleaning supplies go to retire? Add light and suddenly it’s a functional storage zone again.
Quick reality check: the “$5” part typically happens when you buy a multi-pack (say, 6–10 lights), use a coupon, or catch a limited-time deal. Price per light varies constantly, but the category stays cheap compared to permanent fixtures.
How to Choose the Right Magnetic Light (and Avoid the Sad Glow Worm)
Power: Battery-operated vs. rechargeable
This is the biggest decision, because it determines whether you’ll feel like a lighting genius… or the unpaid manager of a tiny battery farm.
- AAA/AA battery models are usually cheaper up front. They’re great for low-traffic spots (a guest closet, a rarely used cabinet). If the light runs often, plan to use rechargeable batteries unless you enjoy buying batteries the way other people enjoy buying scented candles.
- USB rechargeable models cost a bit more but often feel easier long-termespecially if the light pops off its magnetic mount for charging.
Pro tip: motion sensors extend battery life because the light isn’t on constantly. But if you install a motion light in a high-traffic area (like right by the fridge), it may turn on all day and drain faster than your phone battery on road trip Wi-Fi.
Motion sensor or manual?
Motion sensors are fantastic for closets, pantries, hallways, and under-sink cabinets. Manual-on lights are better for tasks like cooking, where you want steady light that doesn’t shut off mid-chop like, “Good luck with that onion.”
Many popular under-cabinet lights offer multiple modes (off / always on / auto motion). If you only remember one feature to look for, make it that.
Brightness (lumens) and coverage
Brightness is measured in lumens. Budget magnetic lights vary widely. For small spaces (closets, cabinets), modest brightness is fine. For under-cabinet kitchen use, you’ll want something bright enough for real tasksespecially if your overhead light casts shadows.
Also watch the shape:
- Bars usually provide more even coverage along a countertop or shelf.
- Pucks create focused “spot” lighting that can look cute, but may leave gaps between lights.
Color temperature: warm, neutral, or cool
Color temperature is measured in Kelvin (K). Typical options:
- Warm white (around 2700–3000K): cozy, flattering, less “hospital hallway.” Great for bedrooms and living areas.
- Neutral white (around 3500–4000K): balanced and practicalexcellent for kitchens and closets.
- Cool white/daylight (5000K+): crisp and bright; can feel harsh at night, but useful for garages, workshops, and utility spaces.
Mounting quality: the make-or-break detail
Budget lights live or die by their mounting method. Look for:
- Strong adhesive strips (bonus points if they’re name-brand style strips).
- Metal plates or magnetic strips included for non-magnetic surfaces.
- Easy removal so you can recharge without ripping your cabinet finish.
Timers and dimming: small features, big sanity
Dimming matters more than people thinkespecially in a pantry or bedroom where “blinding spotlight” is not the vibe. Some models offer multiple brightness levels (often 25%–100%) or remote controls with timers. Those features can be surprisingly common even in affordable sets.
Safety and quality: don’t skip this part
Most tiny magnetic lights are safe when used as directed, but rechargeable electronics are still electronics. Stick with reputable listings, follow charging instructions, and don’t place a battery light where it’s exposed to heat, steam, or water splash (like directly above a stove or right next to the sink).
Also: it’s worth checking whether any model has been recalled. There have been recalls in the broader category of rechargeable light bars due to overheating battery risks, so it’s smart to pay attention to safety notices and stop using any device that gets unusually hot.
Where These Magnetic Lights Shine (Pun Fully Intended)
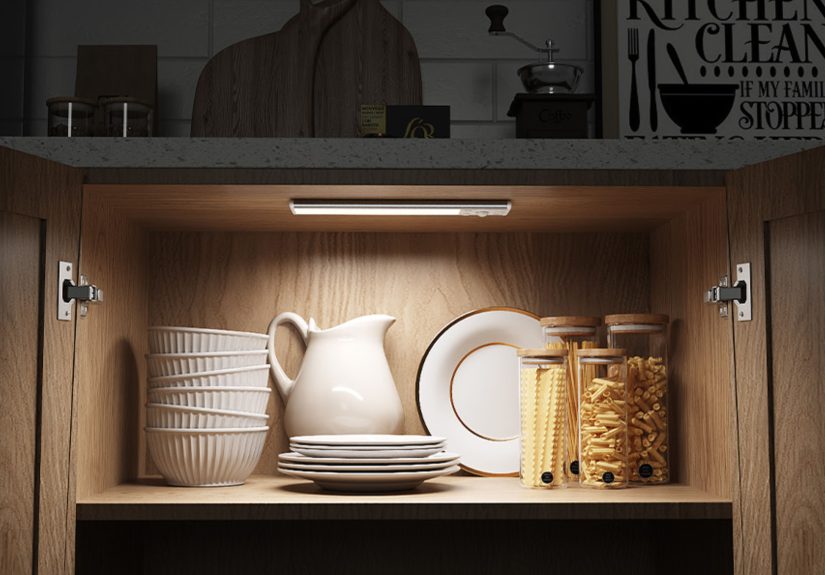
Under kitchen cabinets
This is the classic use. Under-cabinet lighting reduces shadows on countertops and makes cooking feel easier (and frankly, makes your kitchen look more “done”). For the best effect, place bars toward the front edge of the cabinet undersideso the light hits the work surface, not the backsplash only.
Pantries
Pantries are basically caves with snacks. A motion-sensor bar on the inside frame or underside of a shelf can illuminate labels and prevent you from buying your fourth jar of “backup peanut butter.”
Closets and wardrobes
If your closet has no overhead fixture (or it’s wildly dim), a motion light that activates when you open the door is an instant upgrade. Place it high and forward-facing for maximum spread.
Stairs and hallways
Nighttime navigation is where motion lights earn their fan club. A soft glow for the pathway beats turning on the overhead light that makes you feel like you’re being interrogated in your pajamas.
Laundry areas, mudrooms, and utility corners
These spaces often have awkward shadows. Stick a light above the detergent shelf, in the broom closet, or inside a utility cabinet to make everyday tasks smoother.
Garage shelves and metal storage racks
If you have metal shelving, magnetic lights can stick directly (no plates needed). That’s one of the rare times the phrase “magnetic” delivers exactly what it promises.
Emergency lighting (power outages, travel, guest rooms)
Many people keep a couple of magnetic lights charged as backup. They’re small, portable, and useful when you need light quickly without hunting for flashlights like it’s a scavenger hunt designed by chaos.
How to Install Magnetic Lights So They Don’t Fall Off at 2 a.m.
Most complaints about stick-on lights aren’t about brightnessthey’re about the mount failing. Do this instead:
Step 1: Plan placement with “real life” in mind
Open the cabinet door. Stand where you’ll actually use the space. Make sure the light won’t be blocked by hinges, tall items, or a shelf lip.
Step 2: Clean the surface properly
Wipe the mounting area with rubbing alcohol and let it dry. Grease, dust, and cleaning residue are adhesive kryptoniteespecially under kitchen cabinets.
Step 3: Test the angle before committing
Hold the light where you want it and turn it on. Adjust forward/back until it illuminates the right zone. Once you love the angle, mark the spot lightly with painter’s tape.
Step 4: Apply the adhesive plate/strip and press firmly
Press and hold for at least 30 seconds. If you can, let it cure for several hours before snapping the light on (overnight is even better). Adhesive tends to strengthen as it sets.
Step 5: If it’s motion-sensor, pick the right sensitivity zone
A motion light placed too close to traffic can trigger nonstop. Better placement: inside a cabinet, inside a pantry, or under a shelf where movement is intentional (like reaching for something).
Avoid these trouble spots: directly above a stove, close to a dishwasher vent, or anywhere the surface gets hot/steamy. Heat weakens adhesive over time and can shorten electronics life.
How to Get Them for “About $5” Without Turning Into a Coupon Goblin
The best “$5 magnetic light” deals usually happen through math, not miracles:
- Multi-packs: A 6-pack or 10-pack often drops the per-light cost dramatically.
- Clippable coupons: Many listings have on-page coupons that reduce the price at checkout.
- Limited-time deals: Discounts rotate constantly; sometimes the same product swings from “meh” to “wow” within a week.
- Subscribe-and-save (optional): If you already use it, it can shave off a little morejust don’t subscribe to “lights” the way people subscribe to streaming services.
Important: price per light changes often, so treat “$5” as a common target rather than a permanent promise.
What These Lights Won’t Do (So You Don’t Expect Broadway)
Cheap magnetic lights are wonderfulbut they have limits:
- They won’t replace a hardwired lighting plan for a full kitchen remodel.
- Puck lights can look uneven if you use too few (you’ll get bright circles with dim gaps).
- Battery life depends on your habitsmotion sensors help, but high traffic = more activations.
- Adhesive quality varies. Surface prep makes a huge difference.
The goal isn’t perfection. The goal is “I can finally see the back of this cabinet without using my phone flashlight like a cave explorer.”
The 5-Minute “Brighten Dim Corners” Checklist
- Pick the right type: bars for even coverage, pucks for spot lighting.
- Decide on power: rechargeable for frequent use, batteries for occasional use.
- Choose your light color: neutral white for kitchens/closets, warm white for bedrooms.
- Prep the surface: alcohol wipe + dry + press firmly.
- Place with purpose: front edge for countertops; high/forward for closets; inside frame for pantries.
Conclusion: Tiny Lights, Big Quality-of-Life Upgrade
There’s a special kind of satisfaction in fixing an everyday annoyance with something simple. Amazon magnetic lightsespecially the budget-friendly multipack kindcan brighten the spots your home forgot. They’re quick to install, easy to move, and shockingly helpful for kitchens, closets, pantries, and hallways.
And if you’re chasing a “high impact, low effort” upgrade, this is one of the rare purchases that can actually deliver. The bar is low (sometimes literally under your cabinets), but the payoff is bright.
Everyday Experiences With $5 Amazon Magnetic Lights (About )
Once people start using cheap magnetic lights, a funny pattern tends to appear: they buy a pack for one “problem corner,” then suddenly the lights multiply like houseplants. It usually begins with something practicallike a pantry where every spice jar looks the same at night. A motion-sensor bar goes up, and within 24 hours someone says, “Wait… why didn’t we do this sooner?” That’s the moment the rest of the home starts getting ideas.
In day-to-day use, the biggest “wow” isn’t just brightnessit’s convenience. When a cabinet light turns on automatically, you stop doing that one-handed phone-flashlight routine while trying to grab a snack or a cleaning spray. It’s especially noticeable in closets. People often describe the same mini victory: choosing clothes becomes faster because you can see true colors instead of guessing whether that shirt is navy, black, or “mysterious shadow.”
Then there’s the oddly satisfying part of the magnet. If you’ve ever dealt with a battery light that’s taped on forever (and dies forever), a magnetic mount feels like an upgrade in basic dignity. You can remove the light in two seconds, charge it, and click it back into place. For renters, that “no drilling” factor matters, but even homeowners enjoy not turning every tiny project into a tool-grabbing event.
Real life also reveals the trade-offs. Motion sensors are brilliantuntil they’re installed in a spot that triggers constantly. Put a motion light where you walk by all day (like the side of an island) and it might turn on so often that you start noticing charging cycles. People tend to solve this by using motion mode only in truly “grab-and-go” zones (pantries, closets, under-sink cabinets), and switching to manual/always-on mode when they actually need task lighting (like cooking prep).
Adhesive behavior is another classic experience. In cool, dry closets, mounts usually stay put for a long time. In kitchensespecially near heat, steam, or greasy residueadhesive can struggle if the surface wasn’t cleaned well. Most success stories have the same boring secret: wipe with rubbing alcohol, press firmly, and let it set before snapping the light on. That tiny bit of patience can prevent the late-night “thunk” of a light bar falling onto your countertop like it’s trying to get your attention.
Over time, many households develop a simple routine: charge the high-use lights every couple of weeks (or whenever the brightness starts to dip), and leave the low-use lights alone until they remind you. Some people even group-charge themlike lining up little light bars on a counter for a “charging party” nobody asked for but everybody benefits from. The overall vibe is practical and low-stress: small lights, small effort, big payoff. And once your dim corners stop being dim, it’s hard to go back.