Table of Contents >> Show >> Hide
- Tulips 101: What Tulips Actually Need (Hint: Not Constant Attention)
- Pick the Right Tulips: “One-and-Done” vs. “See You Next Spring”
- When to Plant Tulip Bulbs
- Where to Plant Tulips: Location, Light, and Layout
- How to Prepare Soil for Tulips (So Your Bulbs Don’t Sulk)
- How to Plant Tulip Bulbs (Step-by-Step)
- Planting Tulips in Pots (Containers That Look Like a Spring Parade)
- Watering and Fertilizing Tulips (Feed the Bulb, Not the Drama)
- Tulip Care During Bloom: How to Keep the Show Going
- After Bloom: The Step Most People Skip (and Then Wonder What Happened)
- Why Tulips Sometimes Don’t Come Back (and What to Do About It)
- Protecting Tulips From Pests (Because Squirrels Read Gardening Blogs Too)
- Common Diseases and What They Mean (Don’t PanicJust Act Early)
- Easy Tulip Design Ideas That Look Like You Hired Someone
- A Simple Tulip Calendar (So You Always Know What’s Next)
- Real-World Experiences: Lessons Gardeners Learn After a Few Tulip Seasons (Extra Notes That Save You Headaches)
- 1) The squirrel “relocation program” is very real
- 2) Overwatering is the sneakiest tulip killer
- 3) “I mowed the leaves” is the classic regret
- 4) Some tulips are “annuals in disguise,” and that’s okay
- 5) Planting depth matters more than people expect
- 6) The “cluster effect” is a confidence booster
- 7) Weather whiplash is normaltulips are tougher than they look
- 8) You can “stage” spring joy with containers
- Conclusion: Plant Now, Brag Later
Tulips are spring’s way of saying, “Surprise!”a bright, cheerful plot twist after months of gray skies and heavy sweaters.
The good news: tulips aren’t hard. The slightly trickier news: they’re not “set it and forget it,” either.
Tulips run on three things: cold (for flower-making magic), drainage (so bulbs don’t rot), and patience (because bulbs are
basically tiny underground batteries that recharge on their own schedule).
In this guide, you’ll learn exactly when to plant tulip bulbs, how deep and how far apart to place them, how to keep squirrels
from turning your bed into a buffet, and what to do after bloom so your tulips have a fighting chance to return next year.
We’ll keep it practical, a little funny, and very “future you will be grateful.”
Tulips 101: What Tulips Actually Need (Hint: Not Constant Attention)
A tulip bulb isn’t a seedit’s a fully stocked lunchbox of stored energy. In fall, you plant it. Over winter, it chills.
In spring, it sends up leaves and a flower. After that, it spends weeks photosynthesizing to rebuild the bulb for next year.
If you cut the leaves too early, it’s like canceling a recharge halfway through: the battery won’t last.
The chilling requirement (why tulips love real winters)
Most tulips need a long cold period to form strong blooms. In places with reliably cold winters, nature handles this.
In warmer climates (especially USDA zones 8–10), you’ll usually need pre-chilled bulbs or you’ll chill them yourself in the fridge,
then plant later in winter when conditions are coolest.
Drainage (because bulbs hate wet socks)
Tulips can tolerate cold. They can tolerate heat. What they absolutely hate is sitting in soggy soilespecially in winter.
If water pools where you plan to plant, you’re basically inviting bulb rot to move in.
Pick the Right Tulips: “One-and-Done” vs. “See You Next Spring”
Tulips are technically perennials, but many modern hybrids behave like annuals in a typical home gardenamazing the first spring,
then progressively less impressive. If you want tulips that are more likely to come back, variety choice matters.
- Best bets for repeat blooms: species (botanical) tulips, Greigii, Kaufmanniana, Fosteriana/Emperor types, and many Darwin hybrids.
- Often treated as annuals: many fancy “showstopper” tulips like some doubles and parrots (stunning… and sometimes dramatic about returning).
Practical approach: plant a “reliable backbone” (Darwins or species tulips) and sprinkle in a few diva varieties for the
jaw-dropping photos.
When to Plant Tulip Bulbs
The classic timing is fall, after the weather cools and before the ground freezes solid. You want cool soil so bulbs root
without sprouting leafy growth too early.
Rule of thumb
Plant tulip bulbs when soil temperatures are cool (often around the 50s °F at planting depth) and you still have several weeks
before hard freeze. In much of the U.S., that lands in October–November, with warmer areas planting later.
If you live somewhere mild
In warmer regions that don’t deliver enough winter chill, you’ll often get better results by chilling bulbs in a refrigerator
(away from fruit) for several weeks, then planting in mid-to-late winter. Many gardeners in warm climates simply treat tulips
as annuals: chill, plant, enjoy, repeat next year.
Where to Plant Tulips: Location, Light, and Layout
Sunlight
Tulips bloom best with plenty of sunthink 6+ hours in early spring. A spot that’s sunny before trees leaf out can be perfect.
Soil and drainage
Tulips prefer well-drained soil. If your yard is heavy clay, you can still grow great tulipsjust work in compost, plant in a
raised bed, or choose a slope where water doesn’t linger.
Design tip that instantly looks “pro”
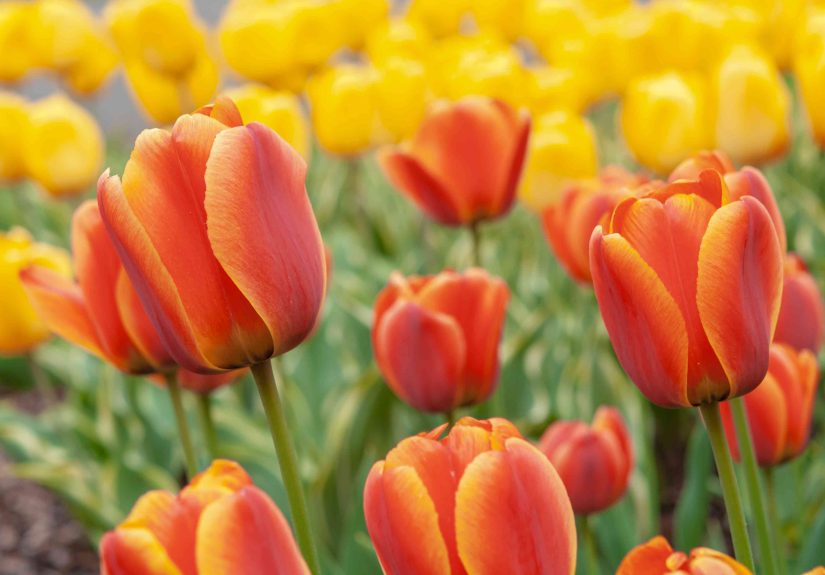
Skip lonely single bulbs. Plant tulips in clusters or driftsgroups of 7, 9, or 12 look intentional, not accidental.
If you want a bold “wow” from the sidewalk, plant a few tight groupings instead of scattering bulbs like sprinkles.
How to Prepare Soil for Tulips (So Your Bulbs Don’t Sulk)
- Loosen the planting area 8–12 inches deep if possible (a little deeper is great in compacted beds).
- Improve drainage with compost. In very heavy soil, consider a raised bed or mixing in gritty material.
- Avoid fresh manure and overly high-nitrogen fertilizersbulbs don’t want a leafy growth party at the expense of flowers.
- Think ahead: tulip foliage needs weeks after bloom. Plant near perennials that will grow up later and hide yellowing leaves.
How to Plant Tulip Bulbs (Step-by-Step)
Step 1: Buy good bulbs
Choose bulbs that are firm and heavy for their size. Skip anything soft, moldy, or damaged.
Bigger bulbs generally mean bigger flowers (and better odds of a strong first-year show).
Step 2: Plant at the right depth
A common rule is to plant bulbs about 2–3 times as deep as the bulb is tall (or wide, depending on the guidance you follow).
For many tulips, that works out to roughly 6–8 inches deep (measured from the bulb base to the soil surface).
In sandy soil, you can go a bit deeper; in heavy clay, a bit shallower can help prevent rot.
Step 3: Space bulbs so they can grow (but still look lush)
Typical spacing for tulips is about 4–6 inches apart. Some guidance stretches to 8 inches for larger bulbs or specific designs.
If you want a dense “bouquet effect,” keep spacing closer (but still not touching).
Step 4: Pointy end up, please
Plant the bulb with the pointed end facing up. If you can’t tell, don’t panicbulbs are surprisingly determined and often correct
themselves, but you’ll get better results if you aim them properly.
Step 5: Water once, then let nature do most of the work
Water thoroughly after planting to settle soil and start root growth. After that, you usually don’t need to water again until spring,
unless the season is unusually dry.
Step 6: Mulch (optional, but helpful)
A light mulch layer (2–4 inches) can reduce winter temperature swings and help prevent soil heaving in freeze/thaw cycles.
Don’t bury the area under a soggy blanketuse loose, airy mulch.
Planting Tulips in Pots (Containers That Look Like a Spring Parade)
Containers are a great solution if your garden soil drains poorly or if you want tulips right by the front door.
The key is drainage holes and enough depth.
- Choose a sturdy pot with drainage holes. Deeper is better for insulation and root room.
- Use potting mix (not straight garden soil). Consider adding a bit of grit for drainage.
- Plant bulbs close for a full look, but don’t let them touch.
- Chill requirement still applies: pots need cold time too. In very cold areas, protect containers from extreme freeze by placing them in an unheated garage or a sheltered spot.
Watering and Fertilizing Tulips (Feed the Bulb, Not the Drama)
Watering
Tulips prefer a “deep but not frequent” approach. Water after planting, then mostly rely on rainfall.
In spring, water during prolonged dry spells. Avoid waterloggingespecially once the foliage starts yellowing.
Fertilizing
If your soil is reasonably healthy, tulips don’t need heavy feeding. If you do fertilize:
- Timing options: when shoots emerge in early spring, or as blooms fade (many gardeners favor post-bloom feeding to help bulbs recharge).
- Choose a balanced or bulb-friendly fertilizer and avoid very high nitrogen.
- Keep fertilizer off foliage and follow label directionsmore is not more, it’s just burned plants.
Tulip Care During Bloom: How to Keep the Show Going
Deadheading (removing spent flowers)
Once blooms fade, snip off the flower head (the goal is to stop seed production so energy goes back into the bulb).
Leave the leaves in place.
Cutting tulips for bouquets
If you want indoor flowers, cut stems early in the morning. Try to leave some leaves on the plant in the garden so it can keep
photosynthesizing. If you cut everything down to the ground every year, you’re basically telling your bulbs, “Good luck, buddy.”
After Bloom: The Step Most People Skip (and Then Wonder What Happened)
Here’s the tulip secret: the leaves after bloom are not “ugly leftovers.” They’re the bulb’s recharging cable.
The greener they stay, the more energy the bulb stores for next year.
- Do: deadhead spent blooms to prevent seed formation.
- Do: leave foliage until it turns yellow/brown and dies back naturally (often several weeks).
- Do not: braid, tie, or aggressively trim the leavesless leaf surface means less energy stored.
- Optional: once foliage is fully brown, you can remove it. At that point, the bulb has done its recharge.
Should you dig up tulip bulbs?
In many gardens, tulips can stay in the ground. Digging is useful if you want to redesign beds, if you have disease issues,
or if your summer watering (like lawn sprinklers) keeps bulbs too wet. If you lift bulbs, let them dry in a cool, airy place,
inspect for damage, and store them dry until fall planting.
Why Tulips Sometimes Don’t Come Back (and What to Do About It)
If your tulips bloomed like champions the first spring and then ghosted you, you’re not alone. Common reasons include:
- Early leaf removal: bulbs didn’t recharge.
- Too much shade: leaves can’t gather enough energy.
- Wet summer soil: bulbs prefer drier dormancy; constant moisture invites rot.
- Hybrid behavior: some varieties are simply less perennial in typical garden conditions.
- Shallow planting: can lead to weak blooms and temperature stress.
If you want reliable return blooms, choose perennial-friendly types, plant them deep enough, keep soil well-drained,
and let foliage die back naturally. If you just want a guaranteed annual spring color blast, replant fresh bulbs each fall.
Both strategies are validone is “perennial hope,” the other is “spring certainty.”
Protecting Tulips From Pests (Because Squirrels Read Gardening Blogs Too)
Squirrels, voles, and other bulb bandits
If critters dig up newly planted bulbs, cover the bed with chicken wire or hardware cloth secured with landscape pins or bricks.
Remove it in early spring before shoots push up hard.
Deer and rabbits
Deer often love tulips. If deer pressure is high, consider fencing, repellents (used correctly), or planting tulips closer to the house
and choosing less-tasty bulbs like daffodils in more exposed areas.
Common Diseases and What They Mean (Don’t PanicJust Act Early)
Tulip fire / Botrytis blight
This fungal disease can cause spotting, blighting, and a scorched lookoften worse in cool, wet conditions.
Good sanitation helps: remove infected plant material, avoid overhead watering, and don’t crowd plantings so air can move.
Tulip breaking virus (and other “breaking” viruses)
If you see dramatic streaking or color “breaking” in petals that isn’t typical for the variety, a virus could be involved.
Viruses can spread via aphids and infected plant material, and infected bulbs can carry problems year to year.
The safest move in a home garden is usually to remove and discard infected plants to protect the rest.
Easy Tulip Design Ideas That Look Like You Hired Someone
1) Stagger bloom time
Plant early, mid-season, and late tulip varieties so you get weeks of color rather than a single “blink and you missed it” moment.
2) Hide fading foliage with smart neighbors
Tulip leaves yellow as the bulb recharges. Plant tulips among perennials that leaf out laterhostas, daylilies, hardy geraniums,
or ornamental grassesso the “messy phase” is disguised by June.
3) Go for drifts, not dots
Plant bulbs in sweeping shapes or irregular clusters. Nature rarely plants in perfect rows, and your eyes tend to like what nature does.
4) Container “lasagna” planting
In a large pot, layer bulbs by bloom time: later-blooming bulbs deeper, earlier-blooming bulbs closer to the top.
The result is a container that keeps giving instead of a one-week cameo.
A Simple Tulip Calendar (So You Always Know What’s Next)
- Late summer to fall: choose varieties, buy quality bulbs early, prep beds.
- Fall planting: plant when soil cools; water once; mulch if needed; protect from critters.
- Winter: let bulbs chill; in mild climates, chill bulbs in the fridge and plant later.
- Early spring: remove protective wire/mulch as shoots emerge; water during dry spells.
- Bloom time: enjoy; cut a few for bouquets (leave leaves behind); deadhead fading flowers.
- Late spring/early summer: let foliage yellow and die naturally; avoid extra watering.
- Summer: decide whether to lift bulbs or leave them; keep soil on the drier side if you want return blooms.
Real-World Experiences: Lessons Gardeners Learn After a Few Tulip Seasons (Extra Notes That Save You Headaches)
The internet makes tulips look effortless: someone places three bulbs, whispers “spring,” and suddenly the yard becomes a postcard.
Real life is a little messierin a reassuring way. Here are practical “been there” lessons gardeners commonly learn (sometimes the hard way),
so you can skip the tuition and go straight to the blooms.
1) The squirrel “relocation program” is very real
Many gardeners plant carefully spaced bulbs… and then wake up to tiny excavation sites like a miniature construction crew clocked in overnight.
A light cover of chicken wire or hardware cloth is the difference between “I planted tulips” and “I opened a snack bar.”
The funniest part? Squirrels often dig up bulbs and then forget where they put them, which means you might get surprise tulips
in the lawn like nature’s prank.
2) Overwatering is the sneakiest tulip killer
New gardeners often assume bulbs need steady moisture all winter. In reality, tulips hate sitting wet.
A bed that drains poorly can turn bulbs mushy before spring even arrives. The “aha” moment is when someone moves tulips
from a low, soggy spot to a slightly raised bed and suddenly gets strong stems and clean blooms.
Tulips don’t need pamperingjust a dry-ish winter and a decent spring.
3) “I mowed the leaves” is the classic regret
After bloom, tulip foliage can look like a sad green mop. The temptation to cut it down is powerfulespecially if you like tidy landscaping.
But gardeners who do it once often remember it forever, because the next spring is noticeably weaker.
The workaround: plant tulips among later-emerging perennials, so you can leave the leaves alone without feeling like your yard is judging you.
4) Some tulips are “annuals in disguise,” and that’s okay
Plenty of gardeners try to make every tulip return and feel personally betrayed when fancy varieties fade after year one.
Then they discover a calmer strategy: treat showy hybrids like seasonal decor (plant new each fall) and invest in a few
return-friendly types (like species tulips or many Darwins) for the “steady relationship” part of the bed.
The garden gets both drama and reliabilitylike a well-written TV show.
5) Planting depth matters more than people expect
Gardeners often notice that shallow-planted bulbs produce smaller flowers, flop in wind, or disappear sooner.
After replanting deeper (within recommended ranges) and improving drainage, blooms often look sturdier and more consistent.
The lesson: depth is not just a numberit’s temperature stability, moisture stability, and better rooting.
Deeper isn’t always better in poorly drained soil, but “barely covered” almost never works long-term.
6) The “cluster effect” is a confidence booster
A single tulip can look like it got lost on the way to a parade. A cluster looks like a plan.
Gardeners who switch from scattered planting to group planting often feel like they leveled up overnight.
Even inexpensive tulips look high-end when planted in drifts of one color or in repeating clusters that guide the eye.
If you want instant curb appeal, plant fewer varieties in bigger groups.
7) Weather whiplash is normaltulips are tougher than they look
Spring can swing from warm to frosty in a heartbeat. Gardeners often panic when a cold snap hits while tulips are budding.
While hard freezes can damage open blooms, many tulips bounce back from chilly nights surprisingly well.
A light mulch and a sheltered location help, but the bigger takeaway is: don’t assume one weird week “ruined” your bulbs.
Tulips are more resilient than their fancy reputation suggests.
8) You can “stage” spring joy with containers
Gardeners who try containers often love the control: better drainage, fewer critter problems (sometimes), and color exactly where it’s wanted.
The trick is winter protection and chilling. Once someone figures out a reliable routinelike chilling bulbs, planting in a deep pot,
and overwintering it in a protected spotcontainers become the easy button for spring color.
It’s like having a portable celebration you can place wherever the gloom needs it most.
Conclusion: Plant Now, Brag Later
Tulips reward good timing and small, smart choices: plant in cool soil, prioritize drainage, give bulbs room, protect them from critters,
and let the leaves do their boring-but-crucial recharge job after bloom. Whether you treat tulips as a reliable perennial project
or as an annual spring spectacle, the result is the same: a yard that looks like it woke up happy.