Table of Contents >> Show >> Hide
If you’ve ever had your favorite gadget zapped during a storm, watched your radio get noisy near other electronics, or just love a good science project, a Faraday cage is your new best friend. This simple conductive enclosure can help shield electronics from certain kinds of electromagnetic interference (EMI), and it makes an awesome at-home physics demo.
In this guide, we’ll walk through how to make a basic DIY Faraday cage in six practical steps using common materials like a metal trash can and cardboard. We’ll also go over how it works, what it can (and can’t) protect against, and a few real-world experiences to help you avoid common mistakes.
What Is a Faraday Cage?
A Faraday cage is an enclosure made of conductive materiallike metal foil, sheet metal, or wire meshthat helps block external electric fields and high-frequency electromagnetic waves from reaching the items inside. When external fields hit the cage, charges in the metal move and redistribute, creating an opposing field that largely cancels the incoming field inside the enclosure.
That’s why Faraday cages are used around sensitive lab equipment, inside MRI rooms, and even in everyday things like microwave oven doors and the metal body of a car. The goal isn’t magic invisibilityit’s reducing interference so electronics stay safe and signals aren’t scrambled.
Important limitations:
- A DIY Faraday cage is not guaranteed protection against every possible EMP or high-energy event.
- It doesn’t block slowly changing magnetic fields (a compass can still work inside many cages).
- Its effectiveness depends heavily on construction quality and how well seams, gaps, and openings are sealed.
Safety First
Good news: building a small, self-contained Faraday cage like the one in this article does not involve connecting to household power or working with exposed wiring. Still, keep these safety basics in mind:
- Do not connect your cage directly to a live electrical source.
- Use hand tools carefullycutting cardboard or foil can be surprisingly sharp work.
- If you choose to ground the cage, follow local electrical codes and consult a qualified electrician for whole-house or large permanent enclosures.
- Only store powered-off devices inside the cage.
Materials for a Simple Trash-Can Faraday Cage
For a practical, home-friendly Faraday cage, many people use a metal trash can with a tight-fitting lid. You can adapt these materials to what’s available locally, but the basics look like this:
Core Components
- One metal trash can with a snug metal lid (galvanized steel is common).
- Cardboard or dense foam to line the inside (corrugated cardboard works well).
- Heavy-duty aluminum foil or conductive tape (optional but helpful for sealing gaps).
- Non-conductive containers or zip-top bags to hold your electronics inside the cage.
Tools
- Scissors or a utility knife (for cutting cardboard).
- Marker and measuring tape (for fitting liners neatly).
- Duct tape or packing tape (for securing cardboard liners).
Optional extras: A simple battery-powered radio or cell phone to test how well your Faraday cage reduces signals.
How to Make a Faraday Cage in 6 Steps
Below are the six main steps. If you imagine this as a wikiHow article, this is where the “with pictures” part would show upfeel free to add your own photos of each step when you build yours.
Step 1: Plan What You Want to Protect
Before you touch the trash can, decide what you’re actually putting inside. Are you storing:
- A small emergency radio and extra batteries?
- A backup hard drive or USB stick with important files?
- A few spare chargers and a basic tablet?
Gather the items first. This helps you choose the right size can and ensures you leave enough interior space once it’s lined with cardboard. Remember, everything inside should be powered off to avoid heat buildup and unnecessary battery drain.

Step 2: Line the Inside with Non-Conductive Material
The inside of your metal can must not directly touch metal parts of your devices. You want them electrically isolated from the can’s walls and lid. That’s where cardboard or foam comes in.
- Cut pieces of cardboard to fit the bottom of the trash can.
- Cut long strips to line the sides, from bottom to just under the rim.
- Secure the pieces with tape so they don’t slip or collapse when you add devices.
Think of this layer like the padding inside a suitcase: it keeps things separated and prevents accidental contact with the metal shell.

Step 3: Check and Improve the Lid Seal
The lid is usually the “leakiest” part of a DIY Faraday cage. Wherever there’s a gap, electromagnetic energy can slip in. You want the lid to make good metal-to-metal contact all the way around the rim.
Try these tips:
- Make sure the rim of the can and lid are clean and free of paint drips, rust, or dents.
- If the fit is loose, use conductive tape (e.g., foil tape) along the rim so that when the lid is pressed down, the tape bridges any tiny gaps.
- A strip of aluminum foil folded over the rim before closing the lid can also improve contact.
The goal is to have a continuous conductive “loop” around the openingno big gaps, seams, or holes.

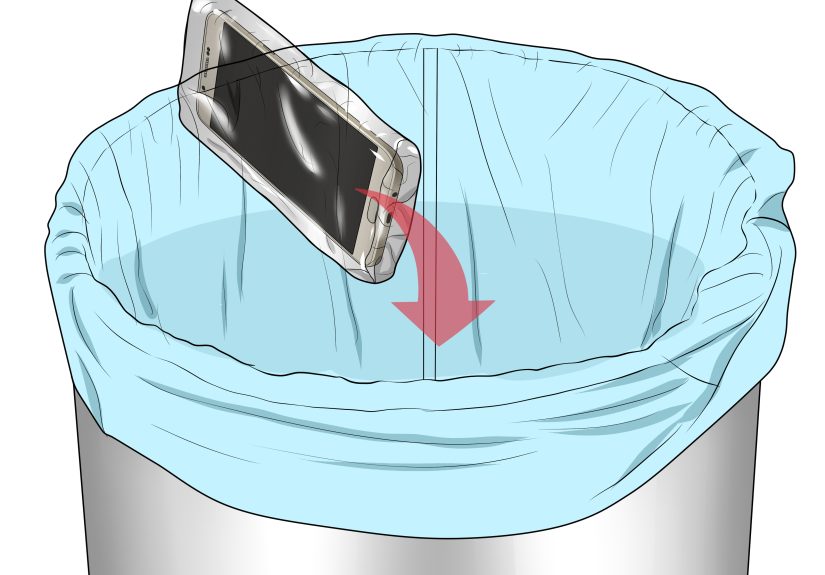
Step 4: Place Devices InsideWithout Touching the Metal
Now you can carefully place your electronics into the lined can. To keep everything organized and extra insulated, use non-conductive containers inside the cage:
- Place devices in plastic bags or plastic storage boxes.
- Set those containers inside on top of the cardboard bottom liner.
- Ensure nothing tall leans against the cardboard walls hard enough to press through and touch the metal.
If you have many small items, consider labeling bags or containersfuture-you will thank you when you’re not digging around in a metal can in the dark.

Step 5: Close and Secure the Cage
Once everything is inside, firmly press the lid down. For extra peace of mind, you can:
- Wrap a band of aluminum foil around the joint between the lid and the can.
- Add a ring of duct tape over the foil to hold it in place (the duct tape doesn’t need to be conductiveits job is just to keep the foil from peeling off).
Don’t overdo it to the point you can’t reopen the can without a wrestling match, but aim for a snug, continuous seal.
Step 6: Test Your Faraday Cage
Testing doesn’t require fancy instrumentssimple signal-based devices will do:
- Turn on a small battery-powered radio and tune it to a station you receive clearly.
- Place the radio inside the cage on its cardboard base and close the lid completely.
- If the station becomes weak or disappears, your cage is blocking a good chunk of the signal.
You can also test with a cell phone by calling it and placing it inside, but remember: signal strength and frequencies vary by carrier and location. In a strong-signal area, a basic cage might reduce the signal without killing it entirely. The goal is noticeable reduction, not necessarily total silence.

How Well Does a DIY Faraday Cage Work?
Effectiveness depends on several factors:
- Material: Steel, aluminum, and copper are all common. Thicker or more conductive metals generally perform better.
- Continuity: Fewer seams and tighter joints mean fewer places for fields to leak in.
- Openings: Any holes or mesh openings should be significantly smaller than the wavelength of the signals you want to block. That’s why microwave doors use very fine mesh.
- Frequency: Faraday cages are usually better at higher frequencies (like many radio and Wi-Fi signals) than at very low-frequency fields.
Your simple trash-can cage is a great “good enough” solution for basic EMI reduction and educational demos, but it’s not a laboratory-grade shield or a guaranteed EMP-proof vault. Think of it as a sturdy umbrella, not an indestructible bunker.
Troubleshooting Common Faraday Cage Problems
Problem 1: The Radio Still Plays Loud and Clear
If your test radio sounds almost the same inside and outside the cage, check:
- Is the lid fully seated all the way around?
- Are there obvious gaps, holes, or dents near the rim?
- Are you testing in an area with extremely strong signal, like right next to a transmitter?
Try adding foil around the rim, sealing visible gaps, and moving the cage to a different spot in the house to retest.
Problem 2: Devices Are Touching the Metal
If you notice anything inside leaning against the side of the can:
- Add more cardboard or a small foam “spacer” along the wall.
- Repack items into smaller containers so they sit upright more securely.
Direct contact doesn’t necessarily break the cage, but it can create unintended paths for current during extreme events, so it’s better to avoid it.
Problem 3: You Need to Open It Frequently
If you find yourself popping the lid on and off every day, it’s easy to get lazy with resealing. In that case:
- Skip permanent foil wraps and use a lid that naturally fits tightly.
- Reserve the extra foil and tape wrap for long-term storage or storm seasons.
Real-World Experiences with DIY Faraday Cages
Because this topic tends to attract equal parts science nerds and cautious planners, people have shared plenty of stories and tips about building Faraday cages at home. Here are a few patterns that show up again and againand what you can learn from them.
Learning from the “First Trash Can” Mistakes
One common experience: the first trash-can cage doesn’t work as well as expected. Someone buys a shiny metal can, drops in a radio, slams the lid, and… the radio keeps playing. The reaction is usually, “Did I just buy an expensive metal drum for nothing?”
Most of the time, the culprit is the lid seal. The rim may be slightly warped, painted, or not fully contacting the lid all the way around. After lining the inside with cardboard, cleaning the rim, and adding a strip of foil tape around the edge, people usually notice a big difference in signal reduction. The takeaway: the details matter more than the raw amount of metal.
Classroom Demos that Hook Students
Teachers and science communicators love Faraday cages because they make an invisible concept visible (well, audible). A simple demo goes like this: a portable radio or speaker plays loud music on the lab bench, then the instructor slowly lowers a mesh or metal container over it. As the cage settles into place, the signal fades or disappears.
Students often try to “beat” the cage by lifting it just a little or leaving a gap. It’s a perfect way to show that even small openings can let electromagnetic waves sneak in. For your own DIY cage at home, recreate this demo with your trash can and a battery-powered radioyou’ll get a feel for how sensitive the effect is to lid position and gap size.
Storm Season Peace of Mind
Another experience people share is building a cage as part of a broader emergency prep plan. They’re not expecting a sci-fi-level pulse; they’re simply trying to protect a few critical devices from possible surges or weird electrical behavior during major storms or grid events.
Those users usually:
- Pick a small set of essentials: a basic radio, a backup power bank, and a USB drive with documents.
- Store them powered off in the cage in a cool, dry area of the home.
- Test the cage a couple of times a year and rotate batteries or devices as needed.
While it’s impossible to guarantee how any one DIY cage will perform under every condition, people often say the project gives them a sense of control and teaches them more about how electromagnetic shielding actually works.
Experimenting with Different Materials
Once someone builds a basic cage and sees it in action, curiosity tends to kick in. People start experimenting:
- Wrapping a small box in several layers of heavy-duty aluminum foil to compare performance.
- Using metal mesh or hardware cloth to build a visible “see-through” cage around a radio.
- Testing how much difference extra layers of foil or better lid seals make.
These experiments underscore an important point: shielding is not all-or-nothing. Each improvement typically adds a bit more attenuation. That’s empoweringyour trash can might not be perfect, but small upgrades really can help.
Conclusion
Building a Faraday cage at home is part science project, part practical insurance policy. You learn why conductive enclosures matter, see electromagnetic shielding in action, and end up with a simple container that can help reduce electromagnetic interference for electronics you care about.
By choosing a sturdy metal can, lining it with cardboard, paying attention to lid contact, and testing it with a basic radio, you can create a surprisingly effective DIY Faraday cage in just six steps. From there, you can experiment, refine, and adapt the design to fit your own emergency kit, classroom demo, or general curiosity about how our invisible electromagnetic environment works.