Table of Contents >> Show >> Hide
- What “Loose Carpet” Usually Means (and Why It Happens)
- Quick Diagnosis: Which Type of Loose Carpet Are You Fixing?
- Tools and Materials: What You’ll Actually Use
- Fix #1: Reattach a Loose Carpet Edge (Baseboard or Doorway)
- Fix #2: Remove Carpet Ripples and Wrinkles by Re-Stretching
- Fix #3: Repair a Small Bubble or Localized Loose Spot
- Fix #4: How to Fix Loose Carpet on Stairs
- Fix #5: Tack Strip or Padding Problems (The “Why It Won’t Stay Fixed” Category)
- Common Mistakes (So You Don’t Make the Carpet Worse)
- When to Call a Pro (and Save Your Weekend)
- How to Keep Carpet From Getting Loose Again
- Real-World Experiences: What Loose Carpet Looks Like in Actual Homes (and What Works)
A loose carpet is basically your floor’s way of saying, “I’d like to become an obstacle course now.” One day it’s a tiny ripple,
the next day it’s a full-on wave that tries to trip you while you’re carrying soup. The good news: in many cases, you can repair
loose carpet without replacing itby reattaching the edges, re-stretching the field, and fixing the real reason the carpet got
slack in the first place.
This guide walks you through the most common “loose carpet” situations (wrinkles, buckles, bubbles, loose edges, doorway lift,
and loose stair carpet), what tools actually help, and how to decide whether you’re in DIY territory or “call a pro before you
invent new swear words” territory.
What “Loose Carpet” Usually Means (and Why It Happens)
Carpets don’t loosen out of spite. They loosen because something changed: the environment, the tension, or the structure holding
them in place. Most wall-to-wall carpet is installed with a stretch-in method: the carpet is stretched tight and hooked onto
tack strips (also called tackless strips) around the perimeter. When tension drops, the carpet has nowhere to go but upinto
ripples and wrinkles.
Common causes of loose carpet
- Improper stretching during installation (the #1 reason for ripples).
- Humidity and temperature swings that relax backing and padding over time.
- Heavy furniture dragged around (or “scooted” repeatedly) pulling the carpet off the tack strip.
- Worn, broken, or loose tack stripsespecially near doorways and high-traffic lanes.
- Old or crushed padding that no longer supports tension evenly.
- Water or moisture issues (leaks, wet cleaning, damp basements) that can distort backing or subfloor.
- Seam stress where glued seams or seam tape begins to separate and the carpet relaxes nearby.
Quick Diagnosis: Which Type of Loose Carpet Are You Fixing?
Before you grab tools, take two minutes to identify what’s actually happening. The right fix depends on where the looseness is
and what’s holding the carpet (or not holding it).
1) Loose along the edge or at a doorway
The carpet lifts near the baseboard or transition strip, but the rest of the room looks mostly flat. This is often a tack strip,
doorway transition, or re-tucking problemnot a full-room stretching problem.
2) Ripples/wrinkles/buckles across the room
Waves appear in open areas (hallways, living rooms, bedrooms). If you can push a wrinkle and “move” it like a little carpet ocean,
the carpet needs to be re-stretched (usually with a power stretcher in standard-sized rooms).
3) A small bubble or localized looseness
One small area is puffyoften near where furniture sat, where padding shifted, or where the carpet was pulled sideways. Small
ripples sometimes respond to a targeted re-stretch from the nearest wall.
4) Loose carpet on stairs
Stairs are their own universe. Loose stair carpet can be caused by loosened staples/tacks, worn gripper, or tension loss along
the nose of the step.
5) Seams splitting or fraying
If the seam is opening up, stretching alone won’t “glue” it back together. You may need seam repair (and then stretching to keep
stress off the seam).
Tools and Materials: What You’ll Actually Use
You don’t need a truck full of professional gear, but you do need the right kind of leverage. If you’re fixing room-wide wrinkles,
the correct stretcher matters more than enthusiasm.
Helpful tools
- Knee kicker: Good for positioning carpet and small adjustments (closets, small sections, edges).
- Power stretcher: The real solution for most room-sized ripples and buckles. Often rentable.
- Carpet tucker / stair tool: For tucking carpet into the gap at baseboards or along stair edges.
- Pliers or carpet puller: To lift carpet off tack strips without shredding your hands.
- Utility knife + fresh blades: For clean trimming (dull blades = frayed edges).
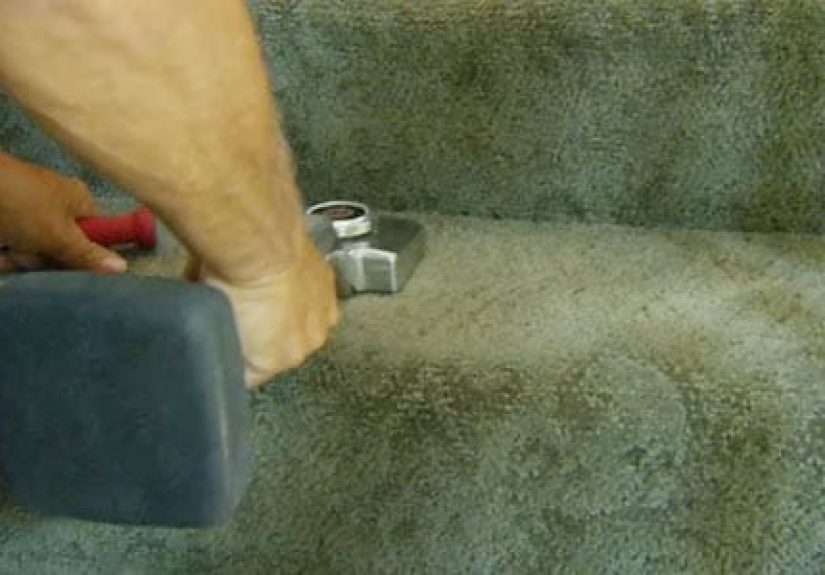
- Hammer or rubber mallet: To help set carpet onto tack strips and reinstall transitions.
- Staple gun: Common for stairs and some edge situations.
- Replacement tack strip / fasteners: If existing strips are broken or won’t hold.
- Transition strip hardware: If the doorway strip is missing or bent.
Safety basics (quick but important)
- Wear knee pads (your knees are not rental equipment).
- Use gloves around tack stripsthey are basically tiny floor piranhas.
- Cut away from your body, and keep fingers clear when stretching and hooking carpet.
- If you suspect moisture issues, fix the leak first or you’ll be back here againsoon.
Fix #1: Reattach a Loose Carpet Edge (Baseboard or Doorway)
If the carpet is loose only at the perimeter, you may not need to stretch the entire room. Many edge issues come down to the
carpet slipping off the tack strip, or the edge not being tucked and protected properly.
Step-by-step: loose edge at a wall
-
Clear the edge. Remove any quarter-round molding if it blocks access (some rooms have it, some don’t). Vacuum the
edge so you’re not installing dust bunnies permanently. -
Lift the carpet carefully. Use pliers to grab the carpet near the edge and gently pull up to unhook it from the tack strip.
Don’t yank; you’re not starting a lawn mower. -
Inspect the tack strip. If it’s broken, rotted, missing nails, or loose from the subfloor, it won’t hold tension. Replace the
damaged section (more on that below). -
Rehook the carpet. Pull the carpet snug toward the wall and press it down onto the angled tacks so the backing catches.
A knee kicker can help with a small snug-up here. - Tuck the edge neatly. Use a carpet tucker to push the edge down into the gap between tack strip and baseboard for a clean finish.
Step-by-step: loose carpet at a doorway
- Remove the transition strip if it’s a metal or wood piece holding the edge down.
- Check the carpet edge for fraying. If it’s badly frayed, you may need to trim a thin strip and re-seat it.
- Verify the tack strip and subfloor at the threshold. Doorways take a beating; tack strips here often loosen first.
- Pull snug and reseat the carpet onto the tack strip, then reinstall or replace the transition strip.
- Test with a shoe shuffle (technical term): if it stays flat when you scuff it, you’re winning.
Fix #2: Remove Carpet Ripples and Wrinkles by Re-Stretching
If your carpet has waves across the room, you’re dealing with lost tension. The correct repair is to unhook the carpet at one edge,
stretch it back to proper tension, and hook it onto the tack strip again. Here’s the key point many DIYers miss:
a knee kicker is great for positioning, but a power stretcher is the tool that properly tensions a full room.
When a knee kicker is enough
- Small closet carpet that loosened near the door
- A tiny ripple right along one wall
- Minor slack after you reattached one edge
When you should use a power stretcher
- Most bedrooms, living rooms, hallways, and open areas with visible ripples
- Wrinkles you can see from across the room (or feel underfoot)
- Repeated buckling that comes back after “temporary fixes”
- Rooms with standard carpet + separate pad (the most common setup)
Step-by-step: re-stretching a room (the reliable method)
-
Empty the room (or at least the work zone). Stretching works best when you can access full wall lengths. Move furniture out
or pile it in the center and work one half at a time. -
Pick your starting wall. Typically, you unhook the carpet along one wall where the wrinkles “aim.” Often that’s the wall closest
to the biggest ripple peak. -
Unhook the carpet from the tack strip. Use pliers and lift gently. Roll the carpet back a bit to expose the tack strip and the
gap where it tucks. -
Set the stretcher. With a power stretcher, brace the padded end against the opposite wall (use a protective board if needed) and
position the toothed head on the carpet backing (not just the surface fuzz). With a knee kicker, set the teeth a few inches from the edge. -
Stretch toward the tack strip. Apply tension in controlled increments. The goal is smooth and tautnot “guitar string”
tight. Over-stretching can stress seams and backing. -
Hook the carpet onto the tack strip immediately. While the carpet is under tension, press it down so the backing catches the tacks.
Work from the corner outward in small sections so tension stays even. -
Repeat in sections along the same wall. Move the stretcher head a bit, stretch, hook, stretch, hook. This prevents one tight
spot and three loose spots. -
Trim and tuck. If extra carpet now extends beyond the tack strip line, trim carefully with a sharp blade, then tuck the edge
into the gap for a clean finish. -
Stretch the adjacent walls as needed. Big wrinkles often require working more than one wall. If ripples run diagonally, you may
need to follow a sequence around the room to distribute tension evenly.
Example: If a hallway carpet has a long ripple running down the center, the best repair often involves unhooking and power-stretching
from one end toward the other, then checking both side edges near the doorway where the carpet frequently slips first.
Fix #3: Repair a Small Bubble or Localized Loose Spot
Small bubbles are tempting because they look like they should be fixable with “one weird trick.” (Spoiler: the one weird trick is
still stretching.) What you want is to pull slack back toward the nearest anchoring point so the bubble flattens and stays flat.
Targeted approach
- Find the nearest wall edge in line with the bubble (usually the shortest path to a tack strip).
- Unhook a short section of carpet along that wall (often a few feet is enough).
- Use a knee kicker for minor slack or a power stretcher if the bubble is stubborn.
- Hook the carpet back down and check the bubble area. Repeat with slightly more tension if needed.
If the bubble returns quickly, check the padding underneath. A shifted or bunched pad can create recurring puffiness. In that case,
lifting and resetting or replacing a section of padding may be part of the real fix.
Fix #4: How to Fix Loose Carpet on Stairs
Stairs are high-impact and high-risk: loose carpet on steps is a safety issue, not just a cosmetic one. Stair carpet is typically
secured with staples or tacks (and sometimes gripper/tack strip placement depends on the stair style).
Step-by-step: tightening a loose stair runner or stair carpet section
- Start at the loose areaoften the stair nose (the front edge of the step) or along the side.
- Carefully lift the edge enough to see how it’s secured (staples, tacks, or gripper).
- Pull the carpet taut toward the back of the tread or down toward the riser, keeping it centered.
- Re-secure with staples where appropriate (commonly under the nose or in the crease where tread meets riser).
- Set the carpet cleanly using a stair tool so it hugs corners and edges without puckers.
Pro tip: If multiple steps are loose or the carpet is coming free along the entire staircase, the best outcome is often a full
re-tightening from top to bottom so tension is consistent. Half-fixes on stairs can shift the looseness to the next step like a
game of “carpet whack-a-mole.”
Fix #5: Tack Strip or Padding Problems (The “Why It Won’t Stay Fixed” Category)
If you stretch carpet perfectly but it won’t hold, the anchoring system may be failing. Tack strips can split, pull up from the
subfloor, or lose gripping powerespecially on concrete, near doorways, or in older installs. Padding can also compress permanently,
making the carpet feel loose even when it’s technically stretched.
Signs you may need to replace tack strip
- The strip wiggles or lifts when you tug the carpet edge.
- Tacks look flattened, broken, or missing in patches.
- The carpet edge repeatedly slips off in the same spot.
- You see wood damage (splitting/rot) or persistent moisture staining.
Basic tack strip replacement overview
- Remove the old strip carefully (pry up gently; mind the tacks).
- Install a new strip along the perimeter with the pins angled toward the wall and a small gap to allow tucking.
- Re-stretch and rehook the carpet so it seats firmly and evenly.
Padding issues are trickier. If a pad is damp, moldy, or crumbling, replacing that section (or the full pad in severe cases) may be
the only way to stop recurring looseness.
Common Mistakes (So You Don’t Make the Carpet Worse)
-
Trying to “flatten” wrinkles with heat or steam. It may look better for a moment, but it doesn’t restore tensionand some methods
can damage backing or adhesive in seams. -
Overusing a knee kicker for full-room ripples. It’s great for positioning, but not a substitute for power stretching in typical
room sizes. - Cutting too much carpet at the edge. Trim only after the carpet is properly seated and you’re sure there’s excess.
- Ignoring moisture. If the subfloor is damp, the carpet can loosen againand you may create bigger problems than wrinkles.
- Leaving wrinkles for “later.” Ripples that sit long enough can form creases that may not fully disappear, even after stretching.
When to Call a Pro (and Save Your Weekend)
DIY carpet repair is doable, but there are times when hiring a professional is the smarter moveespecially because pros already own
the stretcher, the know-how, and the emotional stability to deal with carpet corners.
Strong “call a pro” signals
- Large room wrinkles where a power stretcher is required and you’re not comfortable renting/using one.
- Patterned carpet (misalignment becomes obvious fast).
- Multiple seam issues or seams that are separating.
- Suspected backing delamination (carpet layers separating)stretching won’t solve a material failure.
- Flooding/water damage where pad and subfloor condition matter as much as surface appearance.
How to Keep Carpet From Getting Loose Again
Once your carpet is flat and tight, a few habits help it stay that way longer:
- Control indoor humidity when possible (especially in muggy seasons or damp basements).
- Use furniture coasters and lift heavy items instead of dragging them.
- Be careful with wet cleaningover-wetting can stress backing and padding.
- Fix doorway transitions promptly so edges don’t start lifting and unraveling.
- Address small ripples early before they become creases.
Real-World Experiences: What Loose Carpet Looks Like in Actual Homes (and What Works)
To make this feel less like a textbook and more like real life, here are a few common “loose carpet stories” homeowners run into
plus the lessons that usually come with them. If any of these sound familiar, congratulations: your house is normal, and your carpet
is just being dramatic.
The “Summer Humidity Hallway Wave”
A long hallway suddenly develops ripples right down the traffic lane, usually right after a stretch of humid weather. People often
try the quick stuff first: extra vacuuming, “walking it flat,” or placing heavy books like they’re training a wrinkle to behave.
Sometimes it improves for a day, then pops right back up. The reliable fix is almost always a proper re-stretch from one end of the
hall, because humidity didn’t create new carpetit just revealed that tension wasn’t locked in well enough. When done early, the
hallway can look brand-new again. When ignored for months, the ripple can form a crease that still shows faintly even after the
carpet is tightened.
The “Doorway Edge That Keeps Escaping”
Doorways are where carpet edges go to start a new life. The symptoms are classic: the edge lifts, the transition strip looks bent
or loose, and the carpet starts to fray like it’s auditioning for a distressed denim brand. Many times the room itself is fineonly
that edge is looseso a full-room stretch would be overkill. The fix is usually: remove the transition strip, reseat the carpet onto
a solid tack strip, trim only if necessary, and reinstall (or replace) the transition. The lesson: doorway hardware matters. If the
strip is missing screws or doesn’t sit flush, it’s not “just cosmetic”it’s the guardrail keeping your carpet from unraveling.
The “Furniture Shuffle Bubble”
This one shows up after rearranging a room: a couch gets slid, a recliner gets nudged, or a bed frame gets rotated. Suddenly there’s
a puffed spot nearby. Often it’s not that the whole carpet is looseit’s that the carpet shifted sideways slightly while anchored,
leaving slack to gather in one area. A targeted re-stretch from the nearest wall frequently solves it, especially if the bubble is
small and caught early. The lesson here is simple and slightly annoying: lifting furniture is kinder than sliding it. (Your back may
disagree, but your carpet will send a thank-you note.)
The “Stair Slip Surprise”
Loose stair carpet has a special talent for appearing right when someone is wearing socks. The carpet may feel a little “floaty” on
one step, or the runner puckers at the nose. The best repairs usually involve pulling the carpet taut and re-stapling in the correct
locationsespecially under the stair nose and in the crease where tread meets riserso tension is restored where feet land. The
lesson: stairs aren’t a place for temporary tape fixes. If the carpet moves underfoot, treat it like a safety repair, not a décor
tweak.
The “Why Does It Keep Coming Back?” Mystery
Sometimes a homeowner re-stretches a room and feels victorious… until the ripple returns a few weeks later. That’s often a clue that
the tack strip isn’t holding well (loose nails, broken strip, weak grip) or the padding underneath is crushed and uneven. In these
cases, stretching is necessary but not sufficientlike washing a car while the windshield is still leaking. The durable solution is
to repair the holding system (replace tack strip sections, address moisture, replace bad padding if needed) and then stretch again
so the tension has something solid to anchor to. The lesson: if a wrinkle returns quickly, it’s not youit’s the structure.
If you take one thing from these scenarios, make it this: loose carpet is usually fixable, especially when you address both the
tension and the reason tension was lost. Do that, and your carpet can go back to being a floorrather than a prank.