
Table of Contents >> Show >> Hide
- Before You Paint: The Shortcut That’s Actually Slower (And What to Do Instead)
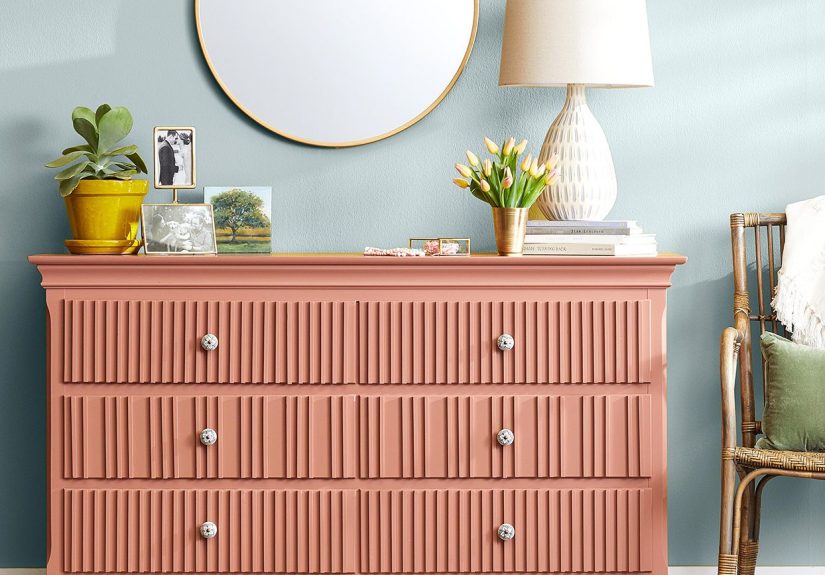
- 16 Clever Painted Furniture Ideas for a DIY Style Boost
- 1) Two-Tone Dresser: High-End Contrast in One Afternoon
- 2) Color-Blocked Shapes: Painter’s Tape = Instant Graphic Design
- 3) Ombre Drawers: The “Gradient” That Makes People Stare (In a Good Way)
- 4) Painted Drawer Interiors: A Secret Pop of Color
- 5) Dip-Painted Legs: The Furniture Version of Great Shoes
- 6) “Just the Doors” Cabinet Refresh: Maximum Impact, Minimal Effort
- 7) Stenciled Pattern: Wallpaper Energy Without the Wallpaper Commitment
- 8) Striped Sides: A Sneaky Way to Add Pattern
- 9) Painted “Frame” Border: Make Flat Panels Look Expensive
- 10) Checkerboard Top: Classic Diner Charm or Modern Graphic Cool
- 11) Painted Cane/Rattan: Keep the Texture, Change the Mood
- 12) Faux Woodgrain Over Paint: The “Wait, That’s Not Real?” Effect
- 13) High-Gloss “Lacquer Look”: Sleek, Modern, and Surprisingly DIY-able
- 14) Distressed Vintage Finish: Cottage Charm Without the “Grandma Basement” Vibes
- 15) Painted Scallops or Arches: Soft Shapes That Feel Fresh
- 16) “Rainbow” DrawersBut Make It Grown-Up
- Finishing Touches: Protect the Paint, Then Let It Actually Get Hard
- of Real-Life DIY Painting Experiences (So You Feel Less Alone)
- Conclusion
Painting furniture is the fastest legal way to give a room a personality upgrade. (No permits. No drywall dust.
No mysterious “extra screws” left over.) With the right paint plan, a tired dresser becomes a statement piece,
a bland side table turns into a color-pop sidekick, and a thrift-store chair suddenly looks like it has an agent.
The best part: you don’t need to be “artsy.” You need a good brush (or roller), painter’s tape, and the patience
to let coats dry instead of panic-painting everything in one go like you’re racing the sunset. Below are 16 clever
painted furniture ideasplus the prep and finishing moves that keep your DIY furniture makeover looking crisp,
not “I sneezed while holding a paintbrush.”
Before You Paint: The Shortcut That’s Actually Slower (And What to Do Instead)
If painted furniture fails, it usually fails for one of three reasons: the surface was dirty, the surface was too slick,
or the finish wasn’t protected for how the piece is used. Fix those three, and you’re 90% of the way to a durable,
smooth finish.
Quick prep checklist (the “future-you will be grateful” edition)
- Clean first. Furniture holds invisible oils (hands, cooking residue, sprays). Use a degreasing cleaner and let it dry fully.
- Scuff the shine. Glossy finishes need light sanding (often 120–220 grit) or a liquid deglosser so primer can grip.
- Prime with purpose. Use bonding primer for slick surfaces (laminate, factory finishes), stain-blocking primer for knotty wood or mystery stains.
- Choose the right paint. Furniture does best with durable enamels, cabinet/trim paints, or specialty furniture paints.
- Thin coats win. Two to three thin coats beat one thick coat (less dripping, better leveling, fewer brush marks).
- Sand lightly between coats (optional but magical). A quick scuff with a fine sanding sponge can help you get that pro-smooth look.
- Ventilate. Paint is not a candle. Open windows, use a fan, and don’t marinate in fumes.
Paint types in plain English
- Water-based acrylic/latex: Easy cleanup, low odor, great for many projectschoose one labeled for cabinets/trim or furniture for tougher wear.
- Water-based “urethane” enamel: Popular for furniture because it levels nicely and cures hard.
- Oil/alkyd: Very durable and smooth, but higher odor and longer dry times. Use only with great ventilation.
- Chalk-style paints: Matte, forgiving, and great for vintage looksoften benefit from wax or a clear topcoat depending on use.
- Milk paint (modern versions): Durable, matte, and great for a historic look; can be topcoated for extra protection on high-use surfaces.
16 Clever Painted Furniture Ideas for a DIY Style Boost
These ideas work because they use paint strategically: to highlight shape, create contrast, fake expensive details,
or add pattern without needing a design degree. Pick one idea for a quick winor combine two for a “how much did
you pay for that?” result.
1) Two-Tone Dresser: High-End Contrast in One Afternoon
Paint the dresser body one color and the drawer fronts another. This instantly modernizes basic furniture and makes
even a thrifted piece look intentional.
- Try: Warm white frame + deep navy drawers, or greige frame + olive drawers.
- Pro tip: Keep hardware consistent (same finish) so the two-tone look reads “designer,” not “leftover paint.”
2) Color-Blocked Shapes: Painter’s Tape = Instant Graphic Design
Color blocking isn’t just for walls. Add angled blocks on drawer fronts, a big rectangle on a cabinet door, or a half-circle “sunrise” on a nightstand.
- How: Base coat first, let it dry, tape your design, then add the second color.
- Pro tip: Seal the tape edge with a light swipe of the base color before the accent color to reduce bleed.
3) Ombre Drawers: The “Gradient” That Makes People Stare (In a Good Way)
Paint drawers from darkest at the bottom to lightest at the top (or vice versa). It’s playful but still sophisticated if you stick to one color family.
- Try: Four shades of blue-gray on a tall chest, or soft greens on a dresser in a nursery.
- Pro tip: Label drawer backs so you don’t mix up the order after drying.
4) Painted Drawer Interiors: A Secret Pop of Color
Keep the outside calm, paint the inside loud. Every time you open a drawer, you get a tiny confetti moment.
- Try: White dresser + mustard drawer interiors, or black nightstand + emerald interiors.
- Bonus: Line drawers after curing for a polished finish and fewer “sock snags.”
5) Dip-Painted Legs: The Furniture Version of Great Shoes
Paint just the bottom third of table legs or chair legs. It’s modern, quick, and surprisingly forgiving.
- Try: Natural wood top + dipped matte black legs, or pastel tips on a kid’s stool.
- Pro tip: Use a level and wrap painter’s tape evenly around each leg for a crisp line.
6) “Just the Doors” Cabinet Refresh: Maximum Impact, Minimal Effort
On a hutch or cabinet, paint the doors a bold color and leave the frame neutral. This highlights the architecture and looks custom-built.
- Try: Cream cabinet + deep teal doors + brass pulls.
- Pro tip: Paint doors flat on sawhorses to reduce drips and help leveling.
7) Stenciled Pattern: Wallpaper Energy Without the Wallpaper Commitment
Stencil a repeating pattern on drawer fronts or cabinet doors for a high-detail lookespecially on flat, boring surfaces.
- Try: A damask stencil on a bedroom bureau or a geometric stencil on a console table.
- Pro tip: Use less paint on the stencil brush than you think you need. “Dry-ish” is your friend.
8) Striped Sides: A Sneaky Way to Add Pattern
Paint stripes on the sides of a dresser, bookshelf, or rolling cart. From the front it looks classic; from the angle it looks like you hired a stylist.
- Try: Thin pinstripes in the same color family for a subtle look, or chunky stripes for bold style.
- Pro tip: Measure once, tape twice. (Okaymeasure twice, tape once. You know what I mean.)
9) Painted “Frame” Border: Make Flat Panels Look Expensive
Paint a thin border around drawer fronts or cabinet doors, leaving the center a different color. It mimics inlay and adds structure.
- Try: A 1/2-inch border in gold or charcoal over a soft neutral base.
- Pro tip: A small artist brush helps the corners look sharp instead of blobby.
10) Checkerboard Top: Classic Diner Charm or Modern Graphic Cool
A checkerboard tabletop (or cabinet top) turns a simple piece into a focal point. Works great on side tables, plant stands, and coffee tables.
- Try: Black-and-cream for classic, or two muted tones (sage + ivory) for a softer look.
- Pro tip: Topcoat is non-negotiable heretables get abused.
11) Painted Cane/Rattan: Keep the Texture, Change the Mood
If your piece has cane panels, you can paint them to refresh the look while keeping the woven detail.
It’s especially striking on cabinet doors and chair backs.
- Try: Paint cane the same color as the frame for modern, or paint it black on a light frame for contrast.
- Pro tip: A sprayer or spray paint can reach the weave more evenly than a brush.
12) Faux Woodgrain Over Paint: The “Wait, That’s Not Real?” Effect
Use a wood-graining tool over a base coat to mimic wood tones on laminate or mismatched surfaces. It’s an optical illusion for furniture.
- Try: Warm tan base + slightly darker glaze dragged with the graining tool.
- Pro tip: Practice on cardboard first so your first attempt isn’t on the coffee table everyone touches.
13) High-Gloss “Lacquer Look”: Sleek, Modern, and Surprisingly DIY-able
A glossy finish can look ultra-modernespecially on mid-century silhouettes. The secret is smooth prep and patient coats.
- Try: Glossy black on a low console, or glossy coral on a bar cart.
- Pro tip: Use a foam roller for flatter surfaces and a high-quality brush only where needed.
14) Distressed Vintage Finish: Cottage Charm Without the “Grandma Basement” Vibes
Distressing works best when it’s intentional: edges, corners, and hardware areasplaces real wear would happen.
- Try: A chalk-style paint in dusty blue, then lightly sand edges once fully dry.
- Pro tip: Stop before it looks “over-sanded.” The line between charming and chaotic is… thin.
15) Painted Scallops or Arches: Soft Shapes That Feel Fresh
Add a scallop trim effect along the bottom edge of a dresser, or paint an arch on cabinet doors.
These shapes make furniture feel playful but still polished.
- Try: A pale peach arch on a white nightstand, or scallops in a slightly darker shade of the base color for subtle texture.
- Pro tip: Use a round object (plate, bowl) to trace consistent curves.
16) “Rainbow” DrawersBut Make It Grown-Up
Paint each drawer a different color, but stay within a tight palette so it looks curated, not like a spilled crayon box.
- Try: Five muted earth tones, or a monochrome gradient from light to dark.
- Pro tip: Repeat one color somewhere else in the room (a pillow, art, or rug) so the dresser feels connected.
Finishing Touches: Protect the Paint, Then Let It Actually Get Hard
“Dry” and “durable” are not the same thing. Paint can feel dry to the touch long before it fully hardens (cures).
Treat fresh paint gently for the first couple weeks: avoid dragging objects, don’t stack heavy items, and don’t scrub it like you’re auditioning for a cleaning commercial.
Do you need a topcoat?
- High-use surfaces (tabletops, desks, frequently handled drawers): A clear topcoat is often worth it for scratch and water resistance.
- Lower-use pieces (decorative cabinet, occasional chair): You may not need a topcoat if your paint is formulated for furniture/cabinets.
- Chalk-style paint: Often benefits from wax or a compatible protective topcoat depending on the look and wear level you want.
Wax vs. water-based clear coat (simple decision guide)
- Wax: Soft, velvety, vintage look. Best for low-traffic pieces and people who don’t mind occasional maintenance.
- Water-based clear coat: Tougher, easier to wipe clean, great for family-life furniture (aka real life).
of Real-Life DIY Painting Experiences (So You Feel Less Alone)
Here’s what usually happens the first time someone tries painted furniture ideas for a DIY style boost:
you start confident, you end confident, and the middle part is a documentary called Why Is This Taking So Long?
The planning phase is pure optimism. You pick a color that looks “coastal calm” on a tiny paint chip and somehow
reads “dentist waiting room” when it’s on a whole dresser. This is normal. Big surfaces amplify undertones, lighting
plays mind games, and your room’s rug is silently judging you. The fix is also normal: test your color on a piece of
poster board, move it around the room, and look at it in morning and night light before you commit. Future-you
will thank you, and present-you will still be dramatic about it. That’s allowed.
Then comes cleaning, which feels unnecessary until you realize how much invisible grime furniture collects. The rag
turns gray. You feel personally offended. You clean again. This is the moment you stop thinking of prep as “boring”
and start thinking of it as “insurance.” It’s also when you learn that glossy furniture is basically a non-stick pan for paint.
Light sanding or a deglosser turns that slippery surface into something primer can actually hold ontolike giving
your paint tiny shoes with traction.
The first coat is always the emotional roller coaster. It looks streaky. It looks patchy. You whisper, “I ruined it,”
despite the fact that paint literally comes in multiple coats. This is where patience becomes your best tool.
Coat one is not the final look; it’s a handshake between the surface and your new color. Coat two is where things
start looking smooth and intentional. Coat threeif you need itis where you start texting people like, “I could open a shop.”
Tape reveals are their own category of joy. Peeling tape off crisp color-blocked edges feels like unwrapping a gift you
actually want. The trick is pulling the tape back on itself slowly and doing it while the paint is dry to the touch but not
rock-hardso you don’t accidentally peel up the finish. And yes, everyone does at least one “oops” corner.
Touch-ups are normal. Your furniture is not auditioning for a microscope.
Finally, the hardest part: leaving it alone. Painted furniture needs time to cure, even when it looks perfect after a day.
The number of people who place a heavy lamp on a newly painted nightstand and then act surprised by a ring mark is…
honestly, most of us. If you can, give your piece a gentle “no stress” weeklight use, soft handling, no aggressive wiping.
Think of it like letting brownies cool: you can cut them early, but you’ll regret it and still eat them anyway.
The payoff for waiting is a finish that looks better, feels smoother, and holds up like you meant it to.
Conclusion
The smartest painted furniture ideas don’t require fancy toolsthey require smart choices: clean well, scuff the shine,
prime when needed, apply thin coats, and protect the finish based on how the piece will be used. Whether you go bold
with color blocking, timeless with a two-tone dresser, or dramatic with an ombre gradient, paint lets you customize
your home in a way that’s affordable, reversible, and genuinely fun. Pick one idea, start with a small piece, and let your
confidence grow coat by coat.


