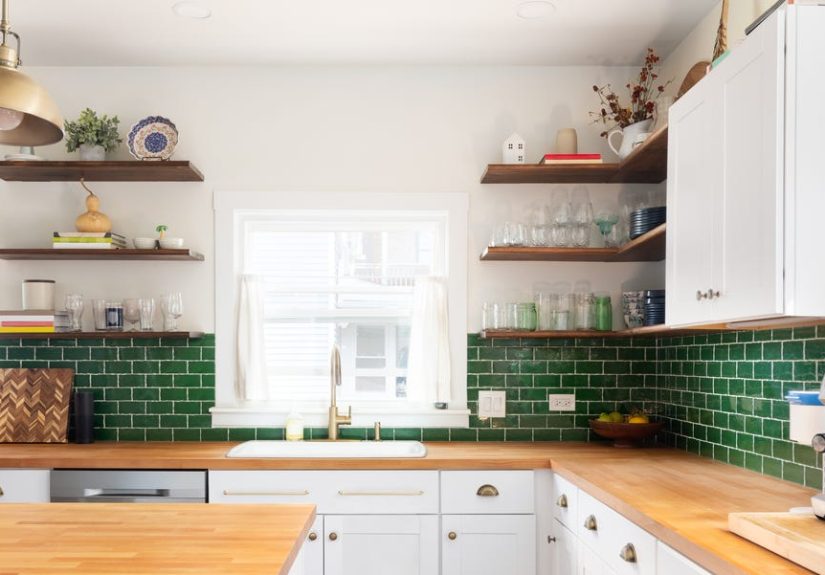
Table of Contents >> Show >> Hide
- Why Make Over an Old Ceiling Fan Instead of Replacing It?
- Safety First (Because Gravity and Electricity Don’t Joke Around)
- Step Zero: Clean It Like You Mean It
- Budget DIY Ceiling Fan Makeover Ideas That Look Expensive
- How to Paint a Ceiling Fan (Without Making a Messy Disaster)
- Easy Style “Recipes” You Can Copy
- Fixing Wobble and Noise While You’re Up There
- When a Makeover Isn’t Worth It
- Budget Breakdown: What a “Wow” Makeover Can Cost
- FAQ: Old Ceiling Fan Makeover on a Budget
- Conclusion: Your Fan Can StayYour 90s Brass Finish Can Go
- Real-World DIY Experiences (500+ Words): What People Typically Run Into
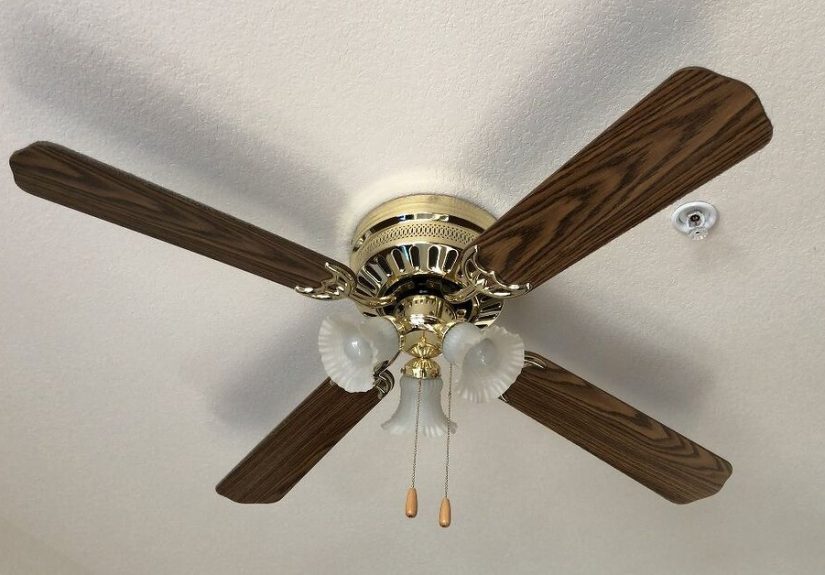
Your ceiling fan is still spinning… but it looks like it time-traveled from 1997 and refuses to come back.
The good news: you don’t have to replace it (or donate an organ) to make it look modern. With a little cleaning,
a little paint, and a few smart swaps, you can give an old ceiling fan a serious glow-up on a very reasonable budget.
This guide walks you through budget-friendly ceiling fan makeover ideas, what’s worth upgrading, what’s not,
and how to get that “wait… is that the same fan?” reaction from anyone who walks into the room.
Why Make Over an Old Ceiling Fan Instead of Replacing It?
Replacing a ceiling fan can be straightforward, but it can also turn into a surprise party you didn’t ask for:
weird wiring, an outdated ceiling box, missing braces, or a fan that’s heavier than it looks. A makeover keeps the
motor and mounting in place (if they’re working well) and focuses on the parts people actually see: finish, blades,
light kit, and hardware.
- Lower cost: Fresh paint + a new shade can cost less than a full new fan.
- Less time: Most makeovers are a weekend project (or a “Saturday + iced coffee” project).
- More style control: You can match your exact decor instead of settling for “close enough.”
- Less waste: If the fan runs smoothly, there’s no reason to toss it.
Safety First (Because Gravity and Electricity Don’t Joke Around)
Before you touch a single screw, turn off the power at the breakernot just the wall switch. Then confirm it’s truly
off with a non-contact voltage tester. If you don’t own one, this is the $15 tool that saves you from becoming a
cautionary tale.
Quick safety checklist
- Power off at the breaker.
- Verify power is off with a non-contact voltage tester.
- Let blades fully stop before cleaning or removing anything.
- Use a stable ladder and keep your workspace clear.
- If the fan wobbles dramatically or the mount feels loose, address that before you “pretty it up.”
If you discover damaged wiring, a cracked mounting box, or anything that seems unsafe, pause the makeover and call a pro.
A stylish fan is great. A fan that stays attached to the ceiling is even better.
Step Zero: Clean It Like You Mean It
Paint won’t stick to a fan that’s wearing a cozy sweater of dust and kitchen grease. Start with cleaning, and do it gently.
A microfiber cloth works well, and the classic “pillowcase method” keeps dust from snowing onto your sofa. If you use any
moisture, keep it minimal and dry blades thoroughlyespecially if the blades are composite (like MDF), which can warp
if they get too wet.
Cleaning supplies that won’t break the bank
- Microfiber cloths or an old pillowcase
- Mild soap + warm water (lightly damp cloth)
- All-purpose degreaser for kitchen-adjacent fans
- Small brush (or old toothbrush) for vents and crevices
Pro tip: Clean the motor housing vents too. Dust buildup can make a fan work harder and sound louderlike it’s sighing
about your renovation timeline.
Budget DIY Ceiling Fan Makeover Ideas That Look Expensive
1) Spray paint the metal housing for a modern finish
If your fan is shiny brass, glossy white, or “mysterious beige,” paint is the fastest style upgrade. Matte black,
satin nickel, warm bronze, or even a soft white can completely change the vibe. The key is prep: clean, scuff sand,
and use the right primer for metal.
- Best for: Brass or dated finishes, scuffs, mismatched decor
- Cost: Usually $10–$25 in primer + paint
- Looks like: A brand-new fan without the brand-new fan price
2) Update or paint the fan blades
Fan blades often date a room more than the motor housing. You can paint them, flip them (many blades are two-sided),
or swap them out. If yours are reversible (for example, dark wood on one side and light wood on the other),
you may already have a “new” look hiding in plain sight.
For painting blades: remove them, sand lightly, wipe clean, then use thin coats. If you want a convincing wood look,
consider a faux wood grain technique or a warm “driftwood” paint tone. Keep it simplesubtle finishes read more expensive.
3) Replace the light shade or globe
Swapping a dated globe instantly modernizes the fan. Many ceiling fan light kits use common fitter sizes, so replacement
shades can be an easy win. Measure carefully before buying: fitter opening size and screw placement matter.
- Best for: “Boob lights,” yellowed glass, overly ornate shades
- Cost: About $15–$60 depending on style
- Style tip: Frosted white glass looks clean and timeless; clear seeded glass feels modern farmhouse.
4) Swap pull chains and finials for small-but-mighty style
Pull chain extensions are cheap, easy, and oddly satisfying. You can find modern minimal pulls, vintage-style pulls,
or fun statement finials (hello, tiny wooden bead tassels). This is the “accessory” steplike changing earrings, but for your fan.
5) Add a light kit (or simplify one)
If your fan has no light, you may be able to add a compatible light kit. If it has an overly fussy multi-light cluster,
you may be able to simplify it with a cleaner shade or a more modern fitter-style kit. Always verify compatibility with
your fan model and follow the manufacturer’s installation instructions.
6) Quiet it down and stop the wobble
A makeover isn’t just about looks. If your fan wobbles, clicks, or rattles, it will still feel oldeven if it’s painted
the prettiest matte black on the planet. Often, wobble comes from loose screws, dust buildup, warped blades, or imbalance.
Tightening and balancing can restore that smooth “new fan” feel.
How to Paint a Ceiling Fan (Without Making a Messy Disaster)
Painting an old ceiling fan is very doable, but it’s all about the sequence. You want to avoid paint in the motor vents,
avoid gunking up moving parts, and avoid a finish that chips the first time someone turns it on.
Tools + materials
- Screwdriver
- Painter’s tape + plastic sheeting or drop cloth
- Degreaser or mild soap
- Fine sandpaper (around 120–220 grit)
- Metal primer (if needed)
- Spray paint or durable enamel
- Disposable gloves + mask/respirator (especially for spray painting)
Step-by-step (fan blades + housing)
- Turn off power at the breaker and verify.
- Remove blades and set screws aside in a labeled cup (because future-you deserves kindness).
- Clean everything thoroughly and let it dry.
- Scuff sand glossy surfaces so primer/paint can grip.
- Mask off anything you shouldn’t paint: vents, labels, wiring openings, and any moving components.
- Prime if you’re painting metal or going from glossy to matte. Light coats are best.
- Paint in thin layers, keeping the can moving. Multiple light coats beat one thick drippy coat every time.
- Let it cure fully before reassembly. Dry-to-touch isn’t the same as cured.
- Reinstall blades, tighten screws evenly, and restore power.
If you spray paint outdoors, choose a calm day with low wind. Indoors, ventilate well and protect surrounding surfaces.
No one wants “matte black overspray chic” on their walls.
Easy Style “Recipes” You Can Copy
Modern matte black makeover (the classic)
- Paint housing + downrod matte black
- Paint blades a warm white or light greige (or swap to light wood blades)
- Replace globe with frosted white glass
- Add simple black pull chains
Soft vintage brass (the “not your grandma’s brass” version)
- Keep brass but tone it down: use a brass-friendly paint in satin or “aged brass”
- Pair with dark walnut blades
- Use clear or seeded glass shade
- Add warm LED bulbs (not the blue-white interrogation-room ones)
Coastal casual (light, airy, forgiving)
- Paint housing bright white
- Paint blades “driftwood” or “sand” tone
- Swap to a simple bowl light kit
- Add a pull chain with a small wood bead detail
Fixing Wobble and Noise While You’re Up There
A wobble can come from surprisingly small issues. Before buying anything, tighten every screw you can access:
blade brackets, blade screws, and the mounting bracket. Then clean dust evenly from all bladesuneven buildup can
throw off balance. If the wobble persists, use a balancing kit (usually a clip + adhesive weights) to identify which
blade is causing trouble and correct it.
Common causes of wobble
- Loose screws on blade brackets or mounting hardware
- Warped or damaged blades
- Dust buildup (especially uneven dust)
- Blade brackets bent slightly out of alignment
If the fan is wobbling aggressively or the ceiling mount feels unstable, stop and inspect the mounting setup. A ceiling
fan should be supported by a fan-rated box or a proper brace system designed for fan loads.
When a Makeover Isn’t Worth It
Most old ceiling fan makeover projects are greatunless the fan is telling you it’s ready for retirement. Consider replacing instead of
refinishing if:
- The motor hums loudly, overheats, or smells “electrical.”
- The fan speed is inconsistent or the fan won’t start reliably.
- The housing is cracked, the mount is compromised, or the wobble is severe even after tightening and balancing.
- You need features your current fan can’t support (remote control, smart control, ultra-quiet motor).
Think of it like shoes: you can clean and polish them, but if the sole is falling off, it’s time.
Budget Breakdown: What a “Wow” Makeover Can Cost
- Cleaner + microfiber cloths: $5–$12
- Sandpaper + tape: $6–$15
- Primer + spray paint: $12–$30
- New shade/globe: $15–$60
- New pull chains: $5–$15
- Balancing kit: $5–$12
Many makeovers land in the $25–$80 range, depending on how many parts you swap.
That’s often less than the price difference between a basic fan and a “nice-looking” fan.
FAQ: Old Ceiling Fan Makeover on a Budget
Can I paint a ceiling fan without taking it down?
You can paint the housing in place if you mask thoroughly, but painting blades is much easier (and cleaner) when removed.
If you’re going for a professional look, removing blades is worth the extra 10 minutes.
What paint works best for a ceiling fan?
A durable spray paint or enamel designed for metal works well on the housing, especially with the right primer.
For blades, thin, even coats matter more than the exact brandthick paint can add weight and create balance issues.
How do I know what size replacement glass shade I need?
Measure the fitter opening (the ring where the shade attaches) and check how the shade is secured (thumb screws, socket ring, etc.).
If you’re unsure, search your fan model and confirm compatible light kit parts.
My fan wobbles a littleshould I worry?
Mild movement is common, but persistent wobble should be addressed. Tighten screws, clean the blades, and use a balancing kit.
If the wobble is severe, inspect the mounting and fan-rated support before running it regularly.
Conclusion: Your Fan Can StayYour 90s Brass Finish Can Go
An old ceiling fan makeover idea on a budget DIY doesn’t have to be complicated. Clean it, tighten it, balance it, then choose
one “big visual change” (paint or blades) and one “quick style upgrade” (shade or pulls). That combination gives you the most impact
for the least money and effort.
And once it’s finished, you’ll look up and think, “Wow. That fan is finally contributing to the room instead of haunting it.”
Real-World DIY Experiences (500+ Words): What People Typically Run Into
If you’ve never tackled a ceiling fan glow-up before, it helps to know what the “real-life” version looks likebecause DIY projects
rarely happen in a perfectly styled home where the dog politely holds the ladder. Here are common experiences DIYers report when doing
an old ceiling fan makeover on a budget, along with the lessons that keep the project fun instead of frustrating.
First, almost everyone underestimates how much dust lives on the top of fan blades. The moment you start wiping, gravity does what it
does best and the dust tries to relocate onto your furniture, your hair, and your soul. The “pillowcase method” (sliding a pillowcase
over each blade and wiping inside it) is popular because it turns the cleanup into a contained situation instead of a dusty confetti
celebration. Many DIYers also learn quickly that a lightly damp cloth is fine, but soaking bladesespecially composite bladescan cause
warping over time. The best approach is gentle cleaning, minimal moisture, and a dry cloth finish.
Next comes the “tiny screw safari.” Ceiling fans have multiple screw types that look identical until you try to put them back and
discover one is slightly longer, slightly shorter, and now nothing lines up. A small organizer (or even labeled sandwich bags)
saves a lot of head-scratching. People who skip this step often end up holding a blade bracket in one hand, a mystery screw in the
other, and questioning every life decision that led to homeownership.
Painting is where the makeover really starts to feel dramaticand where patience pays off. DIYers often report that the first coat looks
disappointing: streaky, uneven, or not “covering” fast enough. That’s normal. Thin coats are the secret. Multiple light passes create a
smoother finish and reduce drips. Another common experience is discovering that masking matters more than expected. A little overspray in
the wrong place can make a vent sticky or leave paint where you don’t want it. People who take a few extra minutes to tape and cover
openings tend to get the “how did you do that?” results.
Then there’s the curing time reality check. Many DIYers feel tempted to reassemble as soon as things are dry to the touchbecause the fan
is right there and it’s hard to resist finishing. But paint that’s dry isn’t always cured, and handling it too soon can leave fingerprints,
dents, or chips that ruin the clean look. A common “aha” moment is realizing that waiting overnight can actually save time because you don’t
have to redo anything.
Finally, wobble fixes are a surprisingly satisfying part of the experience. People often assume wobble means the fan is doomed, but loose
screws and imbalance are frequent culprits. After tightening hardware and cleaning dust evenly, DIYers are often impressed by how much the
wobble improves. If they use a balancing kit, the process can feel oddly scientificmoving a clip, testing, adding a small weightand the
payoff is a fan that runs quietly and smoothly, which makes the makeover feel complete.
The most common overall takeaway? The “budget DIY” part isn’t about doing the cheapest thing possibleit’s about doing the smartest things
that give you the biggest visual and functional upgrade. Clean, prep, paint carefully, and choose one or two upgrades that match your room.
That’s how people end up with a ceiling fan that looks intentional, not “I tried something and now it’s… different.”