Table of Contents >> Show >> Hide
- Why Faux Brick Works So Well in a Laundry Room
- Pick Your Faux Brick Method
- Tools and Materials Checklist (By Method)
- Prep Like a Pro (So Your Wall Doesn’t “Quit” Mid-Project)
- Step-by-Step: Faux Brick Panels + Joint Compound (The Classic Laundry Room Glow-Up)
- Step 1: Measure, Plan Your Layout, and Mark Studs
- Step 2: Cut Panels Cleanly (And Hide Cuts Where They’ll Be Least Noticeable)
- Step 3: Install Panels with Adhesive + Fasteners
- Step 4: Hide Seams and “De-Perfect” the Grout Lines
- Step 5: Let It Dry (Yes, Really)
- Step 6: Sand (or Wet Sand) for the Texture You Want
- Step 7: Prime and Paint (or “German Schmear” the Wall)
- Step 8: Optional Seal for Easy Wipe-Down
- Quick Method: Peel-and-Stick Brick Wallpaper (When You Want Results Tonight)
- Advanced Method: Thin Brick Veneer (For the “Yes, This Is Actually Brick” Crowd)
- Design Ideas That Look Especially Good in Laundry Rooms
- Maintenance and Cleaning Tips (Because Laundry Rooms Are Not Museums)
- Common Mistakes to Avoid (Learn From the Internet’s Finest Regrets)
- FAQ: DIY Faux Brick Wall in Laundry Room
- Conclusion: A Small Room With Big Personality
- DIYer Experiences and Lessons Learned (The Extra You’ll Be Glad You Read)
Your laundry room has one job: turn “mountain of clothes” into “neatly folded pride.”
But if the space looks like a blank drywall box, it’s hard to feel inspiredespecially when your
dryer is thumping like it’s practicing for a drumline.
Enter the DIY faux brick wall: all the character of exposed brick, none of the demolition dust
and “surprise, that wall was structural” panic. Whether you go with faux brick panels,
peel-and-stick brick wallpaper, or thin brick veneer, you can build a laundry-room accent wall
that looks custom, cleans up easily, and makes folding socks feel at least 12% more heroic.
Why Faux Brick Works So Well in a Laundry Room
Laundry rooms are small, hardworking spaces. A brick-look accent wall does three useful things:
- Adds texture fast (which makes the room feel designed, not accidental).
- Hides scuffs and dings better than a perfectly flat wall (because life happens).
- Plays nicely with classic laundry-room stylewhite cabinets, wood shelves, black hardware, vintage signs, baskets, and all the cozy “utility chic” vibes.
The biggest win? You can choose a method that matches your patience level. If you’re in a “weekend warrior”
mood, panels plus joint compound are a sweet spot. If you’re in a “please don’t make me sand anything”
mood, peel-and-stick can be your best friend.
Pick Your Faux Brick Method
Option 1: Faux Brick Panels + Joint Compound (Best Balance of Realism and Effort)
This is the popular “panel wall, then make it look expensive” method. You attach brick-look panels to the wall,
then use joint compound to soften the factory-perfect grout lines, hide seams, and create that old-world,
slightly imperfect brick texture people pay designers to “discover.”
It’s especially great in laundry rooms because it’s durable once painted and sealed (if you choose to seal),
and it handles everyday bumps better than delicate wall finishes.
Option 2: Peel-and-Stick Brick Wallpaper (Fastest, Easiest, Most Forgiving for Renters)
Peel-and-stick brick wallpaper can look surprisingly goodespecially from normal “standing distance,”
also known as “the distance at which you’re not inspecting seams like a detective.”
Prep matters here: smooth, clean walls are the difference between “Pinterest cute” and “wrinkly burrito wrap.”
Option 3: Thin Brick Veneer (Most Authentic, Most Work)
Thin brick veneer is real brick, just sliced thinner. It’s heavier, messier, and more time-consuming,
but it’s also the most convincing because it is brick.
If you want a true masonry look and don’t mind extra steps (and mortar), this is the top-tier option.
Tools and Materials Checklist (By Method)
For Faux Brick Panels + Joint Compound
- Faux brick wall panels (HDF/hardboard or molded panels)
- Measuring tape, pencil, level
- Stud finder
- Construction adhesive (panel-rated)
- Finish nails or screws (and nailer/drill)
- Caulk (paintable) for edges and small gaps
- Joint compound + putty knife / drywall knives (6″ and 10″ are helpful)
- Sanding sponge or damp sponge for wet sanding
- Primer + paint (or limewash-style paint) and brushes/rollers
- Drop cloths, painter’s tape, shop vacuum
- Safety gear: eye protection, dust mask/respirator as needed
For Peel-and-Stick Brick Wallpaper
- Peel-and-stick brick wallpaper
- Level or laser level
- Smoothing tool (or plastic squeegee) + utility knife
- Measuring tape
- Cleaner/degreaser and microfiber cloth
- Optional: wallpaper primer (especially if walls are freshly painted)
For Thin Brick Veneer
- Thin brick veneer + corner pieces (if needed)
- Cement board or approved substrate (follow product requirements)
- Thinset mortar / adhesive system
- Trowels (notched + margin), spacers
- Grout bag or pointing tool
- Bucket, mixing paddle, sponge
- Sealer (optional, depending on finish and location)
Prep Like a Pro (So Your Wall Doesn’t “Quit” Mid-Project)
Laundry rooms add two special challenges: humidity and appliances.
You don’t need to baby the space, but you do want a clean, stable surface and a plan for working around
washer/dryer hookups, vents, and outlets.
-
Clear the wall: Move appliances out if possible. If not, slide them forward enough to work safely.
Take photos of hookups firstfuture you will appreciate it. -
Fix the base wall: Patch holes, scrape off loose paint, and sand down obvious bumps.
Faux brick panels can hide a lot, but they can’t defeat a wall that’s actively crumbling. -
Clean thoroughly: Laundry rooms collect lint, detergent dust, and mystery splatter.
Clean and let the wall dry fully before any adhesive product touches it. -
Check moisture sources: If you have a sink, fix drips. If your dryer vent leaks humidity back inside,
solve that first. Faux finishes love a dry environment. -
Plan your “focal zone”: Most people do the wall behind open shelves, a folding counter,
or the wall you see first when you walk in. That’s the wall that deserves the star treatment.
Step-by-Step: Faux Brick Panels + Joint Compound (The Classic Laundry Room Glow-Up)
This method gives you depth and texture, plus it lets you customize the lookanything from crisp “painted brick”
to soft, rustic “German schmear” vibes.
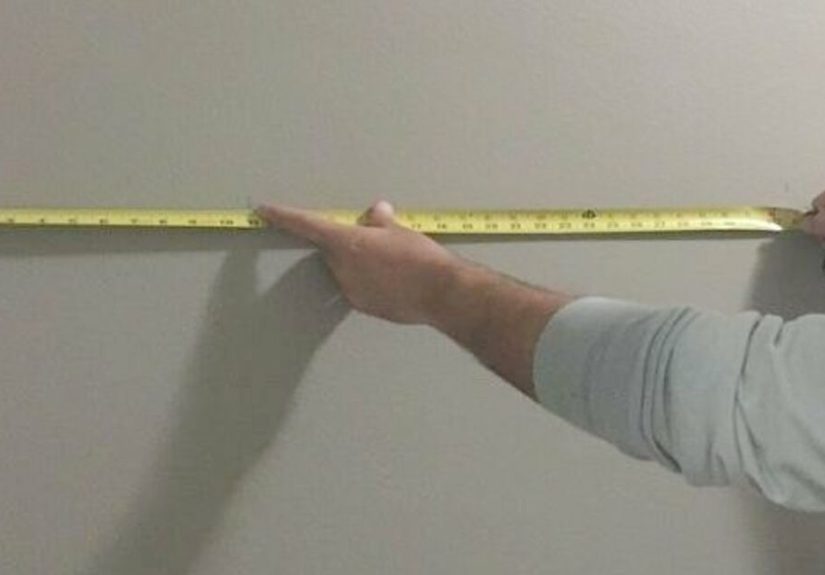
Step 1: Measure, Plan Your Layout, and Mark Studs
Measure the width and height of the wall, then map out how many panels you need.
Use a stud finder and mark studs lightly with pencilthose marks help you place nails/screws where they’ll hold best.
Use a level to mark a straight reference line so your first panel starts perfectly plumb. If the first panel is crooked,
every panel after it will look like it had a long night.
Step 2: Cut Panels Cleanly (And Hide Cuts Where They’ll Be Least Noticeable)
Cut panels to fit around outlets, shelves, or vent covers. A jigsaw is handy for cutouts.
When possible, place factory edges toward the most visible areas and hide cut edges in corners or behind trim.
Step 3: Install Panels with Adhesive + Fasteners
Apply construction adhesive in a pattern recommended for paneling (often beads or zigzags),
then press the panel into place. Add finish nails or screws into studs to lock it in.
Many panel systems recommend using both adhesive and fasteners, plus extra adhesive at overlaps for strength.
Keep checking level as you go. Walls aren’t always square, especially in older homes, so the level is your truth serum.
Step 4: Hide Seams and “De-Perfect” the Grout Lines
Now the magic trick: joint compound.
Use a drywall knife to spread joint compound across the panel surface, pressing it into grout lines and seams.
You can skim the whole surface lightly for a softer, older brick look, or focus on grout lines and seams if you want
the brick faces to stay crisp.
- For a clean painted-brick look: Keep joint compound mostly in grout lines and on seams.
- For a rustic vintage brick look: Drag compound across the brick faces lightly, leaving texture behind.
Step 5: Let It Dry (Yes, Really)
Dry time depends on thickness, temperature, and humidity. As a general rule, many joint compounds recommend
allowing roughly a day between applications, and making sure compound is fully dry before sanding or painting.
In a laundry roomwhere humidity can be higherdry time can stretch longer, so airflow helps.
Step 6: Sand (or Wet Sand) for the Texture You Want
If you want sharper brick faces, sand more. If you want an old-world, slightly irregular look, sand less.
A sanding sponge works, but wet sanding with a damp sponge can cut down on airborne dust for small touch-ups.
Aim to remove ridges and knife lines, not every bit of texturetexture is the point.
Step 7: Prime and Paint (or “German Schmear” the Wall)
If you’re painting, prime first so you don’t need a million coats. Then choose your finish:
- Painted brick: Roll on paint for a uniform, clean look (great in modern laundry rooms).
- Whitewash effect: Thin paint slightly and wipe back areas for a softer “washed” look.
-
German schmear look: Apply a mortar-like coating unevenly so some brick shows through,
creating a rustic, textured finish that feels old and charming instead of brand-new and plastic.
Step 8: Optional Seal for Easy Wipe-Down
If your laundry room is splash-prone (utility sink, kids, dogs, chaotic life), a clear matte sealer can help with wipeability.
Pick a product compatible with your paint and follow label directions. Many people skip sealing on interior accent walls,
but it’s a nice upgrade if you anticipate frequent cleaning.
Quick Method: Peel-and-Stick Brick Wallpaper (When You Want Results Tonight)
Peel-and-stick is all about prep and patience. Measure carefully, clean the wall thoroughly, and use a level so your “brick rows”
don’t drift upward like they’re trying to escape.
- Measure and plan panel placement so seams land in less noticeable areas.
- Start with a plumb line using a level/laserdon’t trust corners to be straight.
- Apply slowly, smoothing as you go to avoid bubbles and wrinkles.
- Trim carefully around outlets and baseboards with a sharp blade.
Pro tip: get a helper. Peel-and-stick behaves better when one person holds and aligns while the other smooths.
It’s basically teamwork therapy, but with more lint nearby.
Advanced Method: Thin Brick Veneer (For the “Yes, This Is Actually Brick” Crowd)
Thin brick veneer is real brick installed like tile. It generally requires the right substrate (often cement board or another approved system),
adhesive/thinset, careful layout, and mortar/grout joints. It’s heavier and more labor-intensive than panels or wallpaper,
but the payoff is maximum authenticity.
If you go this route, follow the brick manufacturer’s installation system carefully and consider your wall structure.
Thin brick adhered veneer is supported by the backing wall/framing and is commonly installed over cement board with appropriate mortar/adhesive systems.
If you’re unsure about weight, substrate, or moisture management, it’s worth getting a pro opinion for peace of mind.
Design Ideas That Look Especially Good in Laundry Rooms
1) The “Shelf Wall” Backdrop
Put faux brick behind open wood shelves. The texture turns basic storage into a styled featurebaskets look intentional,
detergent bottles look curated, and suddenly you’re living in a catalog.
2) Half Wall (Brick Wainscoting)
Install faux brick on the bottom half of the wall, then add a simple cap trim. It protects the wall where laundry baskets bump,
and it looks charming without overwhelming a small room.
3) Utility Sink “Splash Zone”
If you have a sink, faux brick makes a great backdropespecially with a wipeable finish.
Pair it with a simple faucet and a small sconce for a high-impact mini makeover.
4) Moody Brick + Bright Cabinets
Try charcoal or deep gray “brick” with white cabinetry. The contrast feels modern but still warmlike your laundry room got a glow-up
and a good night’s sleep.
Maintenance and Cleaning Tips (Because Laundry Rooms Are Not Museums)
- Dust first: Brick texture can hold lint. A vacuum brush attachment works great.
- Use gentle cleaners: Mild soap and water is usually enough for painted faux brick.
- Wipe splashes quickly: Detergent can get sticky over time, especially on textured surfaces.
- Check edges: If caulk shrinks or cracks near trim, refresh it to keep the finish looking sharp.
Common Mistakes to Avoid (Learn From the Internet’s Finest Regrets)
Mistake 1: Skipping the Level
A faux brick wall that drifts out of level will look “off” even if you can’t immediately explain why.
Use a level early and often. Your eyes will thank you.
Mistake 2: Rushing Dry Time
Joint compound that isn’t fully dry will gum up sandpaper, smear under paint, and generally act like a toddler with a cupcake.
Give it time. Use airflow. Let chemistry do its thing.
Mistake 3: Ignoring Seams Until the End
Deal with seams as you install panels. If you leave big gaps “for later,” later becomes a bigger sanding party,
and nobody invited snacks.
Mistake 4: Over-Texturing in a Tight Space
In a small laundry room, extreme texture can feel busy. If your room is tiny, consider a lighter skim coat,
a cleaner paint finish, or a half-wall application.
FAQ: DIY Faux Brick Wall in Laundry Room
Is faux brick okay in a humid laundry room?
Yesespecially if you manage moisture (good ventilation, no leaks) and use appropriate paint/primer.
If you expect frequent splashes, consider sealing for easier wipe-down.
Will faux brick panels look “fake”?
They can, if you install them crooked, leave visible seams, or use overly glossy paint.
Joint compound and a matte finish are your best friends for realism.
Which method is best for beginners?
Peel-and-stick is the simplest, but panels + joint compound give the most dramatic “wow” for the effort.
Thin brick veneer is more advanced.
Should I do a whole room or just one wall?
In most laundry rooms, one wall is plenty. Accent walls keep the space feeling open and intentional.
Can I install faux brick behind a dryer?
Usually yes, but make sure you’re not interfering with venting, clearances, or access to hookups.
Follow product instructions and keep safety the priority.
Conclusion: A Small Room With Big Personality
A DIY faux brick wall in a laundry room is the kind of makeover that punches above its weight.
It adds warmth, texture, and that “designed on purpose” feelingwithout turning your home into a construction zone.
Pick the method that matches your timeline and tolerance for sanding, and you’ll end up with a space that looks upgraded
every single time you toss in a load.
And if anyone asks why you went through the effort for a laundry room, just smile and say:
“Because I live here, and I deserve nice things… even when I’m wrestling a fitted sheet.”
DIYer Experiences and Lessons Learned (The Extra You’ll Be Glad You Read)
After watching countless DIYers tackle faux brick in laundry rooms, a few themes show up again and againlike lint in the corner
you swear you cleaned yesterday. If you want your project to feel smooth (emotionally and literally), here are the real-world lessons
people tend to learn mid-project, ideally before they’re holding a putty knife at 10:47 p.m. whispering, “One more coat.”
1) Lighting will expose everything. Laundry rooms often have bright overhead lighting, and that means shadows.
Shadows are great when they make your faux brick look dimensional. Shadows are not great when they reveal a seam line that runs
across the wall like a tiny geological fault. DIYers who get the best results treat seams early: they add adhesive where panels overlap,
fasten securely, then use joint compound to feather the seam outward so it disappears gradually. A “wide feather” is more invisible than
a narrow patchkind of like how a wide-area excuse works better than a very specific one.
2) The wall behind appliances is a decision, not an afterthought. Some people remove the washer/dryer and run the faux brick
behind everything. Others stop at the appliance edges, especially if the machines sit tight to the wall and are unlikely to move often.
The best approach depends on your space. If you plan to add shelving, a folding counter, or a hanging rod, run the faux brick behind
the whole feature area so it looks intentional. If you’re doing a single accent wall that’s mostly hidden by machines, consider focusing
on the wall you actually seeyour future self will appreciate not having to contort into a laundry-room yoga pose to finish the last
five inches.
3) “Thin coats” is not a suggestionit’s a sanity strategy. Joint compound is a mood. If you apply it too thick, it takes longer to dry,
clogs sandpaper, and can crack as it shrinks. DIYers who enjoy the process (as much as sanding can be enjoyed) tend to do multiple thin coats,
letting each one dry fully. They also use airflow: a fan, good ventilation, and patience. The surprising part is that the extra time often creates
less work, because thin coats are easier to sand and blend.
4) The “perfect” brick look is usually imperfect. Real brick has variation. That’s the charm. Many DIYers start out trying to keep every grout
line uniform and every brick face smooth. Then they notice the wall looks a little flat or manufactured. The turning point is when they embrace
subtle variation: wiping back a whitewash unevenly, leaving a slightly heavier “smear” in places, or dry-brushing darker paint on a few brick faces
for depth. The goal isn’t chaosit’s realism. Think “historic cottage,” not “brick wall after a paintball game.”
5) Finish matters more than people expect. A matte or eggshell finish tends to look the most brick-like. High gloss can scream “I am paint”
and highlight bumps. If your laundry room is a splash zone (utility sink, muddy dog paws, small humans), a washable paint or a compatible clear
matte sealer can make cleaning easier without turning your wall into a shiny billboard.
The big takeaway: faux brick is one of those projects where the last 10%seams, texture tweaks, paint techniquecreates 90% of the “wow.”
Go slow on the details, and your laundry room will look like it got a designer makeover… even if it still occasionally eats socks.