Table of Contents >> Show >> Hide
- Why Make Your Own Large Concrete Planters?
- What to Know Before You Start
- Tools and Materials You’ll Need
- Step-by-Step: How to Make DIY Large Concrete Planters
- Styling and Finishing Ideas for Concrete Planters
- Planting and Caring for Large Concrete Planters
- Real-Life Lessons & Experiences With DIY Large Concrete Planters
If you’ve ever wandered through a garden center, fallen in love with a giant concrete planter,
checked the price, and quietly backed away like it was a wild animal, this tutorial is for you.
The good news: you can DIY large concrete planters in a weekend, customize them to your style,
and save a serious chunk of money while you’re at it.
In true Hometalk spirit, this guide walks you through everything: from choosing the right mix
and molds to curing, sealing, and styling your planters so they look high-end, not “I mixed
this in my driveway at 11 p.m.” Whether you want a sleek modern cube, a fluted designer look,
or a rustic hypertufa trough that looks like it came from a fancy nursery, you’ll find a method
that works for you.
Why Make Your Own Large Concrete Planters?
1. Huge savings. Extra-large store-bought concrete planters can cost hundreds
of dollars each. A bag or two of concrete mix, some simple molds, and a few hours of work will
usually get you the same size planter for a fraction of the price.
2. Completely customizable. Want an extra-tall planter for a front porch
statement? Prefer a long, low trough for herbs? You decide the shape, size, and texture. You
can even mimic “designer” looks like fluted sides or ultra-smooth, modern finishes.
3. Tough and weather-resistant. When mixed and cured properly, concrete
planters are heavy, stable, and durable. They can stand up to sun, wind, and everyday bumps far
better than thin plastic pots.
4. They look expensive. Concrete, cement, and hypertufa (a lighter, textured
mix made with cement, peat, and perlite) all give that timeless, sculptural look that pairs well
with modern, farmhouse, cottage, or minimalist outdoor spaces.
What to Know Before You Start
Choose the Right Mix
For large planters that need strength, most DIYers choose either:
- Standard concrete mix (like a general-purpose ready-mix with sand and
gravel already included) for sturdy, thick-walled planters. - Portland cement + sand + gravel mixed yourself in roughly a
2:1:1 ratio by volume (two parts cement, one part sand, one part small gravel) for a
strong, smooth finish. - Sand topping mix for planters with thinner walls, sometimes reinforced
with mesh or wire for extra strength.
If you’re going for that aged-stone look instead of pure concrete, you can use a
hypertufa mix: a blend of Portland cement, peat moss, and perlite or
vermiculite. This produces a lighter planter with a slightly rustic, stone-like surface and
great drainageperfect for alpine plants and succulents.
Think About Weight and Location
Large concrete planters are heavy. That’s a feature when you’re trying to keep tall plants from
tipping over, but not so fun when you realize you poured one directly in front of the door
you’re supposed to open. Decide the planter’s final location before you start, and if possible,
pour it where it will live or close enough that you can move it with a dolly or wheeled caddy.
Also plan for where water will go. Outdoor concrete planters need drainage
holes and should be slightly elevated on pot feet, bricks, or shims so water doesn’t
get trapped under the base and cause damage over time.
Safety First
Cement is alkaline and can be irritating to skin and lungs. When mixing concrete, always wear:
- Nitrile or rubber gloves
- A dust mask or respirator when handling dry mix
- Eye protection (splashes happen!)
Work in a well-ventilated area, preferably outdoors or in an open garage. And keep kids and
pets at a safe distanceespecially during mixing and pouring.
Tools and Materials You’ll Need
- Concrete or cement mix (ready-mix bag, or Portland cement plus sand and gravel)
- Large mixing tub, wheelbarrow, or heavy-duty bucket
- Trowel or masonry hoe
- Two molds per planter:
- One for the outside (like a large plastic storage bin, bucket, or
cardboard box) - One for the inside (a smaller bucket, bin, or foam cooler)
- One for the outside (like a large plastic storage bin, bucket, or
- Vegetable oil, spray oil, or mold release
- Duct tape and packing tape
- Scrap wood, bricks, or weights
- Drill with masonry bit (for drainage holes, if not formed during the pour)
- Sandpaper, sanding block, or rubbing stone
- Concrete sealer (water-based and plant-safe)
- Screwdriver, rubber mallet, or utility knife (for demolding)
Step-by-Step: How to Make DIY Large Concrete Planters
Step 1: Plan Your Size and Shape
First, decide what you want this planter to do. Do you need a tall, narrow planter to frame
your entryway? A low, wide trough for herbs? Sketch a quick plan with approximate dimensions.
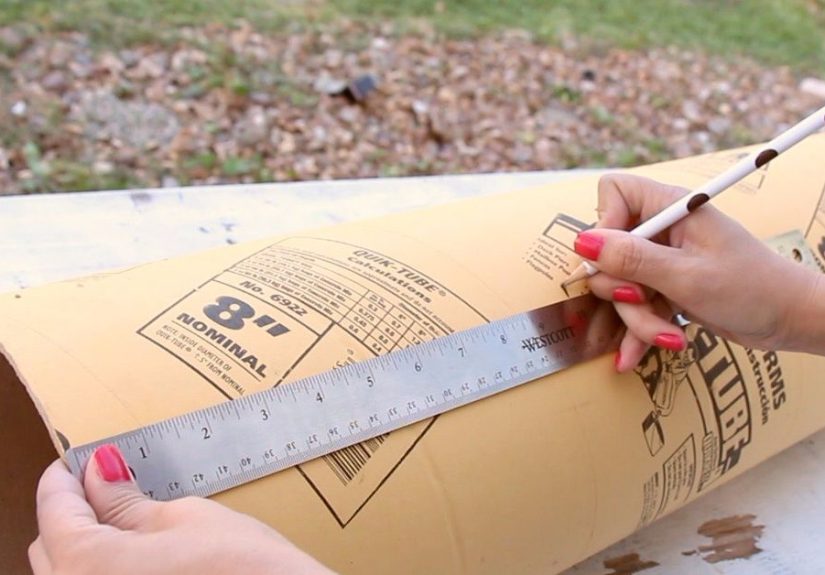
Then, find or build your molds. Easy options include:
- Plastic storage bins for modern, boxy shapes.
- Buckets or trash cans for round planters.
- Cardboard boxes for one-time molds you can cut away later.
- Sand molds: mound damp sand into a shape, then cover with concrete for
organic, sculptural forms.
Whatever you use, the inner mold must fit inside the outer mold with a gap between them for your
concrete wallsusually 1.5–3 inches, depending on how large the planter is and how sturdy you
need it to be.
Step 2: Prep the Molds
Concrete loves to grab onto things, so give yourself a head start by prepping the molds:
- Reinforce flimsy cardboard or thin plastic with tape and scrap wood.
- Spray or wipe the inside of the outer mold and outside of the inner mold with
cooking spray, mineral oil, or mold release. - Mark your desired fill height on the outer mold so you don’t accidentally overfill.
If you’re planning to cast drainage holes, you can tape pieces of foam or dowel to the bottom of
the mold where you want the holes to be. Otherwise, you can drill them once the concrete is
cured.
Step 3: Mix the Concrete
Pour your dry mix into a tub or wheelbarrow and add water slowly, mixing as you go. You’re aiming
for a consistency similar to thick peanut butter or oatmealwet enough to pack
and settle, but not so sloppy that it slumps or separates.
Resist the urge to add too much water. Excess water makes the mix easier to stir, but it also
weakens the final planter and increases the risk of cracking and surface flaking. Take your time
and mix thoroughly, scraping the bottom and sides of the tub.
Step 4: Pour and “Vibrate” the Concrete
Start by adding a layer of concrete to the bottom of the outer mold, pressing it into the
corners to form a thick base. Tap and shake the mold repeatedly to help air bubbles rise to the
surfacethis is what gives you that smooth, solid look instead of Swiss-cheese voids.
Set your inner mold into place and press it down into the wet concrete. Add weights (bricks,
rocks, sandbags) inside the inner mold so it doesn’t float. Then start packing concrete into the
gap between the molds, working your way around and up in layers.
Every few inches, stop and vibrate the mold: tap the sides with a rubber mallet,
shake it gently, or lift and bump it down onto the ground. This removes trapped air and helps
the concrete settle and compact.
Step 5: Create Drainage Holes
If you embedded foam plugs or dowels in the bottom, they’re already forming drainage holes as
you pour. Otherwise, once the concrete has set to a firm but not rock-hard state (often after
several hours, depending on temperature), you can push through with a dowel or metal rod to
create holes.
If you miss that window, don’t worryyou can always drill the holes with a masonry bit after the
planter has fully cured.
Step 6: Cure Slowly for Strength
Concrete gains strength as it cures, and that process likes patience. Once you’ve poured and
finished vibrating:
- Cover the planter with plastic or a garbage bag to slow moisture loss.
- Keep it in a shaded area, out of hot direct sun and strong wind.
- Let it cure at least 24–48 hours before demolding, and ideally keep it
slightly damp for up to a week for maximum strength.
It’s incredibly tempting to peel the mold off early “just to peek.” Try to resist. Early
demolding increases the chances of chipping or hairline cracks.
Step 7: Demold, Smooth, and Seal
When the planter feels solid and the surface looks dry and lightened in color, it’s time for the
most satisfying moment: demolding. Gently flex plastic molds, cut away cardboard, or tap the
outside with a rubber mallet to loosen the planter.
Use a sanding block, fine-grit sandpaper, or a masonry rubbing stone to:
- Knock down sharp edges and drips.
- Smooth out rough spots where air bubbles left pockmarks (unless you like that raw,
industrial look).
Once the surface is dry and dusted off, apply a water-based concrete sealer,
especially inside the planter. This helps reduce lime leaching into the soil and protects your
planter from moisture, staining, and freeze-thaw damage. Look for a sealer labeled safe for use
around plants.
Styling and Finishing Ideas for Concrete Planters
One reason Hometalk-style projects are so addictive is the creative finishing. Here are a few
ideas to make your DIY large concrete planters look custom, not contractor-grade:
- Fluted sides. Line the inside of the outer mold with flexible trim or
half-round dowels before pouring. The concrete will pick up the texture and give you those
trending “ribbed” planters you see all over design blogs. - Color washes. After sealing, add diluted exterior paint or limewash for a
soft, layered look. Neutrals like warm gray, greige, and off-white always feel modern. - Two-tone planters. Tape off the top or bottom section and paint for a
dipped or color-blocked effect. - Hypertufa texture. If you use a hypertufa mix, the planter will naturally
look a bit rustic and stone-like. You can brush off edges with a wire brush after curing to
enhance the aged effect. - Stenciled patterns. Use outdoor-safe paint and simple stencils to add
geometric patterns, numbers, or even house numbers to your planters.
Planting and Caring for Large Concrete Planters
Seal, Then Fill
Before adding soil, double-check that:
- Your drainage holes are open and unobstructed.
- The interior has been sealed with a plant-safe, water-based sealant if you’re worried about
lime affecting sensitive plants. - The planter is elevated on pot feet, bricks, or spacers, especially if it will sit on a
wood deck or patio.
Add a layer of coarse gravel or broken pottery over the drainage holes if you’re concerned about
soil washing out, then fill with a high-quality potting mix (not heavy garden soil) appropriate
for your plants.
Pick the Right Plants
Large concrete planters are ideal for:
- Small trees and shrubs like dwarf evergreens, Japanese maples, or bay
laurel. - Thriller-filler-spiller combos: a tall central plant, mid-height fillers,
and trailing plants along the edges. - Herb or kitchen gardens in long trough-style planters.
- Succulent arrangements in hypertufa planters with excellent drainage.
Seasonal and Winter Care
Concrete handles weather fairly well, but the soil inside can still expand and contract with
freezing temperatures. To help your planters last:
- Avoid waterloggingmake sure excess water can drain freely.
- In very cold climates, move planters closer to the house or to a sheltered area if possible.
- Mulch the surface of the soil in winter to protect roots and reduce freeze-thaw cycles.
With good drainage, a proper mix, and patient curing, your DIY concrete planters should easily
last for many seasons.
Real-Life Lessons & Experiences With DIY Large Concrete Planters
If you talk to people who’ve tried this projectespecially the Hometalk crowdyou’ll hear the
same thing over and over: “My first planter wasn’t perfect, but I’m already planning the next
one.” That’s the magic of concrete. Each project teaches you something that makes the next one
easier, better, and more fun.
The First Planter Is a Teacher, Not a Failure
Many DIYers start with whatever they have on hand: a random tote, a bucket, half a bag of
leftover concrete. The resulting planter might be a little lumpy, a little uneven, or dotted
with air bubblesbut it still looks surprisingly good once it’s filled with plants. That first
attempt shows you:
- How quickly your particular mix sets in your climate.
- How much you need to tap or vibrate the mold to remove air pockets.
- Whether you prefer smoother, more polished finishes or raw, industrial textures.
One common story: someone pours their first planter, checks it the next morning, and panics over
hairline cracks or surface variations. A week later, once it’s fully cured and planted up,
they’re shocked by how “designer” it looks. Concrete has a way of mellowing as it cures
don’t judge it too soon.
Classic Mistakes (So You Can Skip Them)
Every DIY concrete fan has a few “wish I’d known” moments. Here are some greatest hits:
- Using way too much water. It makes mixing easier but weakens the planter.
Results: chalky surfaces, flaking, or edges that crumble when you demold. - Skipping mold release. That “it’ll be fine” moment ends with a plastic bin
permanently fused to your planter. Using a quick spray of oil or release agent is absolutely
worth the 10 seconds. - Not weighing down the inner mold. Concrete flows under and around the mold,
and if it floats, you’ll get uneven wall thickness or a crooked cavity. - Demolding too early. Impatience can lead to chipped corners and cracks.
Give the planter at least a full day, preferably two, before attempting to remove the mold.
Many people also underestimate just how heavy a large planter is. It’s a rite of passage to
build a gorgeous 80-pound planter in the middle of the driveway and then realize you now own an
immovable sculpture. Plan ahead: pour close to where it will live, or have a dolly ready.
Upgrades DIYers Swear By
Once people get hooked, they start experimenting. Some upgrades that frequently earn rave
reviews include:
- Reinforcing with mesh or wire. For very large planters, adding light
reinforcement (like mesh or wire) inside the walls helps prevent cracking and makes lifting a
bit safer. - Double sealing. Sealing inside and out keeps stains, lime leaching, and
weather damage at bay. It also helps paint and limewash finishes last longer. - Batch production. Once you’ve dialed in a mix ratio you like, it’s much
easier to make multiple planters at once. Many DIYers pour two or three matching planters in a
single weekend to get a cohesive look for walkways, patios, or around a pool. - Mixing in style elements. Things like flexible trim for fluting, textured
liners, or even imprinted leaves or patterns in the mold can give each planter a unique,
high-end twist.
Over time, you’ll develop your own style and “house recipe” for concrete or hypertufa. Maybe
you like lighter, more porous mixes for succulent bowls and heavier, smoother mixes for tall
entry planters. The more you experiment, the more dialed-in your planters becomeand the more
your outdoor space starts to look like a custom-designed garden from a magazine, not a big-box
clearance aisle.
In the end, DIY large concrete planters are one of those projects that look intimidating before
you start, but quickly become addictive once you realize how flexible and forgiving concrete
actually is. With a simple mold, a sturdy mix, and a bit of patience during curing, you’ll have
planters that look like they came from a high-end outdoor storeexcept you get to smile every
time you remember you made them yourself.