Table of Contents >> Show >> Hide
- Why Build a Pallet Entryway Table?
- Before You Start: Choosing Safe Pallets
- Tools and Materials
- Project Size and Design Plan
- Step 1: Break Down the Pallets
- Step 2: Clean and Sand the Wood
- Step 3: Cut Your Pieces
- Step 4: Build the Side Frames
- Step 5: Connect the Long Aprons
- Step 6: Attach the Tabletop
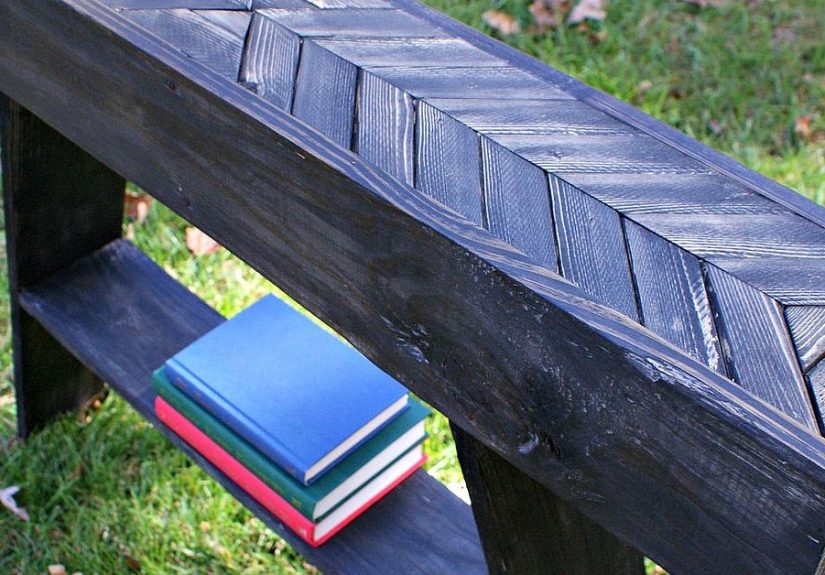
- Step 7: Add the Lower Shelf
- Step 8: Fill, Sand, and Soften the Edges
- Step 9: Finish the Table
- How to Style Your DIY Entryway Table
- Common Mistakes to Avoid
- Why This DIY Is Worth It
- Experiences From Building a DIY Pallet Entryway Table
- Conclusion
Every entryway needs a hero. Not a superhero in a cape, exactly, but at least a hardworking little table that catches keys, corrals mail, and makes your front door area look like you absolutely have your life together. A DIY pallet entryway table does all of that while also giving old wood a second act. It is budget-friendly, surprisingly stylish, and just rustic enough to make guests think you own at least one tasteful woven basket.
If you love reclaimed wood projects, this one hits the sweet spot between practical and charming. You get the character of pallet wood, the function of a narrow console table, and the satisfaction of building something with your own hands. Better yet, this project can be customized to fit tight hallways, roomy mudrooms, or that awkward wall where nothing seems to belong except disappointment.
In this tutorial, you will learn how to choose pallet wood safely, break it down without wrecking your patience, build a sturdy entryway table, and finish it so it looks intentional instead of “I found this behind a warehouse and hoped for the best.” Let’s get into it.
Why Build a Pallet Entryway Table?
A pallet entryway table checks a lot of boxes for DIY fans. First, pallet wood is often inexpensive or free, which means your budget can breathe a sigh of relief. Second, reclaimed wood has natural variation, weathering, nail marks, and grain patterns that make every piece feel unique. Third, an entryway table is one of the most useful pieces of furniture in a home. It creates a drop zone for everyday items, gives you a place for a lamp or mirror, and makes the entry feel finished.
It is also a smart project for beginner to intermediate woodworkers. The structure is simple: a top, legs, aprons, and sometimes a lower shelf. You do not need to build a Versailles armoire here. You just need straight cuts, a square assembly, decent sanding, and enough confidence to say, “Yes, I built that,” when someone asks where you bought it.
Before You Start: Choosing Safe Pallets
This step matters. A lot. Not every pallet should come home with you like a rescue puppy.
Look for clean, dry pallets in decent condition. Avoid any pallet that is painted, heavily stained, warped beyond reason, moldy, or smells strange. If it looks like it survived a chemical spill, a seafood apocalypse, or three monsoons, leave it where it is.
Check for treatment stamps. For indoor furniture, stick with pallets that appear safe and clean, and avoid anything with signs of contamination. Heat-treated pallet wood is the most common pick for indoor DIY furniture because it is the safer bet for reclaimed wood projects. Also inspect for excessive splits, protruding nails, insect damage, and rot. Basically, choose pallets like you choose avocados: a little character is fine, but chaos is not.
Tools and Materials
Tools
- Reciprocating saw or pry bar for pallet disassembly
- Miter saw or circular saw
- Drill/driver
- Pocket hole jig or drill for pilot holes
- Orbital sander
- Clamps
- Combination square or speed square
- Tape measure
- Safety glasses
- Dust mask or respirator
- Work gloves
Materials
- 2 to 3 clean pallets
- Wood glue
- 1 1/4-inch and 2-inch wood screws
- Optional pocket screws
- Wood filler
- Sandpaper: 80, 120, 180, and 220 grit
- Stain, paint, or whitewash finish
- Clear protective topcoat such as polyurethane or polycrylic
- Optional felt pads for the legs
Project Size and Design Plan
A good entryway table is usually narrow enough to fit in a hallway without becoming a shin-hunting device. A practical size for this project is about 42 to 48 inches wide, 10 to 12 inches deep, and 30 to 34 inches tall. That gives you enough surface area for a lamp, tray, and small décor without eating half the walkway.
For this tutorial, we will build a simple pallet console table with:
- A plank-style top
- Four straight legs
- Upper aprons for support
- A lower shelf for baskets or shoes
If your space is extra tight, go shallower. If you want a chunkier farmhouse look, double up the top boards or use beefier leg pieces. Pallet wood is wonderfully flexible like that.
Step 1: Break Down the Pallets
Disassembling pallets is the part where your optimism meets reality. Go slowly.
You can use a pry bar, but a reciprocating saw is often easier and less likely to split the wood to splinters and sadness. Cut through the fasteners where possible, then remove remaining nails carefully. Stack the boards and inspect each one. Save the straightest, prettiest boards for the table top and shelf. Use thicker pieces or doubled boards for the legs and structural parts.
Once the boards are separated, trim off damaged ends. This is also a good time to sort by width and thickness so your build does not turn into a geometry puzzle halfway through assembly.
Step 2: Clean and Sand the Wood
Reclaimed pallet wood almost always needs a lot of sanding. Not a little. A lot. This is where the rustic charm is earned.
Start with 80-grit sandpaper on rough, unfinished boards to knock down splinters, grime, and raised grain. If a board is smoother or already partially finished, 120 grit may be enough to start. Then move to 120 and 180 grit for a cleaner surface. For the top, a final pass at 220 grit gives a nicer hand feel, especially if you do not want guests to leave with a souvenir splinter.
Always sand with proper dust protection and in a ventilated area. Wood dust is no joke, and reclaimed wood can produce plenty of it. Wipe all boards clean before assembly and again before finishing.
Step 3: Cut Your Pieces
Here is a simple cut list for a 44-inch-wide entryway table:
- Top boards: enough boards cut to 44 inches long to create a top about 11 inches deep
- Legs: 4 pieces at 31 inches long
- Long aprons: 2 pieces at 38 inches long
- Short aprons: 2 pieces at 8 inches long
- Lower shelf supports: 2 pieces at 38 inches long and 2 pieces at 8 inches long
- Lower shelf boards: enough boards cut to 38 inches long to form the shelf
If your pallet boards are thin, laminate two together for each leg. Glue and clamp them, then sand the edges flush after they dry. This trick makes the table look more substantial and keeps it from feeling wobbly.
Step 4: Build the Side Frames
Start with two side assemblies. Each side gets two legs, one short upper apron, and one short lower support.
Position the upper apron so it sits just below the top edge of the legs. Place the lower support about 5 to 7 inches above the floor, depending on how tall you want the shelf opening. Attach using pocket screws, or use pilot holes plus wood screws if you do not have a jig. Add glue to strengthen the joints.
Check for square before tightening everything down. Clamps are your friends here. They are not glamorous, but neither is rebuilding a crooked table.
Step 5: Connect the Long Aprons
Once the side frames are built, connect them using the long aprons. Attach one apron near the top on each long side and another set of long supports lower down for the shelf frame.
Measure corner to corner diagonally to check for square. If the diagonal measurements match, you are in good shape. If they do not, adjust before driving the screws home with full commitment. A combination square and clamps help keep everything aligned while you work, and that one extra minute of checking is worth about a hundred minutes of regret.
Step 6: Attach the Tabletop
Lay your top boards side by side and arrange them until the grain and color look balanced. You can leave tiny gaps for a more rustic look or edge-join them tightly for a cleaner finish. If you love the weathered pallet aesthetic, keep a little variation. If you want a more polished entryway table, trim the boards carefully and fit them tighter.
Attach the top from underneath with screws through the aprons, or fasten from above and fill the holes later. Be sure your screws are the right length so they do not punch dramatically through the top and ruin your day.
If you want the top to overhang slightly, leave about 1/2 inch to 1 inch on each side.
Step 7: Add the Lower Shelf
The lower shelf is optional, but honestly, it is the overachiever of this project. It adds storage, stability, and a great place for baskets, boots, or folded throws.
Install the shelf boards across the lower supports. You can space them tightly or leave small gaps between boards. Secure them with screws and glue if needed. If the pallet boards vary slightly in width, that is fine. It can actually add to the reclaimed look, provided the shelf is still level and sturdy.
Step 8: Fill, Sand, and Soften the Edges
Before finishing, do one more detail pass. Set nail heads if needed, fill obvious holes or cracks you do not want to feature, and sand again. Pay special attention to corners and edges. Slightly easing the sharp edges makes the table more comfortable to use and helps it look more finished.
This is the moment where the piece goes from “garage project” to “furniture.” Do not skip it.
Step 9: Finish the Table
You have a few great options here, depending on your style.
Option 1: Natural Rustic Finish
Apply a clear coat to preserve the weathered pallet look. This is perfect if the wood already has beautiful color variation and texture.
Option 2: Stain
Staining enhances the grain and gives the wood a richer look. Popular choices include walnut, provincial, or weathered oak tones for entryway furniture.
Option 3: Paint or Whitewash
Painted bases with stained tops look great in farmhouse, cottage, and modern rustic spaces. Whitewashing is ideal if you want to brighten dark pallet wood without hiding the grain entirely.
Whichever finish you choose, let it dry fully, then protect it with a topcoat. For indoor use, a couple of thin clear coats will help the table survive keys, bags, coffee cups, and the occasional dramatic mail-sorting session. Lightly sand between coats for a smoother finish.
How to Style Your DIY Entryway Table
Once your pallet entryway table is done, the fun part begins: making it look like the entryway belongs in a magazine instead of just functioning as the family launch pad.
- Add a tray for keys, sunglasses, and loose odds and ends
- Place a lamp for warmth and practical lighting
- Hang a mirror or artwork above the table to visually anchor the space
- Use baskets on the lower shelf for shoes, dog leashes, or seasonal accessories
- Bring in one natural element such as greenery, a vase of branches, or a woven box
The best entryway table décor balances beauty and function. It should look good, yes, but it should also make everyday life easier. A stylish drop zone is still a drop zone, and that is a compliment.
Common Mistakes to Avoid
Using sketchy pallets
If you are unsure where the wood came from or what it has been exposed to, do not use it indoors.
Skipping sanding
Rustic does not mean rough enough to file your fingerprints off.
Ignoring square during assembly
A console table that wobbles like a nervous flamingo is not charming.
Using screws without pilot holes
Pallet wood can split easily. Pilot holes save frustration and make the build cleaner.
Rushing the finish
Stain and topcoat need time. If you pile on the finish too quickly, the result can look muddy, tacky, or uneven.
Why This DIY Is Worth It
A DIY pallet entryway table is not just another reclaimed wood project. It is a useful, customizable piece that adds character to your home and helps you make the most of salvaged materials. It is also deeply satisfying to turn rough pallet boards into a table that looks right at home beneath a mirror, beside a basket, or under the glow of a cozy lamp.
The best part is that your version will not look exactly like anyone else’s. The wood grain, the saw marks, the finish, the little imperfections, and the styling choices all make it yours. That is the magic of building furniture by hand: the project ends up with a personality. Ideally, a likable one.
Experiences From Building a DIY Pallet Entryway Table
If you talk to people who have actually built pallet furniture, you will hear the same thing over and over: the project is usually simpler than expected, but the prep work is where the real story lives. The cutting and assembly often go quickly. The sanding, cleaning, sorting, and deciding which boards are worth saving? That is where the emotional character development happens.
One of the most common experiences is discovering that no two pallet boards behave the same way. Some come apart beautifully and reveal clean grain with barely any effort. Others fight back like they have a personal vendetta against pry bars. That unpredictability is part of the reclaimed-wood experience. It can be annoying in the moment, but it also gives the finished entryway table a look that brand-new lumber rarely has. The little dents, color shifts, and old nail marks make the piece feel storied instead of sterile.
Another familiar experience is underestimating how much sanding the project will need. A lot of first-time builders imagine they will lightly scuff the wood and move on with their lives. Then they spend an afternoon covered in sawdust, rethinking every choice that led them there. But once the rough surface becomes smooth enough to touch comfortably, the project feels like it turns a corner. That is usually the moment people start getting excited, because they can finally see the furniture instead of just the scrap wood.
There is also a surprisingly satisfying stage when the table frame first stands up on its own. Even before the finish goes on, it suddenly looks real. What was a stack of questionable boards becomes an actual entryway table with shape, height, and purpose. That shift is one of the best parts of DIY furniture building. It is practical, yes, but it also feels a little magical.
Many builders end up loving the styling step almost as much as the build itself. A pallet console table tends to work with a lot of looks: farmhouse, rustic, industrial, cottage, and even modern if the lines stay simple. Add a mirror, a ceramic lamp, a catchall tray, and a basket underneath, and the whole entry starts to feel more polished. It is one of those rare DIY projects that improves both storage and mood.
There is usually a lesson learned, too. Sometimes it is “always wear gloves when handling pallet wood.” Sometimes it is “measure the hallway before choosing the table depth.” Sometimes it is “pilot holes exist for a reason and should not be treated as optional.” The good news is that pallet projects are forgiving. Minor imperfections often blend into the rustic style, which makes them great for people who want a handmade result without needing museum-level perfection.
In the end, the experience of building a DIY pallet entryway table is not just about saving money or filling an empty wall. It is about creating a piece with history, function, and personality. It is about taking wood that was made for shipping and giving it a new purpose in a home. And maybe, just maybe, it is also about earning the right to brag a little every time someone says, “Wait, you made that?”
Conclusion
A DIY pallet entryway table is one of those projects that manages to be practical, stylish, affordable, and oddly addictive. Once you build one, you may start looking at every old pallet like it is a future coffee table, bench, or shelf just waiting for its moment. With careful pallet selection, patient prep, solid assembly, and a finish that suits your space, you can create an entryway table that looks custom-made because, well, it is.
Build it narrow for a small hallway, stain it dark for drama, paint it for farmhouse charm, or leave it natural for maximum reclaimed character. However you finish it, this project proves that useful furniture does not need a luxury price tag. Sometimes it just needs a drill, a sander, and a willingness to wrestle with old wood until it becomes something great.